How to Stake on Astar Network
1. Overview
In this guide, you’ll learn how to stake ASTR on Astar Network (L1) using the Astar Portal and the Zerion wallet on the EVM version, which works similarly to the Substrate version. To complete this tutorial, you’ll need:
- A wallet that supports the EVM format (we’ll use Zerion)
- ASTR tokens in your EVM wallet on Astar L1
- Minimum of 500 ASTR required to stake
- Bit of extra ASTR for the fees
To set up your wallet on Astar Network, follow → this guide.
To acquire ASTR tokens through a DEX or CEX, follow this guides in our documentation.
To earn rewards continuously, users have to vote and stake every new period.
We’ll now walk through the full transfer process step by step.
2. Guide to Stake on Astar Network
Before using dApp Staking, make sure you understand all the parameters described here.
An address can only stake on a maximum of 16 contracts (dApps).
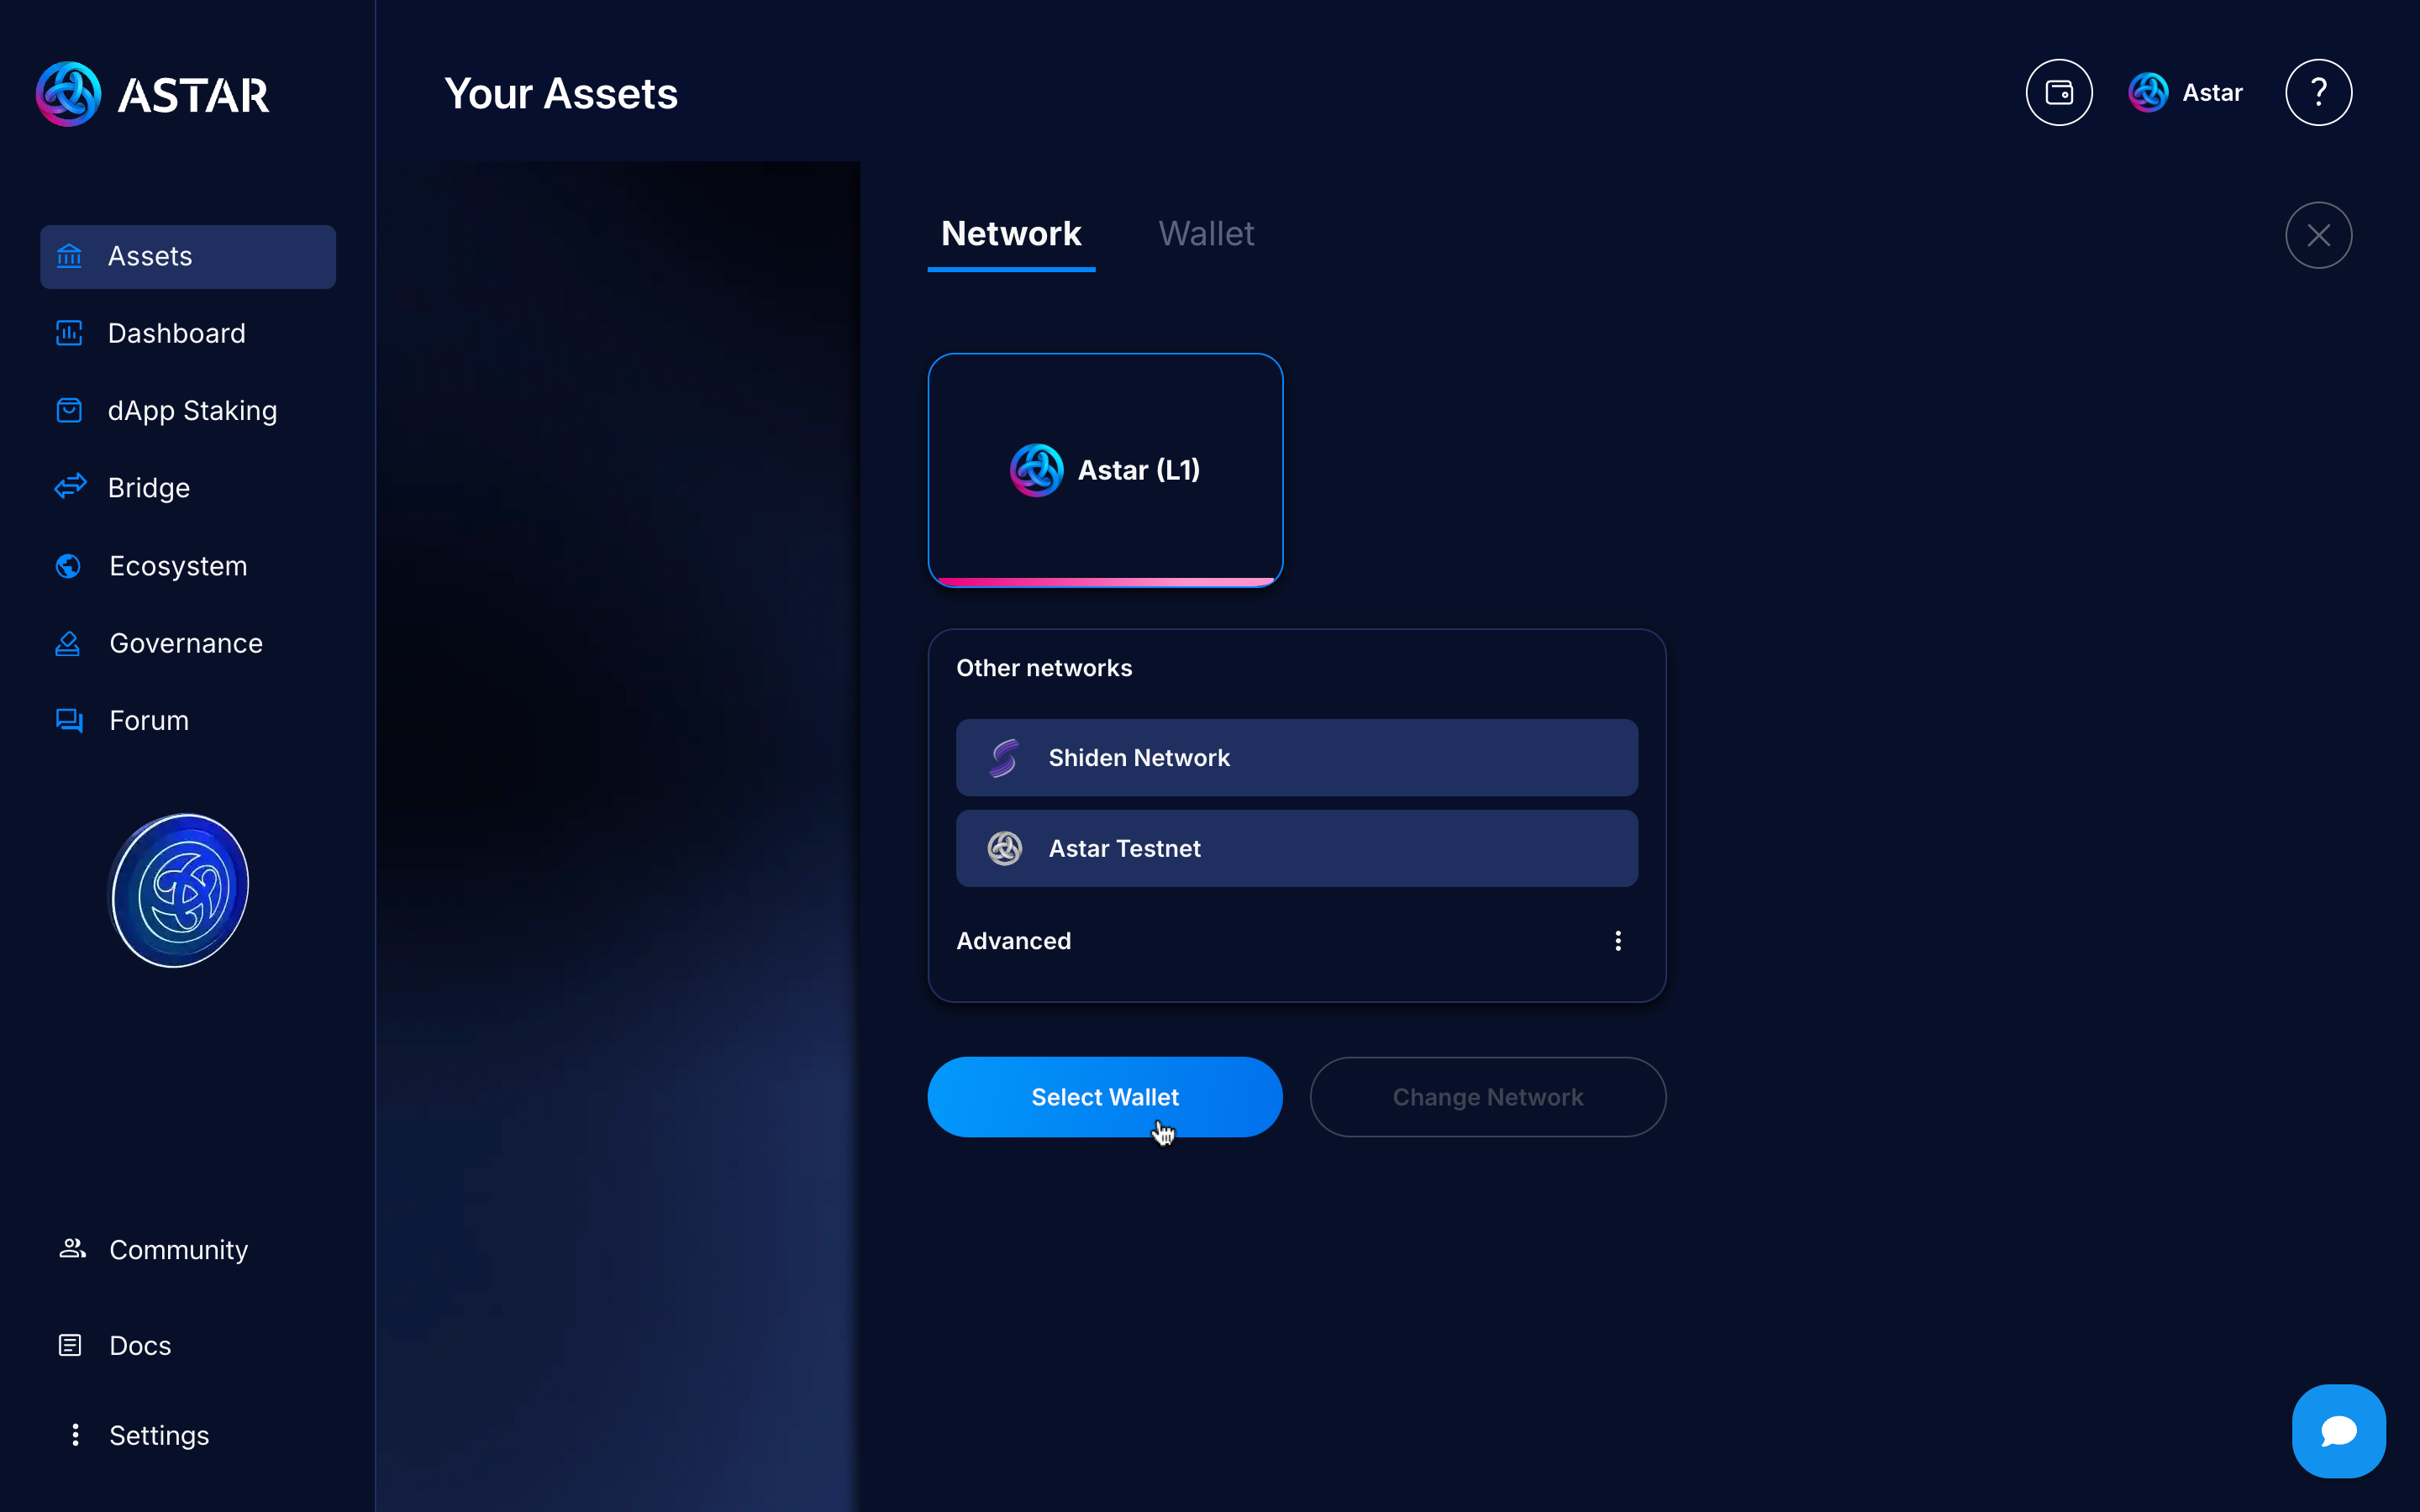
Step 1: Access the Astar Portal
Go to our Astar Portal, the site where you can manage your funds and accounts within Astar ecosystem.
Select the network, in this case, Astar (L1).

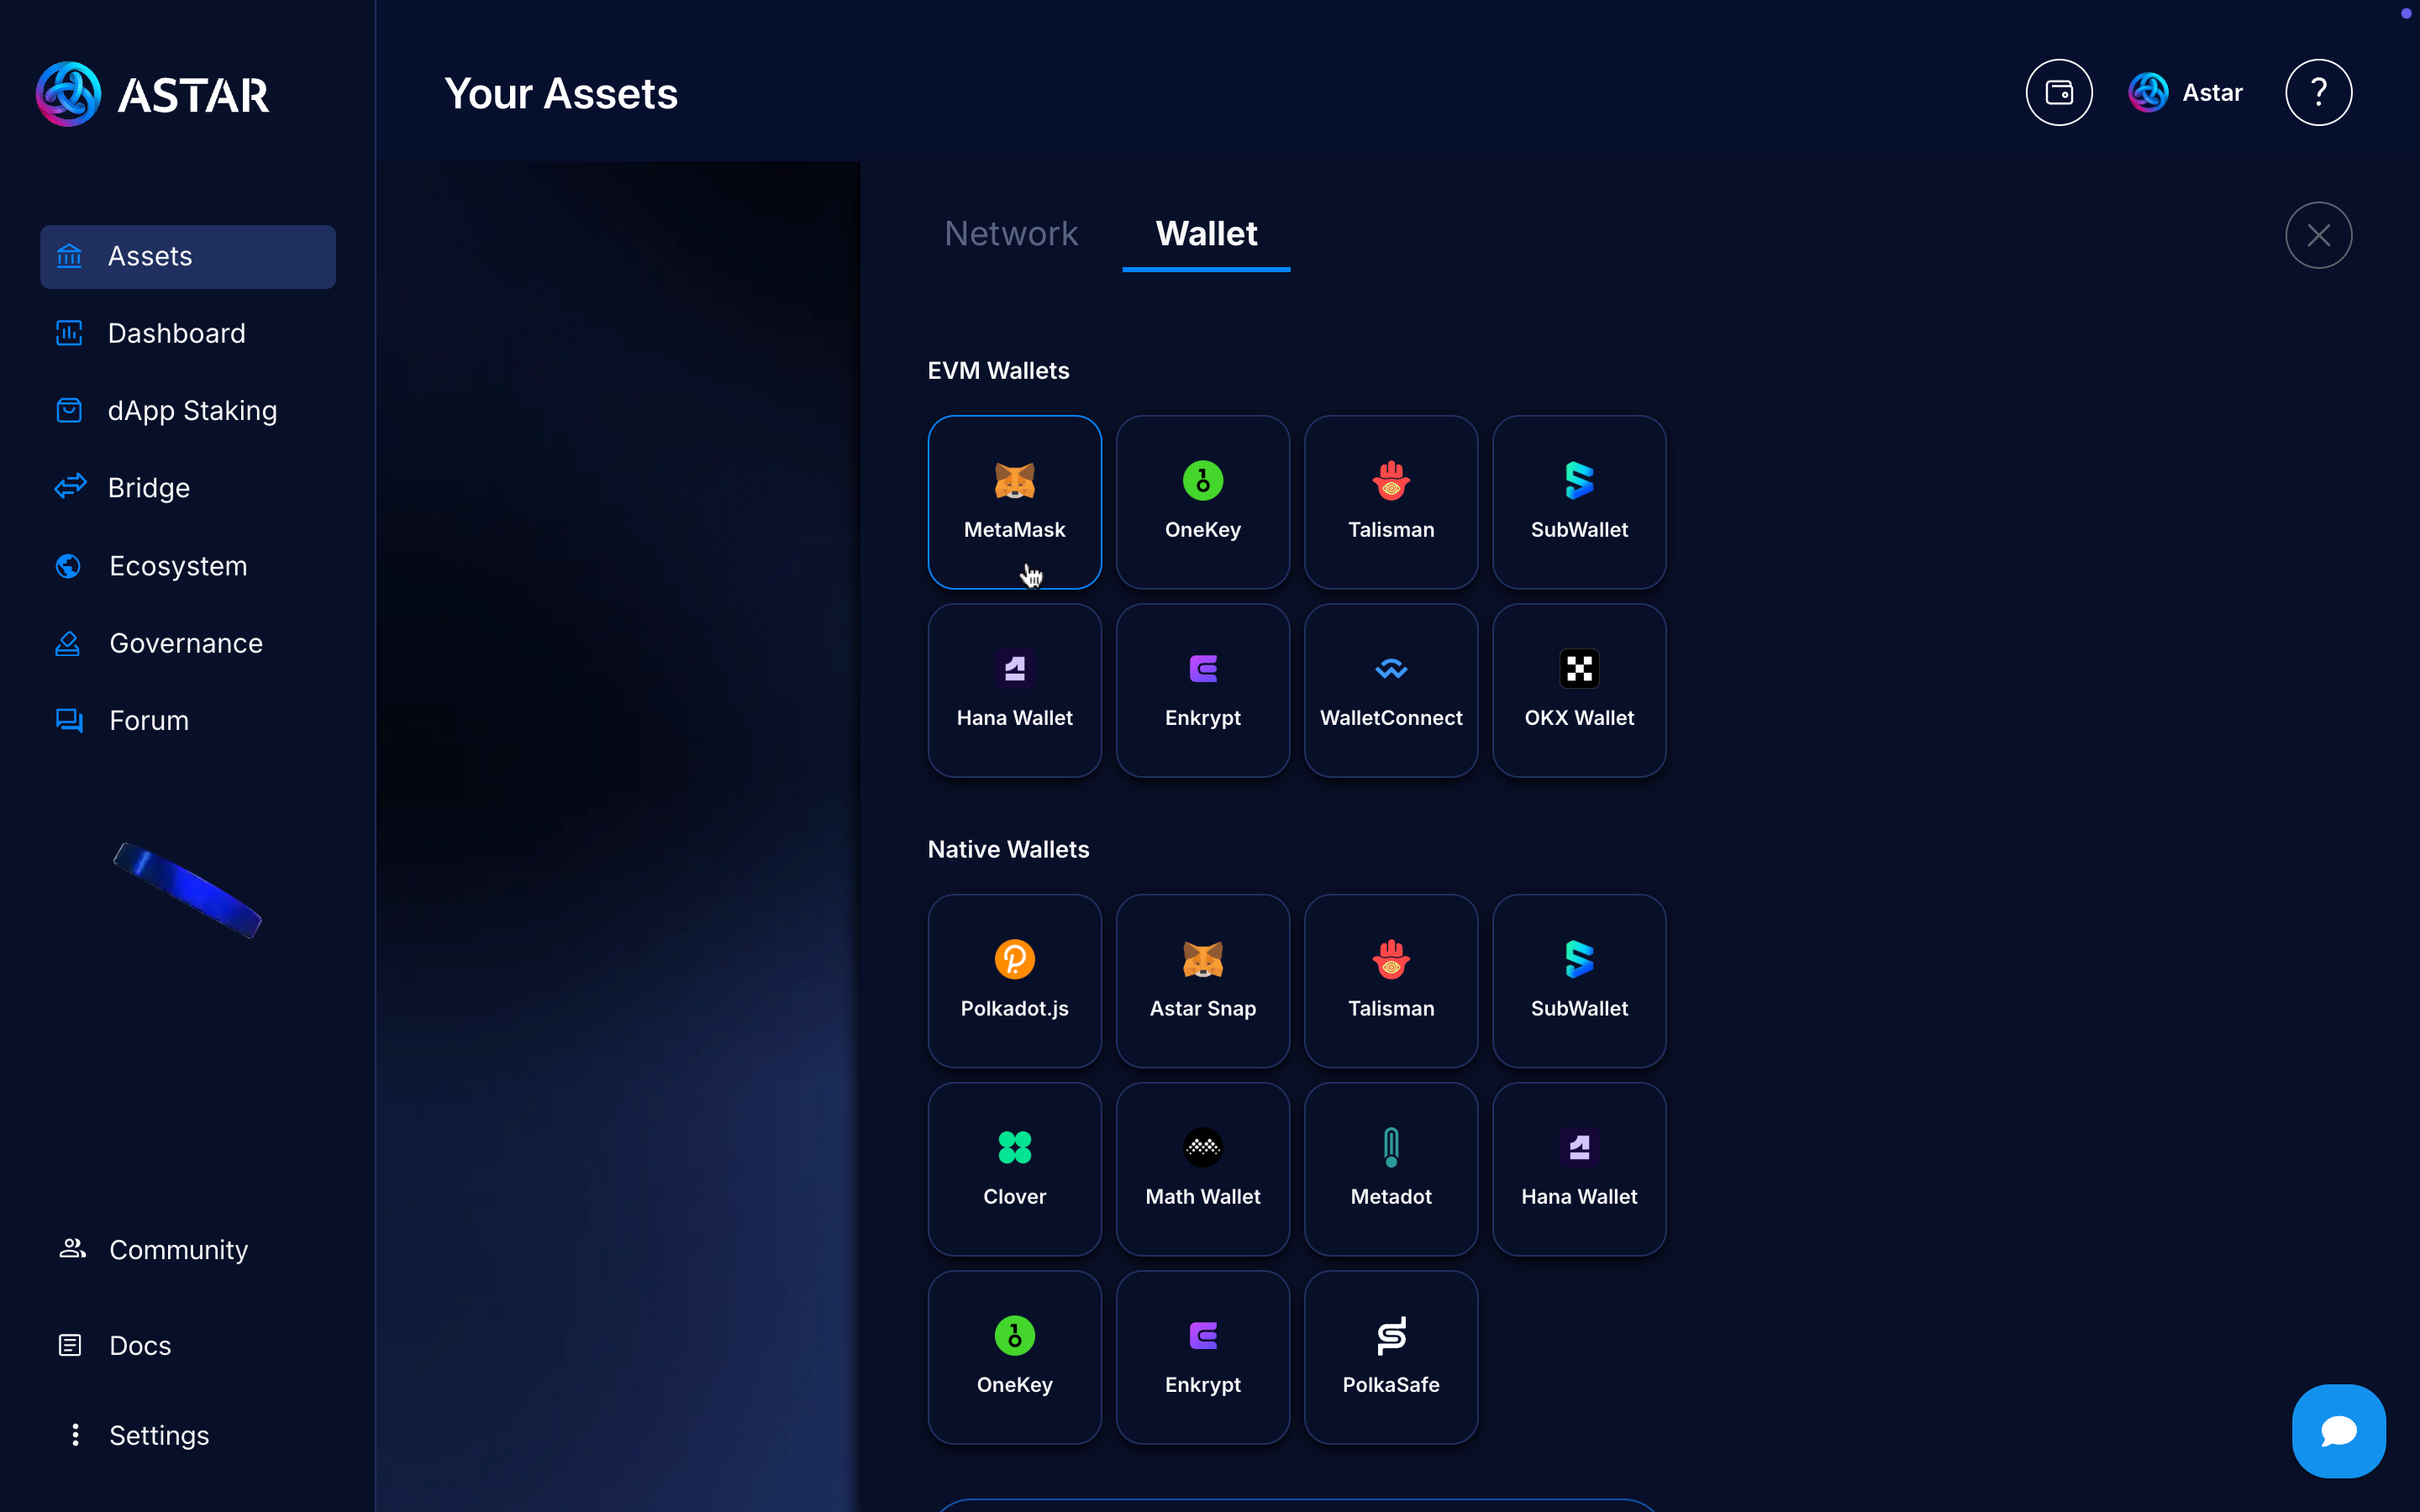
Step 2: Connect EVM wallet
Click on Select wallet.
Choose the wallet you use, in this case, it will be Zerion, so we’ll click on Metamask to open the modal and connect it.
Zerion uses a mode called Metamask mode, where every request made to Metamask is handled by Zerion first. That’s why we click on Metamask, as the Zerion logo doesn’t appear directly.
Step 3: Go to Staking Section
Then go to the staking section on the left sidebar.
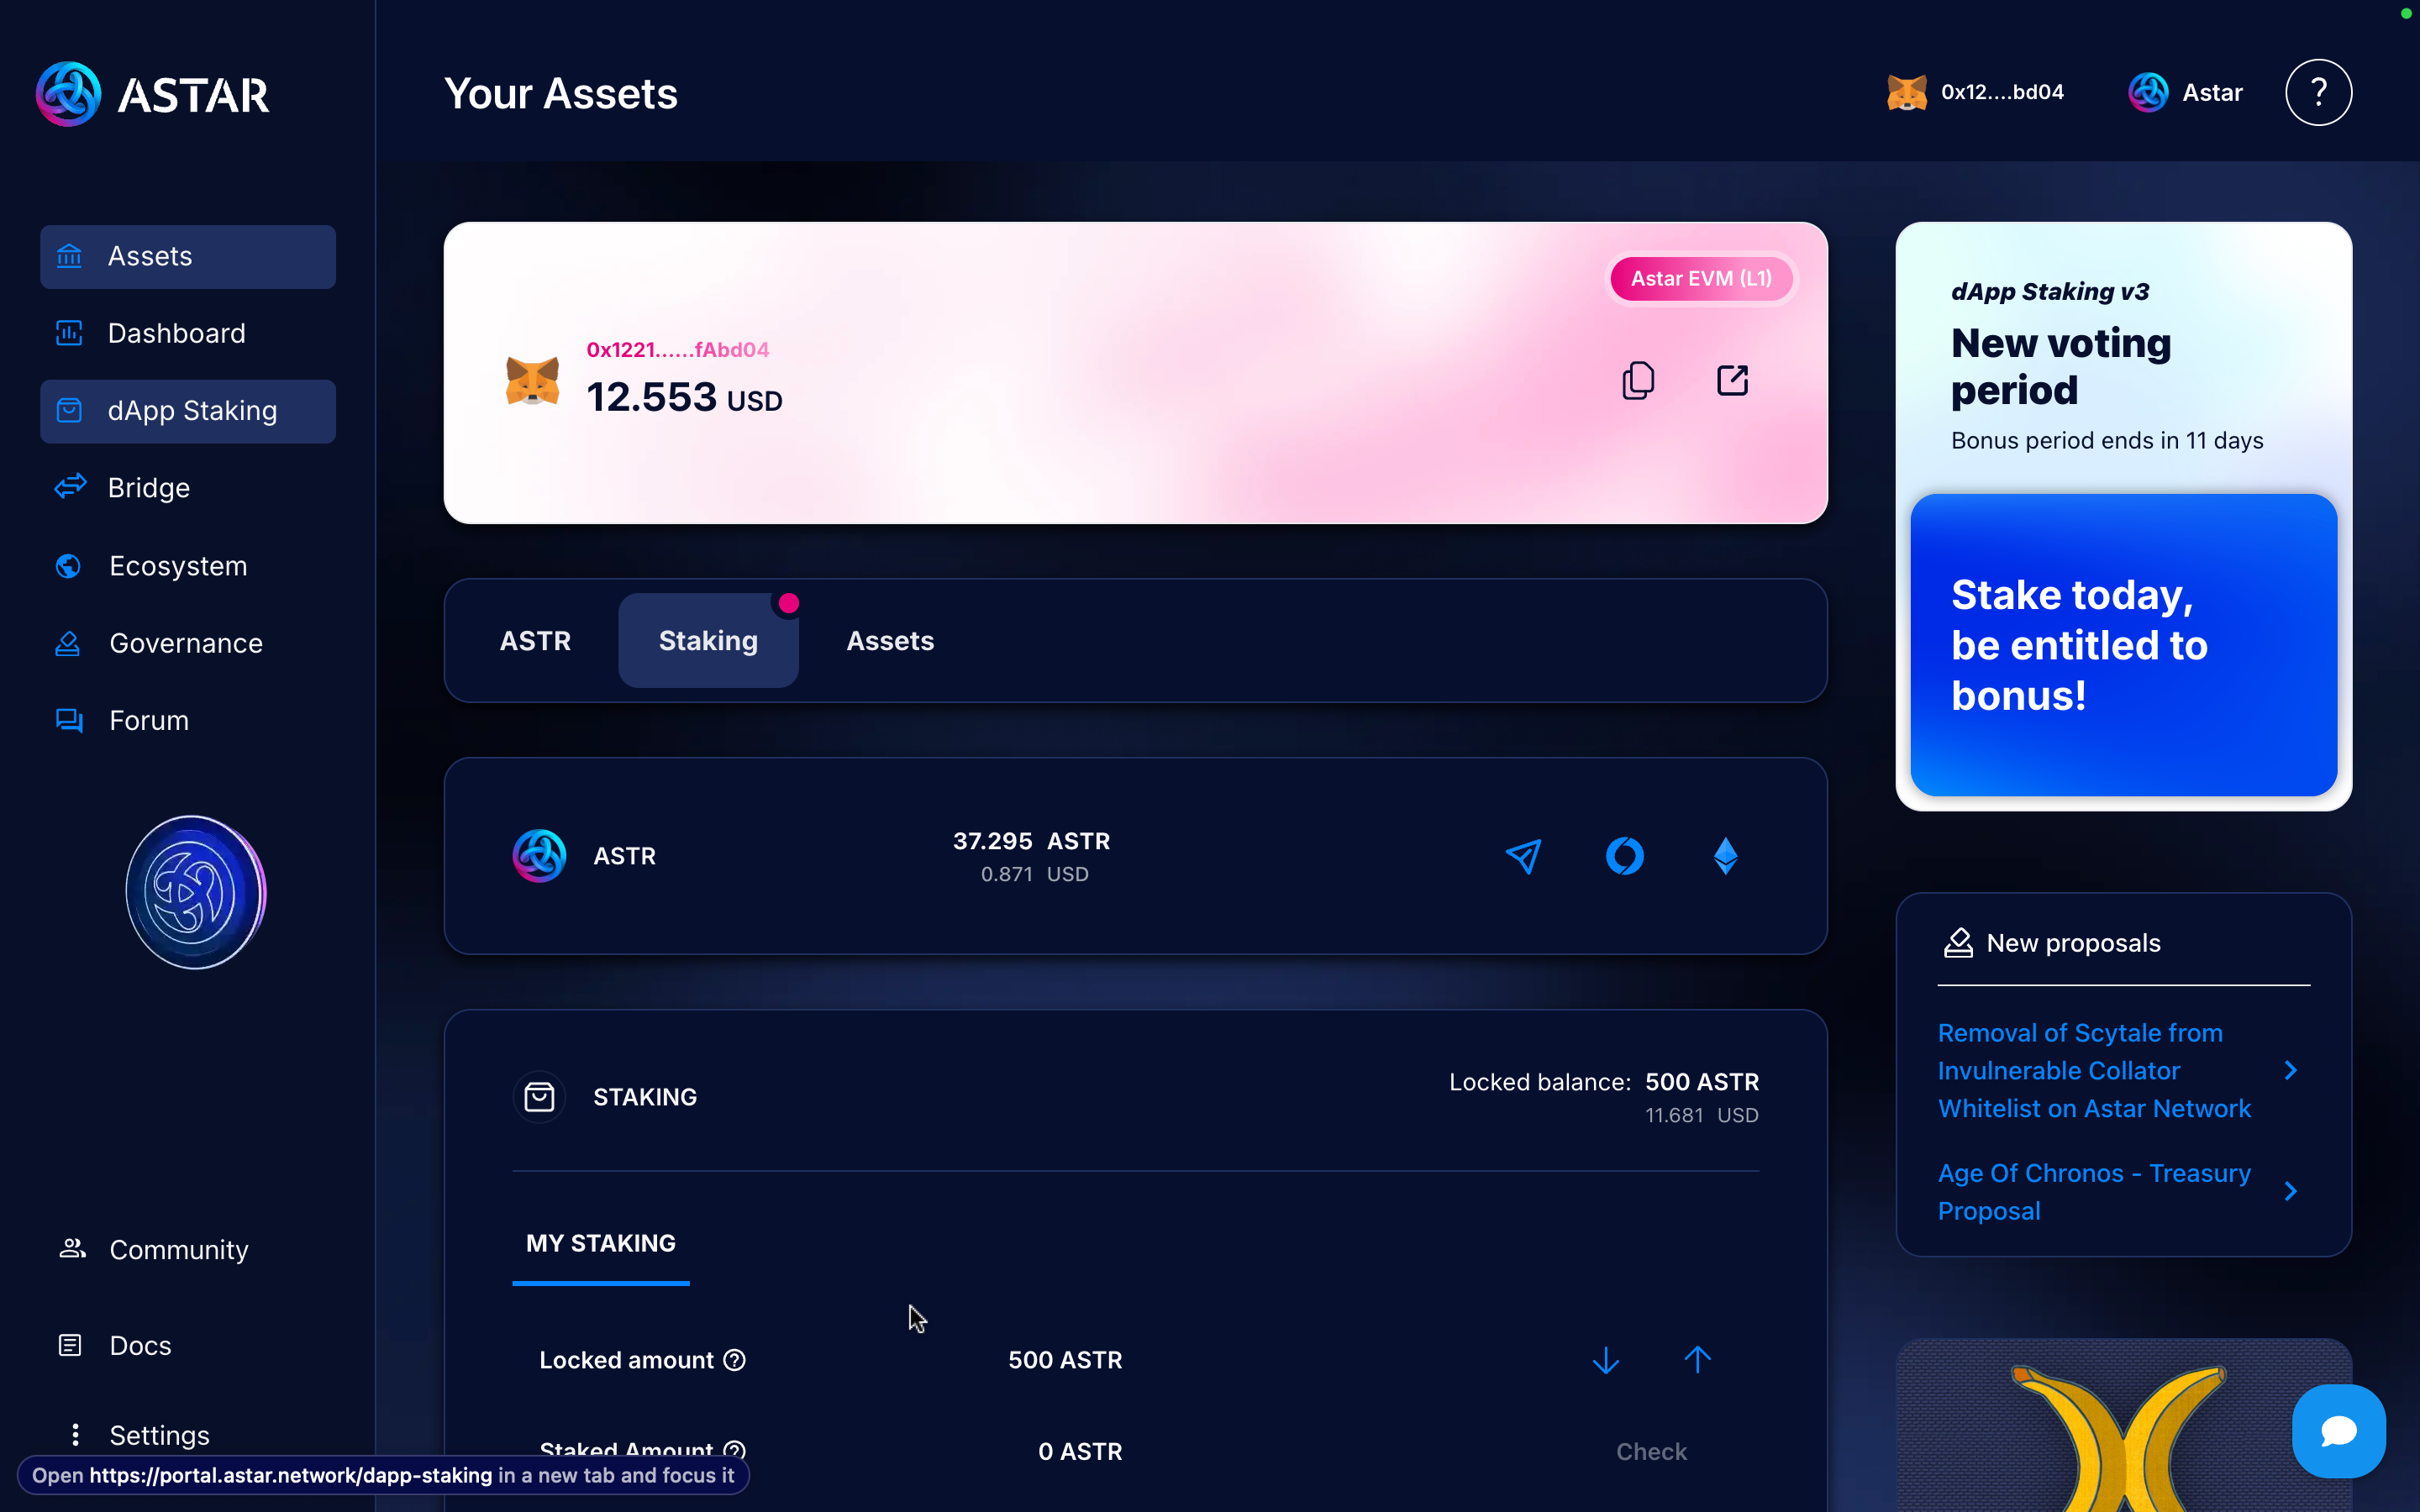
There, you’ll see a panel with all the staking information: current period, APY, remaining days, etc.
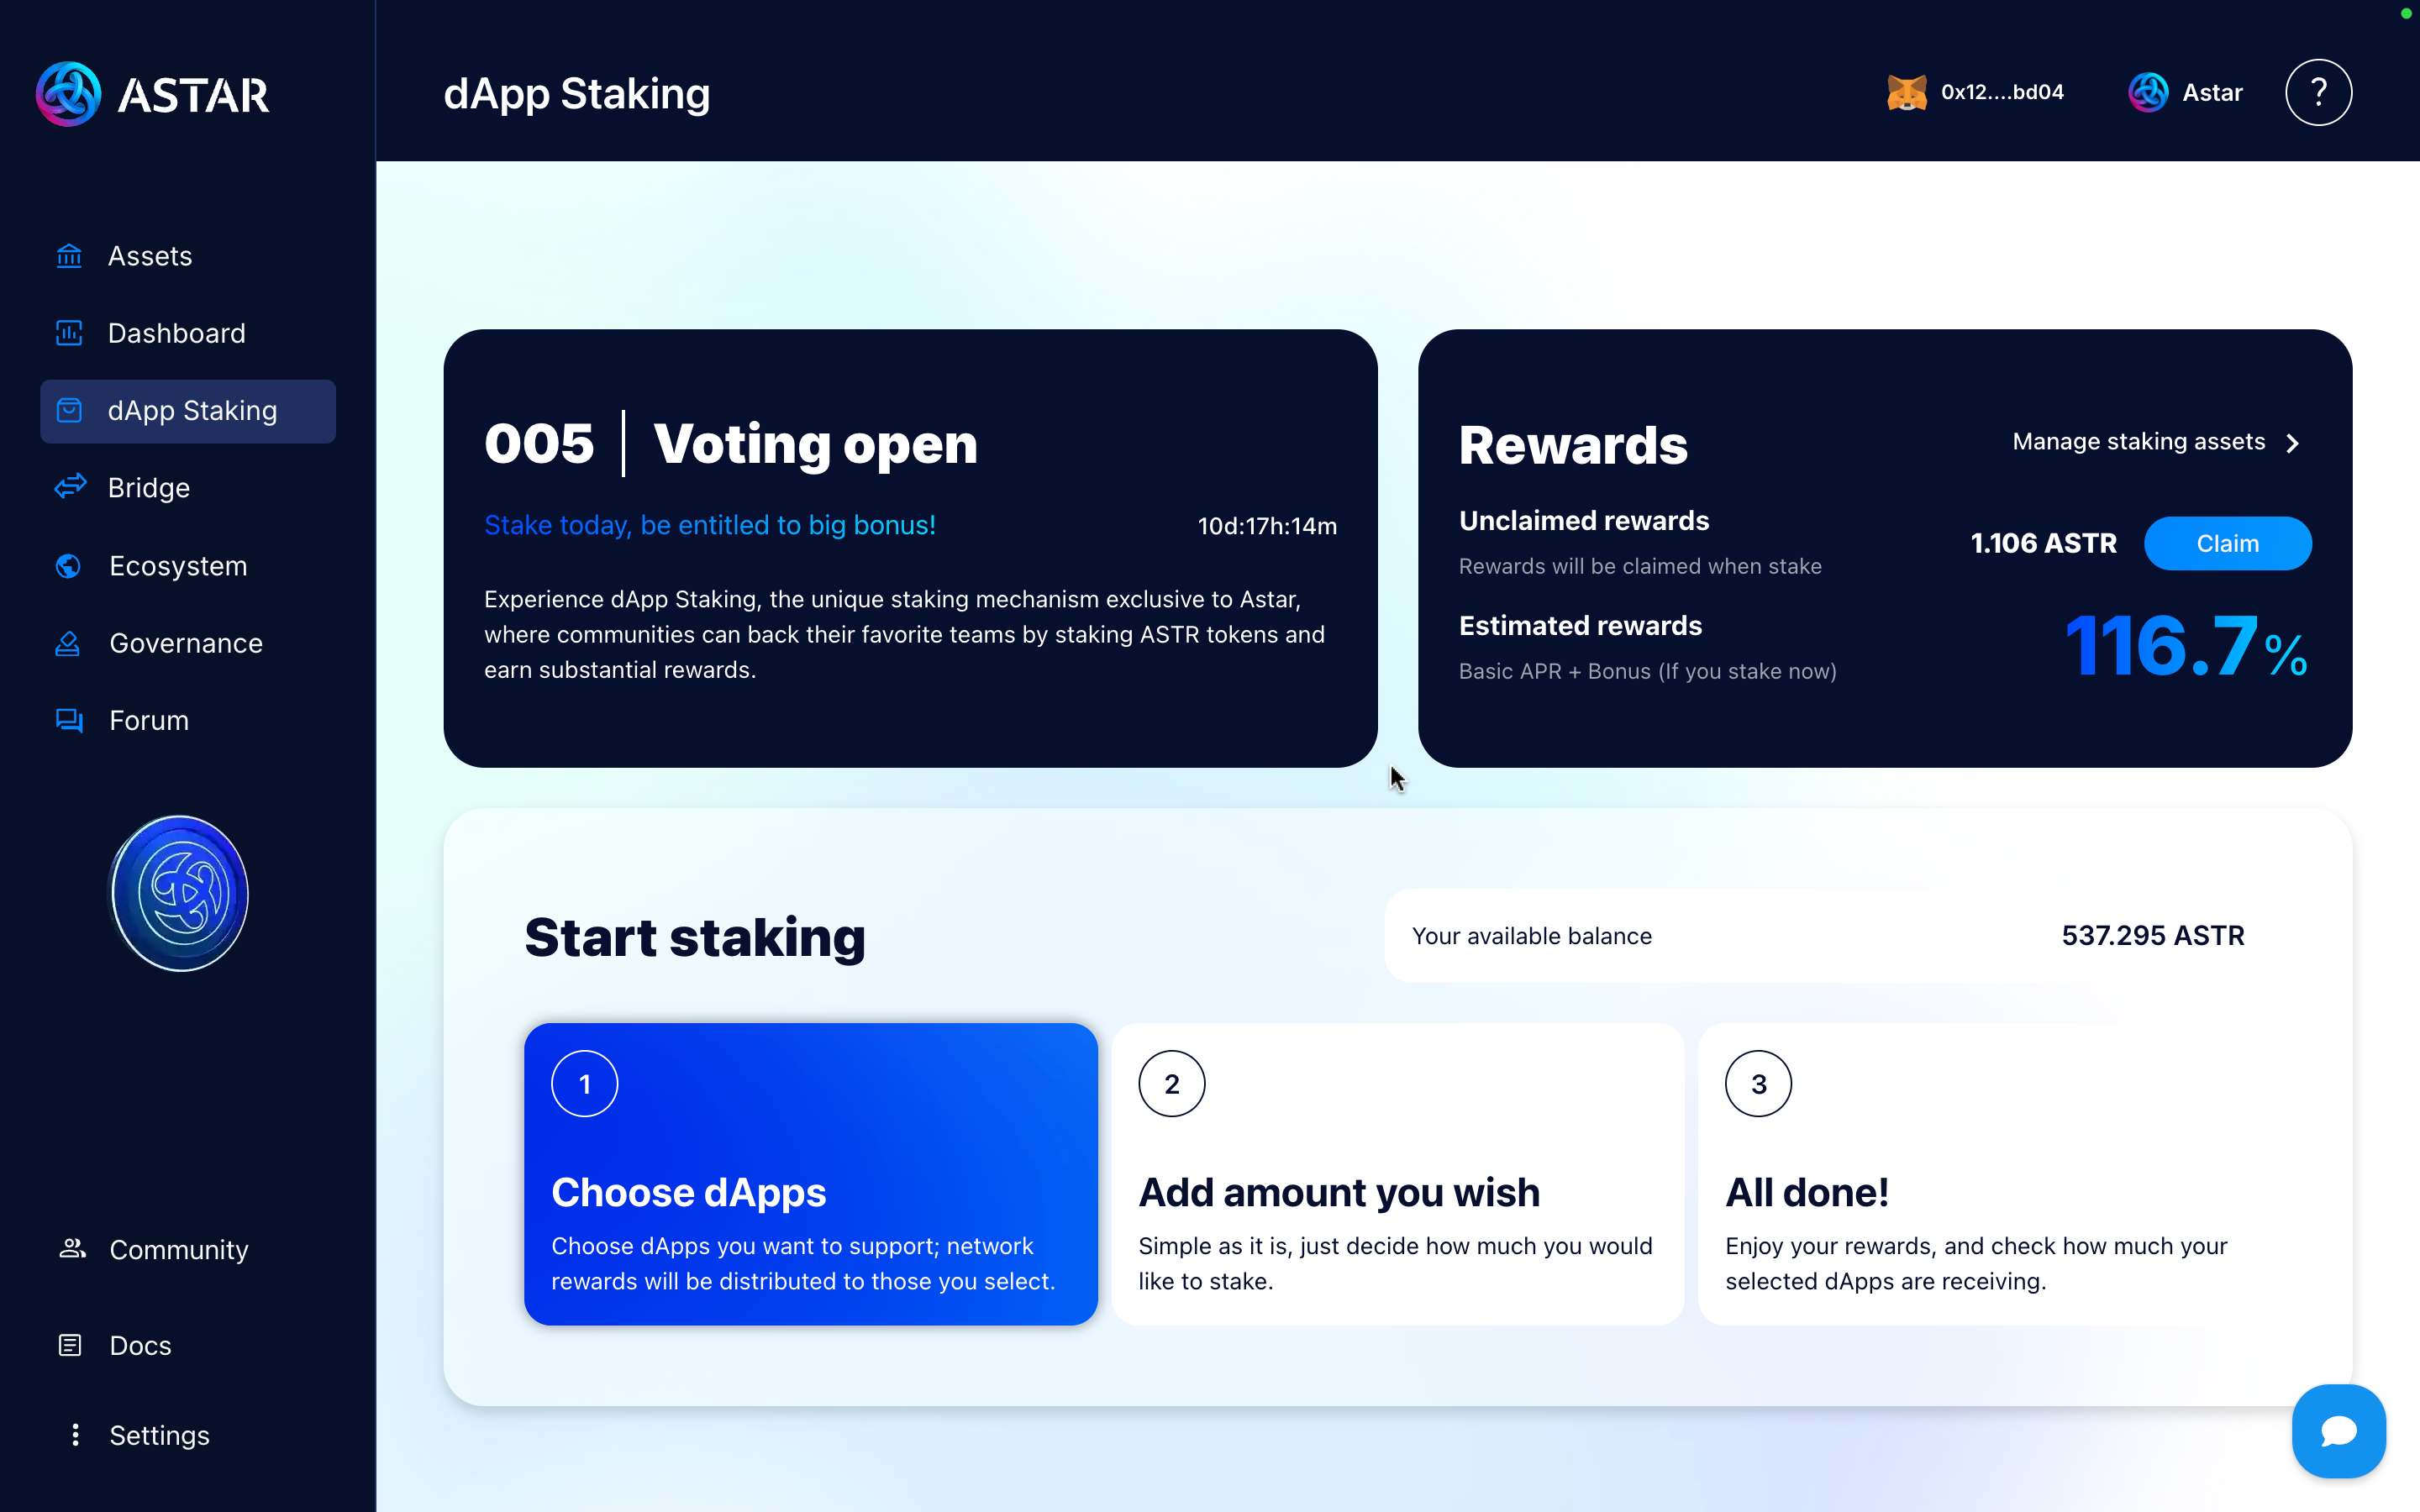
You can start staking either by clicking the blue “Choose dApps” button or by scrolling down to view all the listed dApps.

Step 4: Select dApp & amount
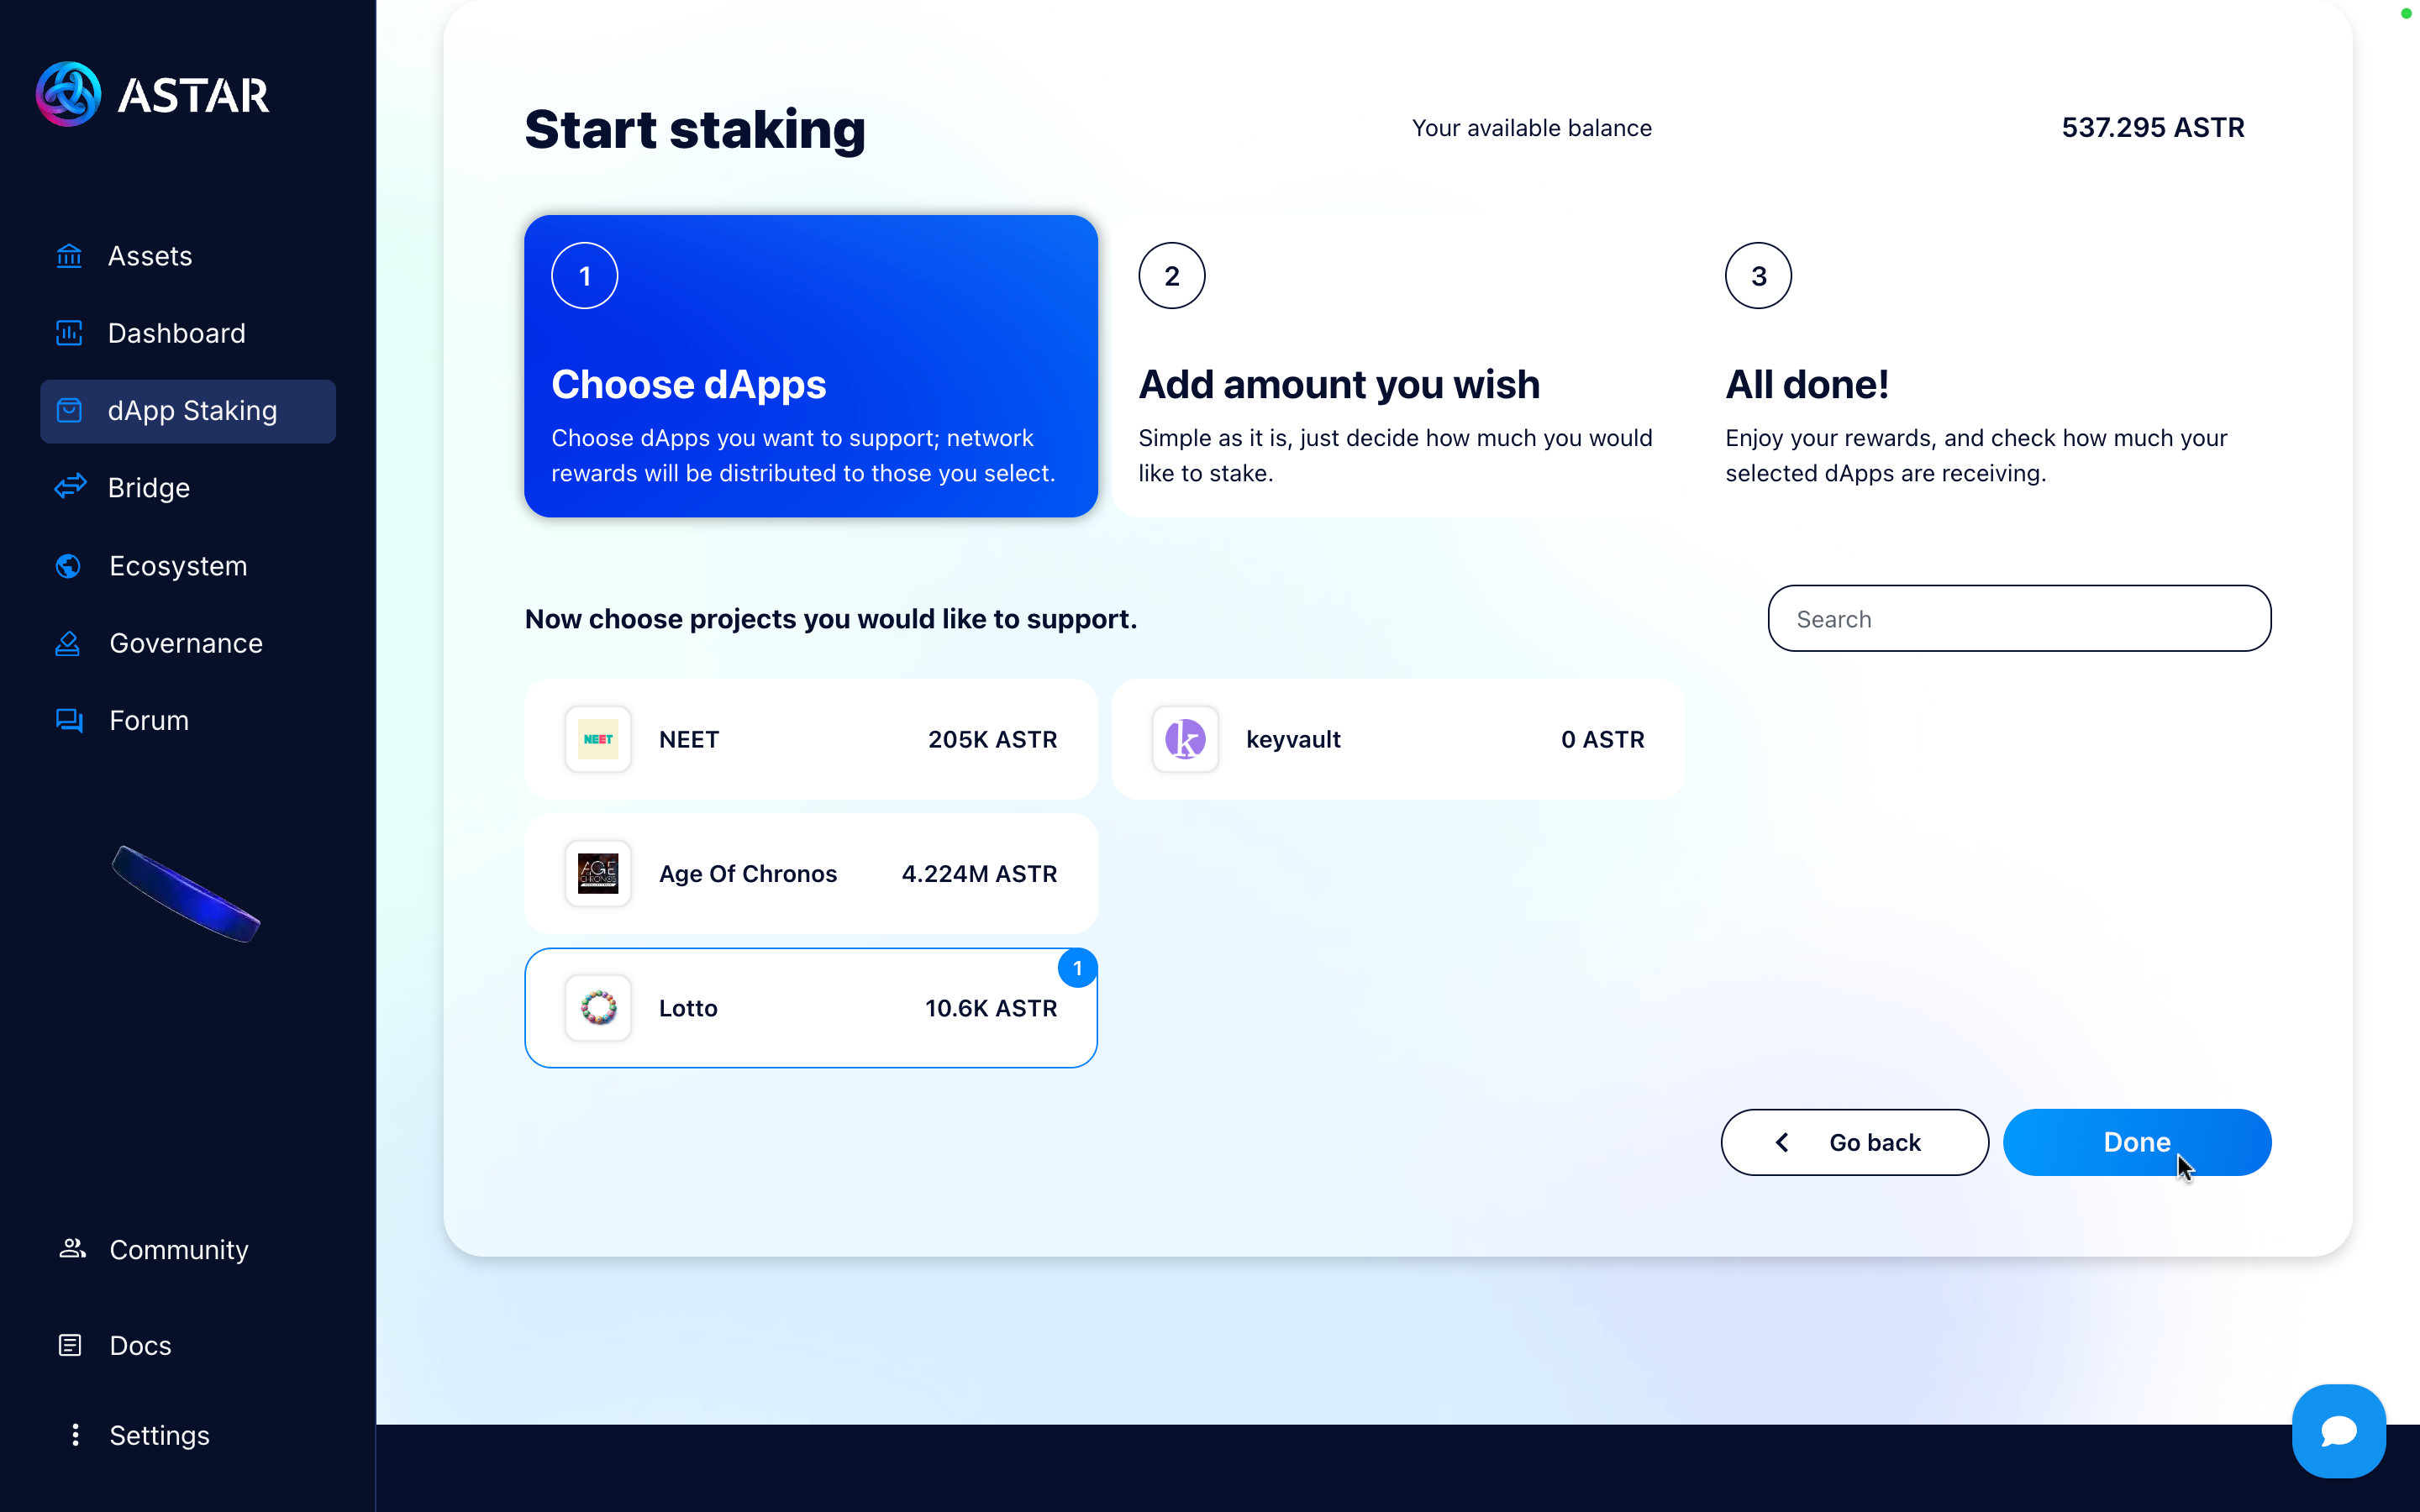
You can choose up to 16 projects that you would like to support.
Go back to the previous screen and click on “Choose dApp”.
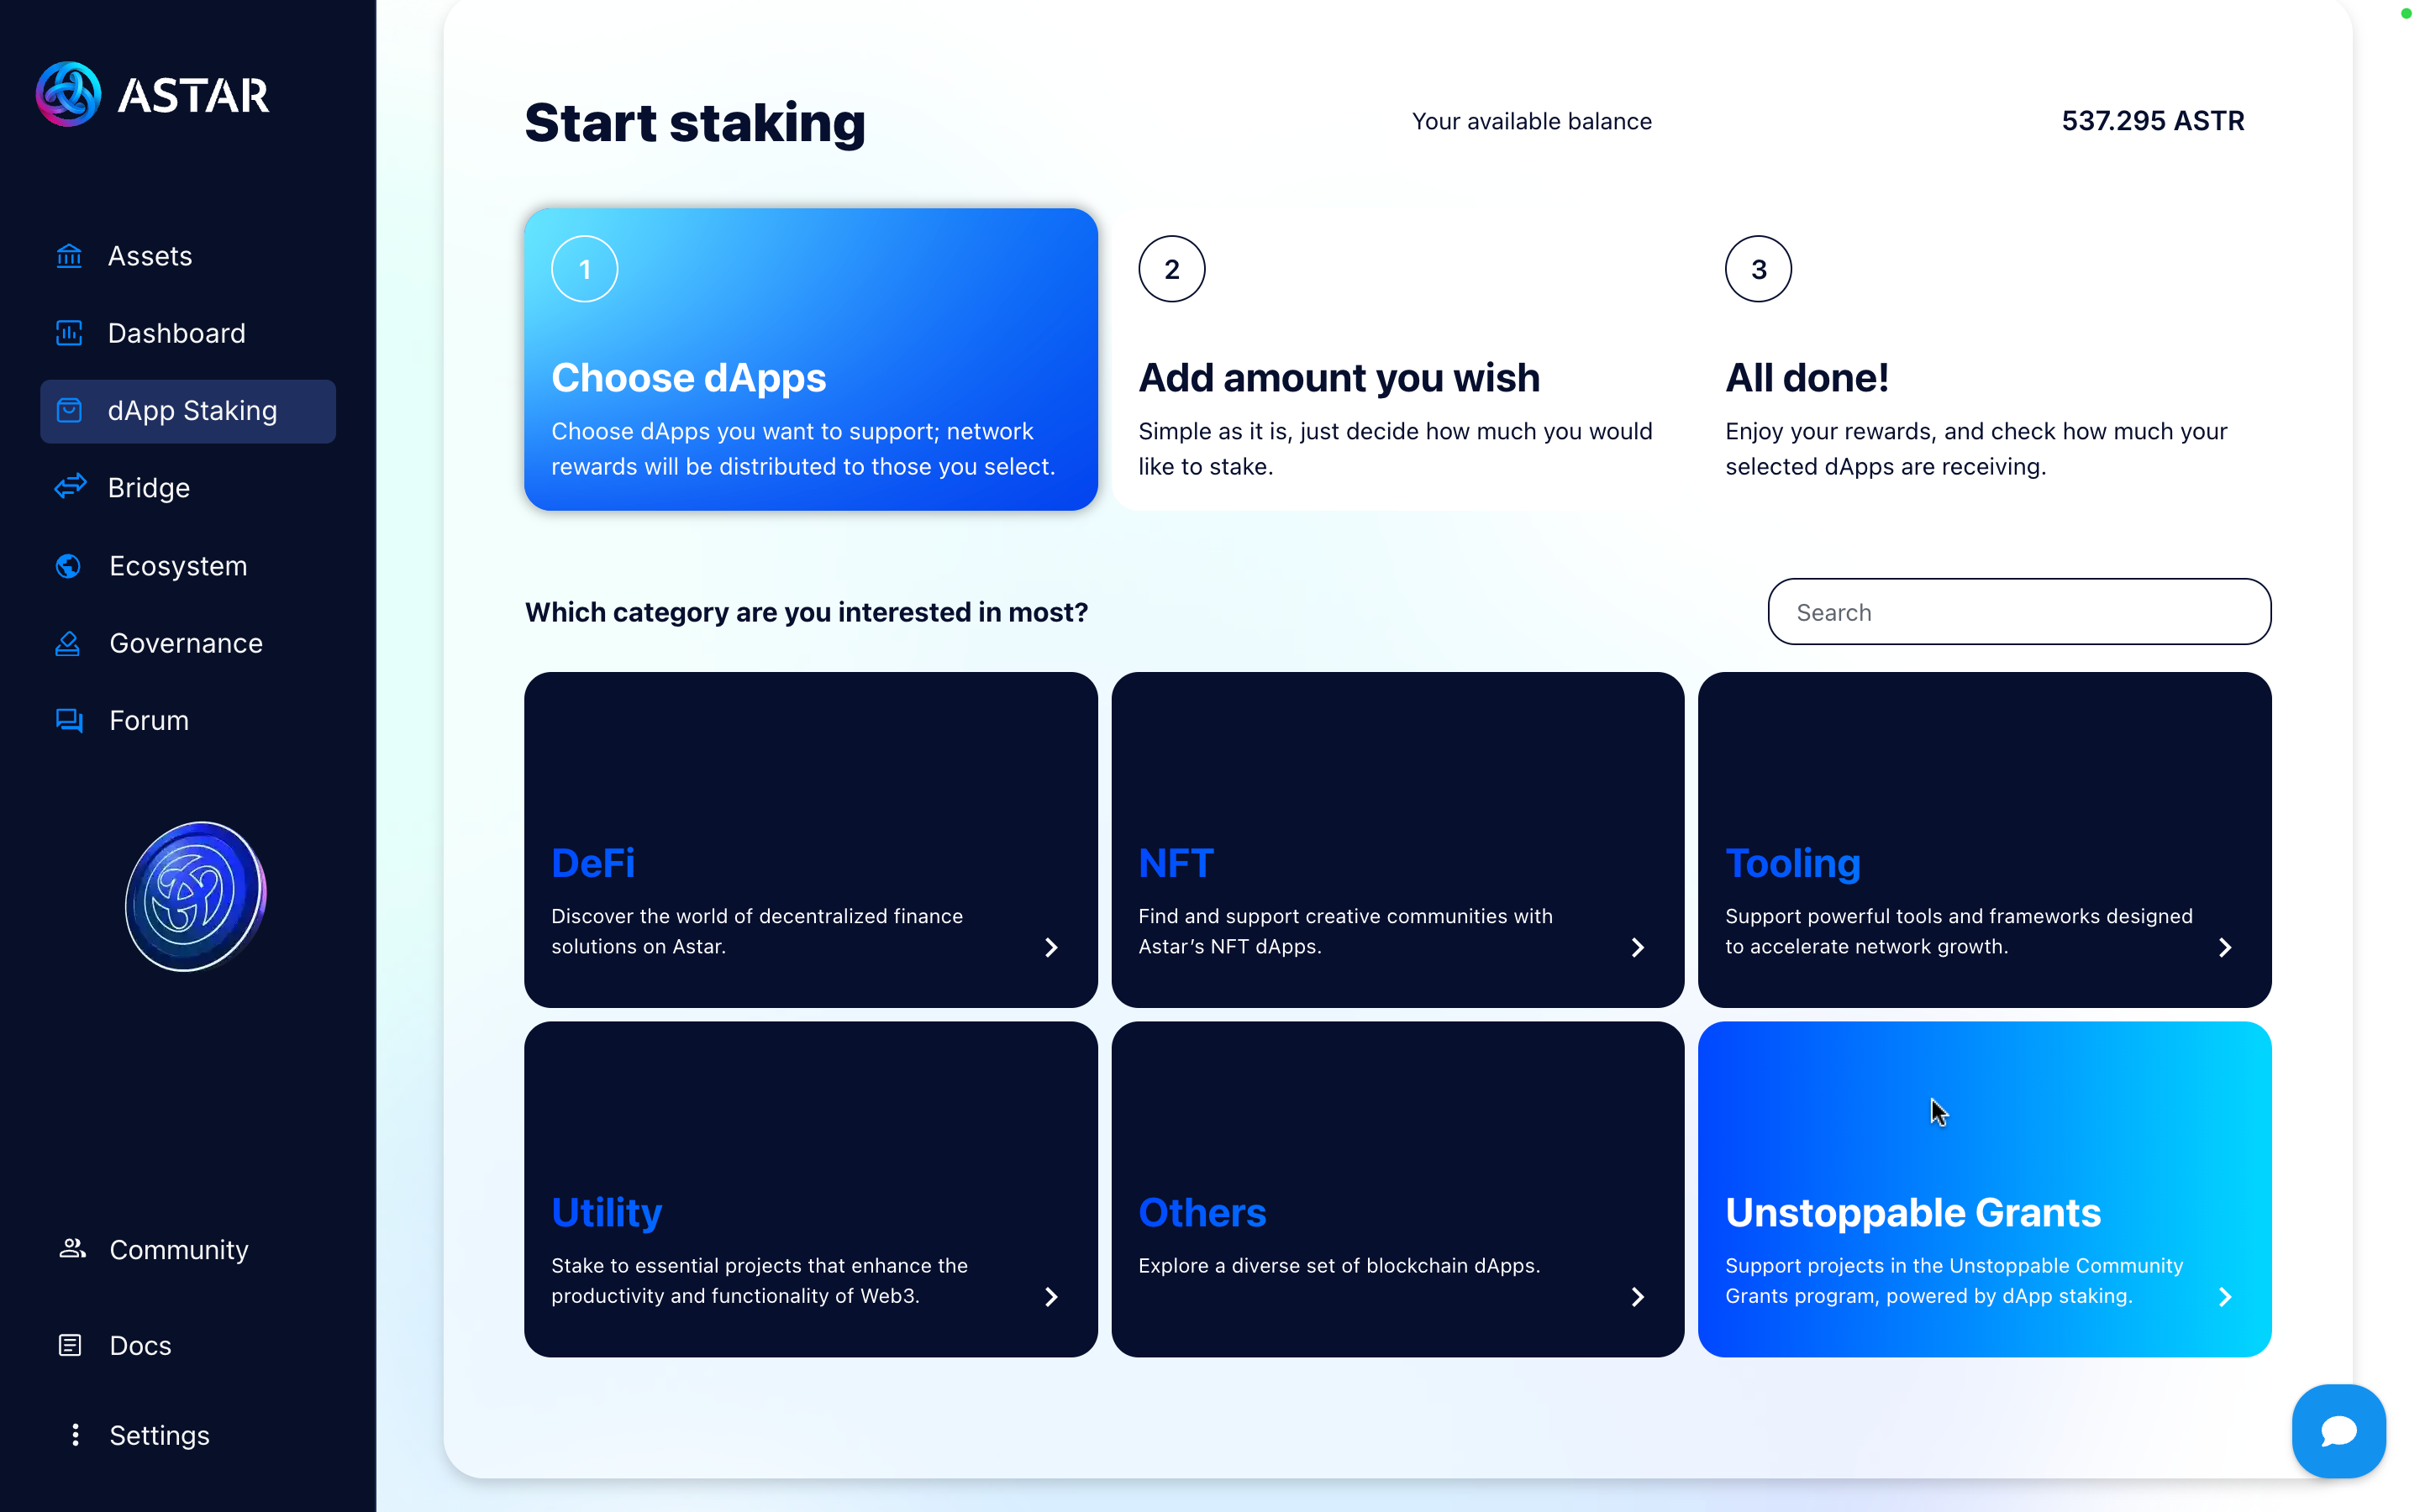
Select the category and the dApp you want.
Your available balance represents the balance available for staking and includes tokens locked in governance.
Then, enter the amount you want to stake.
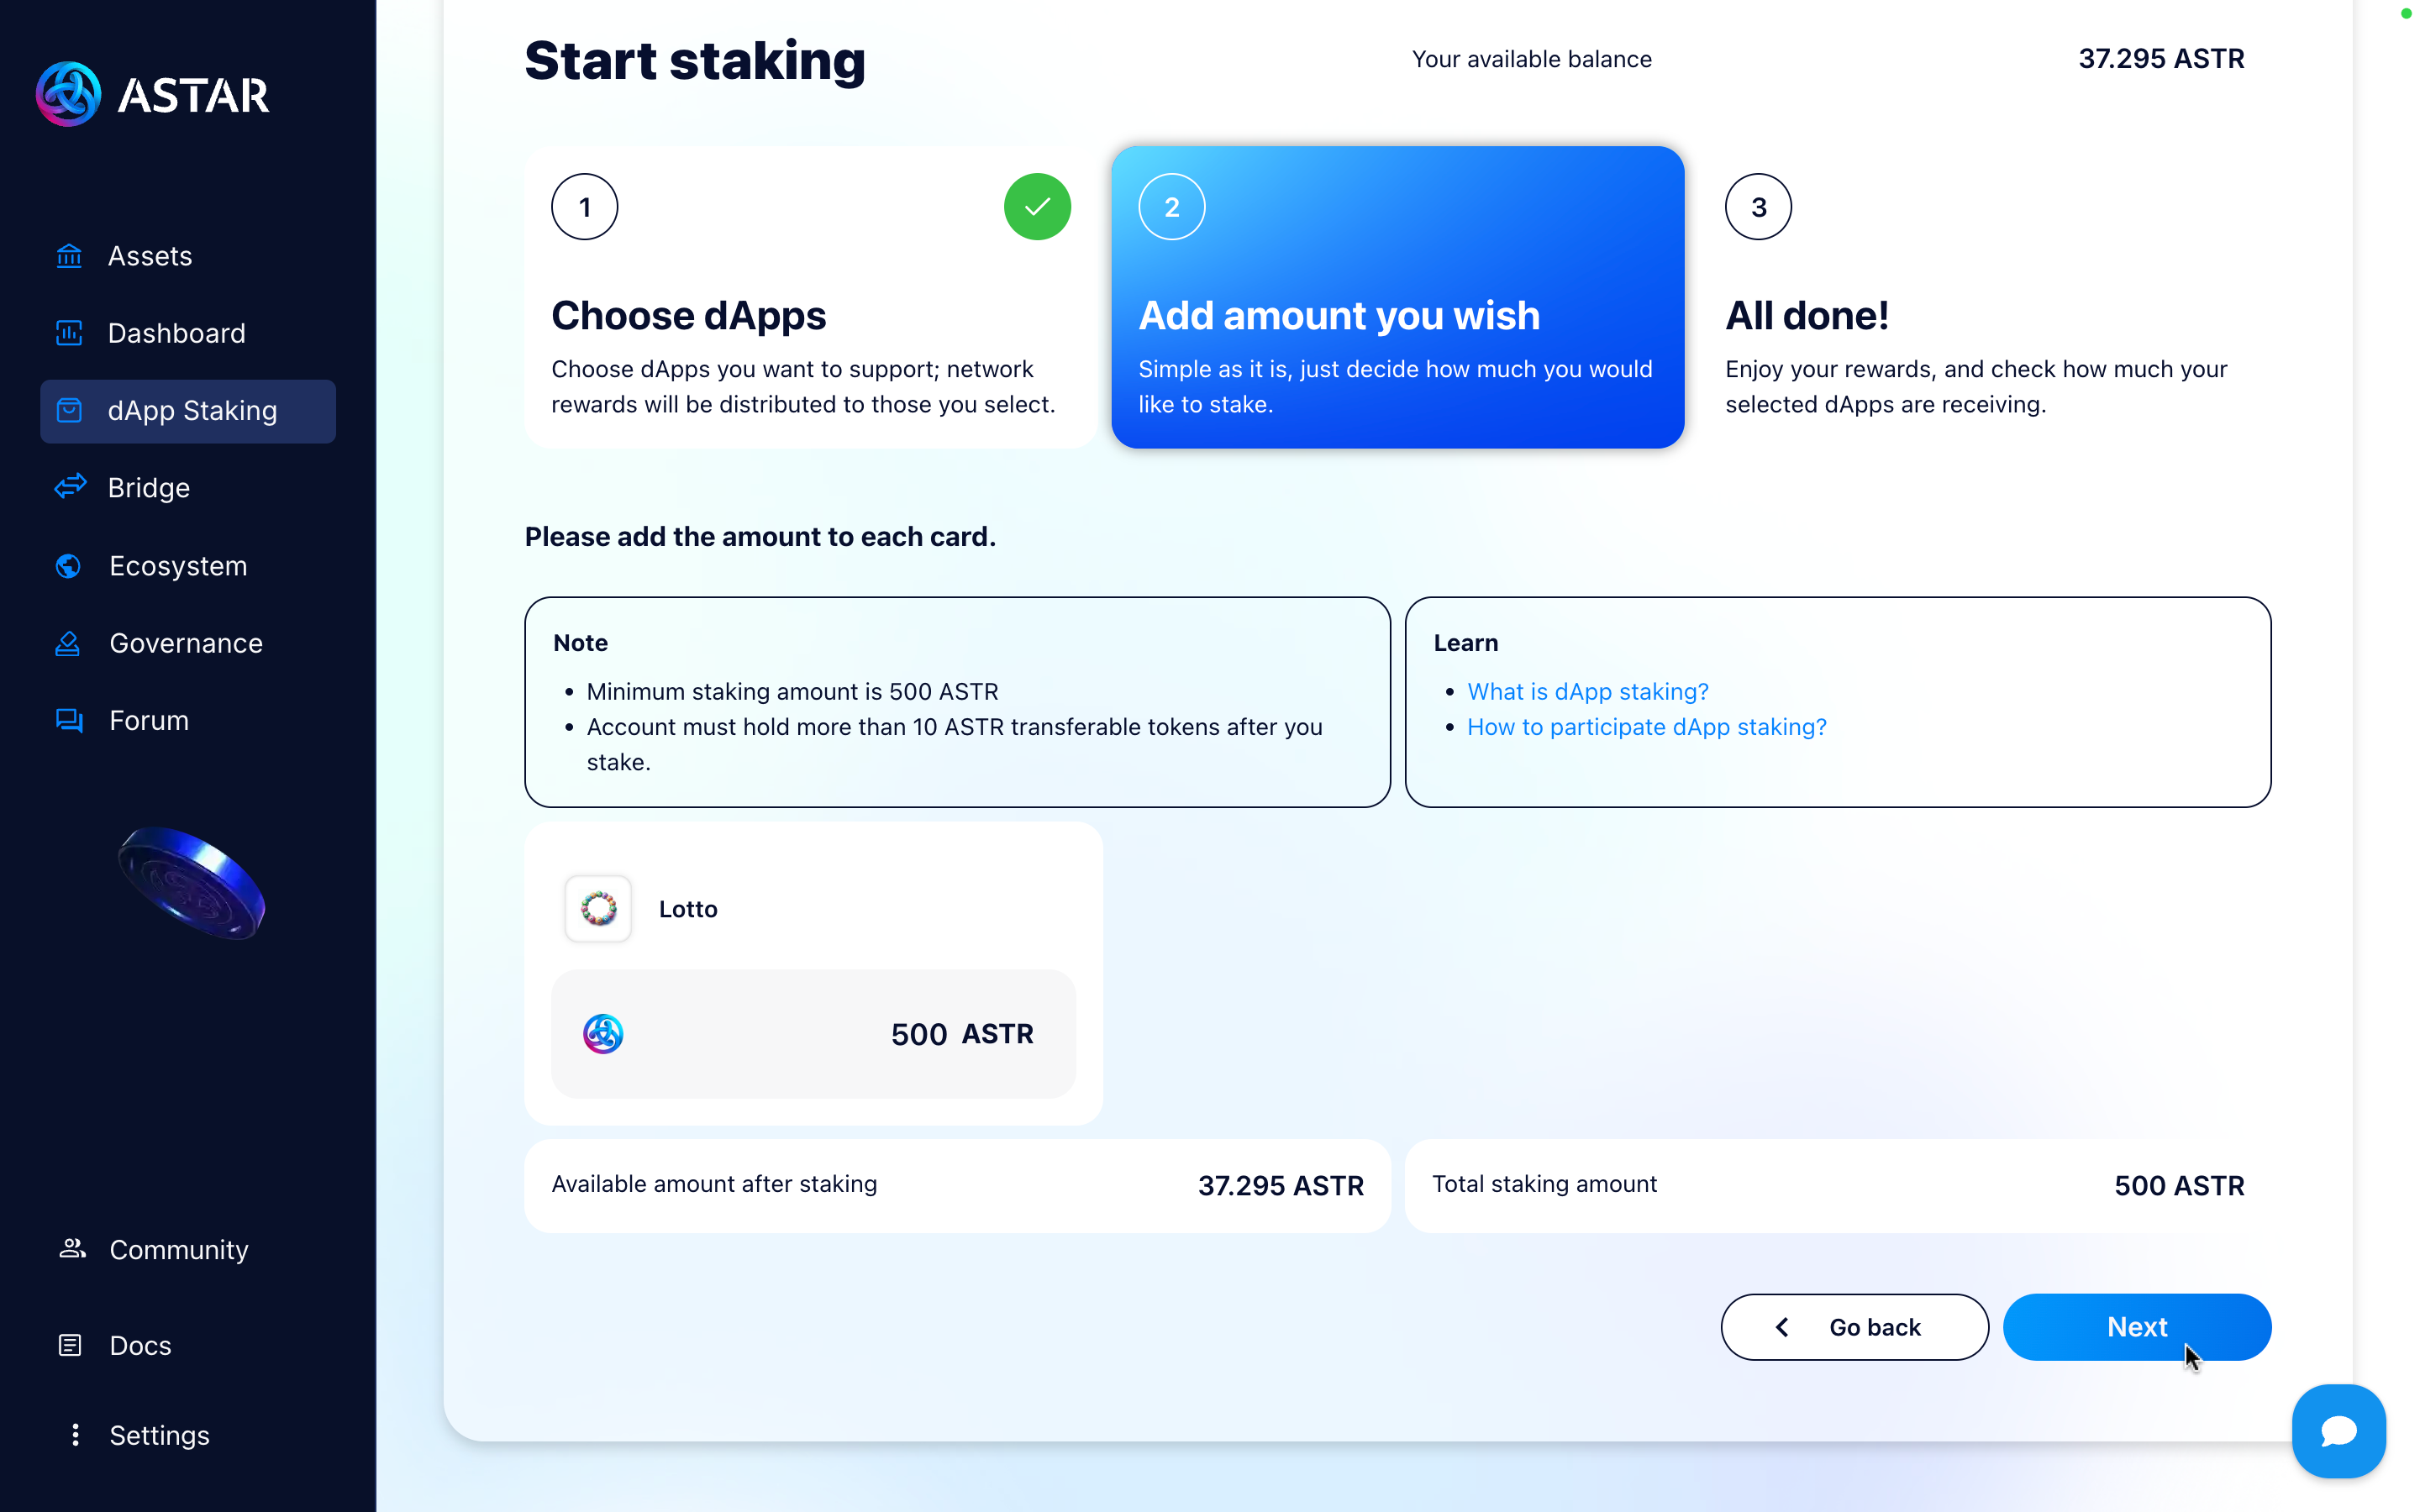
Confirm, and sign the transaction.
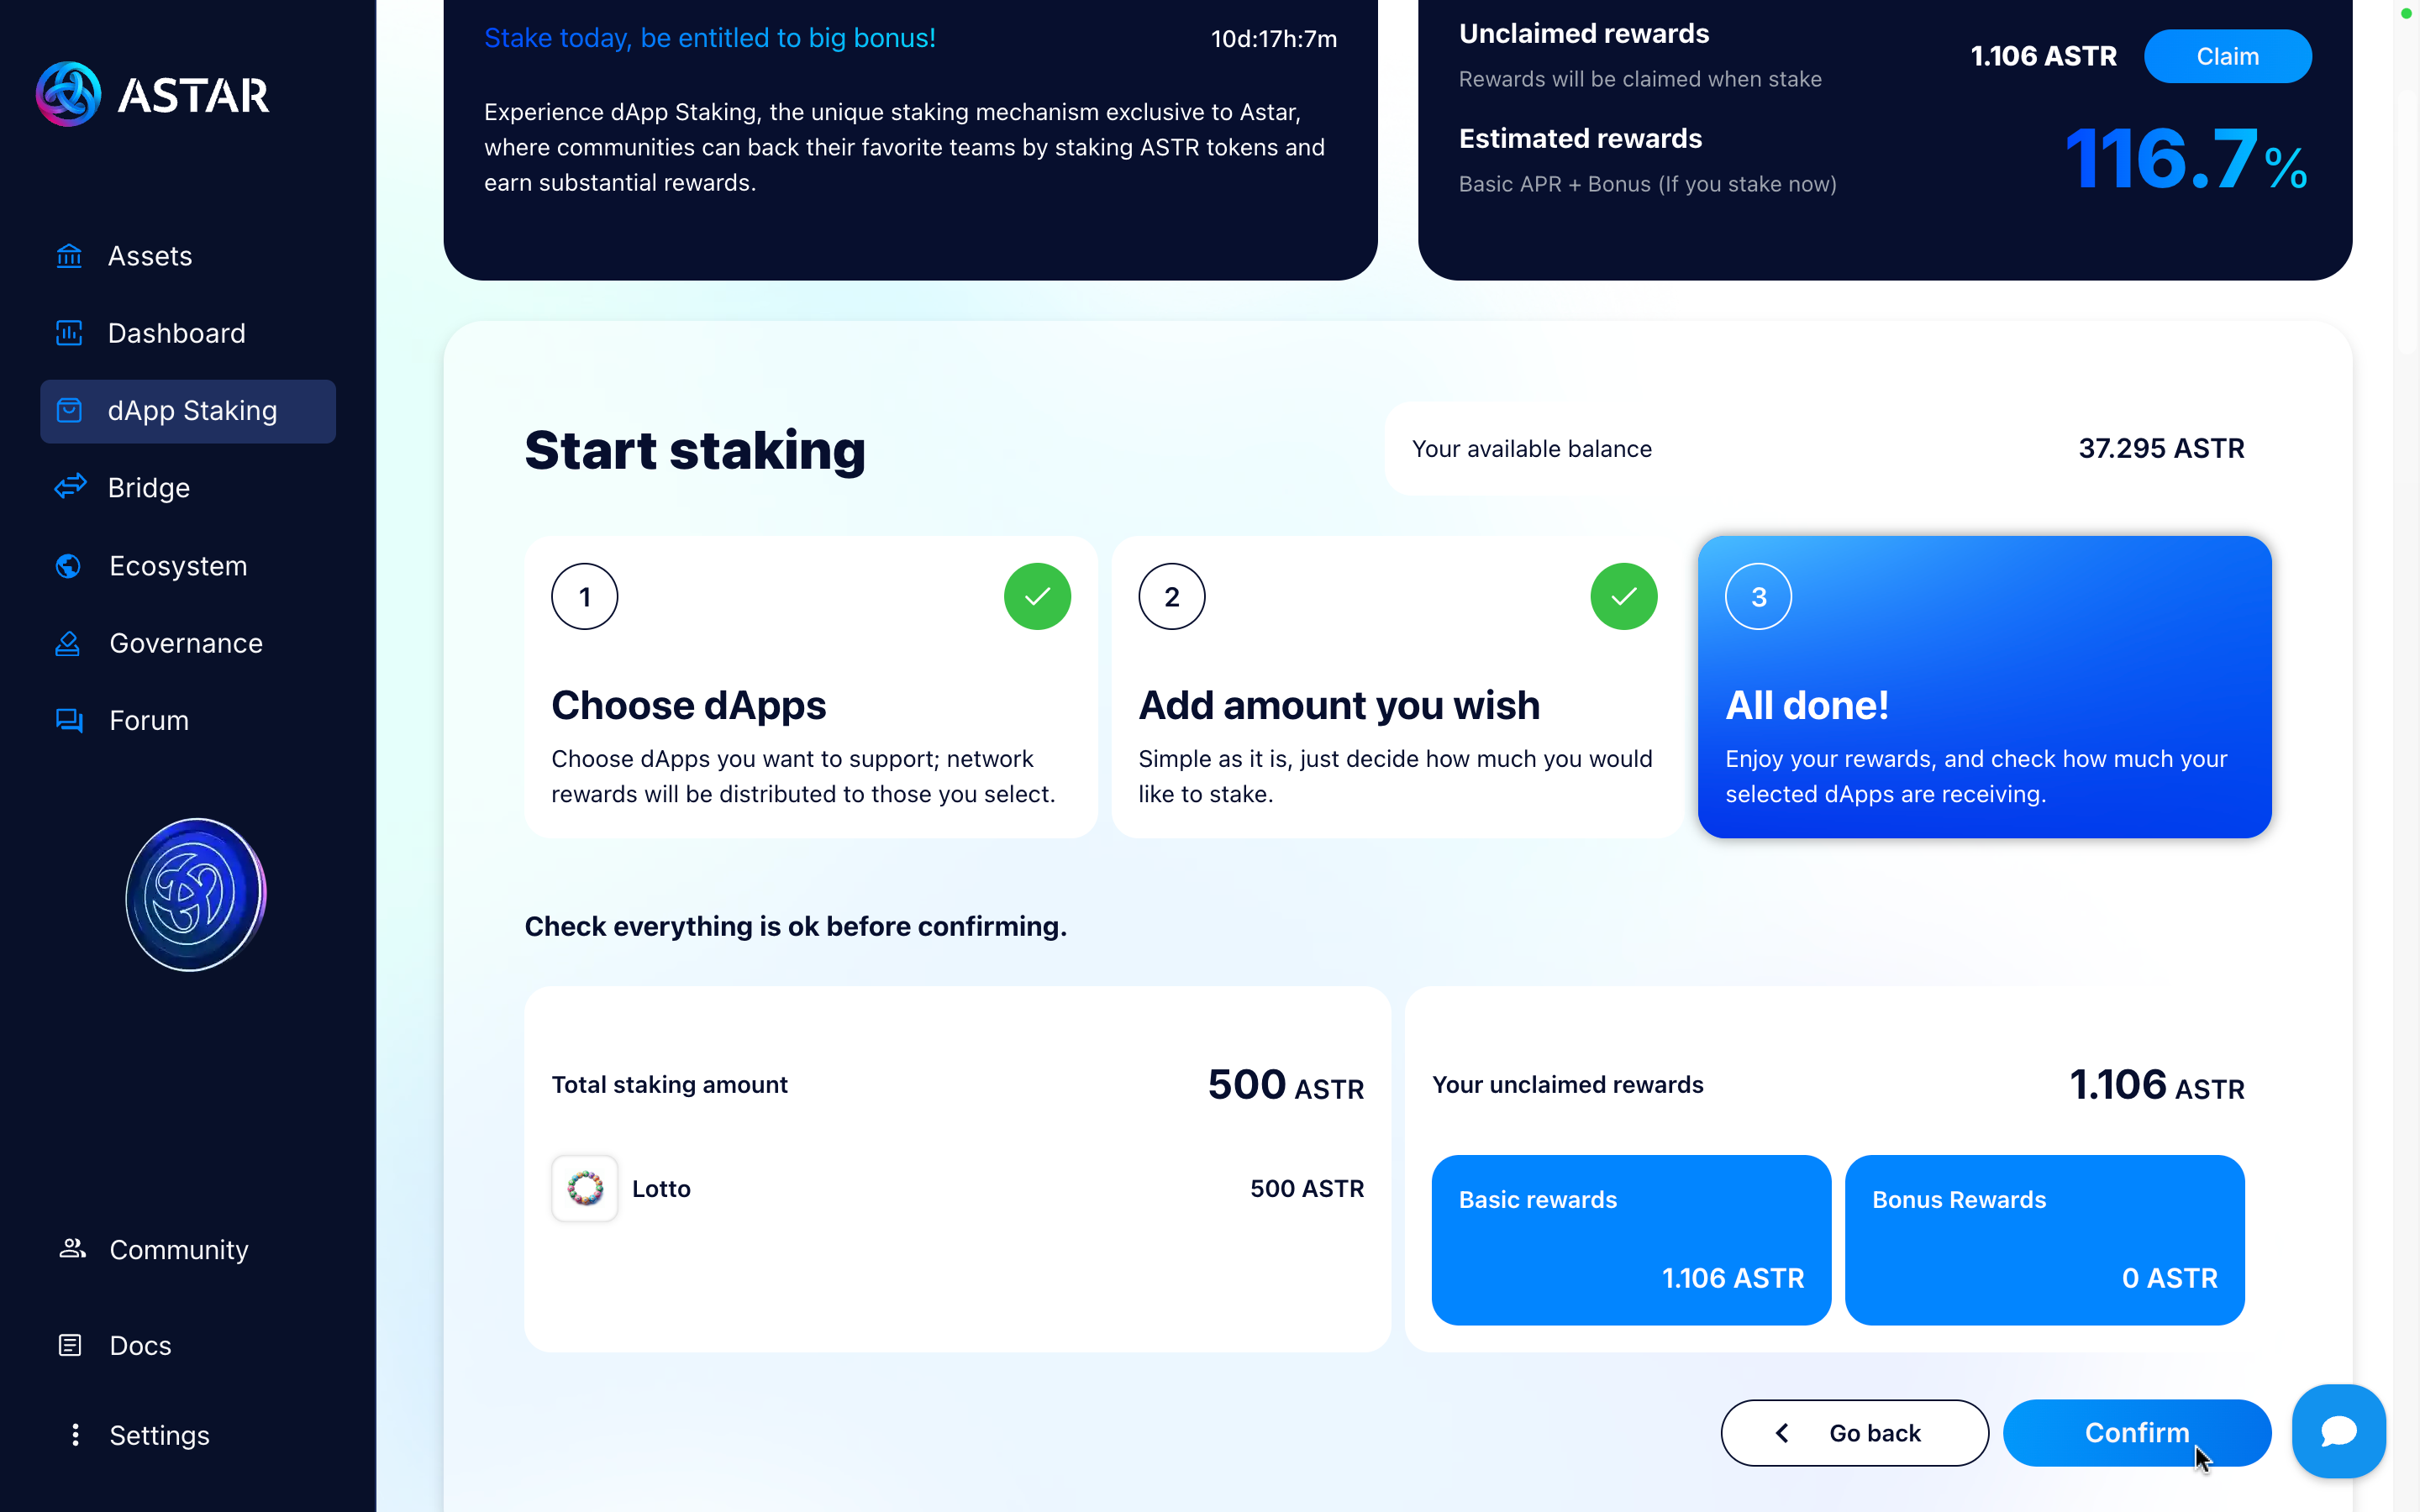
Make sure to always keep some tokens free for gas manage to claim your rewards.
If everything is correct, you’ll see a message confirming that the transaction was successfully executed, and you’ll be able to view your transaction in the block explorer.
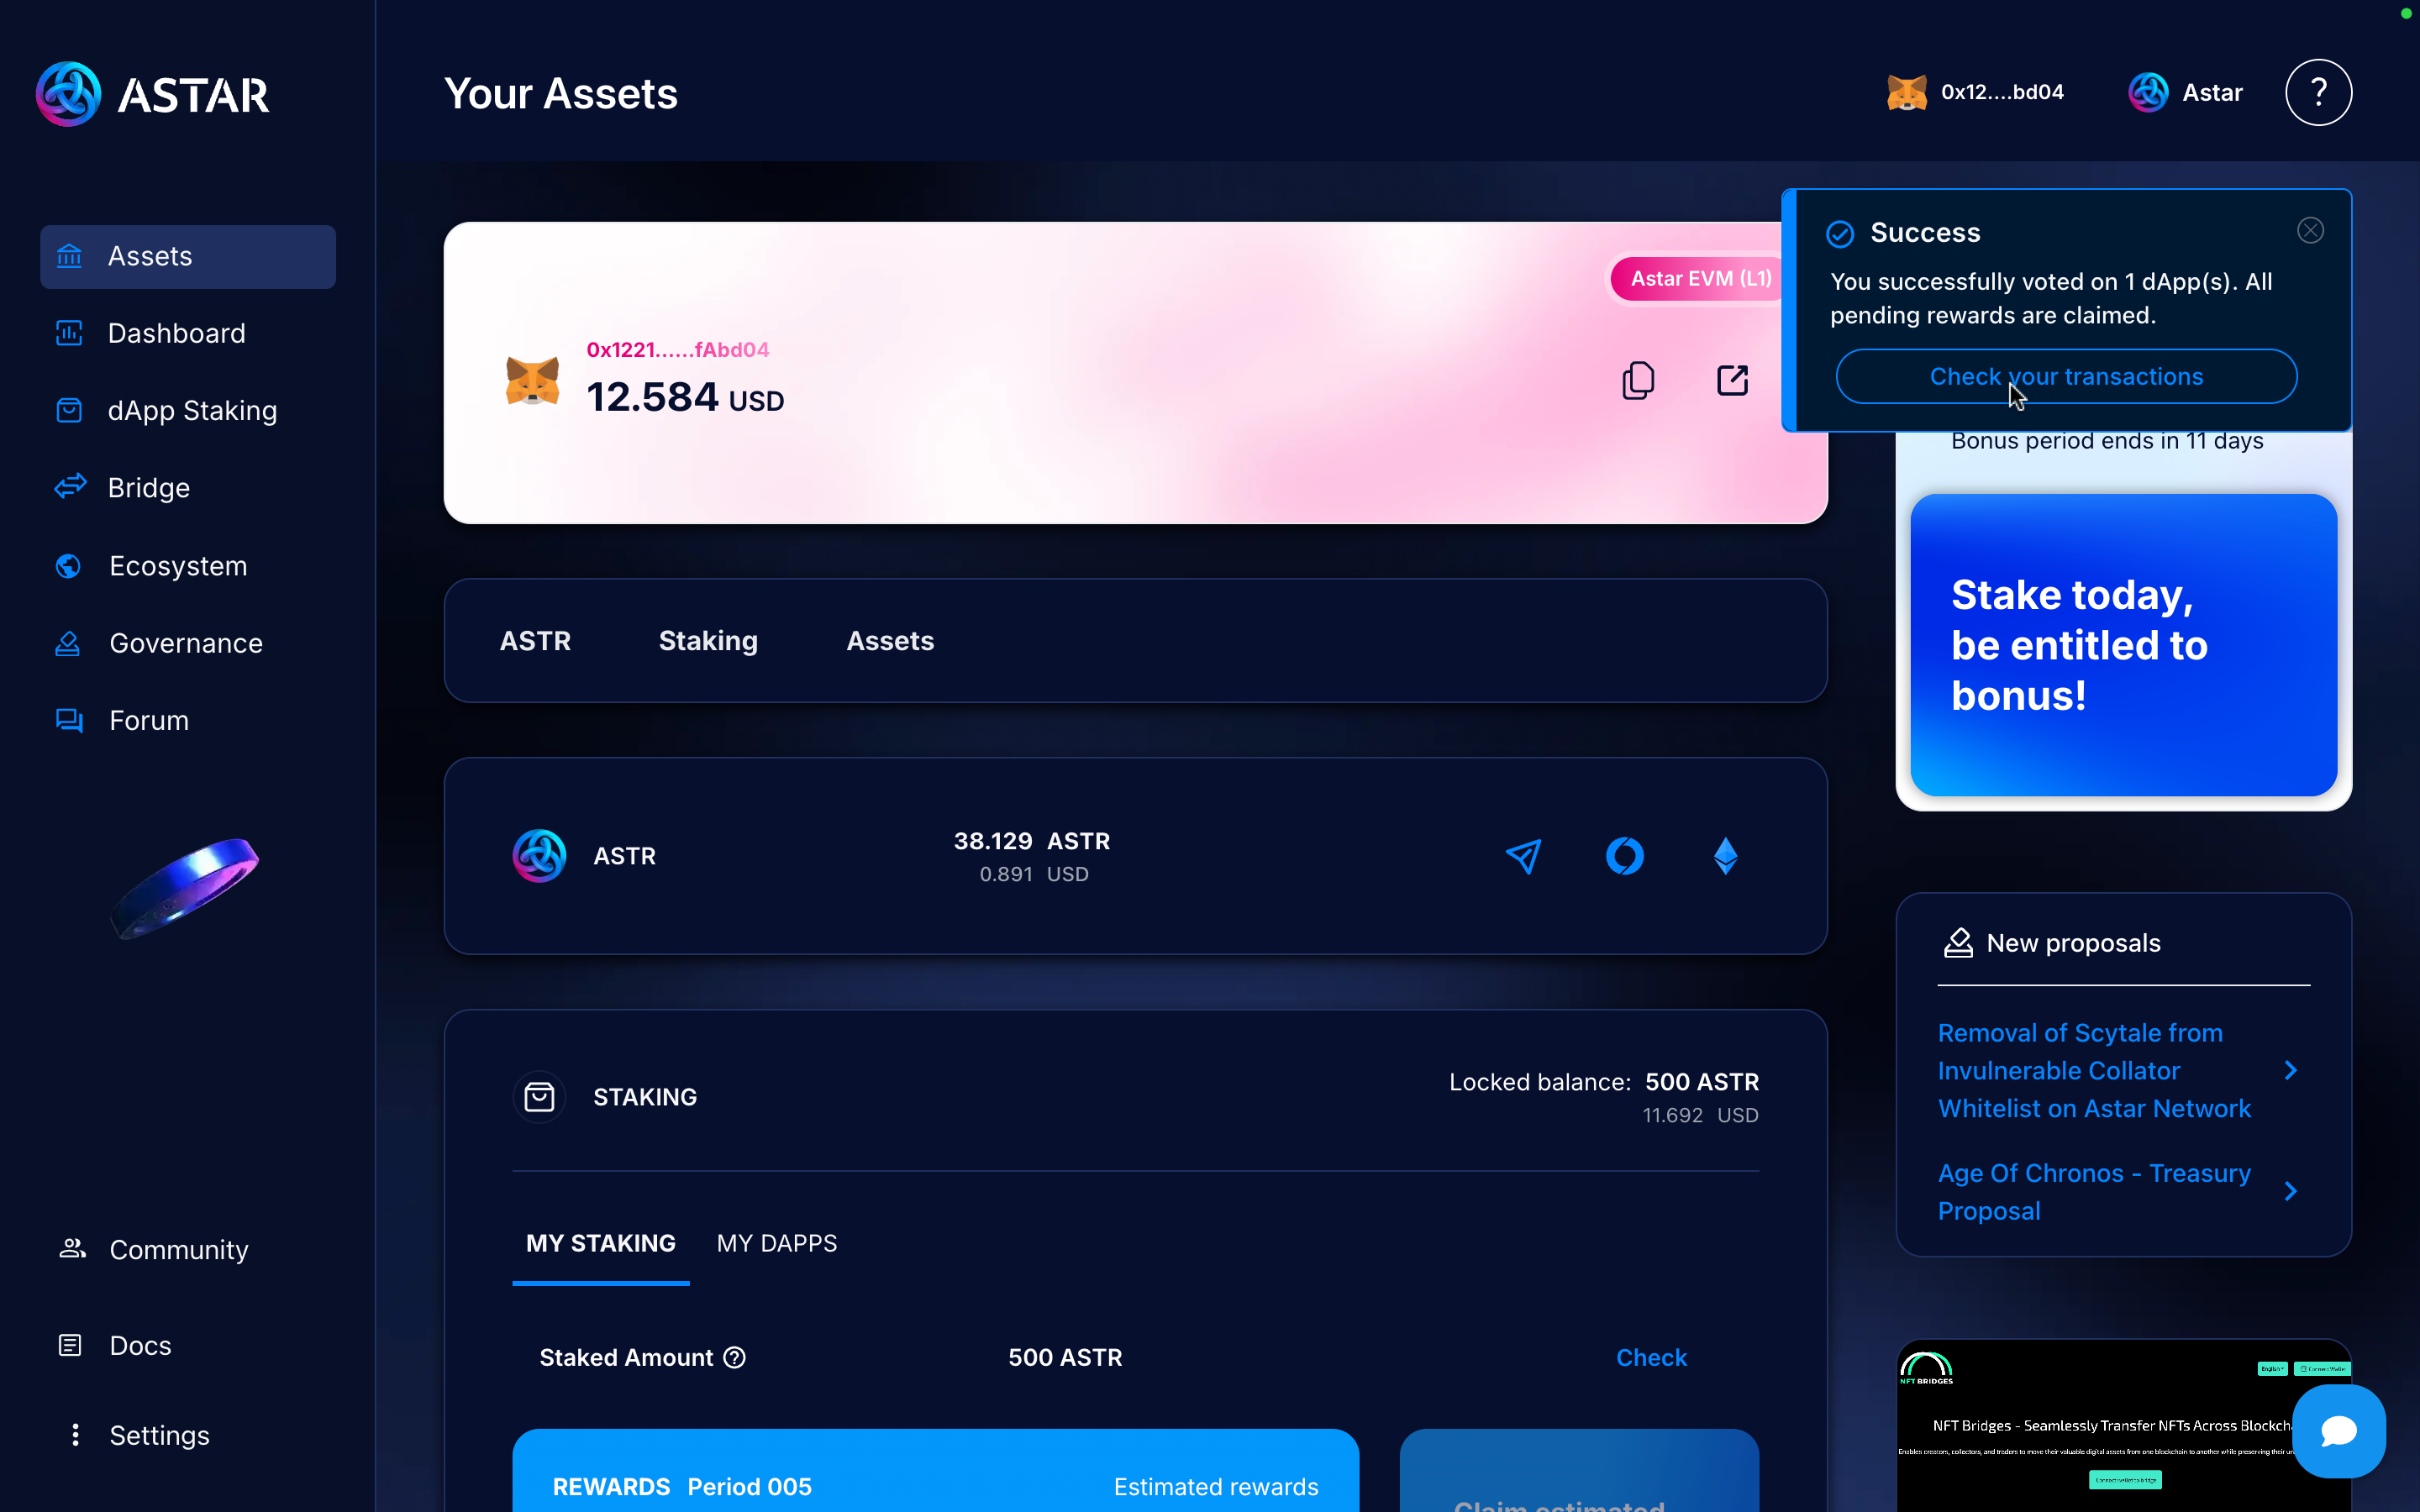
Step 5: Check your staking
Finally, you’ll be able to see your balance. Go back to the Assets screen. In the Staking section, you’ll be able to view your staked balance and more.

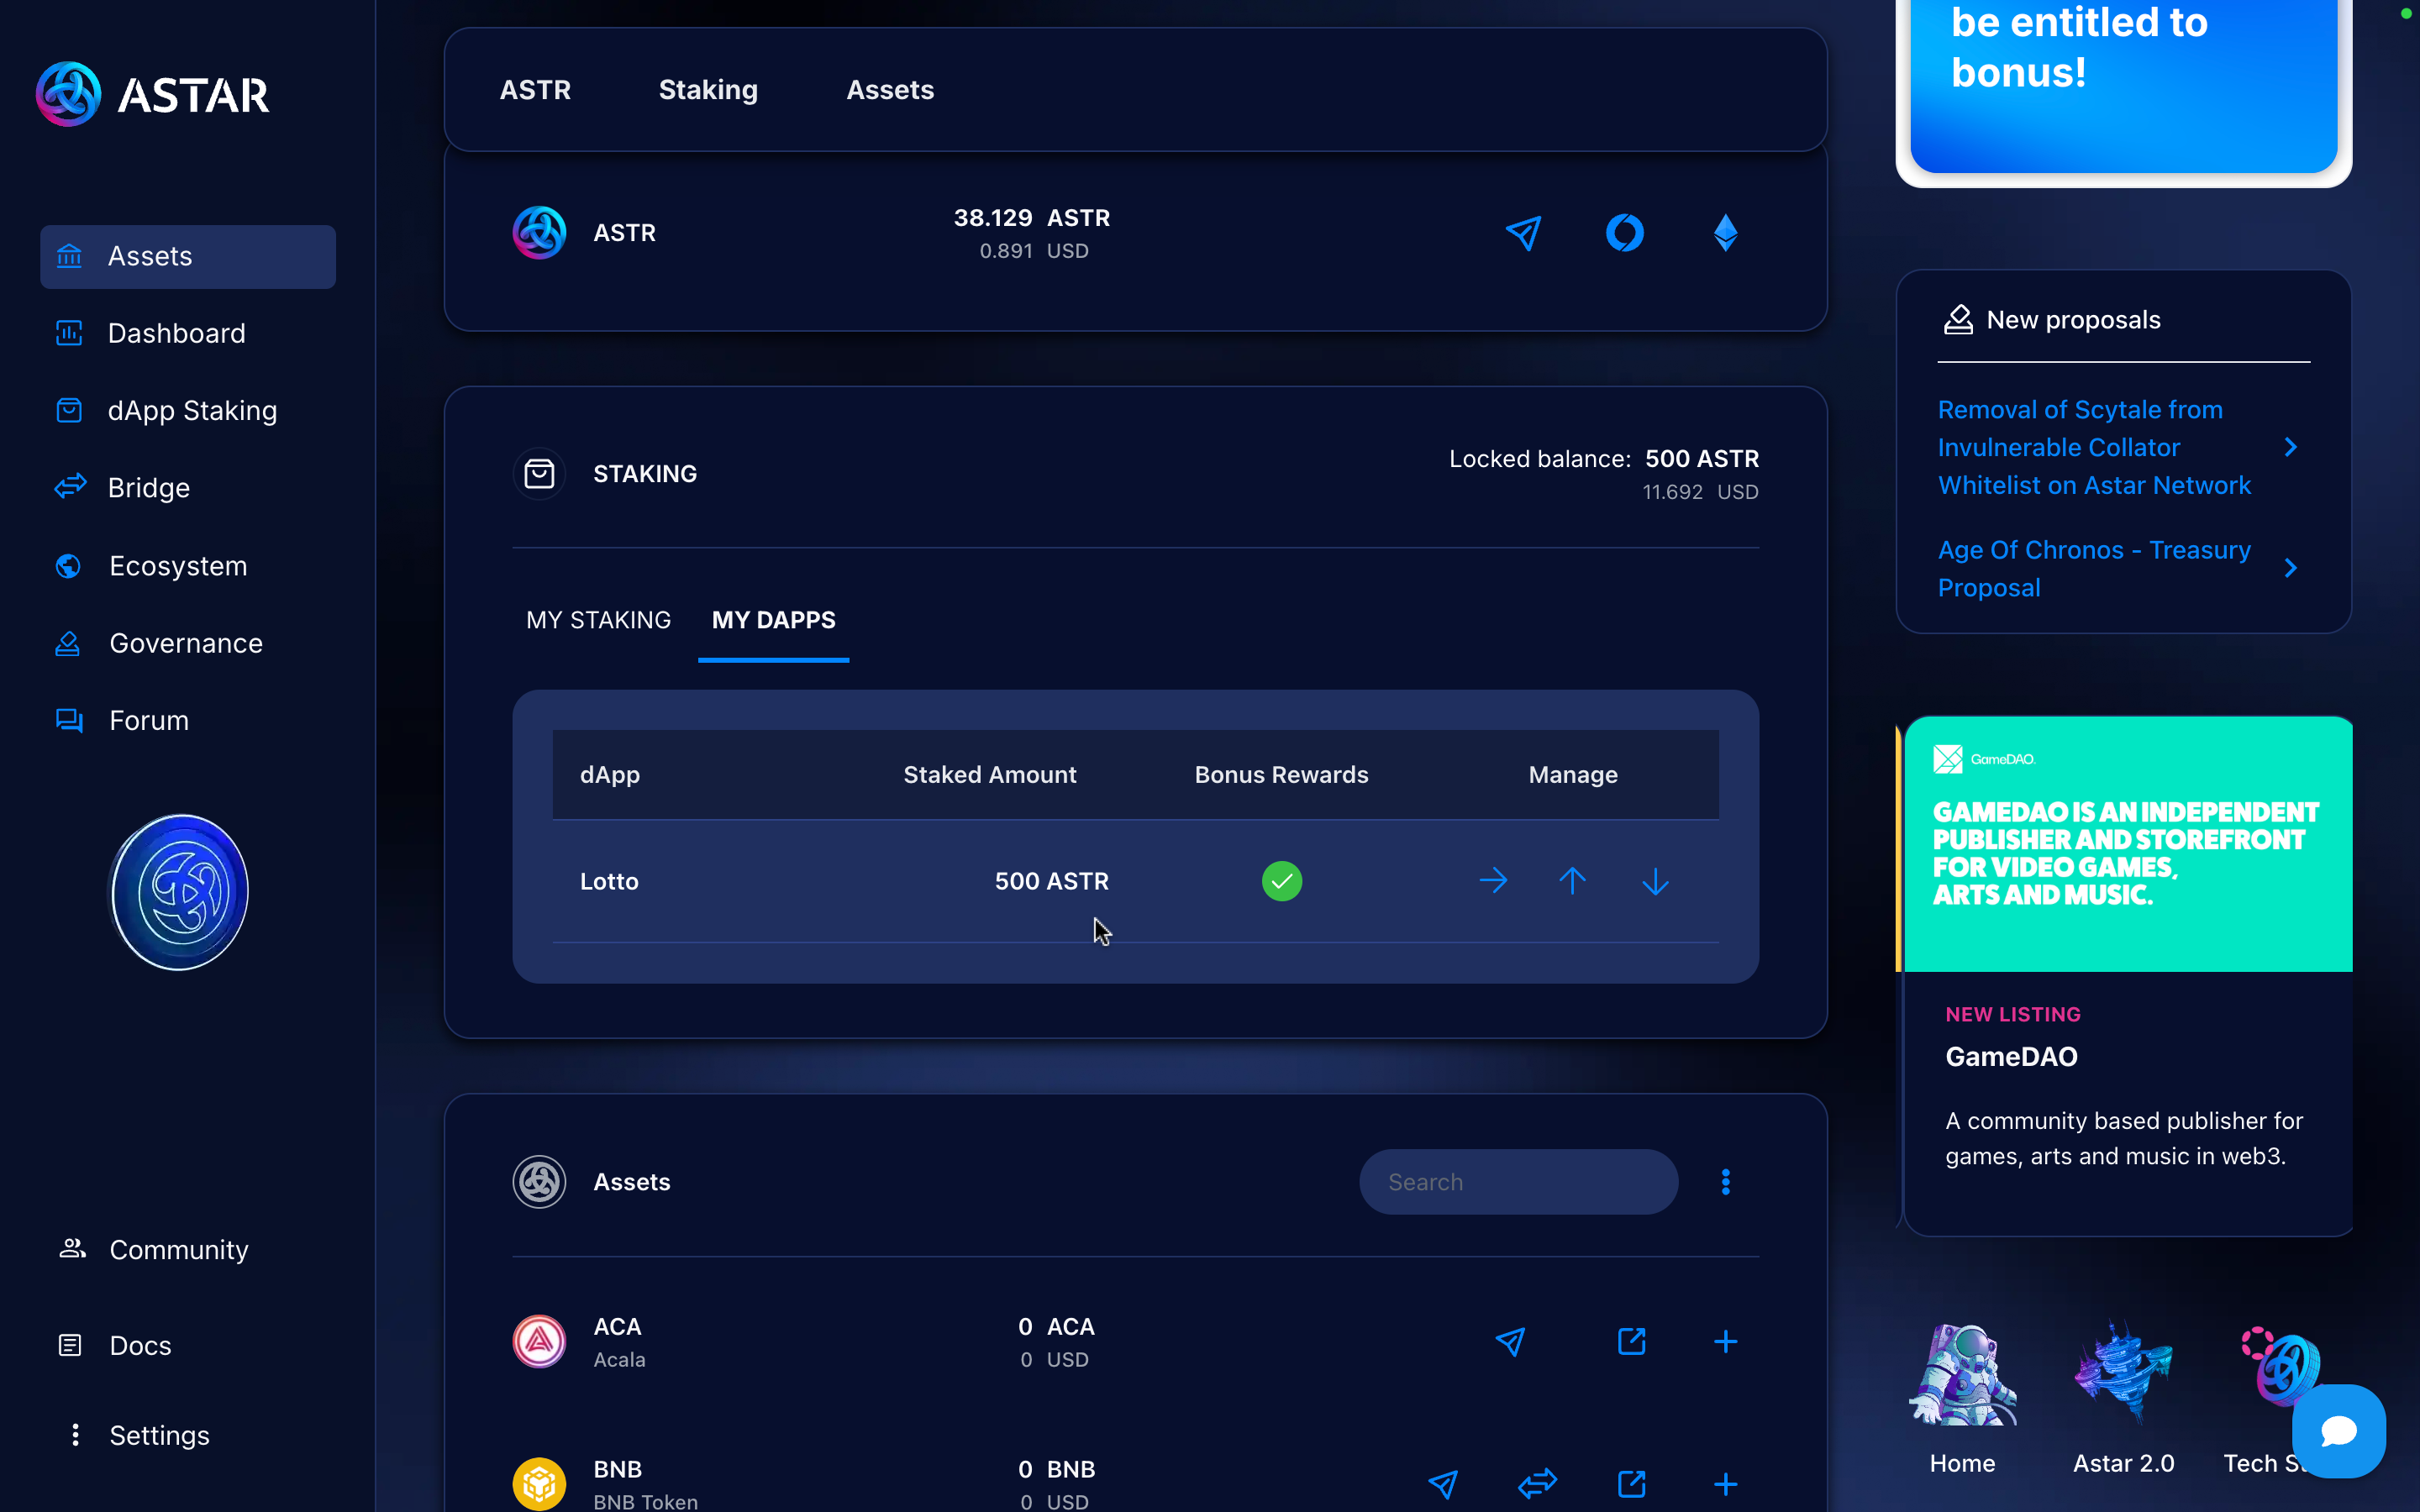
If you go to the My dApps section, you’ll be able to see the different dApps you staked on and their respective amounts.
At the end of a Period, tokens are unstaked from all dApps, remain locked on the account but must be staked back on dApps for the new Period.
3. Video tutorial
To wrap up, here’s a video tutorial that will guide you through the step-by-step process in case anything wasn’t clear. Feel free to ask your questions in our official Astar Discord.