Create a Proxy Account with Polkadot.Js
In this tutorial, you'll learn how to manipulate proxy accounts using the Polkadot{.js} application.
Proxy accounts
Overview
Pallet Proxy enables accounts to grant specific permissions to other accounts, allowing them to make calls on their behalf while keeping the underlying account secure. On this page, you will find a detailed overview of the various proxy types, extrinsics, general definitions, and features associated with the proxy pallet. Additionally, there are tutorials available to help you understand and utilize the proxy functionality effectively.
Proxy Types
-
Any - This proxy type allow delegate account to make any call that are supported by proxy pallet. This is the highest level of privilege and should always be used with caution.
-
NonTransfer - This proxy type allows the delegate account to make any call supported by the proxy pallet except for asset transfer functionalities. This can come handy when you want to keep your funds secure in cold storage and want to delegate all the other functionalities to a proxy account. To see complete list of functionality, checkout the source code in Astar repo.
-
Balances - This proxy type gives control of handling accounts and balances to the delegate account. Complete list of calls can be found here.
-
Assets - This proxy type allows delegate account to control the functionalities related to fungible assets which includes asset issuance, transferal, minting etc. This is to be notes that this proxy types doesn't control the native currency like Astar or Shiden which are controled by Balances proxy.
-
IdentityJudgement - This proxy type allows a single functionality to delegate account which is to provide a judgement to an identity in a naming system. The delegator must be a registrar.
-
CancelProxy - This proxy type allows delegate account to to reject and remove any announced proxy calls.
-
DappsStaking - This proxy type allows delegate account to perform DappStaking related transactions such as register, unregister contracts, claim rewards etc.
Extrinsics
The proxy pallet provides the following extrinsics (functions):
-
addProxy(delegate, proxyType, delay) - allows the sender to register a proxy account capable of making calls on behalf of the sender. If the delay value is set to a number greater than 0, the proxy account must announce a transaction and wait for the specified number of blocks before executing it as a proxy. This function also emits a ProxyAdded event.
-
announce(real, callHash) - used to record the announcement of a proxy transaction made by proxy accounts that have a delay requirement. This function emits an Announced event.
-
anonymous(proxyType, delay, index) - generates a new account with an inaccessible private key, making it inaccessible. The sender assumes the role of a proxy for this account, based on the specified type and delay. Caution: If the proxy is removed, the primary account will become inaccessible. This function emits an AnonymousCreated event.
-
killAnonymous(spawner, proxyType, index, height, extIndex) - removes a previously spawned anonymous proxy.
-
proxy(real, forceProxyType, call) - performs a transaction as a proxy. This function emits a ProxyExecuted event.
-
proxyAnnounced(delegate, real, forceProxyType, call) - executes a transaction as a proxy and removes any previous corresponding announcements. This function emits a ProxyExecuted event.
-
rejectAnnouncement(delegate, callHash) - if the sender is a prime account, it removes a specific announcement from their proxy account.
-
removeAnnouncement(real, callHash) - if the sender is a proxy account, it removes a specific announcement to their prime account.
-
removeProxies() - unregisters all proxy accounts associated with the sender.
-
removeProxy(delegate, proxyType, delay) - unregisters a specific proxy account linked to the sender. This function emits a ProxyRemoved event.
Constants for Pallet Proxy
| Constant | Description |
|---|---|
| announcementDepositBase | base amount of currency required to reserve when creating an announcement. |
| announcementDepositFactor | amount of currency required per announcement made. |
| maxPending | maximum number of time-delayed announcements allowed to be pending. |
| maxProxies | maximum number of proxies permitted for a single account. |
| proxyDepositBase | base amount of currency required to reserve when creating a proxy. |
| proxyDepositFactor | amount of currency required per proxy added. |
Why Proxy Deposits ?
To create proxies within the network, it is necessary to provide deposits in the native currency (like ASTR or SDN). The deposit is required because adding a proxy requires some storage space onchain, which must be replicated across every peer in the network. Due to the costly nature of this, these functions could open up the network to a Denial-of-Service attack.
When creating a proxy, a bond is deducted from your free balance and transferred to your reserved balance. This mechanism helps maintain the integrity and stability of the proxy system while providing assurance that the bond can be returned when the proxy is deactivated or removed.
The required deposit amount for n proxies is equal to:
ProxyDepositBase + ProxyDepositFactor * n
Pure / Anonymous Proxy
Anonymous proxies (Pure Proxies) are freshly generated accounts, distinct from original one, which originate from a primary account. The primary account assumes the role of a proxy, representing the anonymous proxy. These proxies are non-deterministic and lack a private key, yet possess a randomly generated address. It is worth noting that anonymous proxies remain ownerless, as no individual possesses a private key to exercise control over them.
Despite their complexity and associated dangers, pure proxies have many important benefits like enhanced security and multi-sig account management.
It is highly encouraged to checkout this documentation by Polkadot for more information about Pure proxy, its limitations and benefits.
Video resource for Pure Proxy - https://youtu.be/MqY6yU-YLO0
Time-Delayed Proxy
To enhance the security of proxies, we can implement a delay mechanism measured in blocks. A delay value of 10 corresponds to ten blocks, resulting in a delay of around two minute (for Astar network). The proxy will utilize the proxy.announce extrinsic to declare its intended action and will wait for the specified number of blocks according to the defined delay time before executing it.
During this delay window, the intended action can be canceled by either the proxy itself using the proxy.removeAnnouncement extrinsic or by the accounts controlling the proxy through the proxy.rejectAnnouncement extrinsic. The announcement made by the proxy includes the hash of the intended function call, enabling the identification and validation of the action.
By incorporating this delay mechanism, any malicious activities can be detected and reversed within the designated delay period. After the time-delay has passed, the proxy can proceed with executing the announced call using the proxy.proxyAnnounced extrinsic.
Any attempt to sign the transaction using proxy extrinsic with pure proxy will fail. Read more about pure proxies here.
This implementation adds an additional layer of security to proxies, providing confidence in their usage, knowing that actions can be observed and undone within the specified delay period.
Check out this video by Polkadot to learn how to set up time-delayed proxies.
How to create a proxy account
-
Go to Polkadot{.js} application and navigate to the
Developertab on the Polkadot{.js} dashboard; -
Within the Developer tab, find the
Extrinsicsand select it; -
Choose the primary account for which you want to create a proxy from the list. We will be using ALICE as primary account in this tutorial;
-
From the
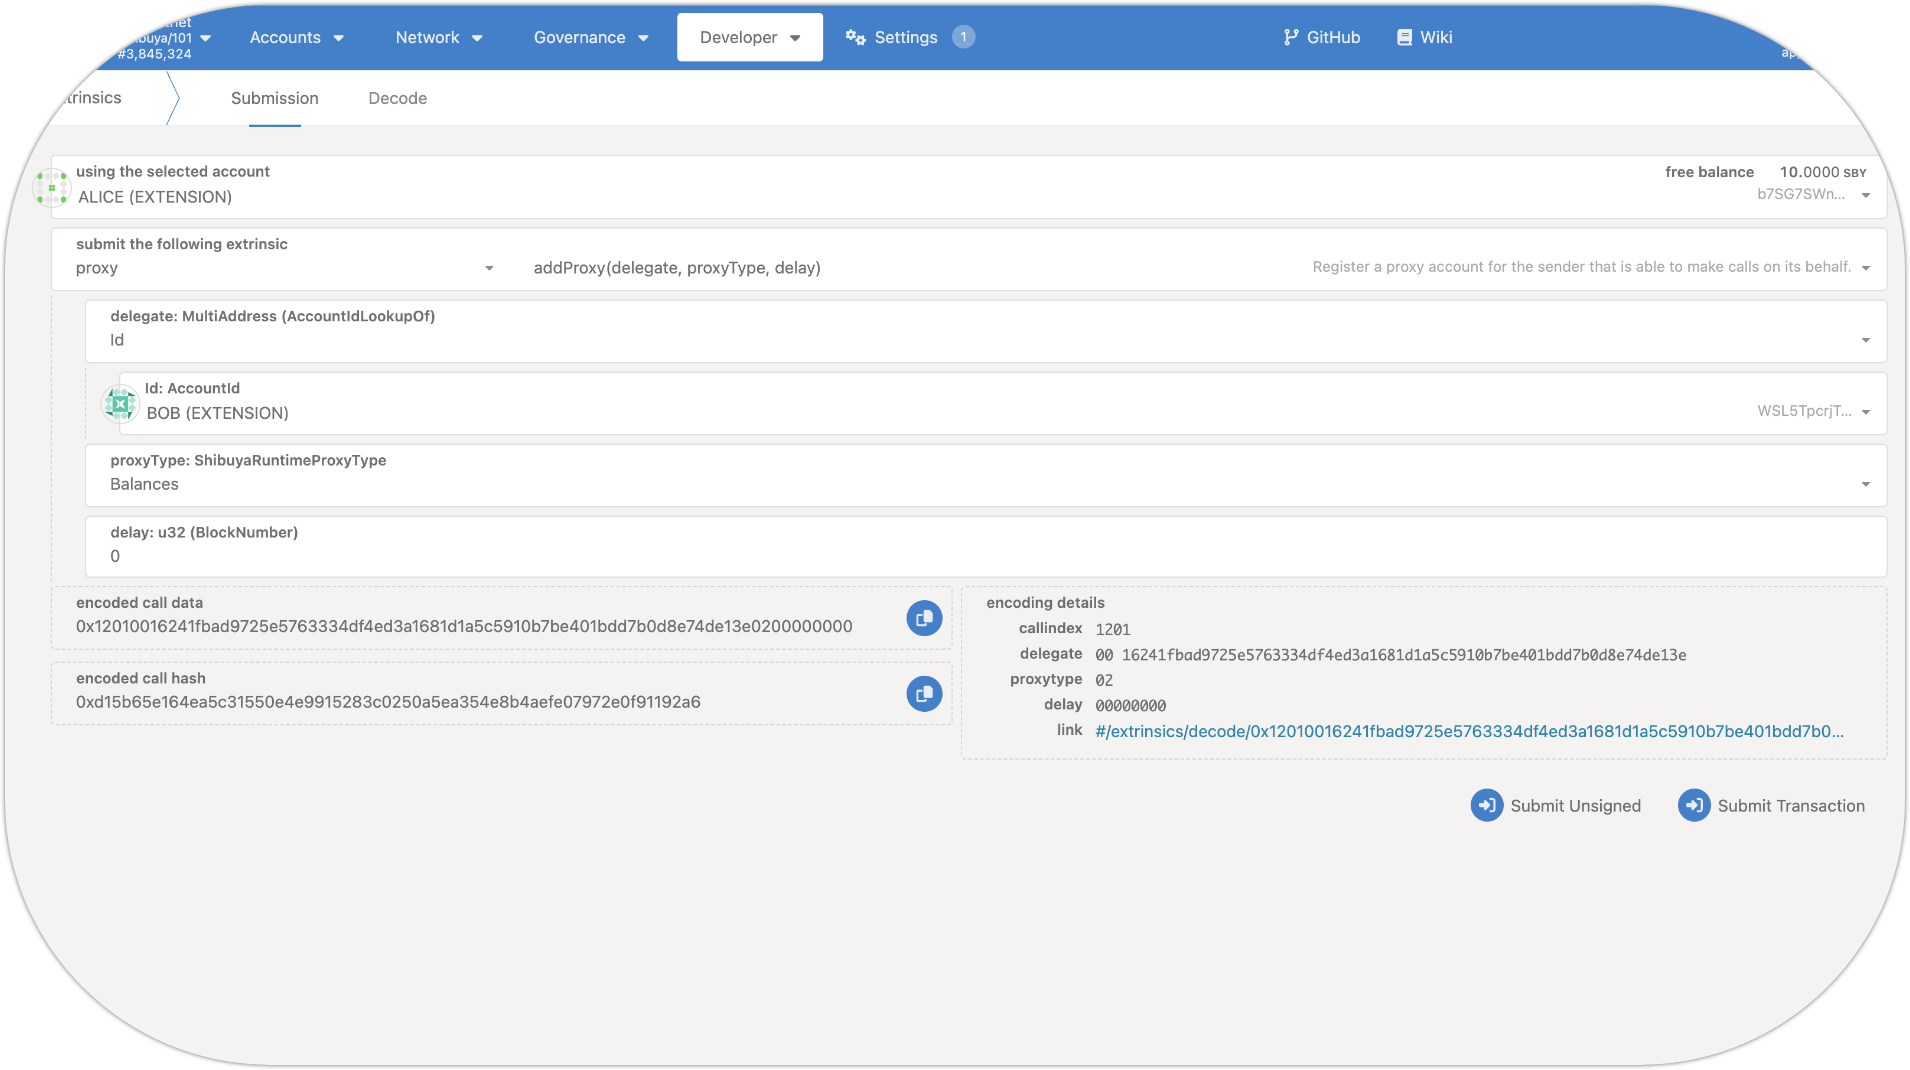
submit the following extrinsicdropdown, select proxy; -
Choose the addProxy extrinsic;
-
Select the delegate account for the proxy;
-
In the proxyType drop-down list, you can choose Any to give full access to the proxy account, or select a specific
palette, for example Balances, dAppStaking, etc. -
(Optional) Add a time delay: If desired, you may have the option to add a time delay to the transaction. This adds an extra layer of security by requiring the primary account to review the pending transaction before it is executed. Specify the desired number of blocks for the time delay;
-
Once you have filled in all the necessary details, find the button to submit the transaction. Click on it to initiate the process.
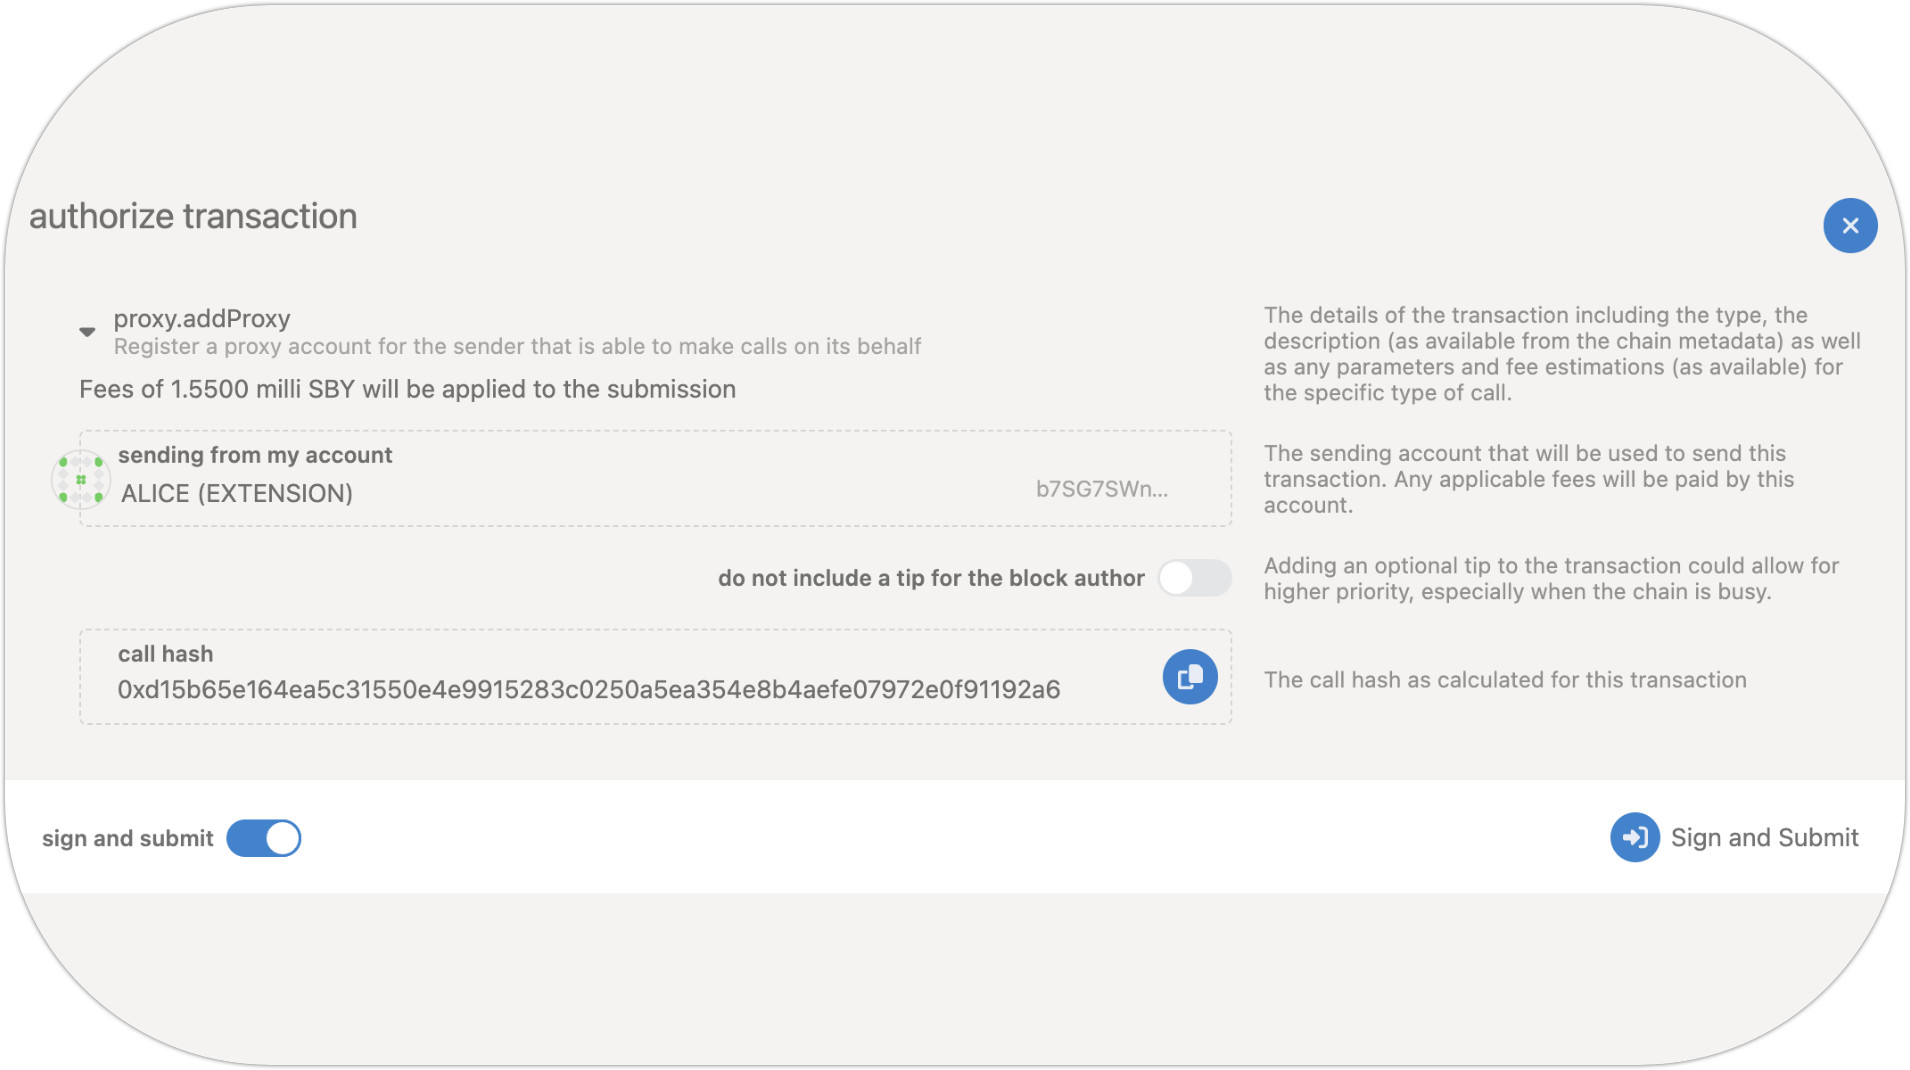
- You will then be prompted to authorize and sign the transaction. Go ahead and click
Sign and Submitto create the proxy relationship;
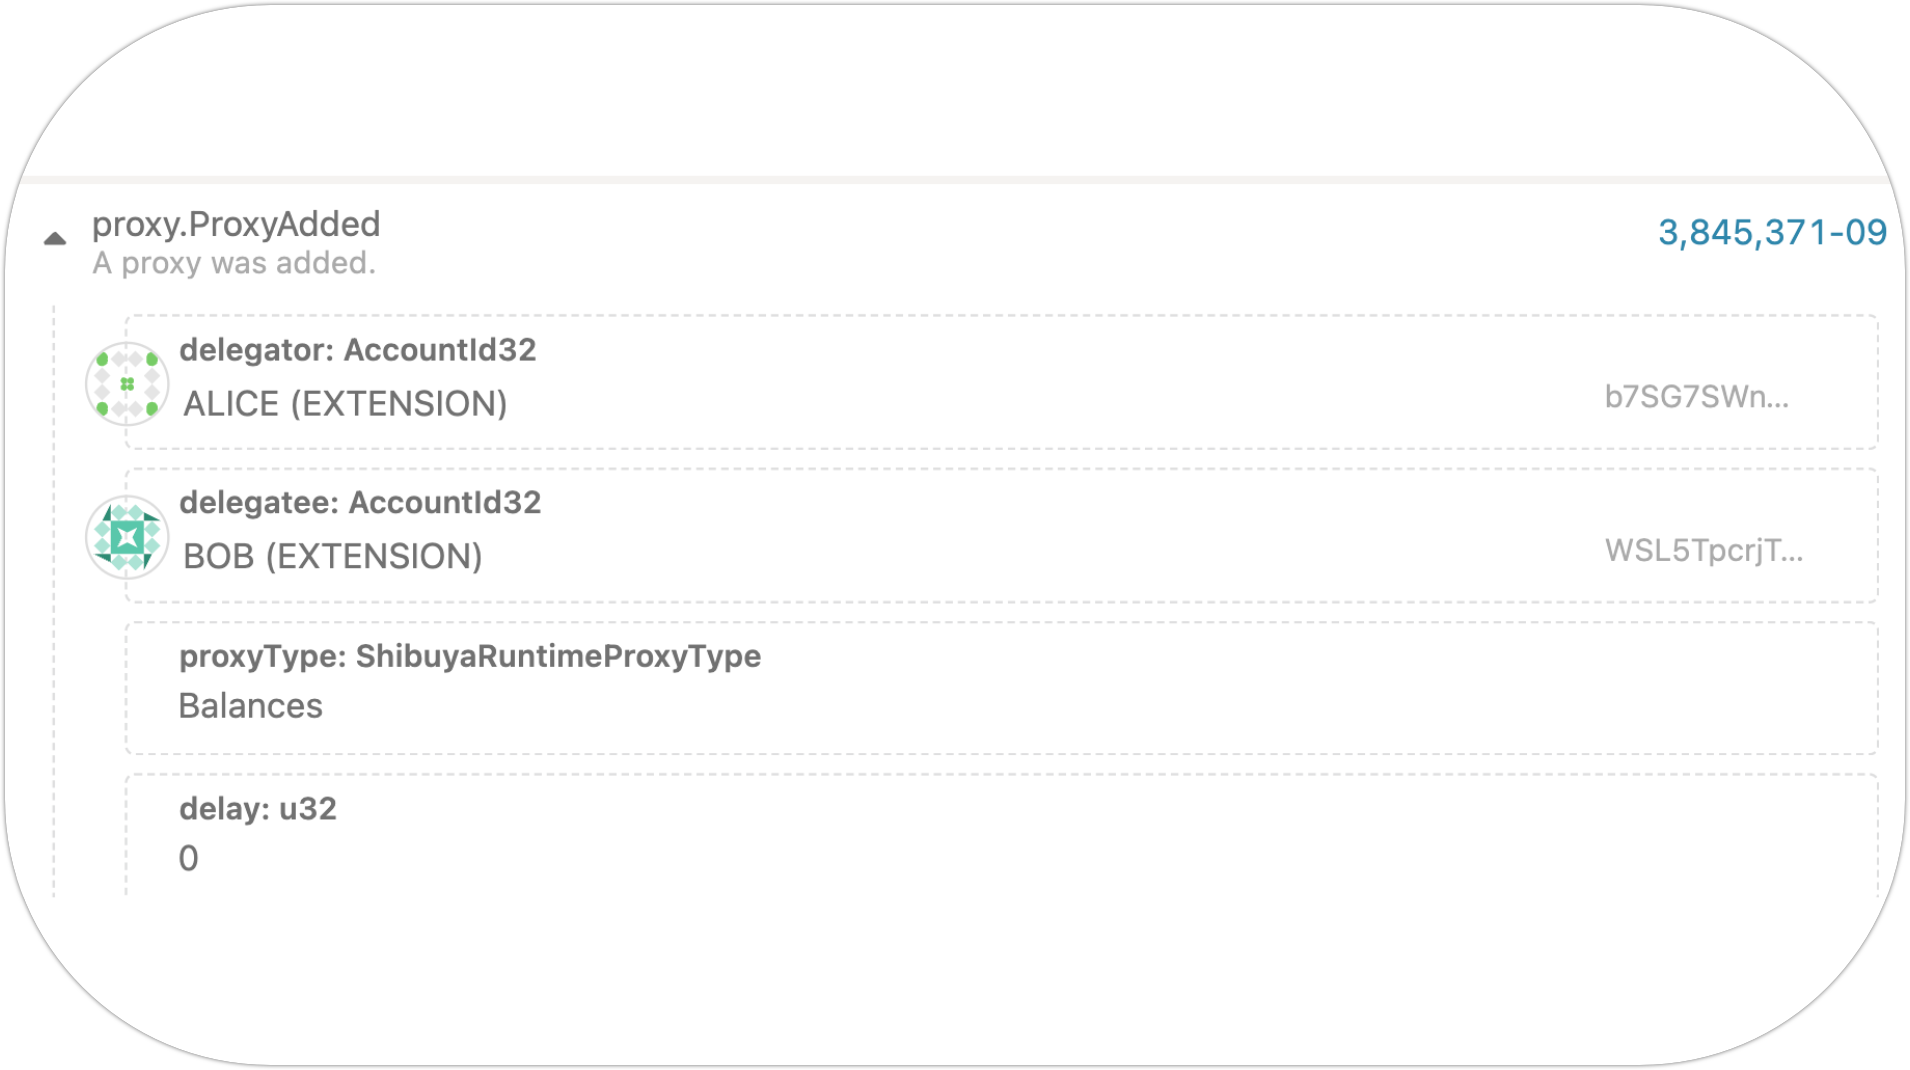
Once the transaction has been successfully submitted, you will receive notifications confirming the transaction.
You can also find the event proxy.ProxyAdded in recently emitted events inside Network > Explorer tab.
How to verify your proxy account
There are many ways of verifying if your proxy was added or not. Easiest way to do so is using the Accounts page.
-
Navigate to the Accounts page by clicking on Accounts tab and then selecting Accounts;
-
Here find you Primary Account and click on the 3 dots as seen in the provided picture;
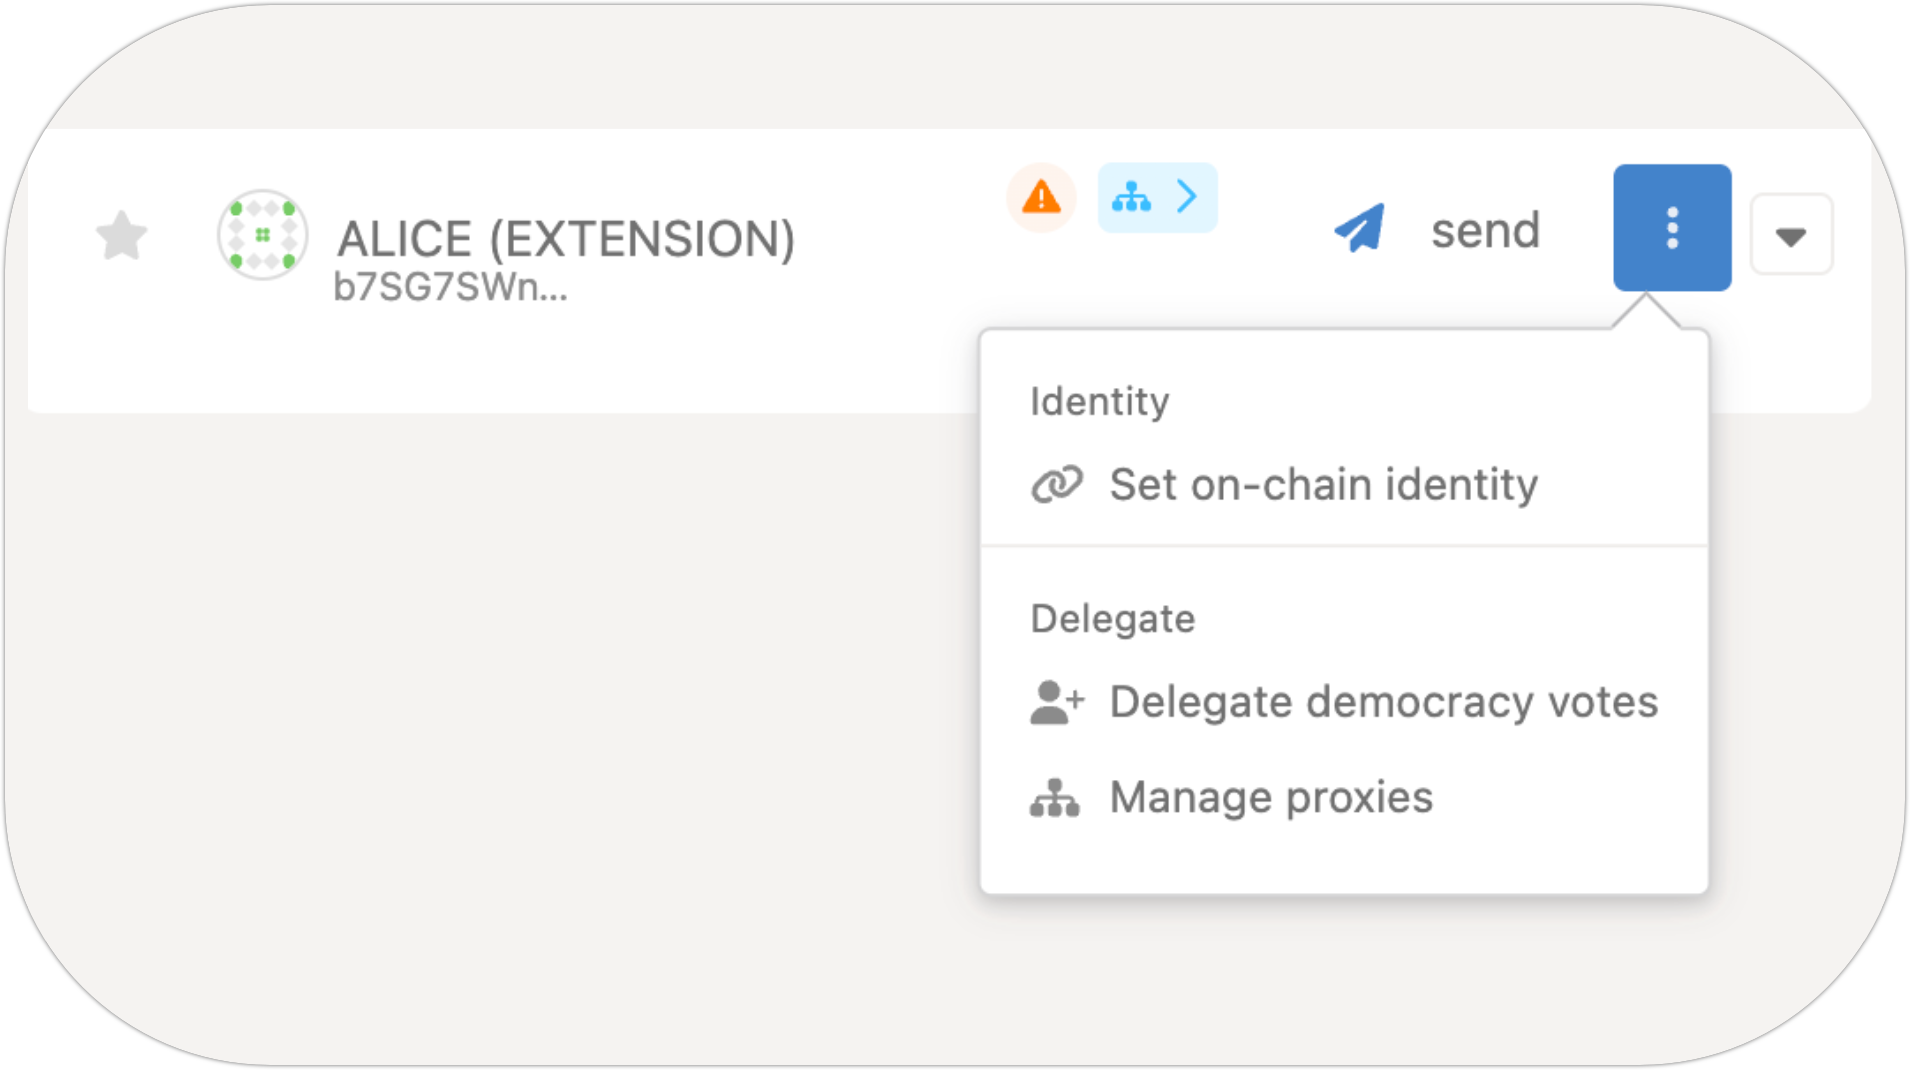
- Select Manage proxies option.
Here you can see the list of all proxies that you account has. For this tutorial, it is only Balances proxy that we added in the above section.
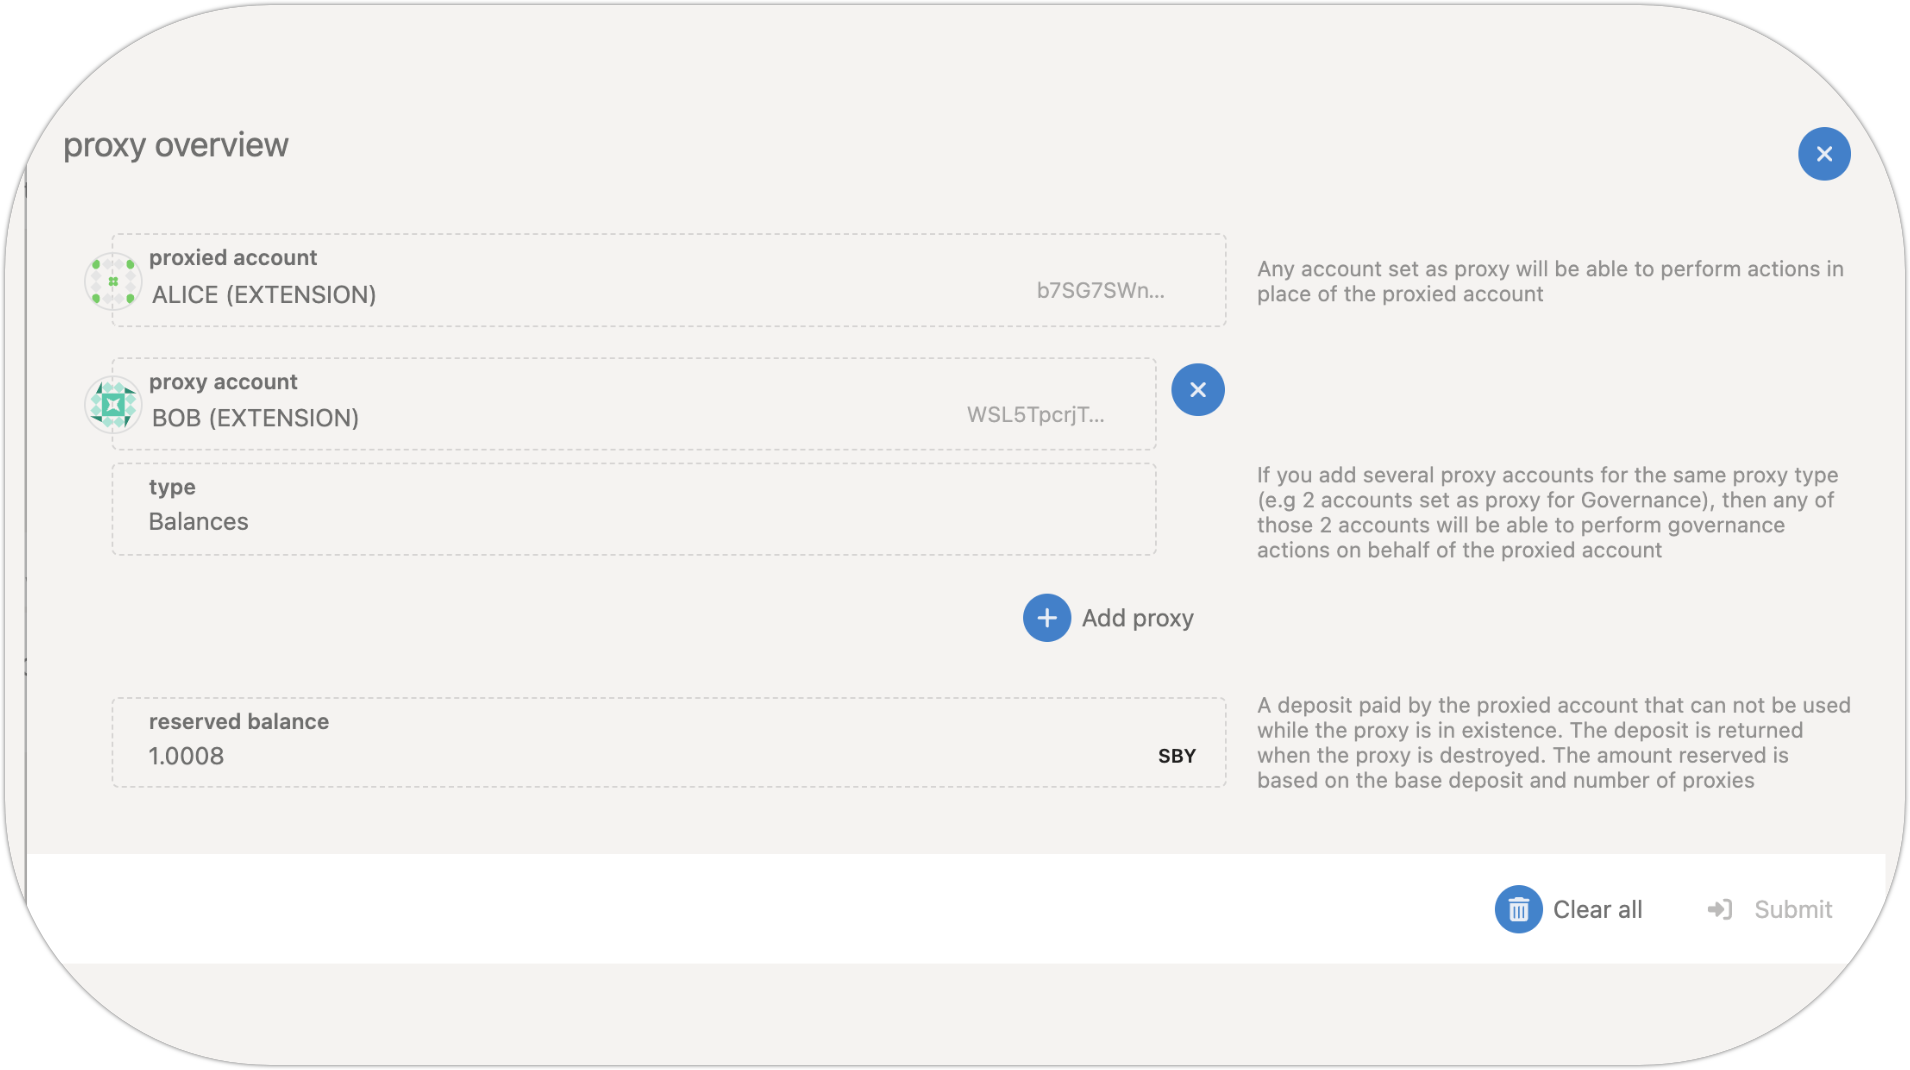
You can also remove the proxy by clicking on the (X) icon next to the proxy account (in our case BOB). After clicking (X) button, the proxy will diappear from the list, Click on Submit.
Once the transaction has successfully been submitted, you can review your current proxies or if you removed all proxies you will notice the proxy icon is no longer being displayed next to the primary account.
How to execture a proxy transaction
To execute a proxy transaction, go back to the Extrinsic page and do the following:
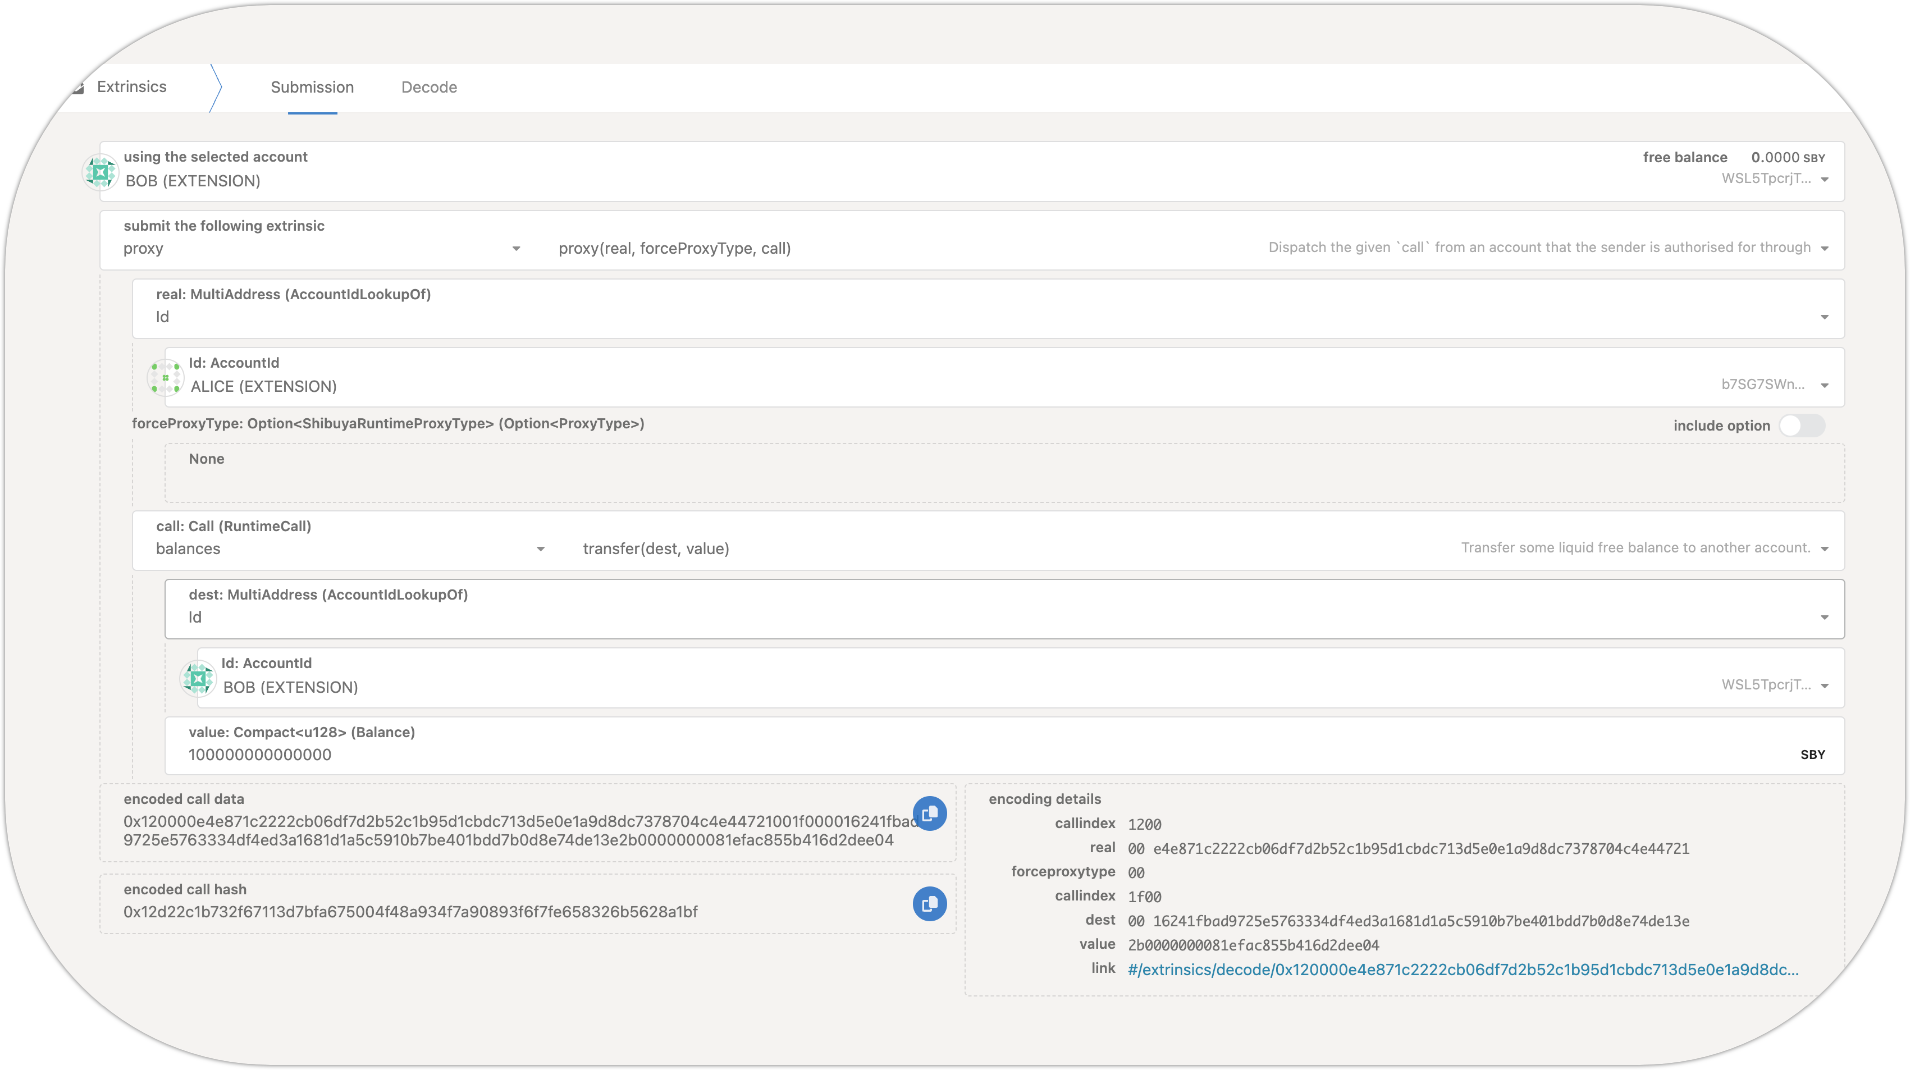
Submitting a Proxy Transaction
To submit a proxy transaction, follow these steps:
-
Choose the proxy account to submit the transaction from using the
Select Accountdropdown; -
From the
Submit the following extrinsicmenu, select proxy; -
Select the proxy extrinsic;
-
From the real dropdown, select Id and then select the Primary Account (ALICE in our case);
-
Select the balances call;
-
Choose the transfer extrinsic;
-
In the
destfield, enter the address where you want to send the funds; -
In the
valuefield, enter the amount of funds to send; -
Once you have entered all the necessary details, click on
Submit Transactionto initiate the transaction.
Congratulations! You've completed the entire process successfully.
You have created a proxy account, reviewed all the proxy accounts linked to your primary account, performed a proxy transaction, and even removed a proxy account. Well done!