Interact with Ledger using Astar Native Accounts
Introduction
Polkadot (DOT) and Polkadot Migration are Ledger-integrated apps that allow users to use a Ledger device as an account and sign transactions for substrate accounts.
Ledger Live is not supported hence user will not be able to create Astar accounts with Ledger Live.
This tutorial describes the process of configuring a Ledger device to manage assets, connect to the Astar portal and participate in dApp staking using native ASTR tokens. It also includes the initiation of the first interaction between the device and the network.
Your Ledger device is ready for use
- Make sure you have set up your Ledger device
- Update your device to latest firmware
- Download and install Ledger Live app for your OS
- Download and install Polkadot.js extension for your browser
Polkadot Migration App
Due to the new Polkadot Generic Ledger application, the Astar Native Ledger application is no longer supported by all wallet providers in the ecosystem, including the Polkadot.js extension, and is therefore unusable at the moment.
To access Astar accounts created with the Astar Native Ledger app, users must use the Polkadot Migration application.
At the time of this release, XCM transfers operations are NOT SUPPORTED on Ledger devices for Polkadot Migration app.
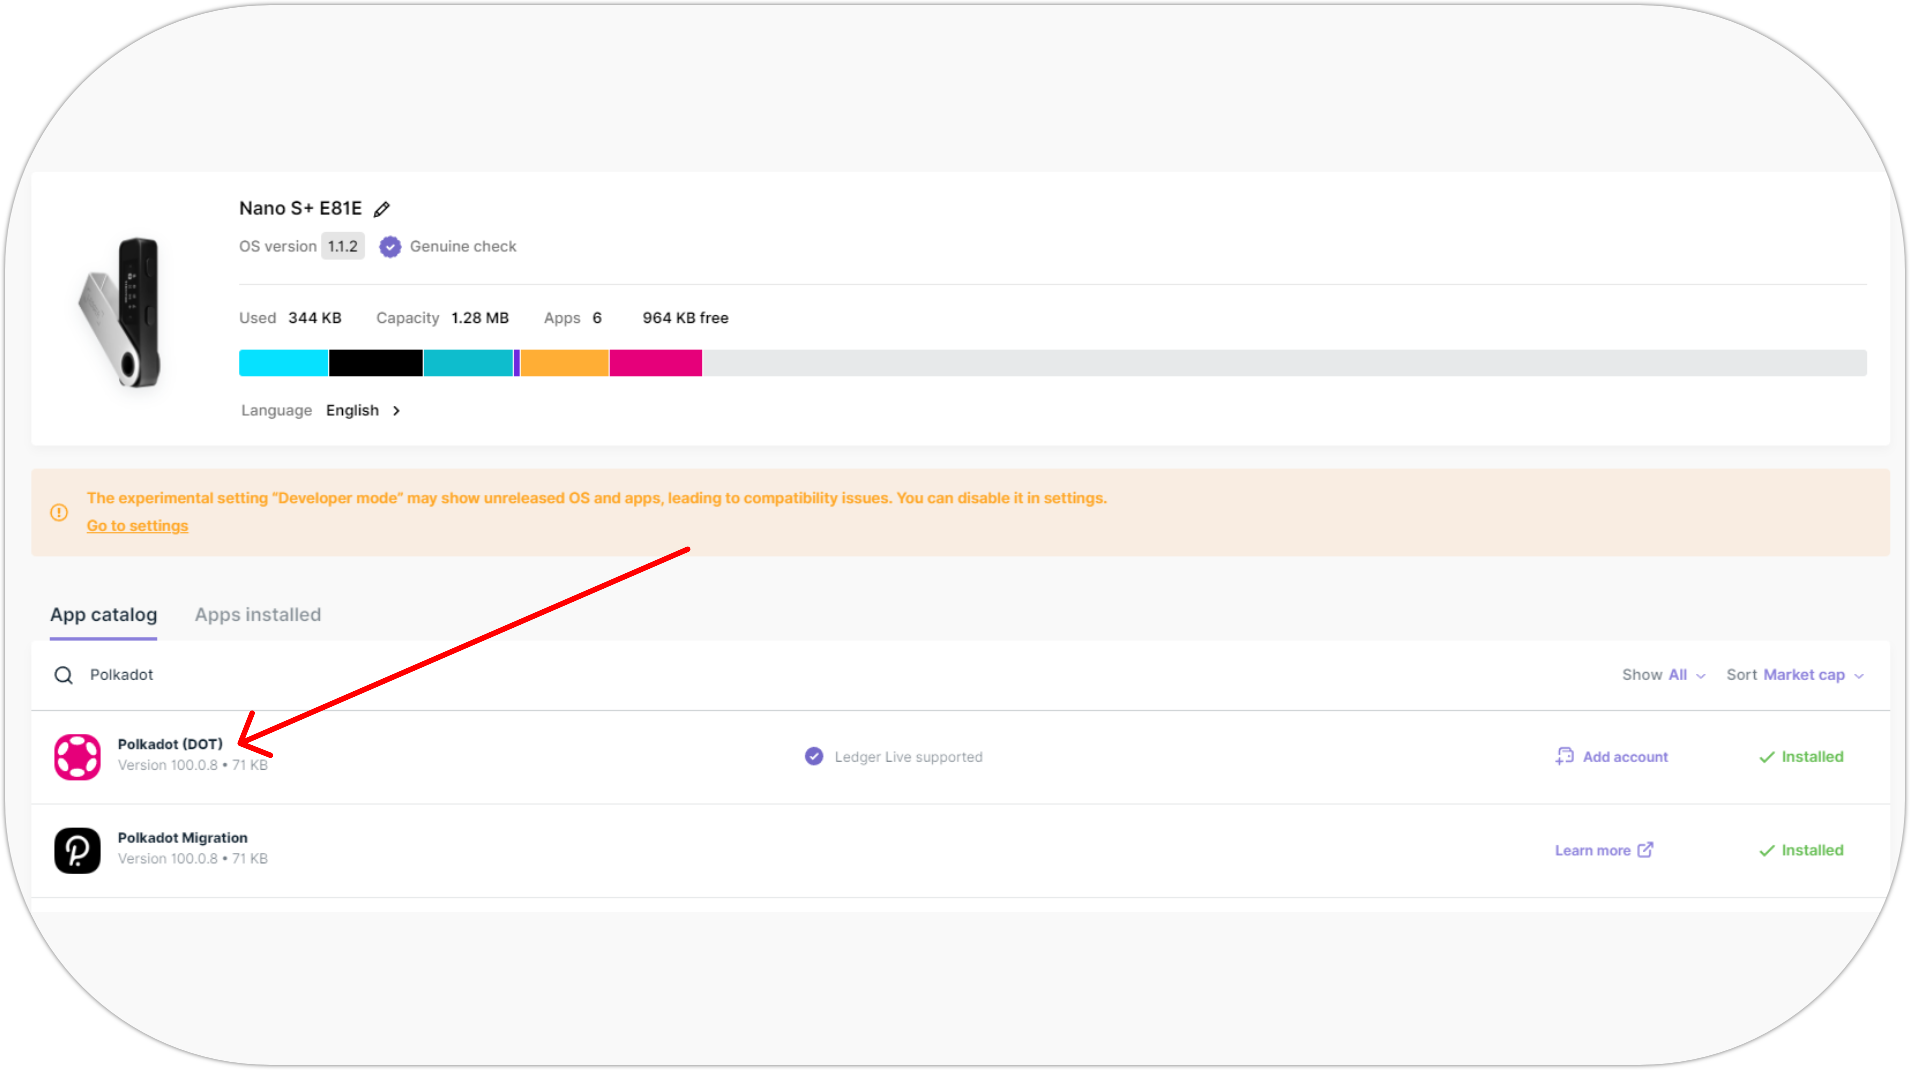
Install Polkadot Migration app to your Ledger device
- Open My Ledger in Ledger Live;
- Connect and unlock your Ledger device. If asked, allow
My Ledgerto access your device; - Search for Polkadot Migration (Version
100.0.8) in the app catalog; - Click Install.
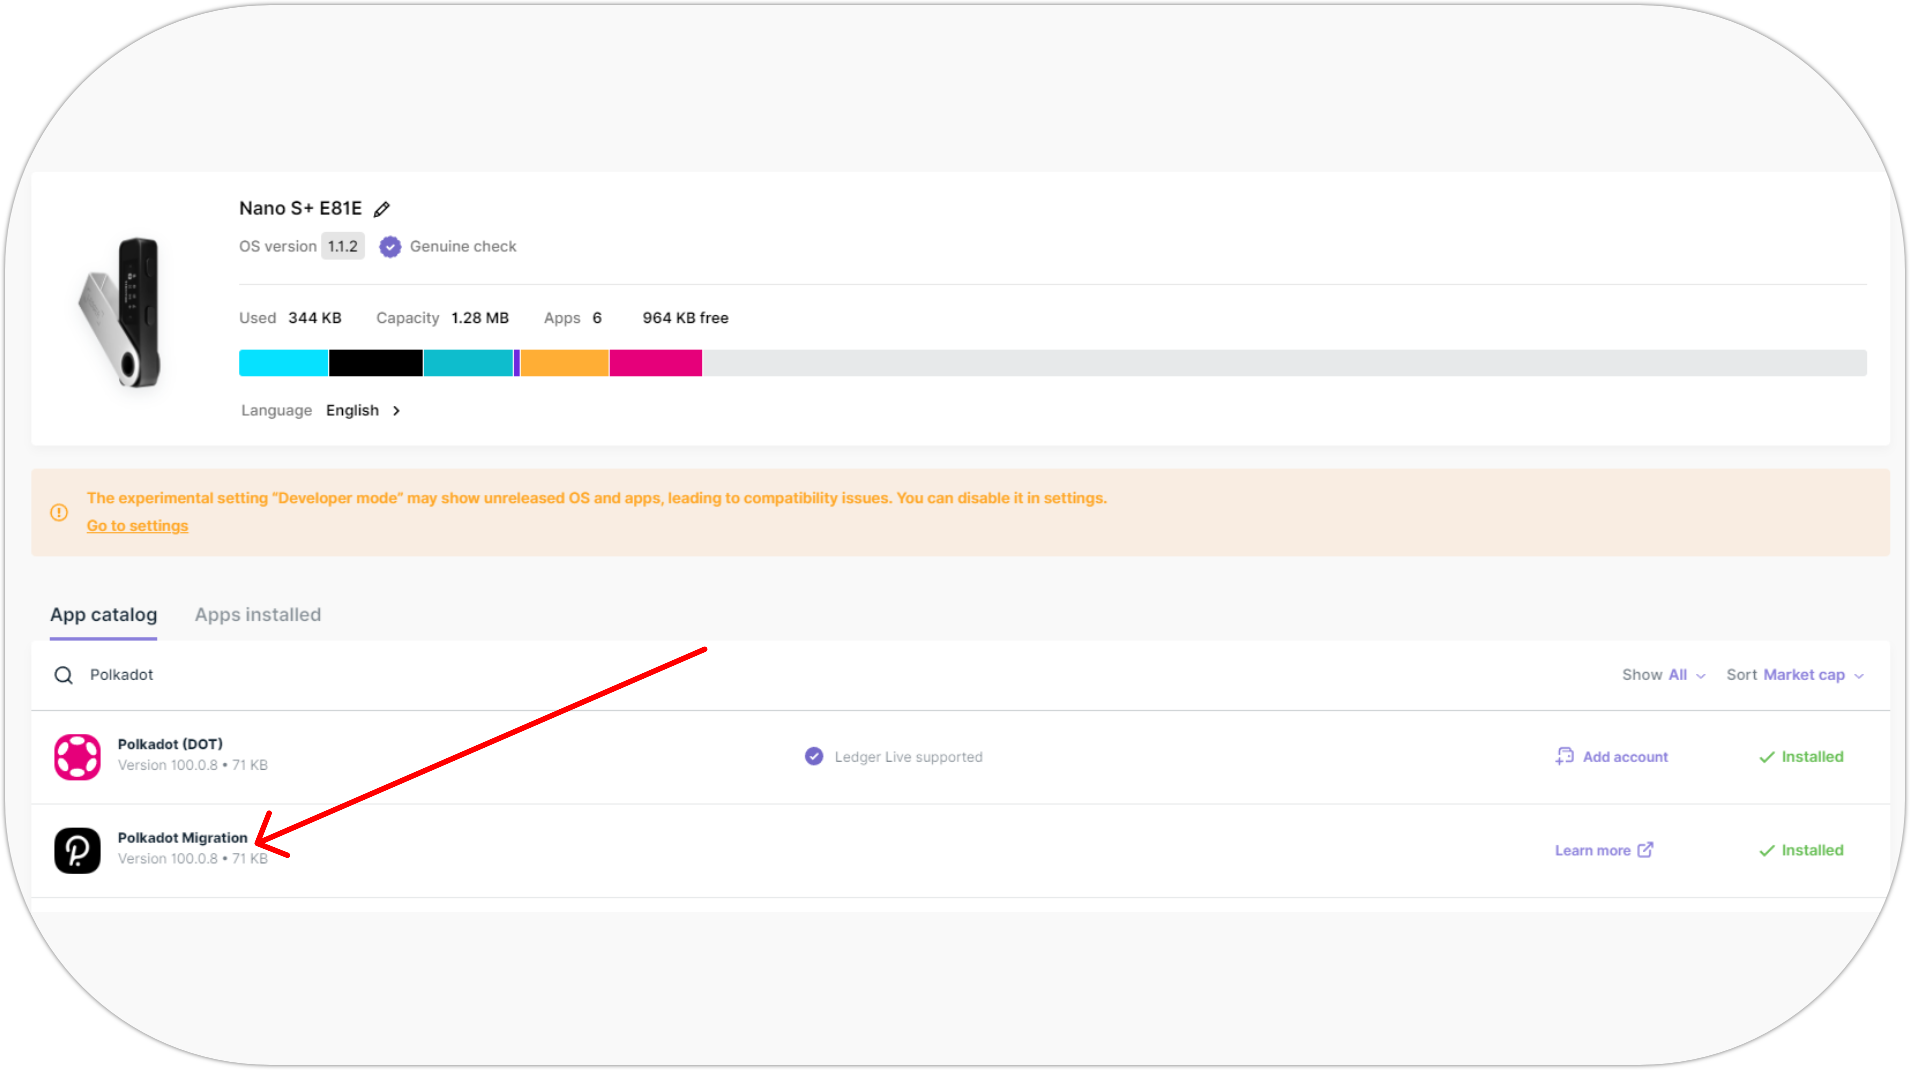
After this step, you should have the Polkadot Migration app installed.
Connect your Ledger device to Astar Network using Polkadot.js
- Install Polkadot.js extension;
- Open the extenstion;
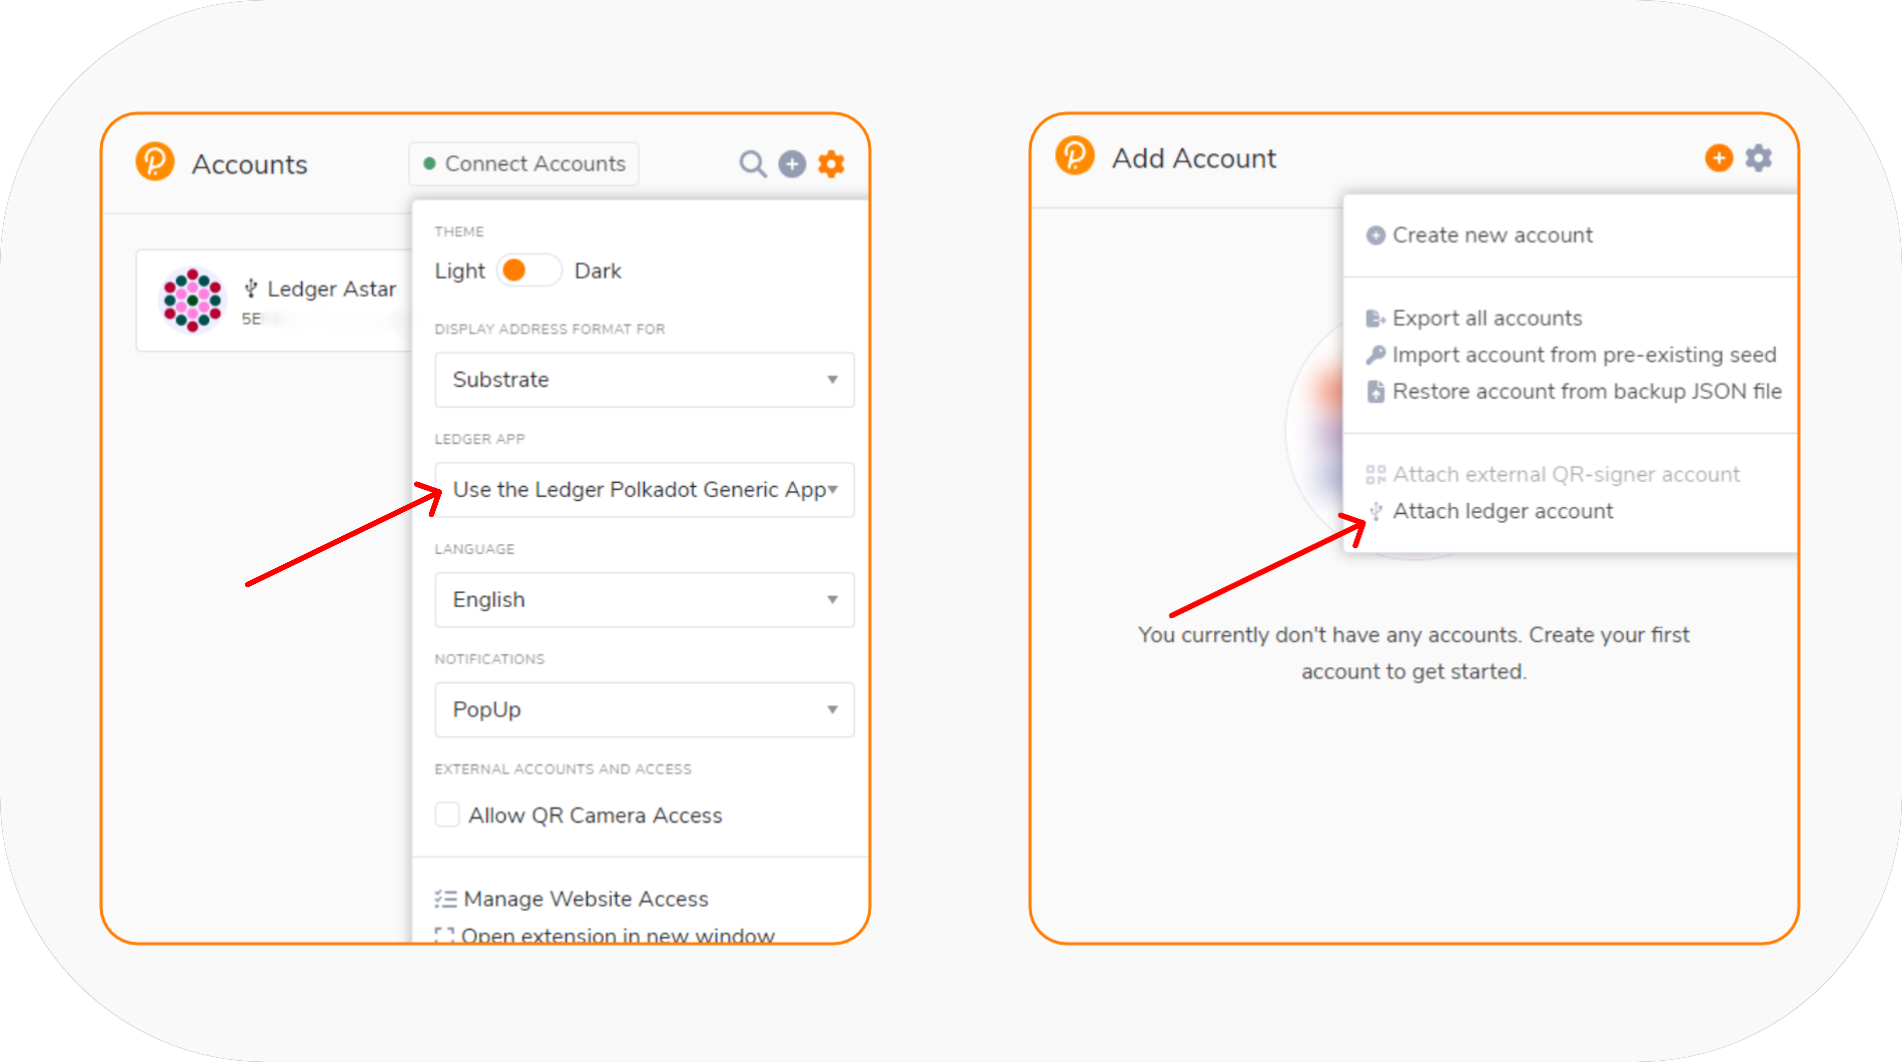
- In Polkadot.js settings, select
Use the Ledger Migration Appin Ledger App setting; - Click on Attach Ledger account as shown below;
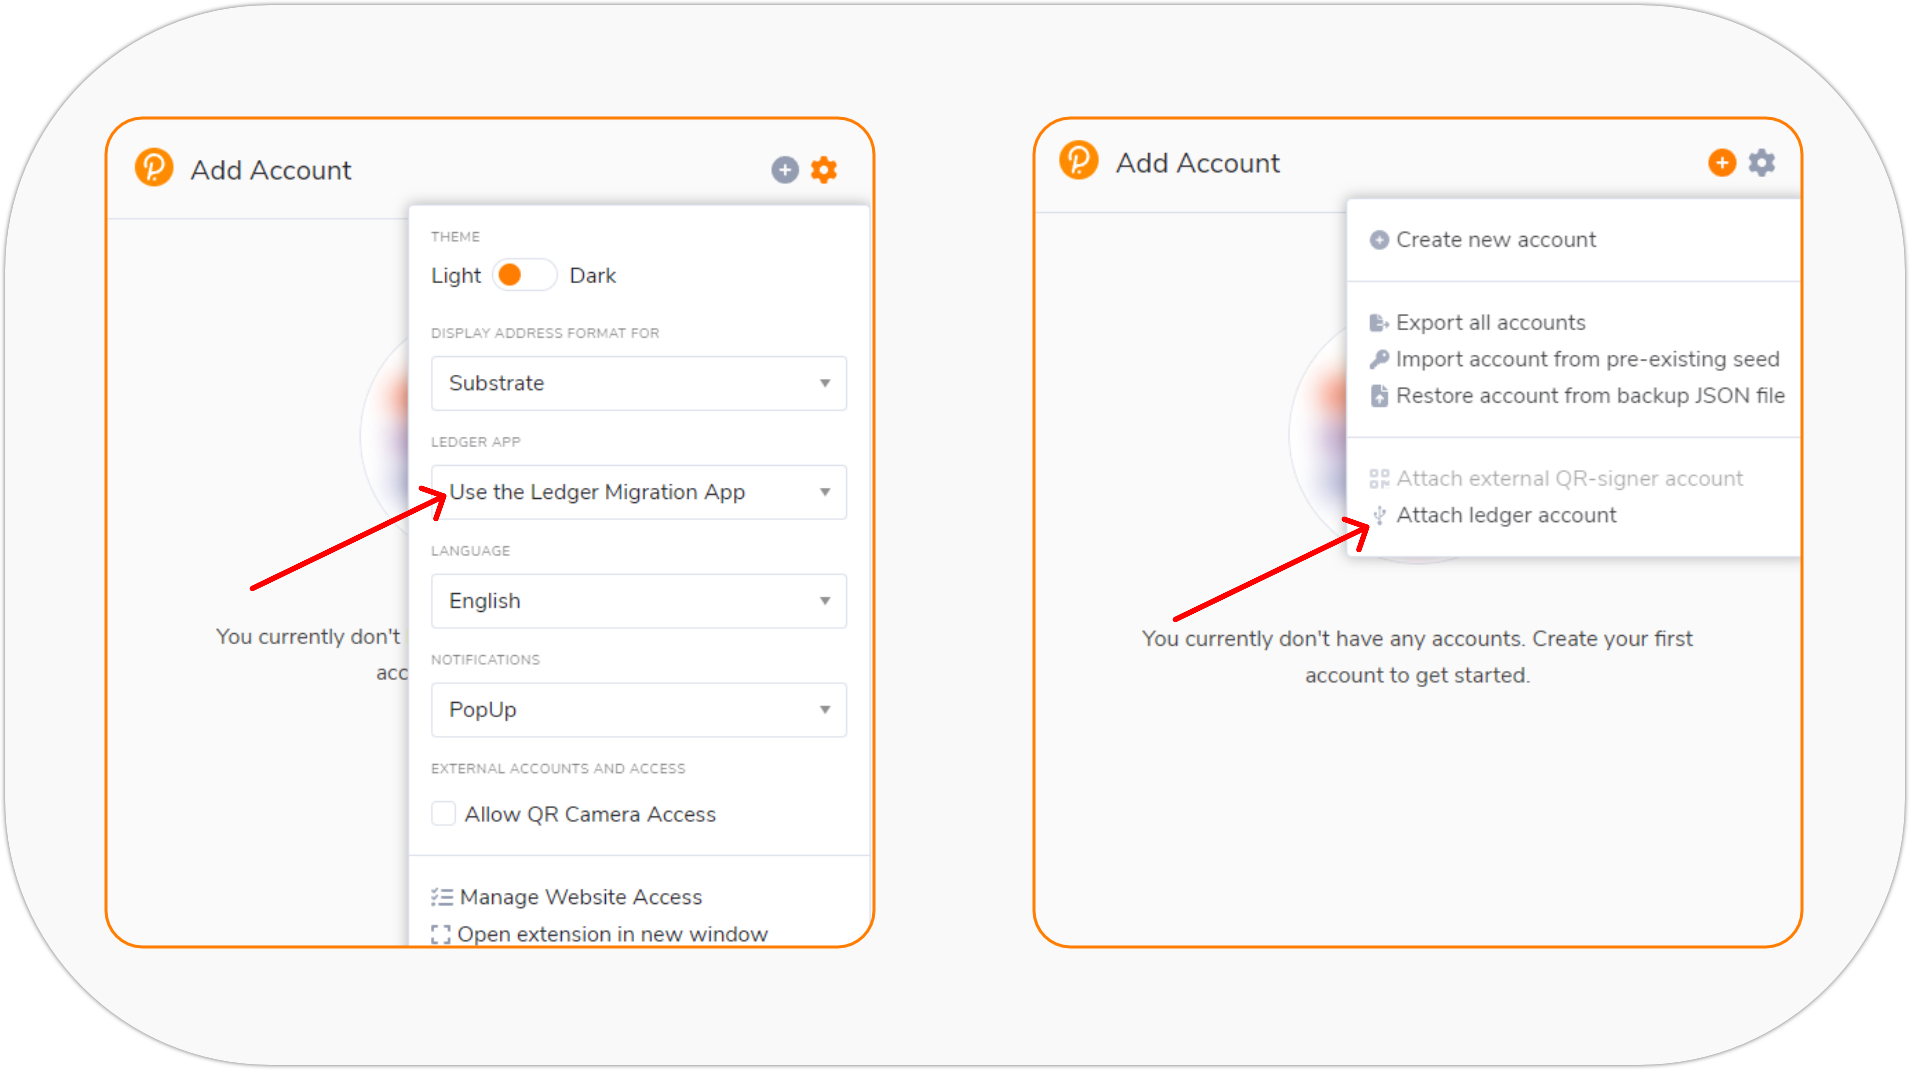
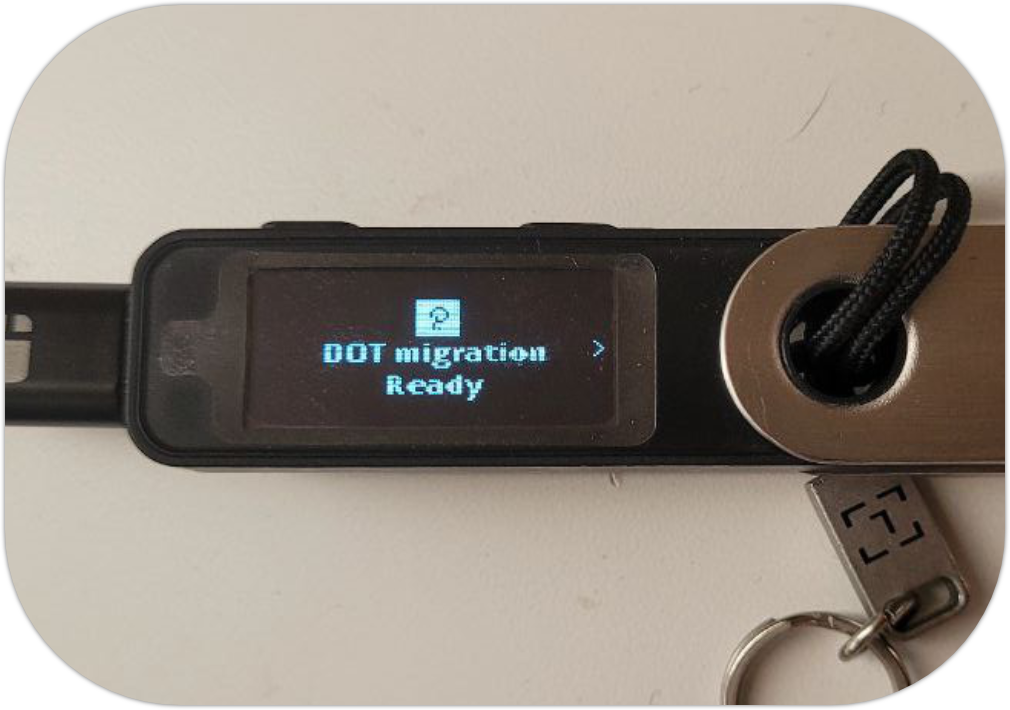
- Make sure your Ledger device is connected to your PC and the Polkadot Migration app is open;
- Select Astar Network and enter a descriptive name;
- Click Import Account.
You successfully connected to Ledger Astar account.
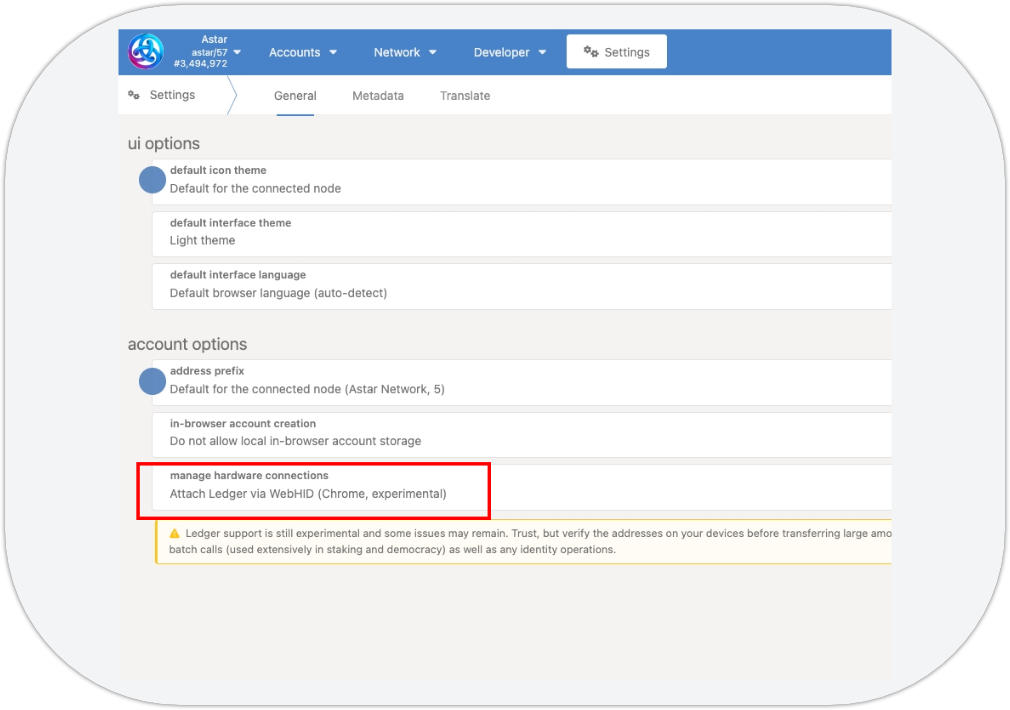
Configure the Ledger device connection method
- Go to the Astar settings page on the Polkadot.js portal;
- Ensure Attach Ledger via WebHID is the preferred connection method listed under account options > manage hardware connections, as shown in the image below:
Connect your Ledger device to the Astar Portal
- Open your browser and visit the Astar Portal;
- Update the Metadata of your Polkadot.js extension wallet if necessary;
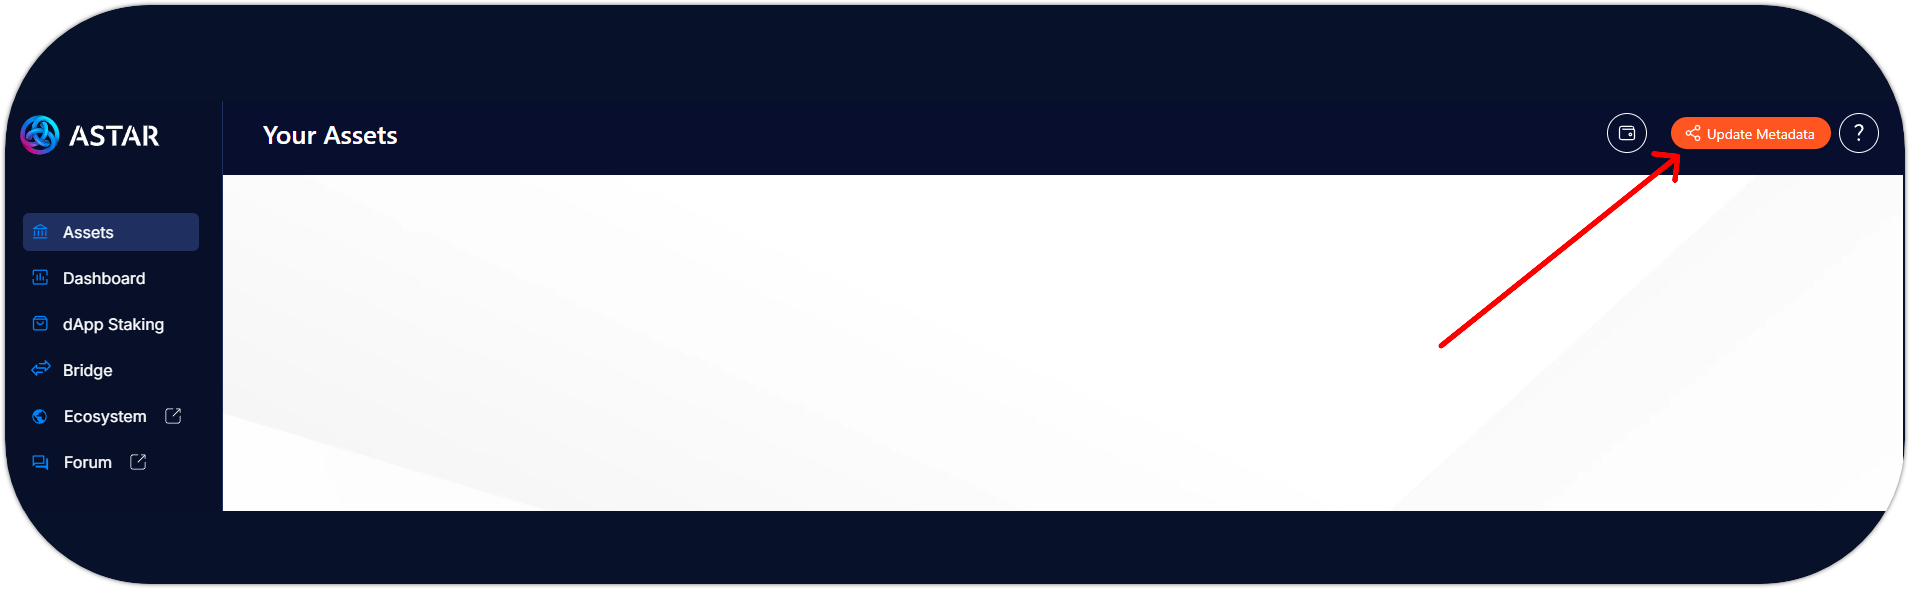
- Connect the Polkadot.js extension to the Portal;
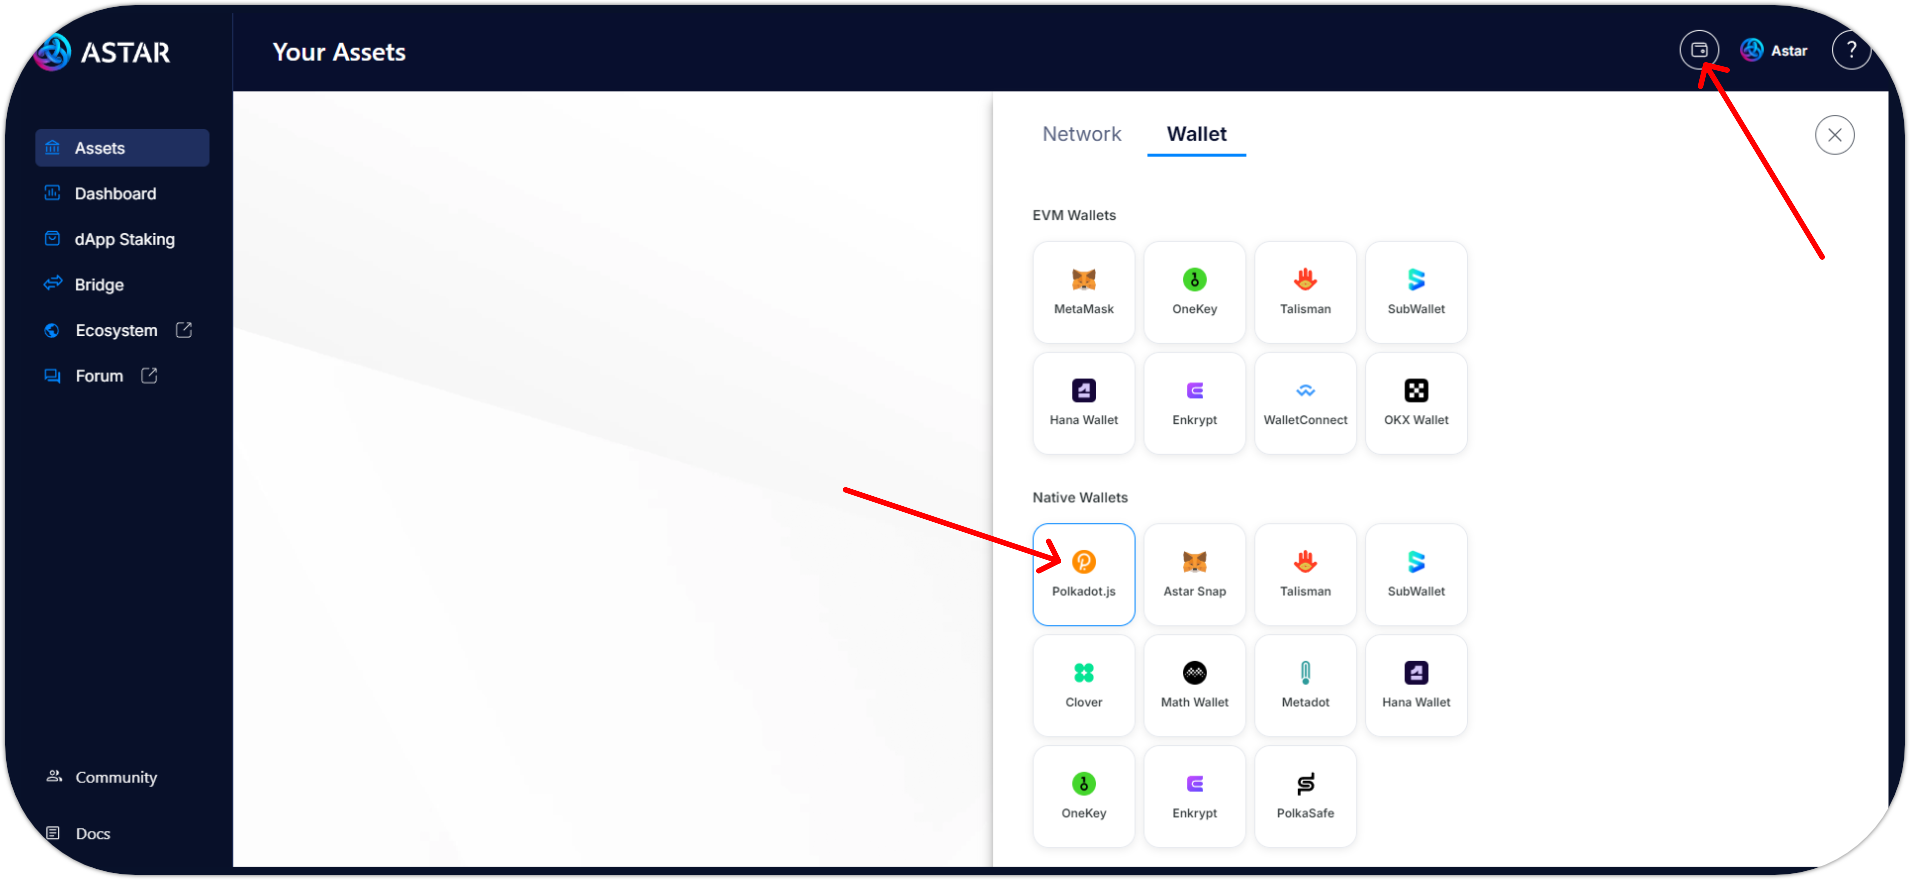
- Open the Polkadot Migration app on your Ledger device;
- Select the Ledger account that was imported during the last step;
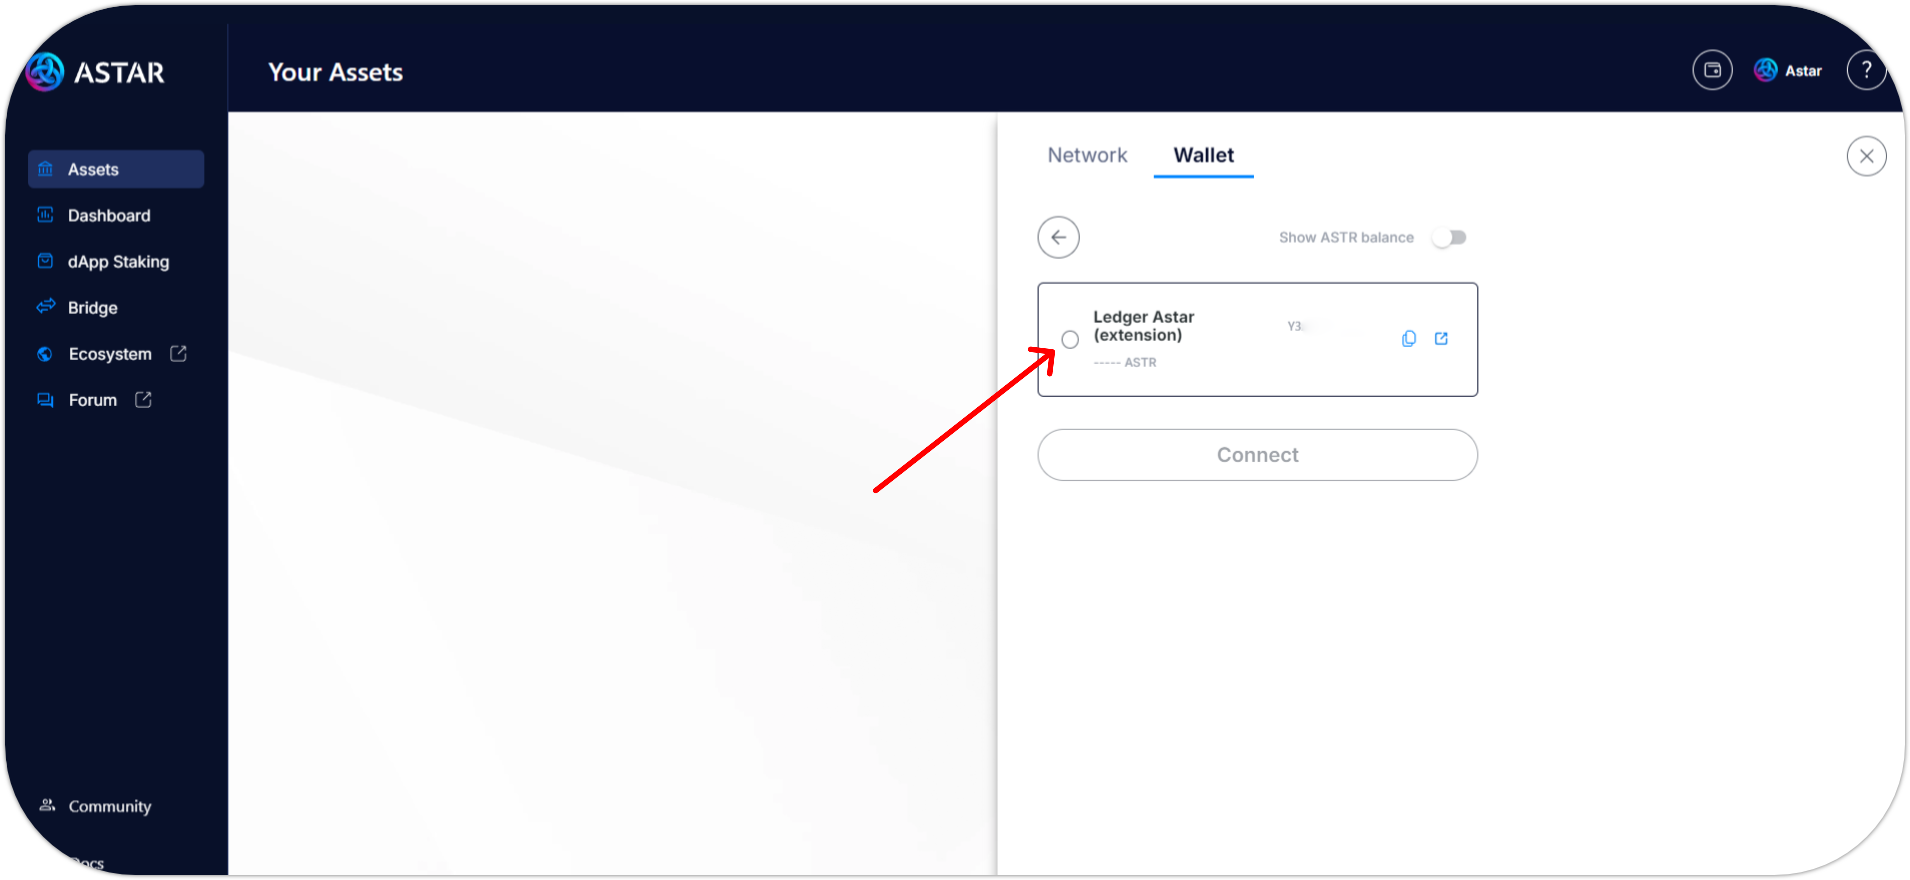
- You successfully connected your Ledger Astar account using the Polkadot Migration app. 🎉
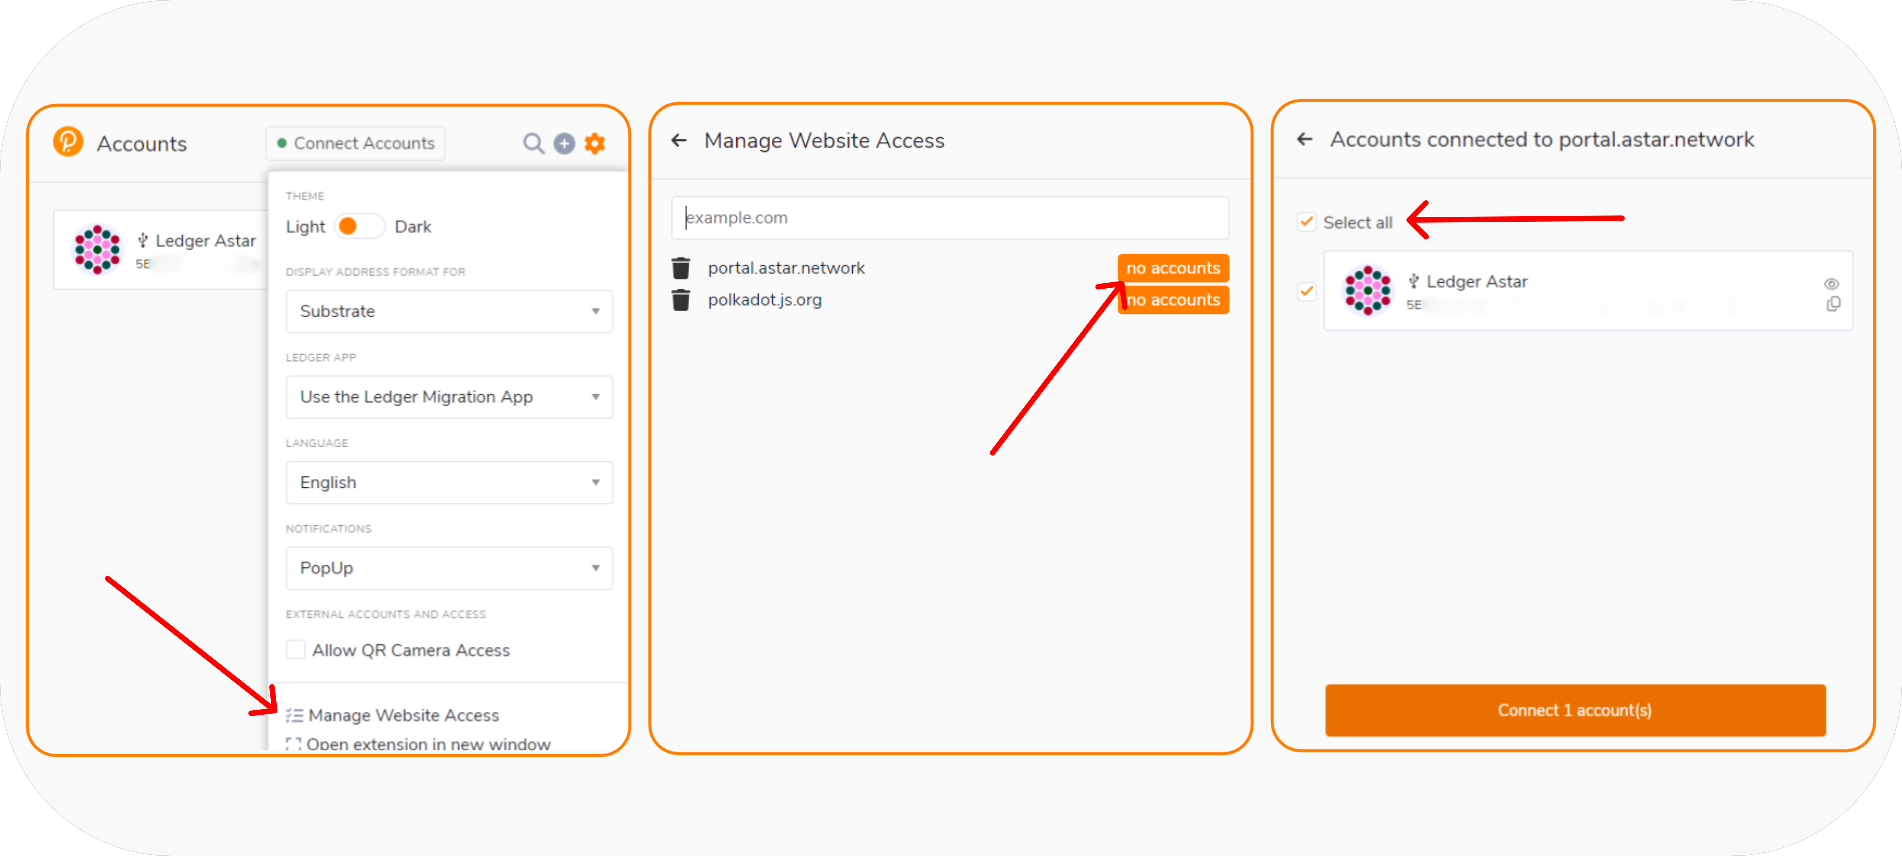
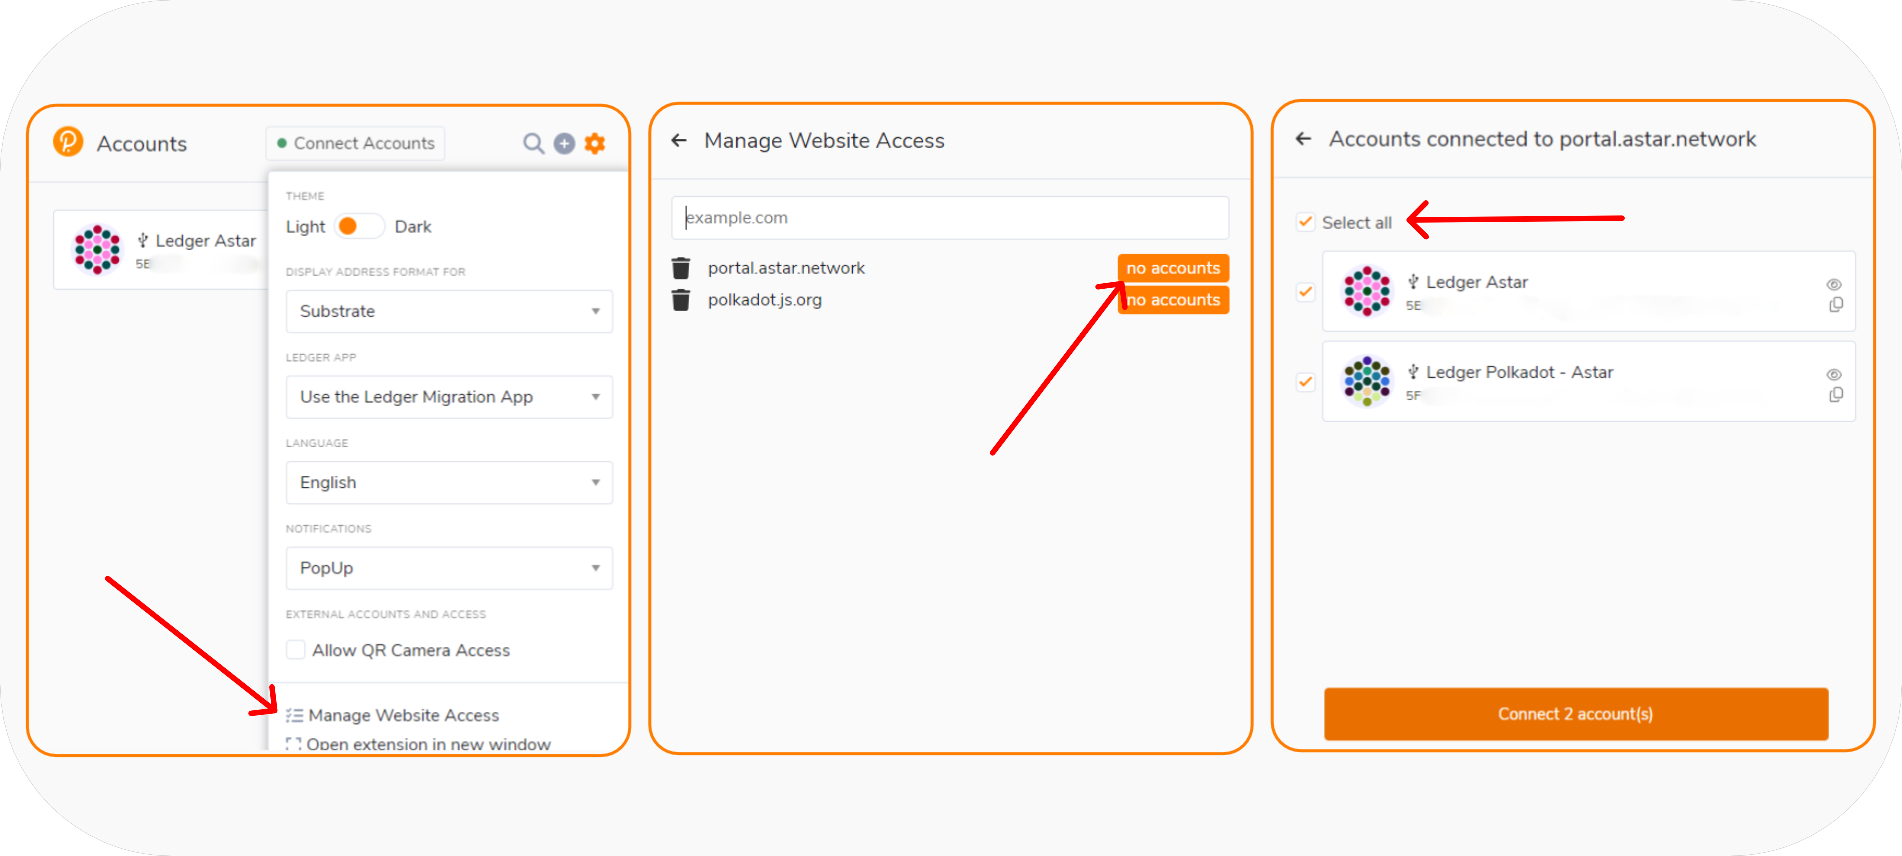
If you can't see your wallet, open the Polkadot.js extension settings and allow the wallet to manage the Astar portal.
Then refresh the Portal and connect your Astar ledger account.
Talisman, Subwallet and Nova Wallet
For more detailed information on the migration process for specific wallets, you can check the following guides:
- Talisman: Talisman migrate to the New Ledger Generic app
- If you have an existing Astar Native Ledger account in your Talisman extension, you must first erase it in order to reimport it using the Polkadot Migration app.
- SubWallet: Subwallet migrate to the New Ledger Generic app
- Nova Wallet: Nova wallet migrate to the New Ledger Generic app
Polkadot Generic (DOT) App
The Polkadot Generic app is the standard Ledger application for the Polkadot ecosystem, supporting all Polkadot parachains. New Ledger account users should use the generic Polkadot application directly instead of the Polkadot Migration app for a more unified experience.
Now that you have access to your Astar Ledger accounts again, you should start thinking about transferring everything (assets, NFT, identities, staking, etc.) to new accounts created with the Polkadot Generic app.
The Polkadot Migration app will remain available for an extended period, but it's advisable to migrate to the new generic Polkadot app for a more unified and improved ledger experience on both Polkadot and Astar Network.
Install Polkadot (DOT) to your Ledger device
- Open My Ledger in Ledger Live;
- Connect and unlock your Ledger device. If asked, allow
My Ledgerto access your device; - Search for Polkadot (DOT) (Version
100.0.8) in the app catalog; - Click Install.
After this step, you should have the Polkadot (DOT) app installed.
Connect your Ledger device to Astar Network using Polkadot.js
- Install Polkadot.js extension;
- Open the extenstion;
- In Polkadot.js settings, select
Use the Ledger Polkadot Generic Appin Ledger App setting; - Click on Attach Ledger account as shown below;
- Make sure your Ledger device is connected to your PC and the Polkadot (DOT) is open;
- Select Astar Network and enter a descriptive name;

- Click Import Account.
You successfully connected to Ledger Astar account.
Configure the Ledger device connection method
- Go to the Astar settings page on the Polkadot.js portal;
- Ensure Attach Ledger via WebHID is the preferred connection method listed under account options > manage hardware connections, as shown in the image below:
Connect your Ledger device to the Astar Portal
- Open your browser and visit the Astar Portal;
- Update the Metadata of your Polkadot.js extension wallet if necessary;
- Connect the Polkadot.js extension to the Portal;
- Open the Polkadot (DOT) app on your Ledger device;
- Select the Ledger account that was imported during the last step;

- You successfully connected your Ledger Astar account using the Polkadot (DOT) app. 🎉
If you can't see your wallet, open the Polkadot.js extension settings and allow the wallet to manage the Astar portal.
Then refresh the Portal and connect your Astar ledger account.
Talisman, Subwallet and Nova Wallet
For detailed instructions on creating new wallets with the Polkadot Generic app for specific wallet providers, please refer to the following guides:
- Talisman: Talisman migrate to the New Ledger Generic app
- If you have an existing Astar Native Ledger account in your Talisman extension, you must first erase it in order to reimport it using the Polkadot Migration app.
- SubWallet: Subwallet migrate to the New Ledger Generic app
- Nova Wallet: Nova wallet migrate to the New Ledger Generic app
For detailed information about dApp staking or how to stake on the EVM side of Astar Portal using a Ledger device, please refer to the Astar official documentation or Ledger EVM staking guide
Ledger Troubleshooting
If you receive a Ledger error: Failed to execute 'claimInterface' on 'USBDevice': Unable to claim interface message during the dApp staking claim process, ensure you are performing the operation:
- Using a Chromium-based browser such as Chrome or Brave,
- The Ledger device connection method is WebHID, as outlined in the previous step
