Nginx Server
To access your archive node from outside, you need to install a server and setup a certificate. In this guide, we will use the Nginx server as an example.
Firewall
Your server will communicate through HTTP ports, you need to enable ports 80 (http) and 443 (https) in your firewall.
At the end of the configuration, you can close port 80 since only port 443 will be used to access the node. See the section below, Self-signed certificate.
Domain name
This guide assumes that you have a domain name and control over the DNS. In this case, you need to add the A record with the sub domain you will use and the IP address of your node into you DNS provider console.
If you don't have a domain name, you will have to generate a self-signed certificate and access your node through the raw ip address of your server.
Installation
In the following steps, don't forget to update {SUB_DOMAIN} with your full sub domain name. Example: ws.astar.awesomedappproject.io
First, install Nginx and Certbot:
sudo apt-get install nginx snapd
sudo snap install core; sudo snap refresh core
sudo snap install --classic certbot
sudo ln -s /snap/bin/certbot /usr/bin/certbot
Create and enable the site:
cd /etc/nginx/sites-available
sudo cp default {SUB_DOMAIN}
sudo ln -s /etc/nginx/sites-available/{SUB_DOMAIN} /etc/nginx/sites-enabled/
Edit the site file:
sudo nano {SUB_DOMAIN}
Change the root and server_name to get a file like this:
server {
    listen 80;
    listen [::]:80;

    root /var/www/{SUB_DOMAIN}/html;
    index index.html index.htm index.nginx-debian.html;

    server_name {SUB_DOMAIN};

    location / {
            try_files $uri $uri/ =404;
    }
}
Generate SSL certificate
Issue the Certbot certificate:
sudo certbot certonly --nginx
Certbot will issue the SSL certificate into /etc/letsencrypt/live.
Switch to https
Edit again the site file:
sudo nano {SUB_DOMAIN}
Delete the existing lines and set the content as below:
map $http_upgrade $connection_upgrade {
    default upgrade;
    '' close;
}

server {

    # SSL configuration
    #
    listen 443 ssl;
    listen [::]:443 ssl;

    root /var/www/{SUB_DOMAIN}/html;

    server_name {SUB_DOMAIN};
    ssl_certificate /etc/letsencrypt/live/{SUB_DOMAIN}/fullchain.pem; # managed by Certbot
    ssl_certificate_key /etc/letsencrypt/live/{SUB_DOMAIN}/privkey.pem; # managed by Certbot
    ssl_session_timeout 5m;
    ssl_protocols SSLv2 SSLv3 TLSv1 TLSv1.1 TLSv1.2;
    ssl_ciphers   HIGH:!aNULL:!MD5;
    ssl_prefer_server_ciphers on;

    location / {
        proxy_pass http://localhost:9944;
        proxy_pass_request_headers on;
        proxy_http_version 1.1;
        proxy_set_header Host $host;
        proxy_set_header X-Real-IP $remote_addr;
        proxy_set_header X-Forwarded-For $proxy_add_x_forwarded_for;
        proxy_set_header Upgrade $http_upgrade;
        proxy_set_header Connection $connection_upgrade;
    }

}
In the example above, note that port 9944 is used in proxy_pass. This is the WS port. Change this to 9944 to pass the RPC port.
Check and restart nginx:
sudo nginx -t
sudo systemctl restart nginx
Usage
This is it, your arcive node is set and available from outside.
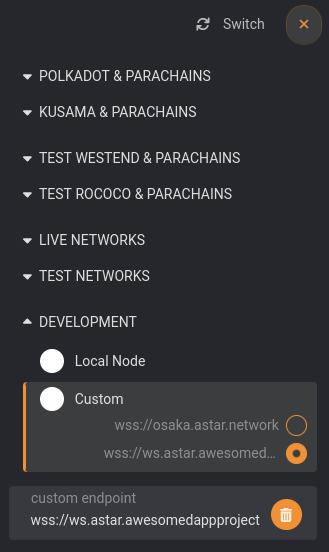
If you set a WS endpoint, you can explore the chain from the Polkadot.js portal using the format wss://{SUB_DOMAIN}
If you set a RPC endpoint, you can it through https://{SUB_DOMAIN}
Self-signed certificate
In case you do not have a domain name, you need to issue yourself a self-signed certificate:
sudo openssl req -x509 -nodes -days 365 -newkey rsa:2048 -keyout /etc/ssl/private/nginx-selfsigned.key -out /etc/ssl/certs/nginx-selfsigned.crt
sudo openssl dhparam -out /etc/ssl/certs/dhparam.pem 2048
Then in the https site config file, you will have to replace the following values:
ssl_certificate /etc/ssl/certs/nginx-selfsigned.crt;
ssl_certificate_key /etc/ssl/private/nginx-selfsigned.key;
ssl_dhparam /etc/ssl/certs/dhparam.pem;
In all steps, the {SUB_DOMAIN} value will be the node server ip address.