Astar Subsquare - Onchain Governance
Intro
Astar Network is transitioning its governance system from offchain voting through Townhall to onchain voting. This change empowers Astar stakeholders to directly vote on key network proposals and decisions onchain. Astar governance allows ASTR token holders to influence and participate in decisions that affect the network, such as protocol improvements, runtime updates, and dApp Staking applications.
To interact with the onchain governance, users have two primary interfaces to choose from: Subsquare or the traditional Polkadot.js interface. Subsquare provides a user-friendly interface for governance participation, while Polkadot.js offers a more technical approach.
This guide will walk you through the process of participating in Astar onchain governance using the Subsquare platform. For those who prefer to use Polkadot.js, you can refer to the Astar Governance Technical Guide.
What is Astar Governance?
Astar governance is a decentralized mechanism where ASTR token holders can propose, discuss, and vote on important changes and initiatives within the Astar ecosystem. Proposals may cover a wide range of topics, such as protocol upgrades, treasury funding requests, and the management of dApp Staking. This governance system ensures that decisions are made collectively and transparently by the community, reflecting the interests of the network’s stakeholders.
For a deeper understanding of Astar governance, including its structure and processes, we encourage you to read the Astar Governance Overview in our documentation.
Using Subsquare for Onchain Governance
Subsquare is designed to make onchain governance participation easy for all users. Through Subsquare, you can:
- View active proposals.
- Participate in discussions.
- Cast your votes on governance decisions.
- Track the progress of proposals from submission to execution.
The purpose of this guide is to demonstrate how to utilize the Subsquare platform for governance actions on Astar & Shibuya. Working assumption is that the reader has familiarized themselves with the governance model, and will refer back to the docs if needed.
Account Selection
Both Substrate & EVM style accounts can participate in governance actions.
When connecting an account to the Subsquare platform, the user can choose between different wallets and account types.
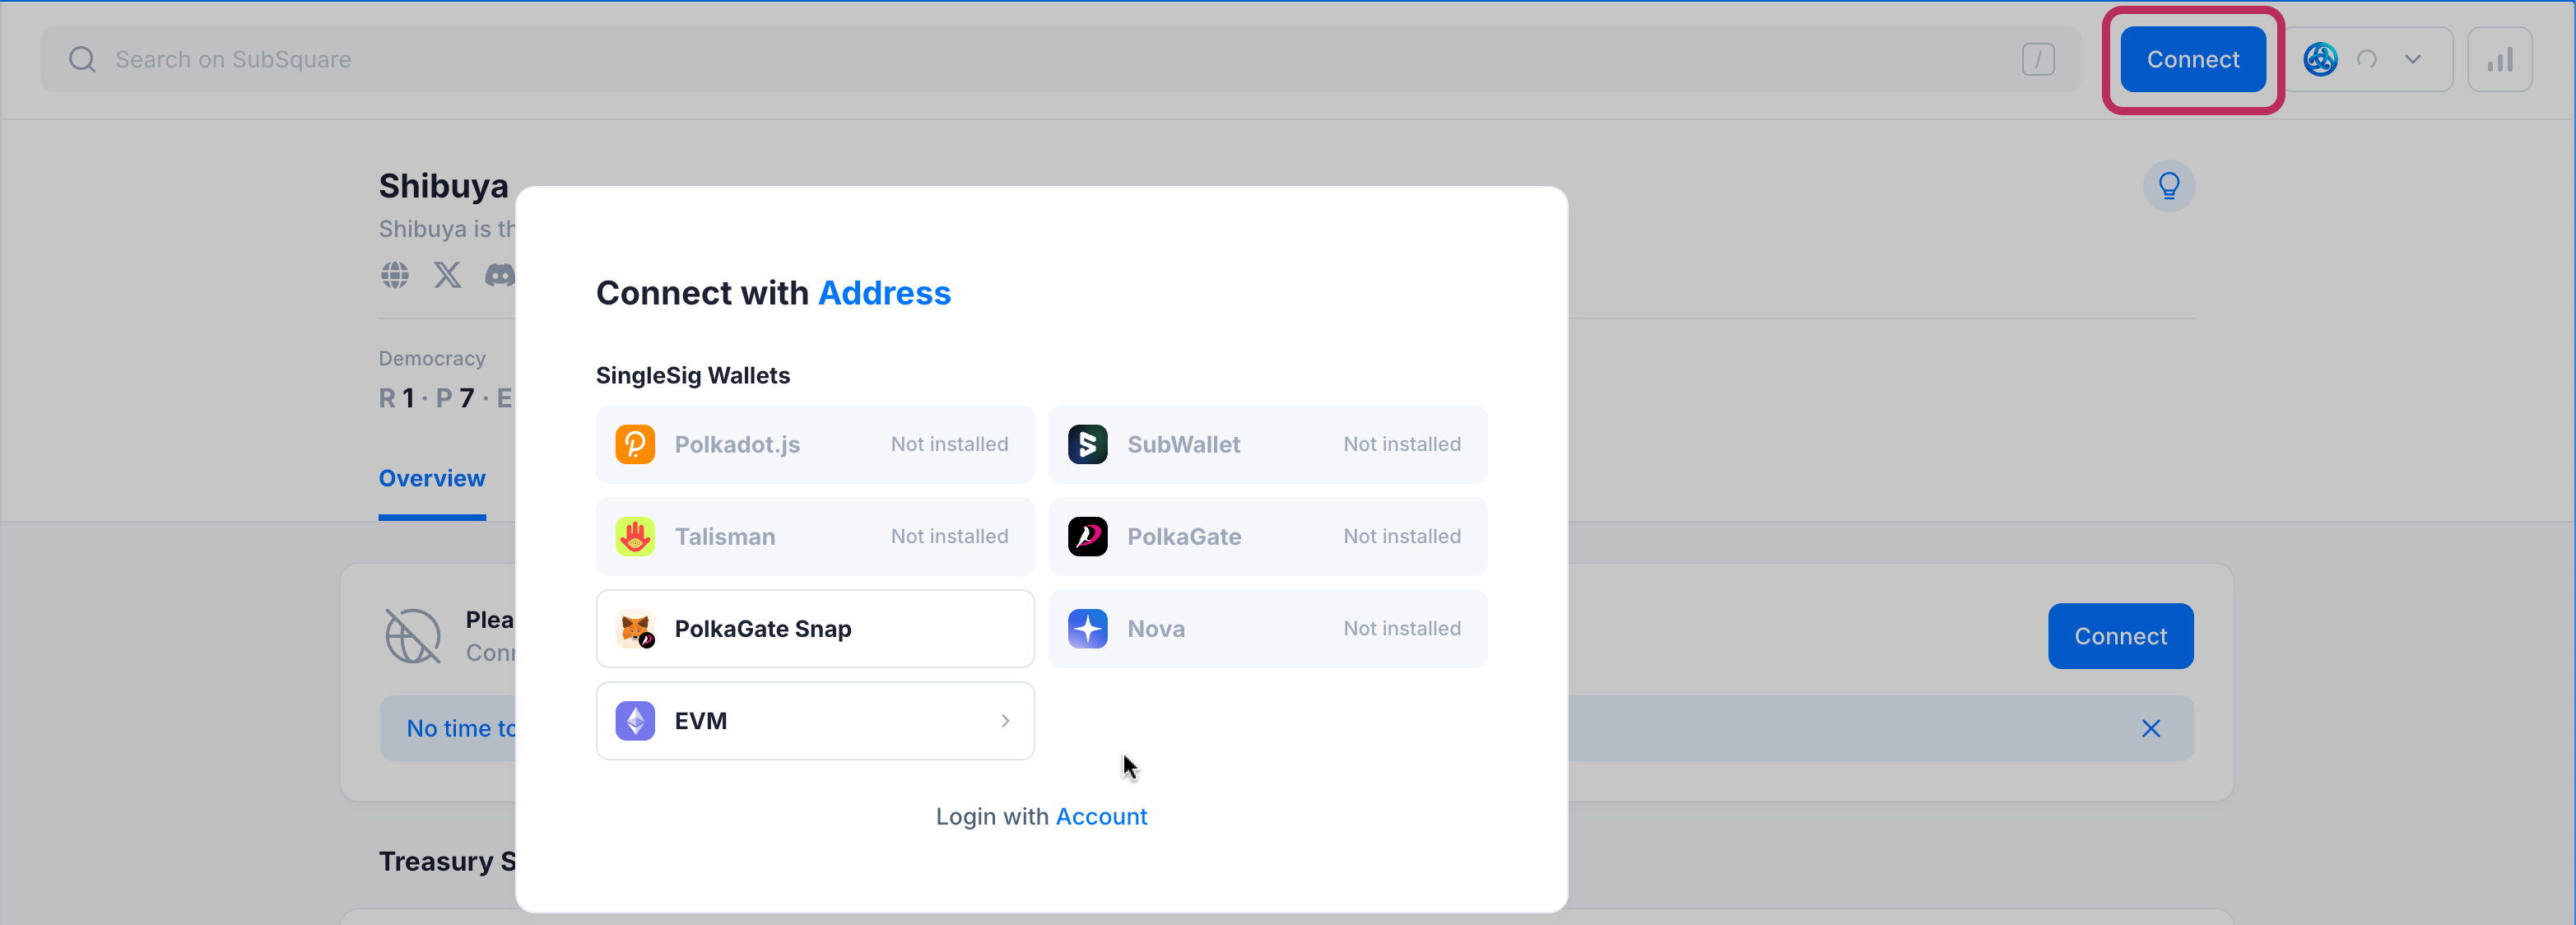
Different Substrate account compatible wallets are available. If the user wants to use their EVM account, they should select EVM under the option.
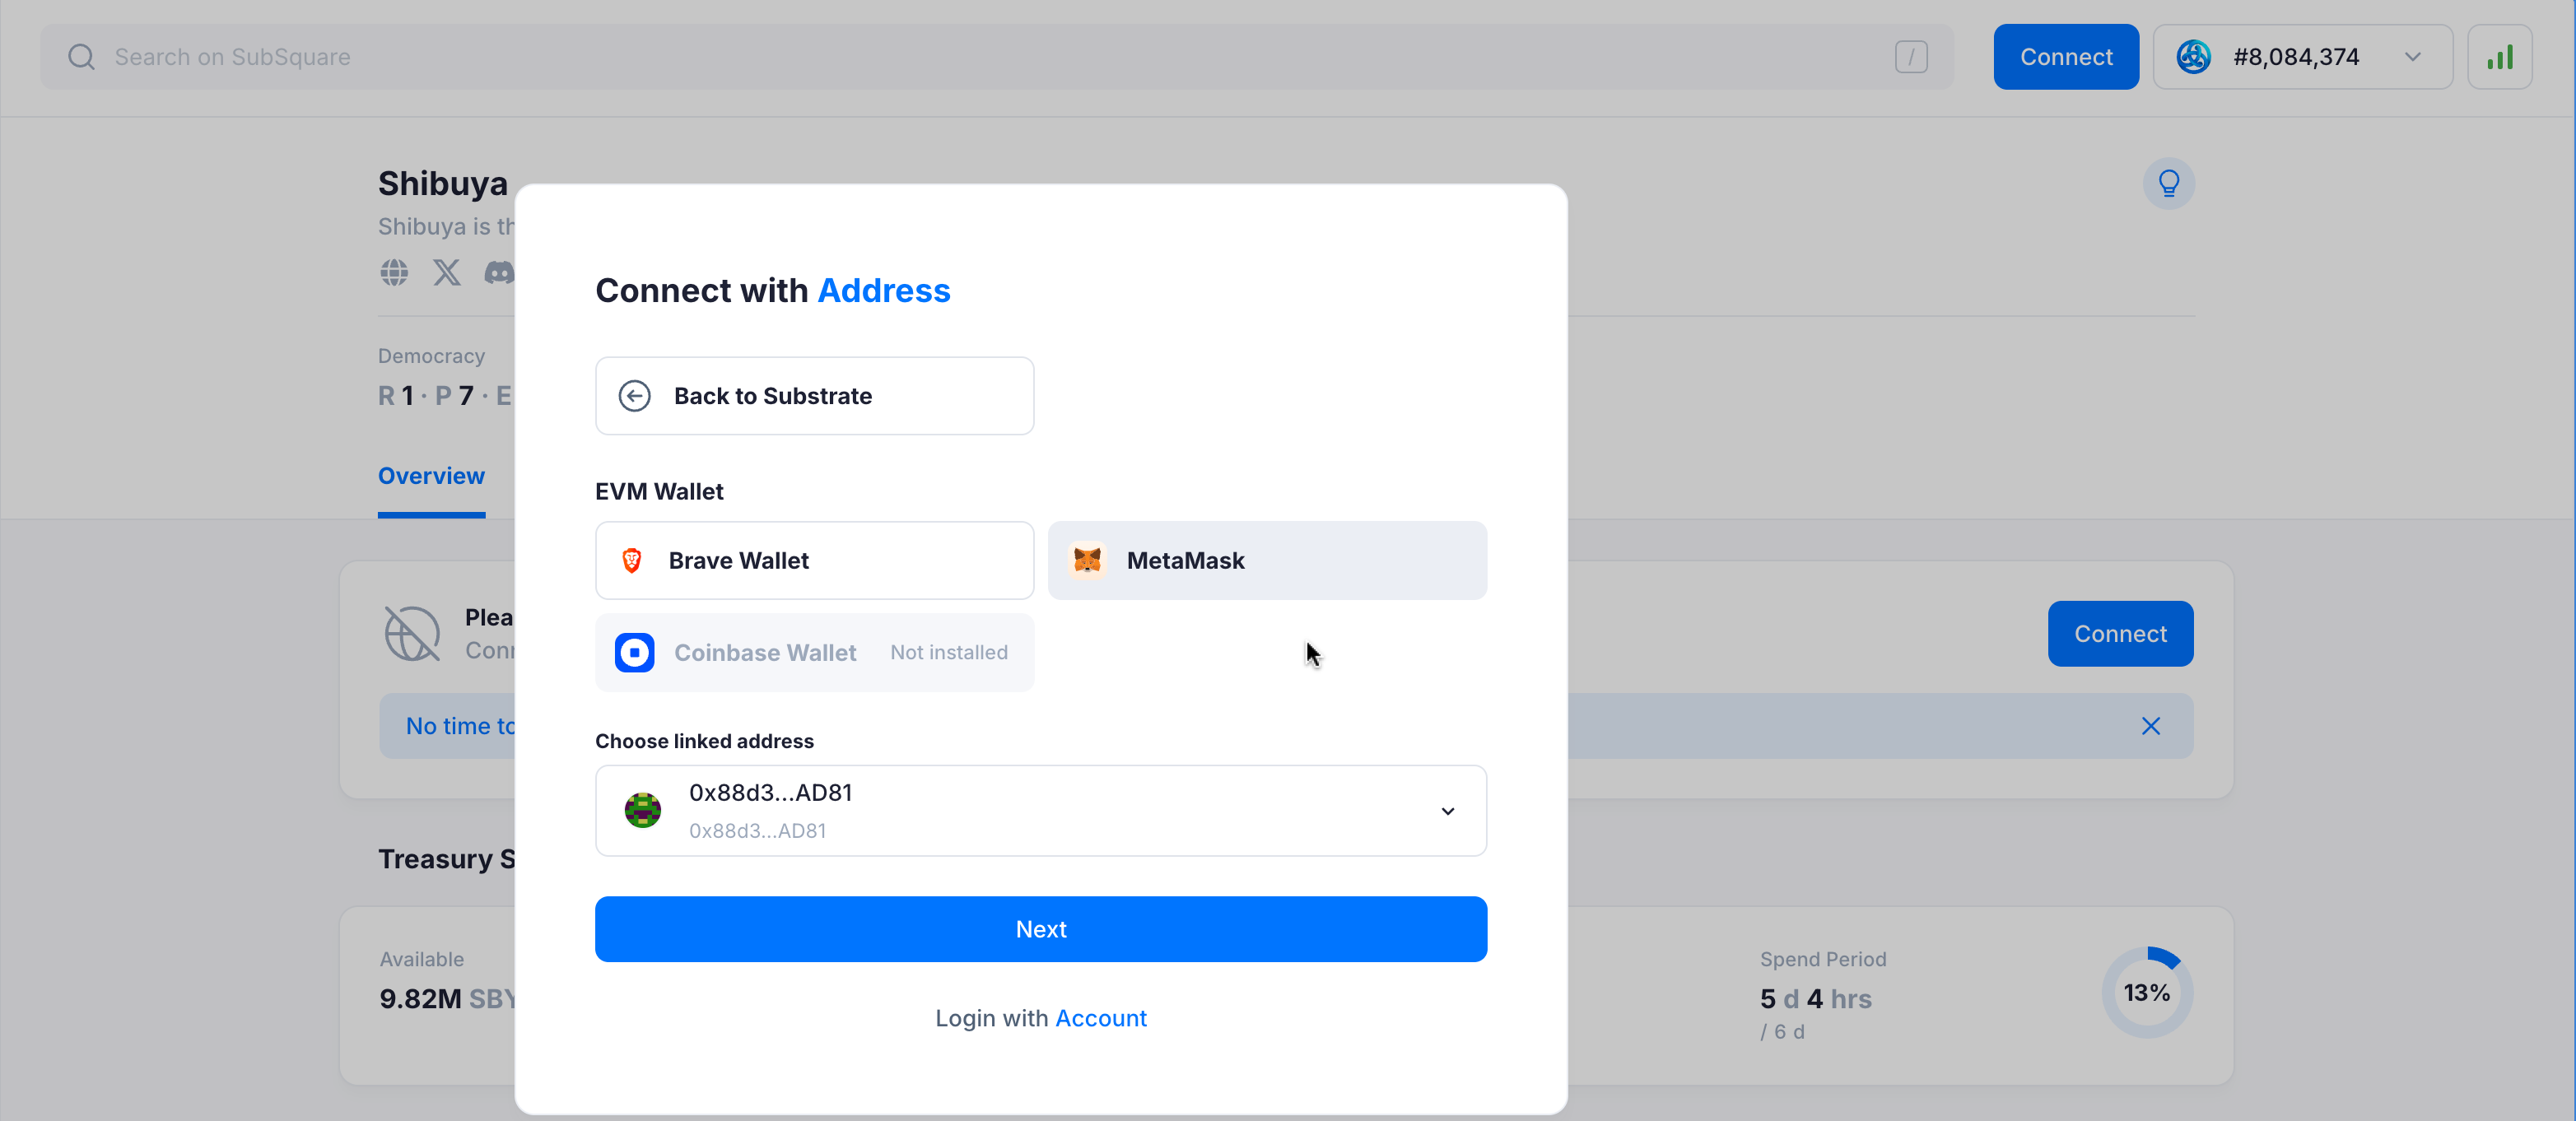
Here, the user can select the desired EVM wallet.
Token Holder
Preimages
Select the Preimage tab on the sidebar.
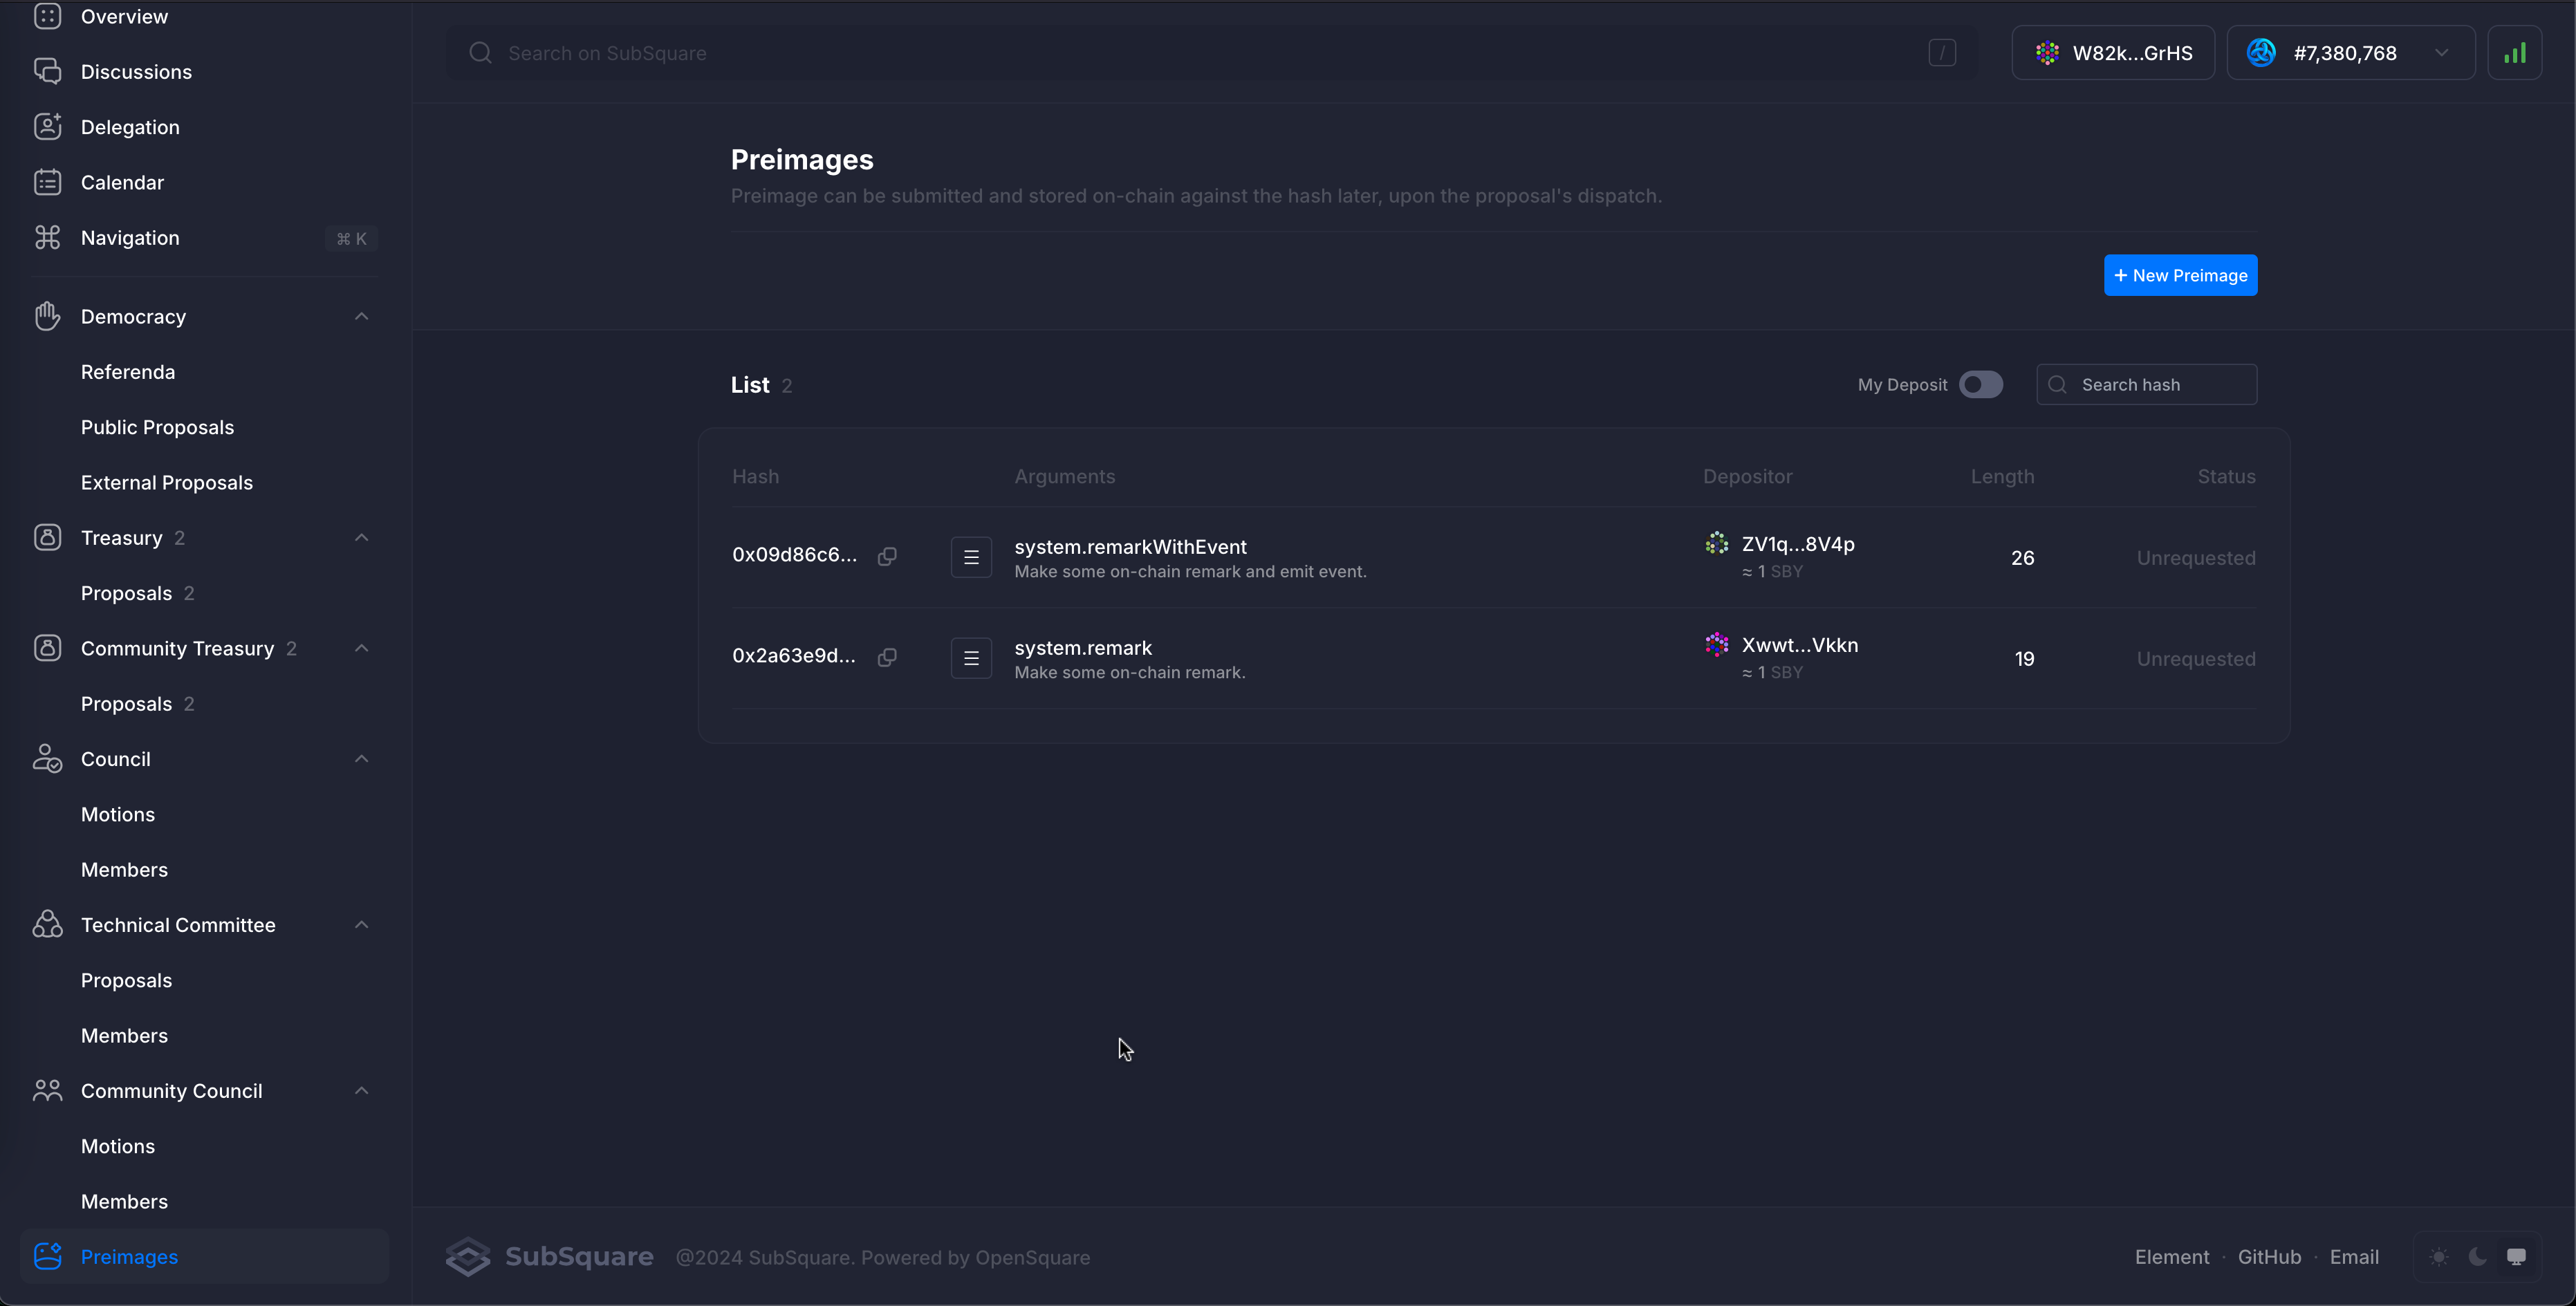
The existing preimages are displayed on the page. They can be reused by anyone to propose a governance action, any number of times.
In order to create a new preimage, click on the New Preimage button.
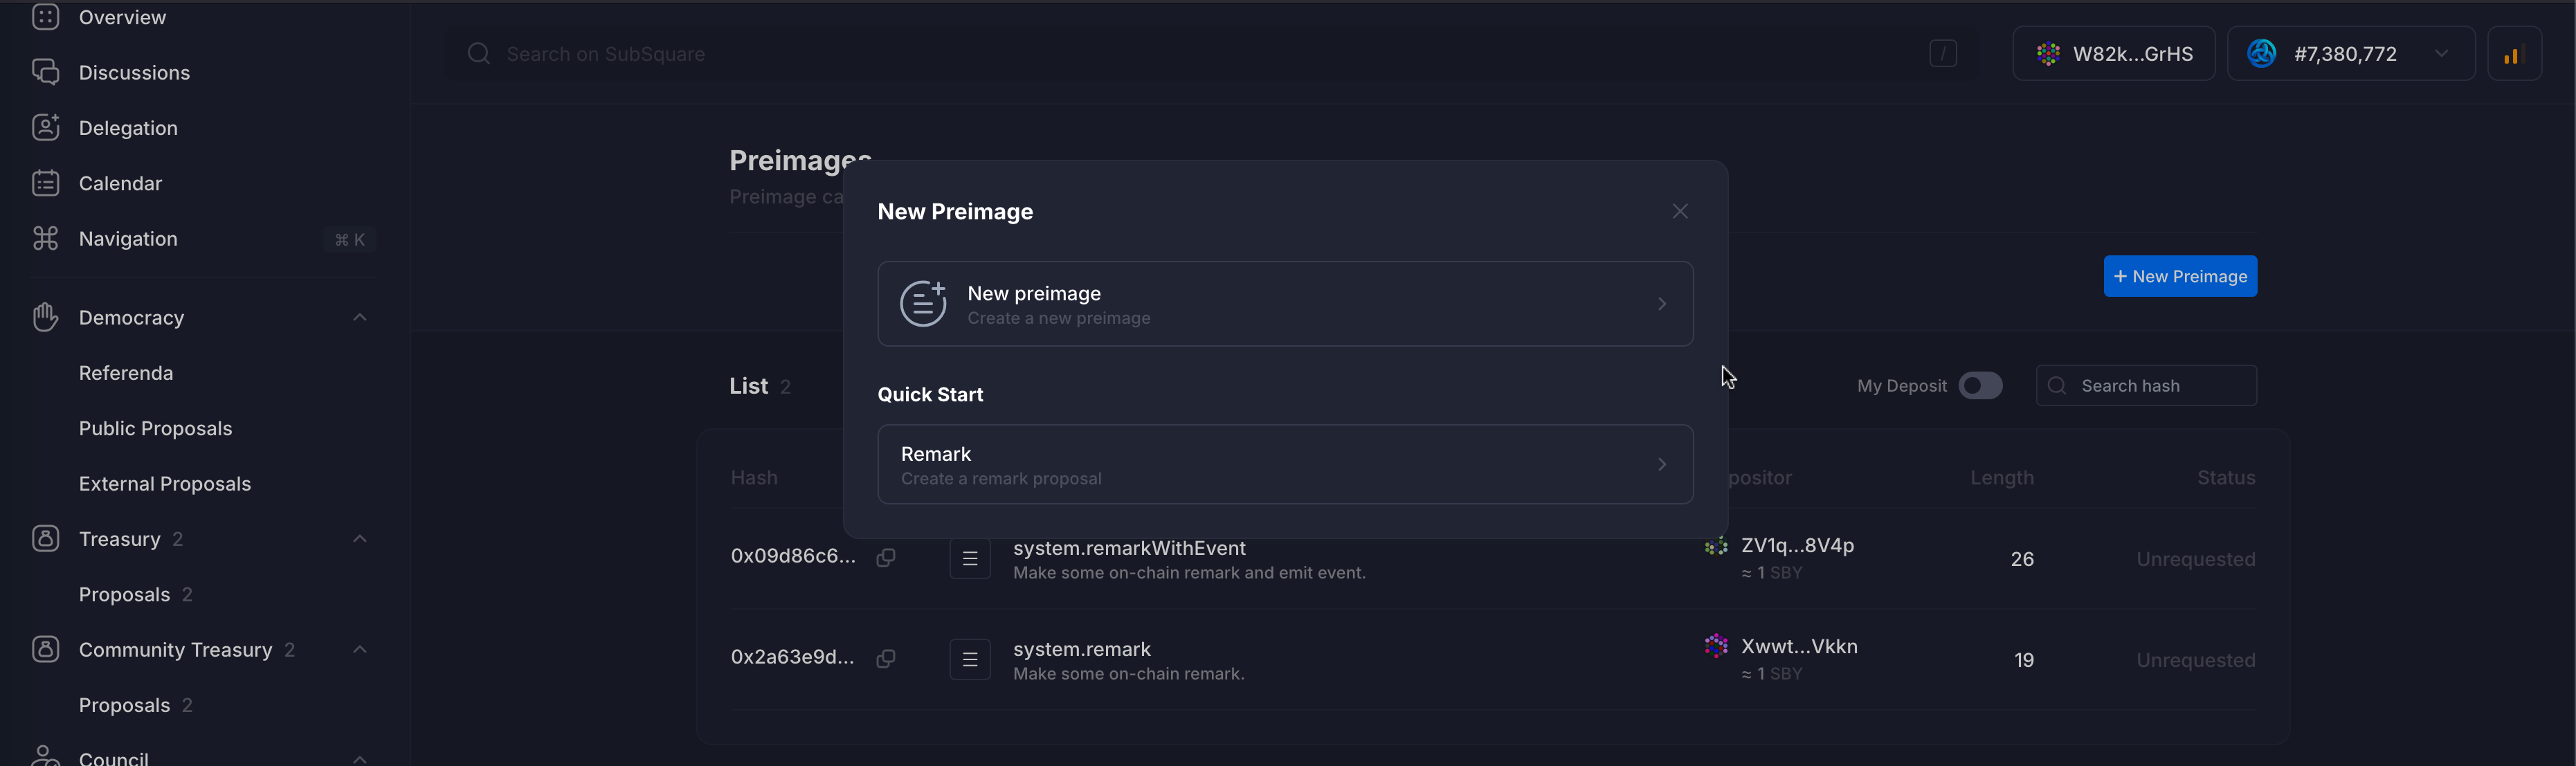
Again, click on the New preimage button.
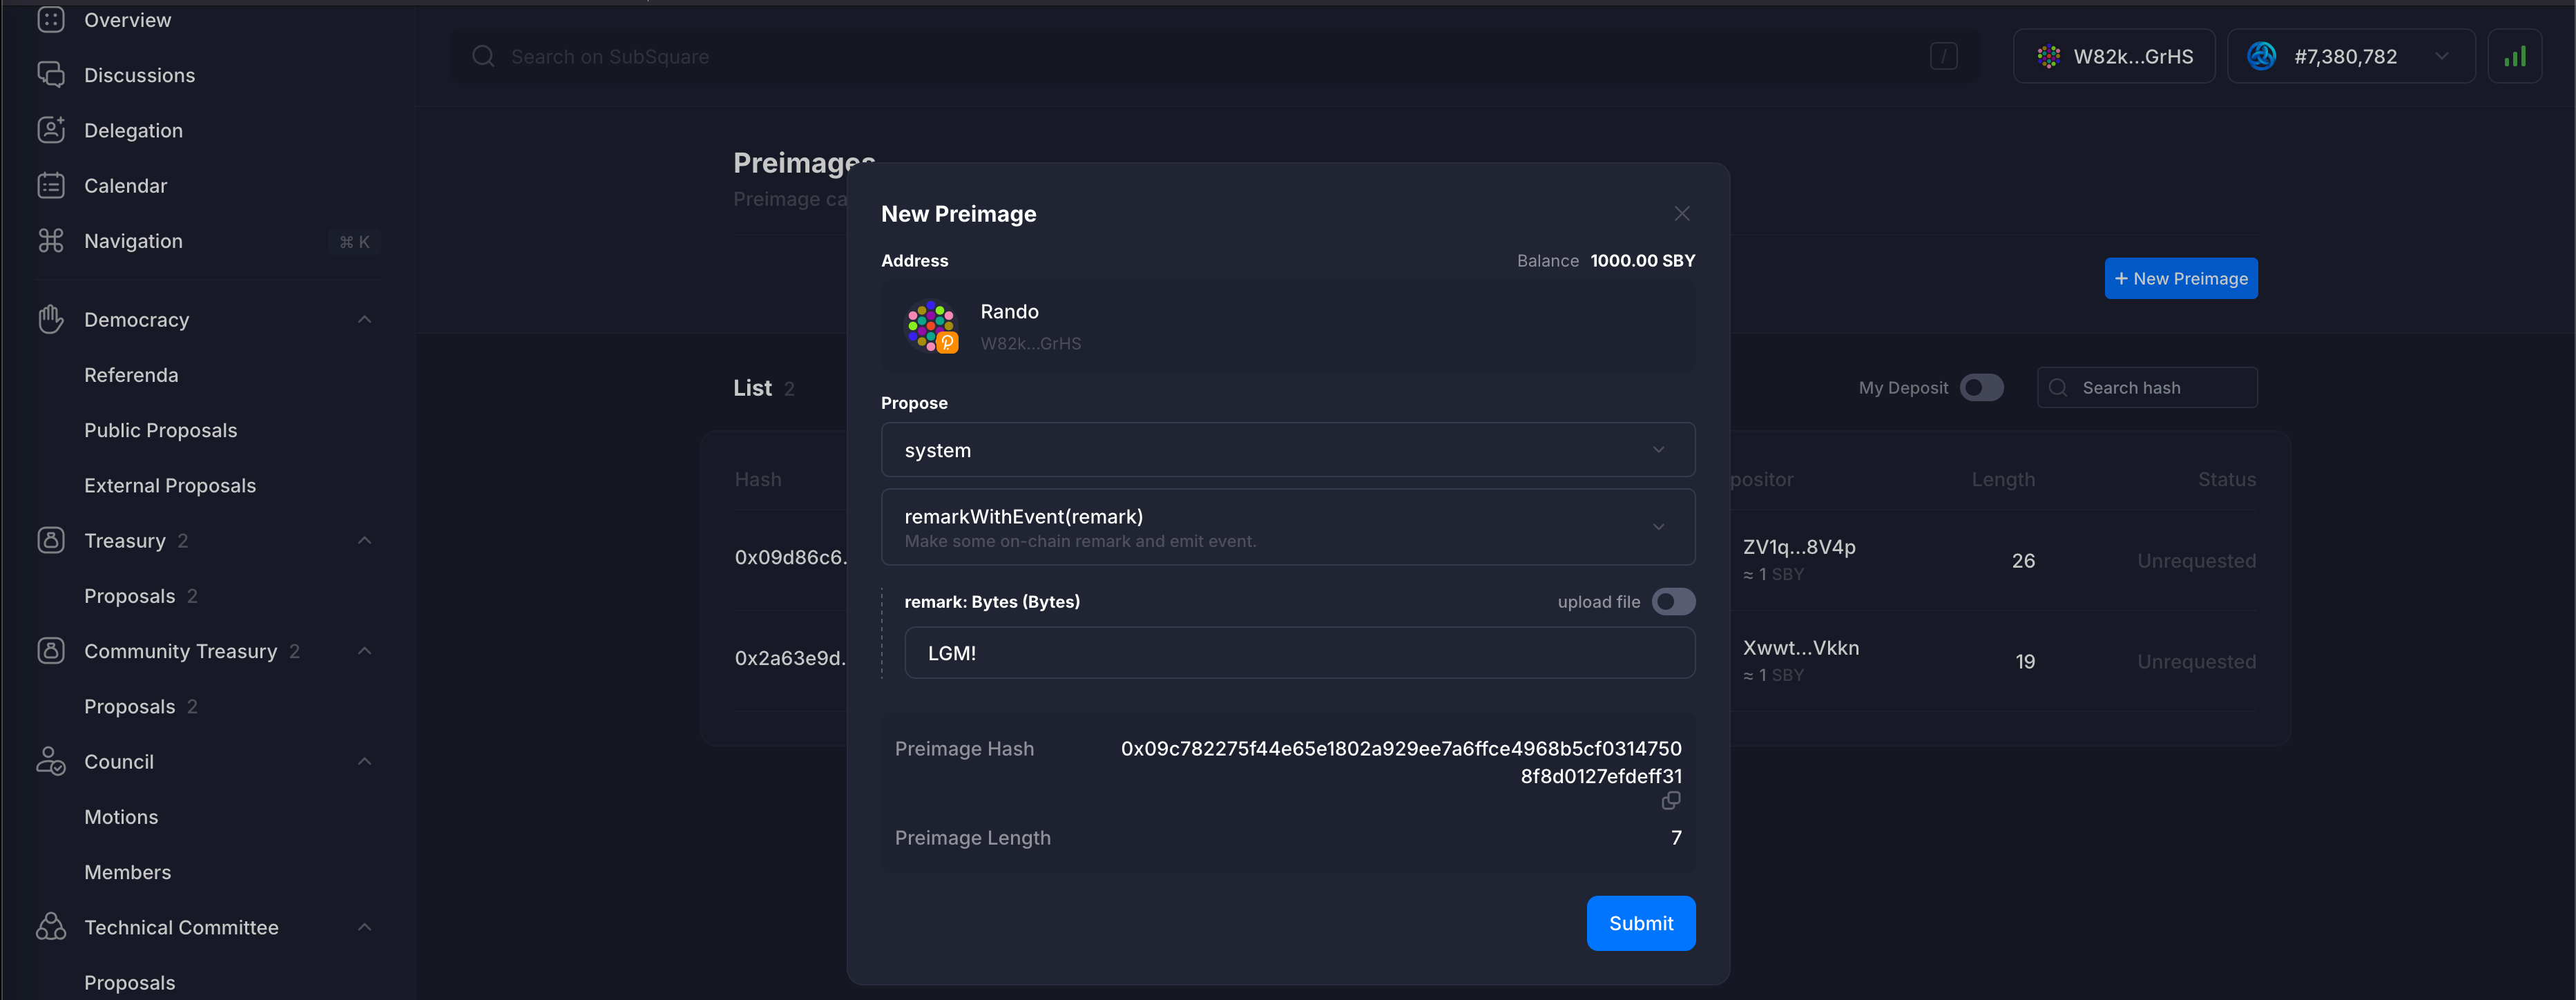
This allows you to create an arbitrary new preimage.
For the sake of this example, we will create a preimage of a remarkWithEvent extrinsic call, containing LGM! as the message.
Note the hash and length; these are important for later use.
Submit the message and wait for the transaction to be confirmed and finalized.
Once the preimage has been created, it will be displayed on the main Preimage page.
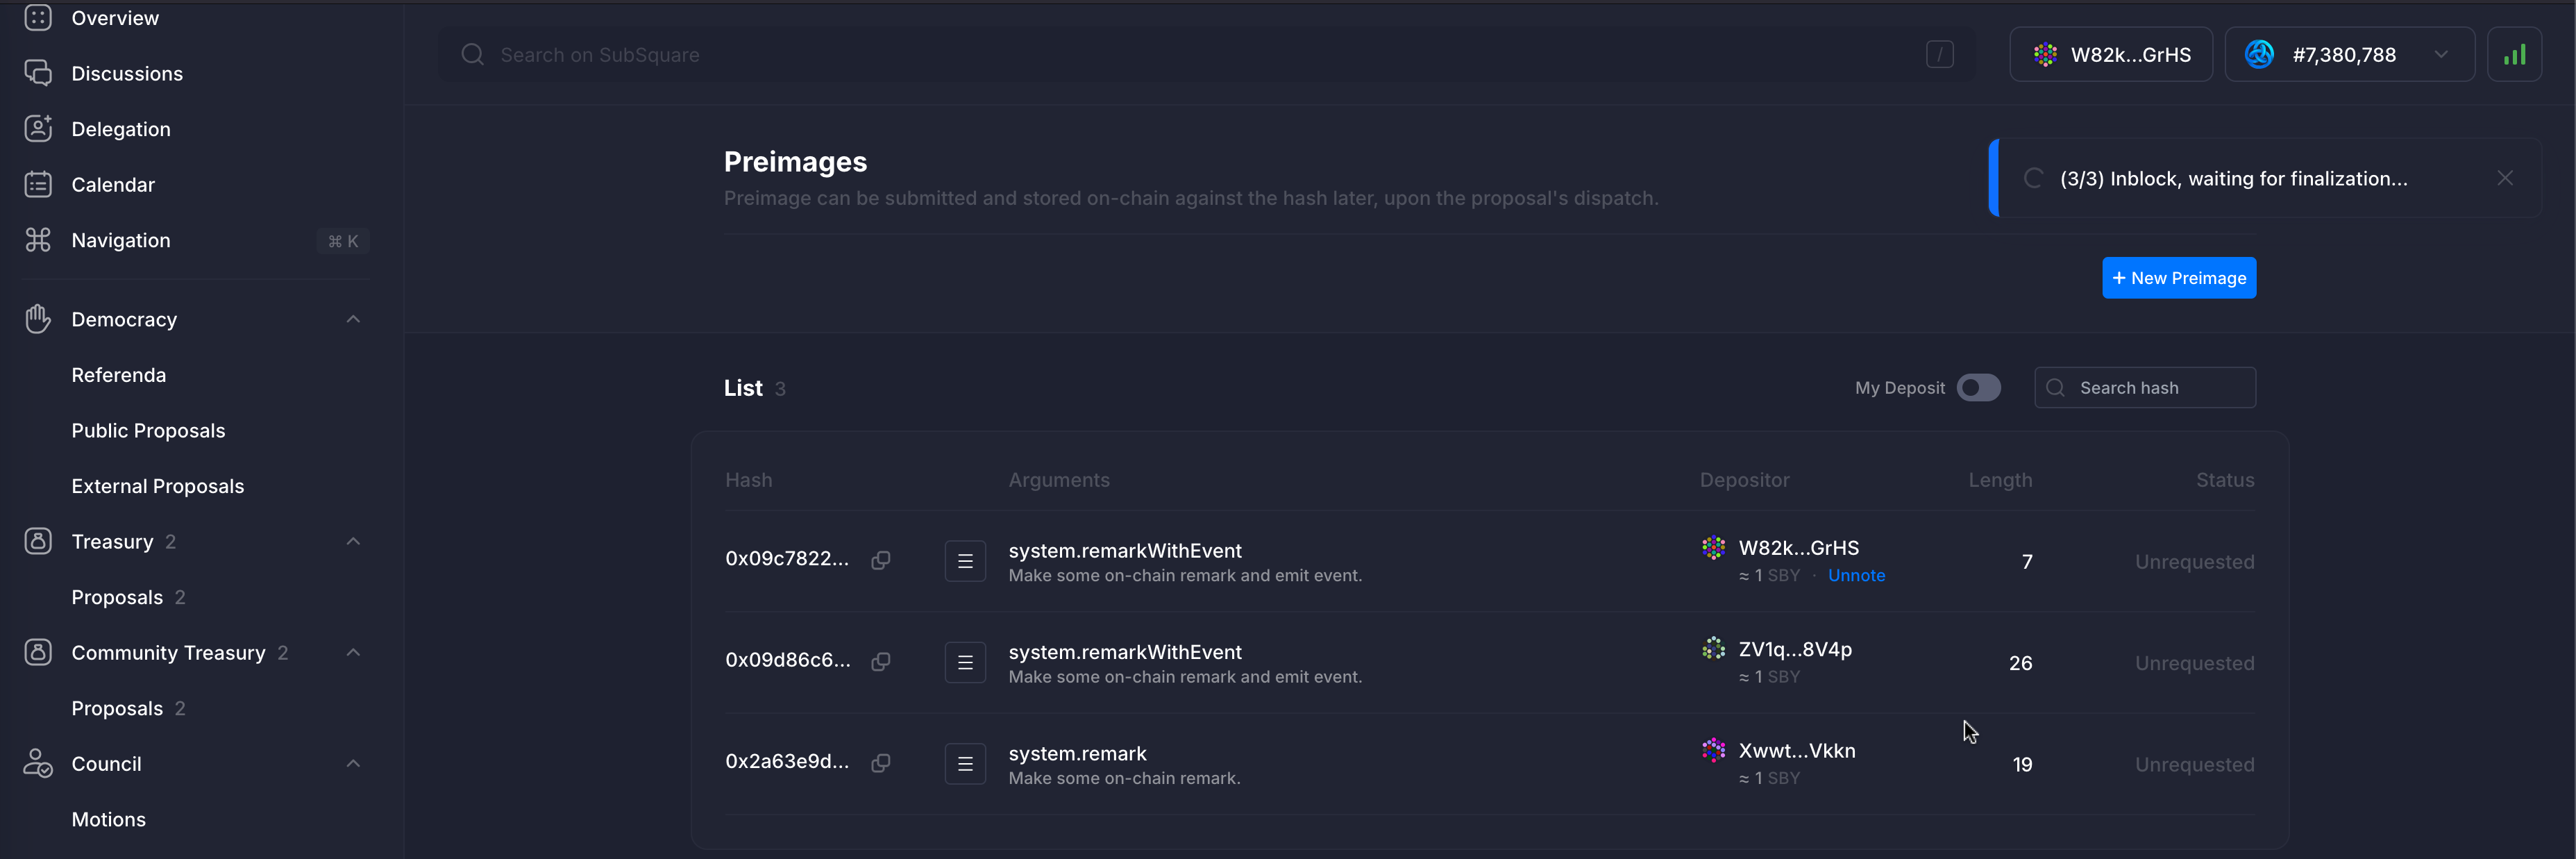
Note that the newly created image has an Unnote button. This is because the current user is the creator of the preimage.
Since at this point the preimage is not yet used in any proposal, it can be unnoted, which will remove it from the list of preimages, refunding the deposit.
Public Proposal
Select the Public Proposal tab on the sidebar, under the Democracy section.
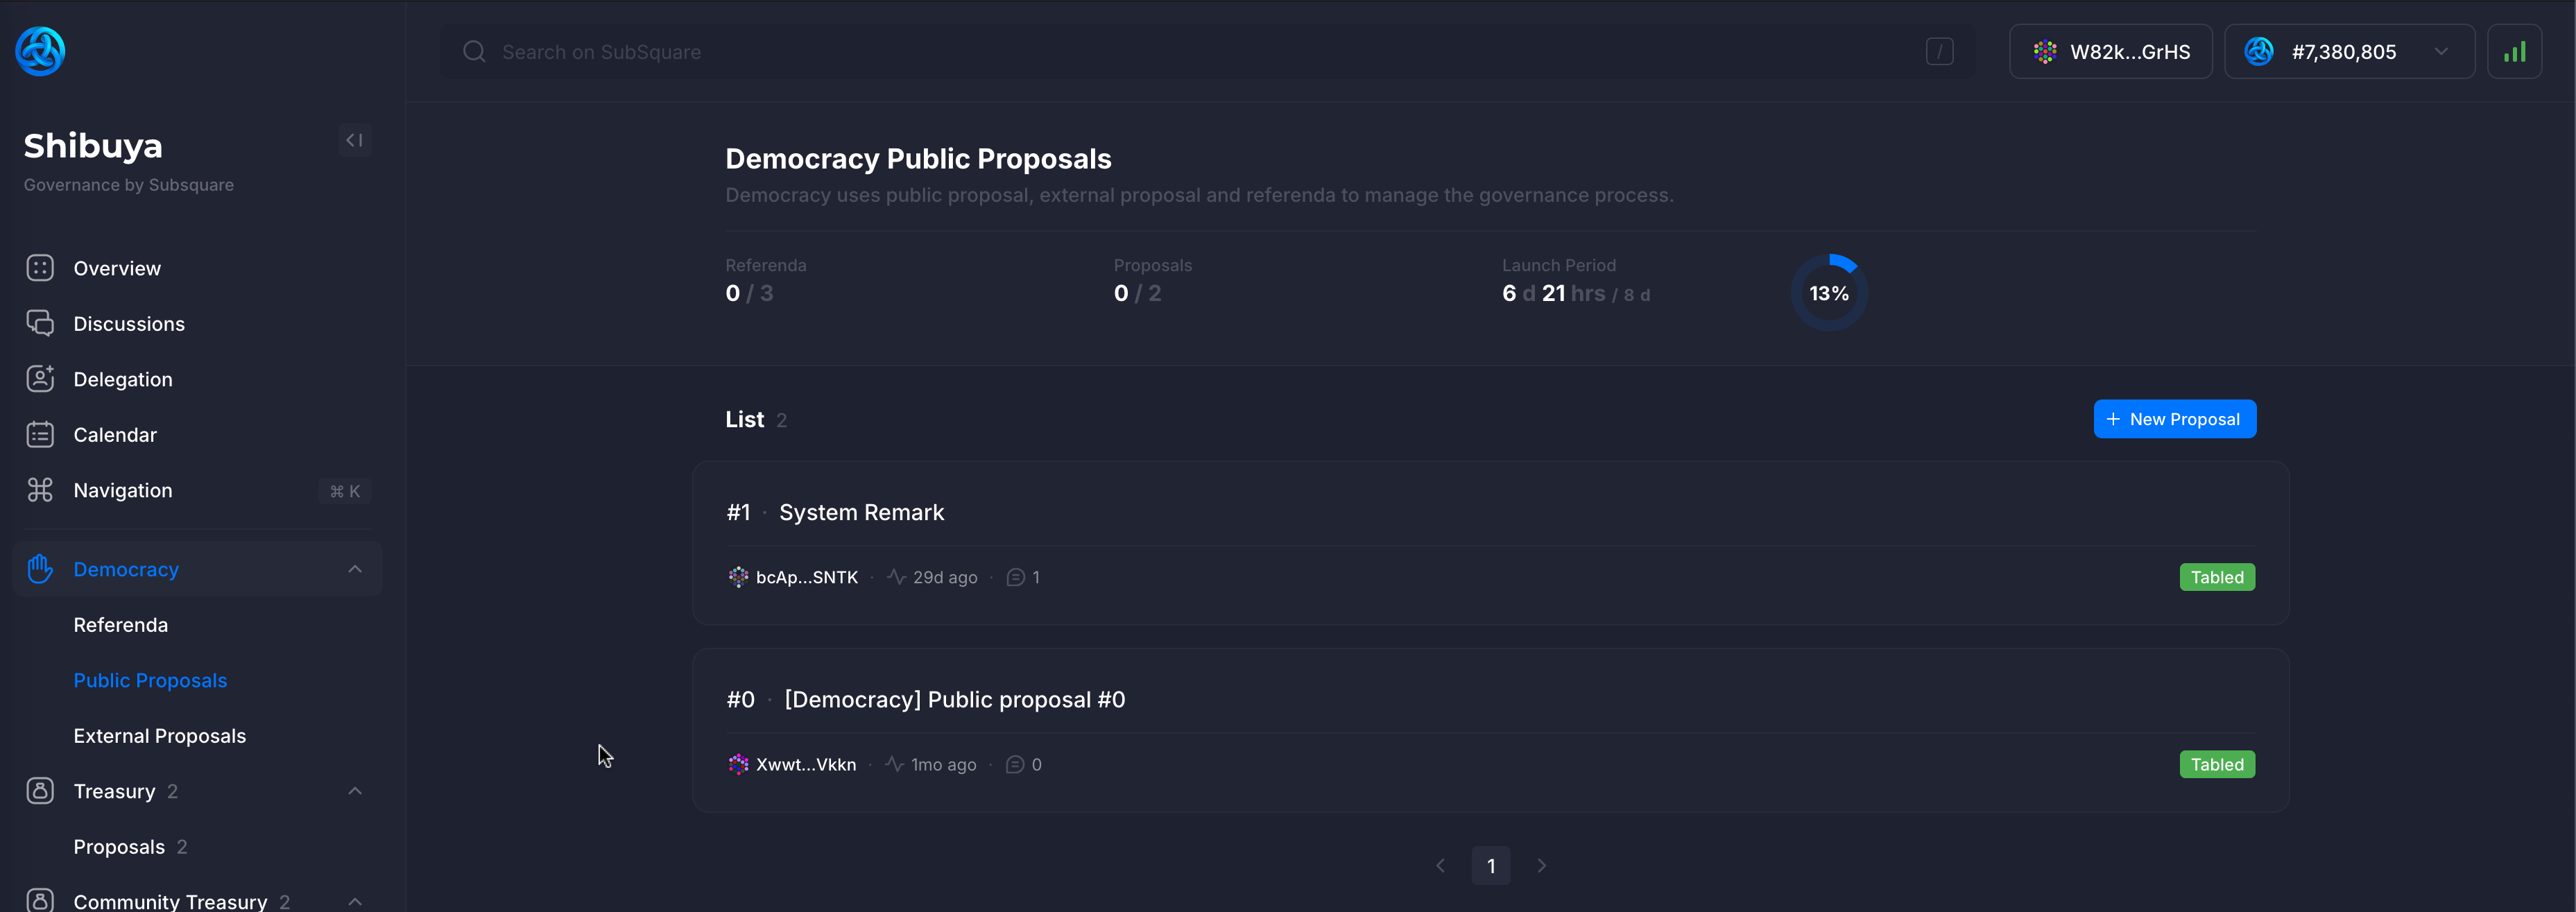
Here the existing public proposals are displayed. Some have been tabled (upgraded to a referendum), some have been proposed, and others might be canceled.
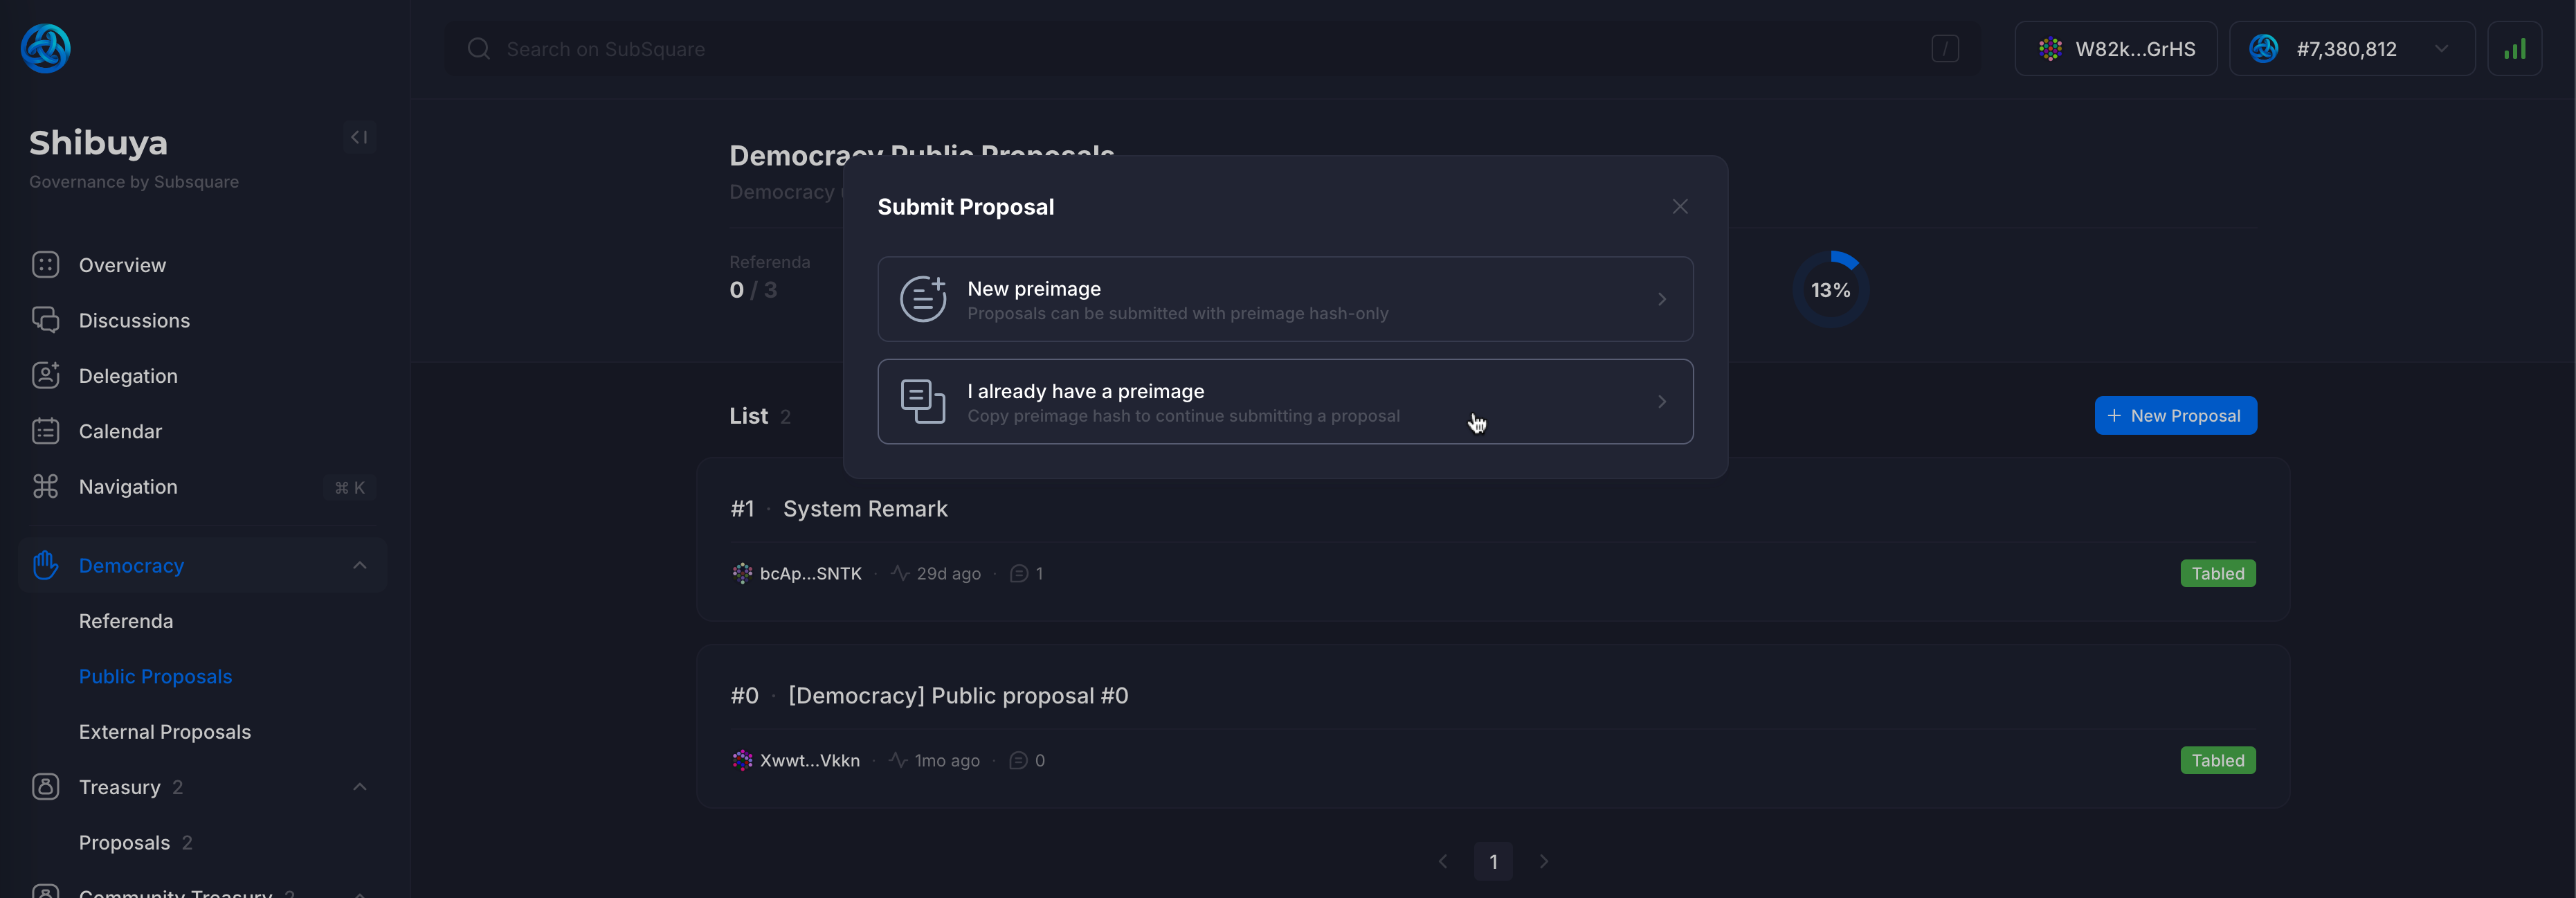
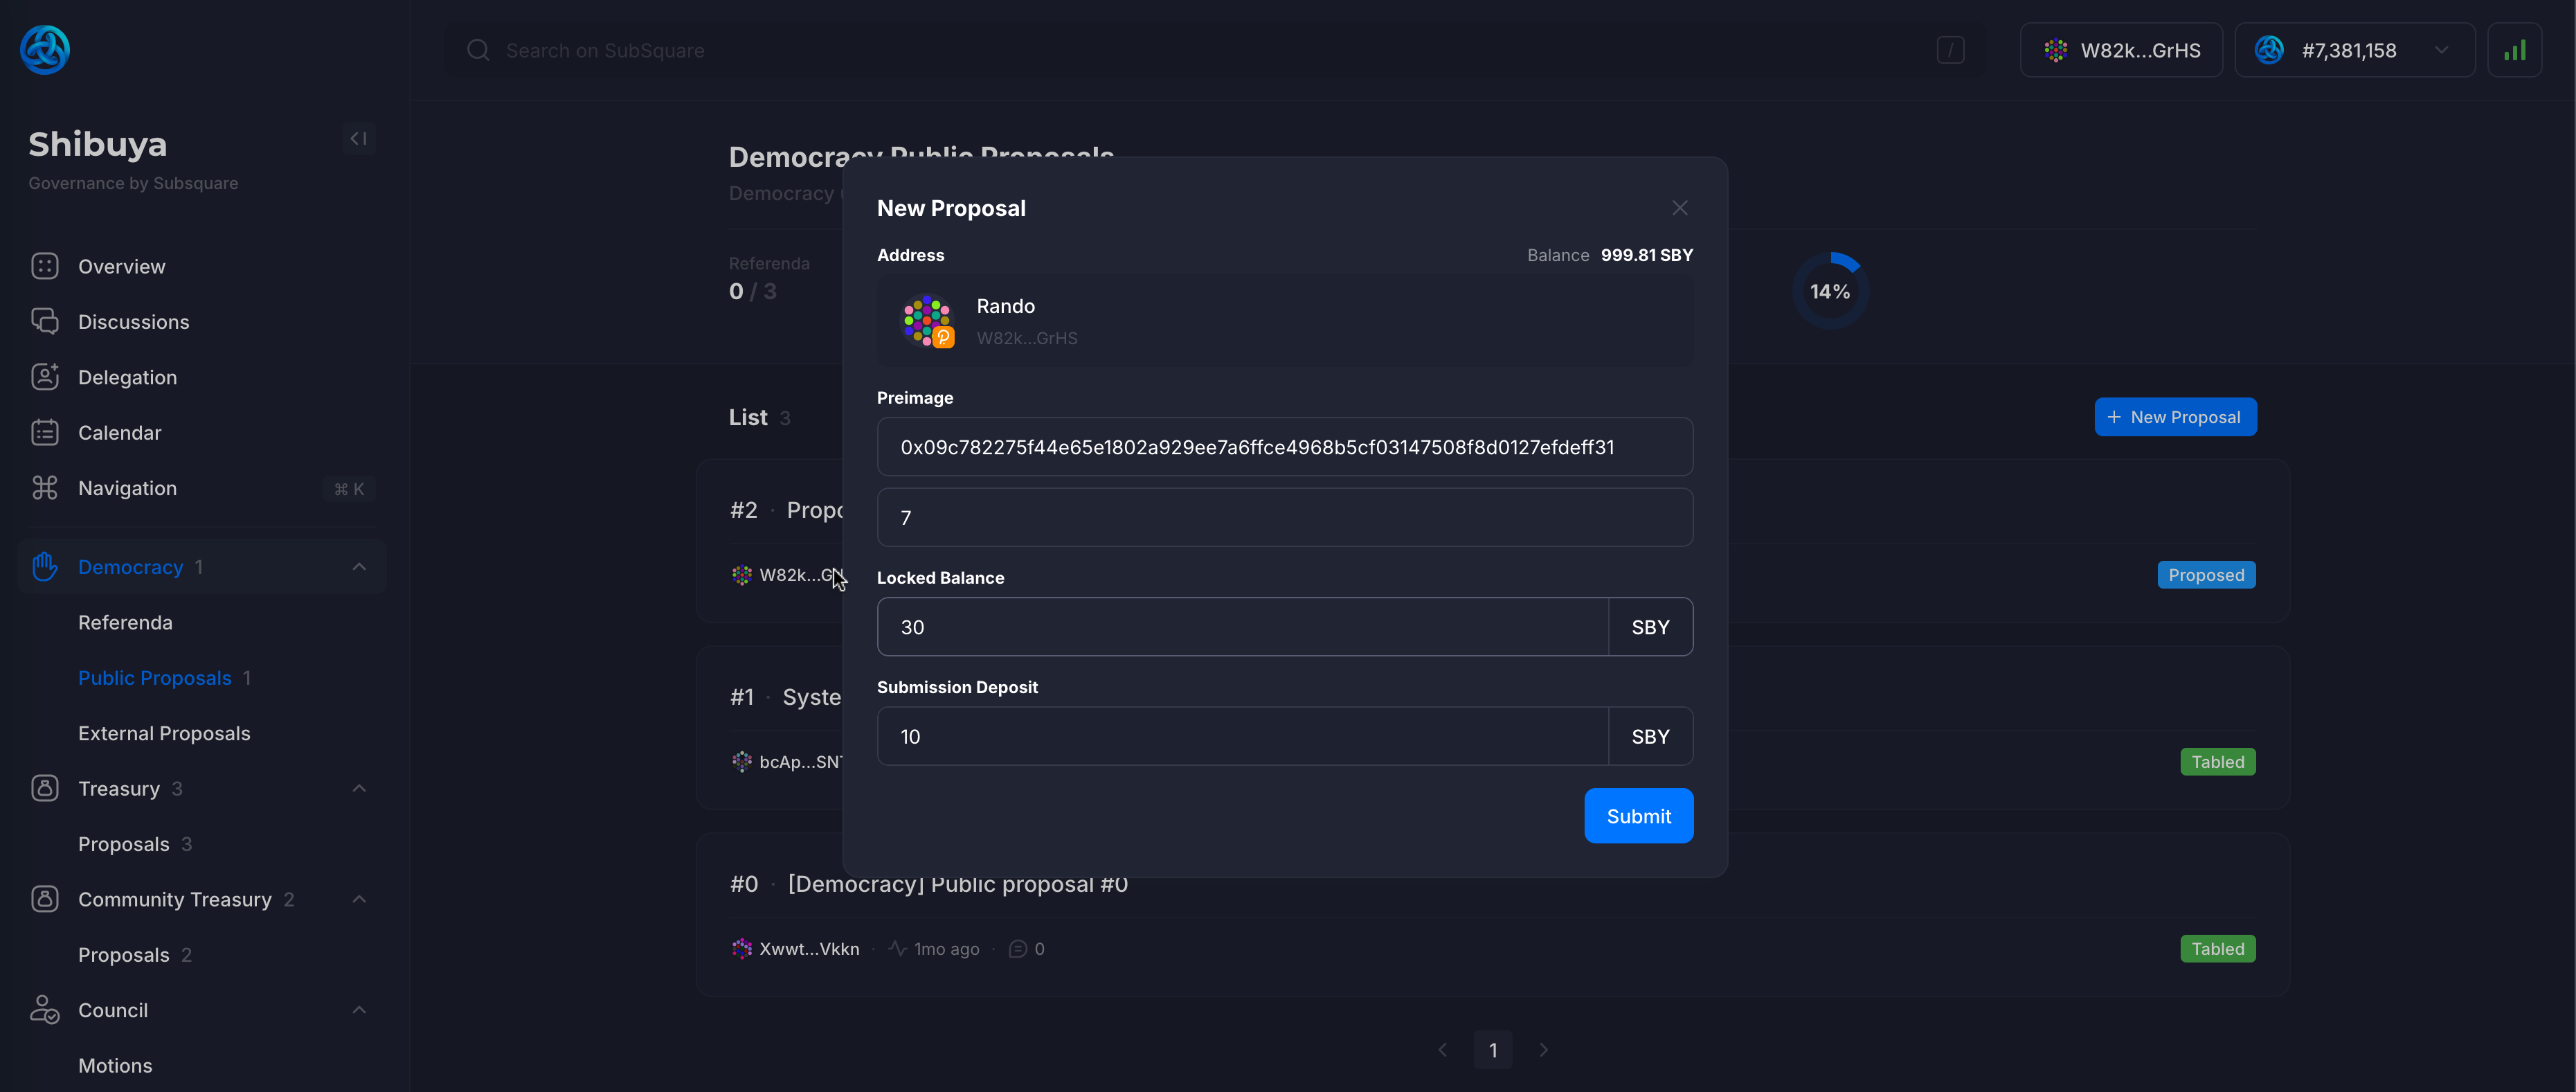
Click on the New Proposal button to create a new public proposal.
Since a preimage was created in the previous step, it can be used to create a new proposal.
The hash of the preimage is required to create a new proposal.
In this case, hash of the preimage created earlier is simply copied and pasted into the Preimage field.
The Locked Balance refers to the amount being deposited (not locked) for the proposal.
In case the proposal is canceled, the deposit will be slashed.
In case the proposal is tabled, the deposit will be refunded.
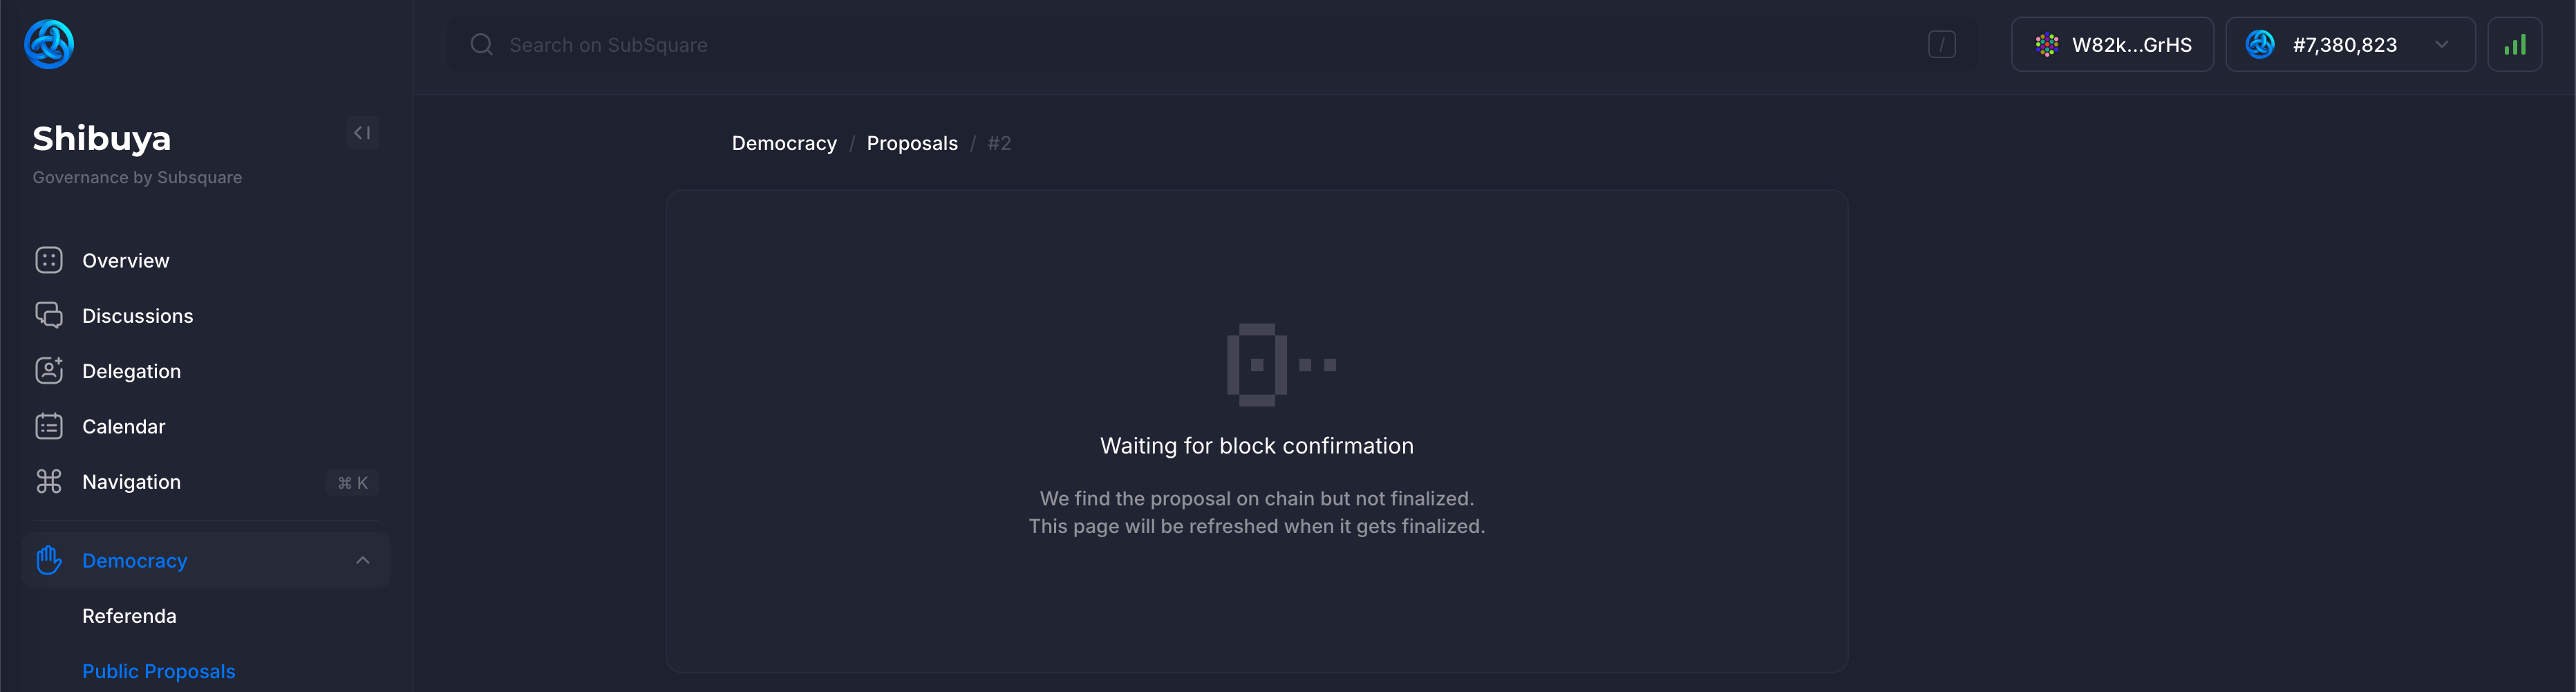
After submitting the proposal, some time needs to pass before the transaction is confirmed and finalized.
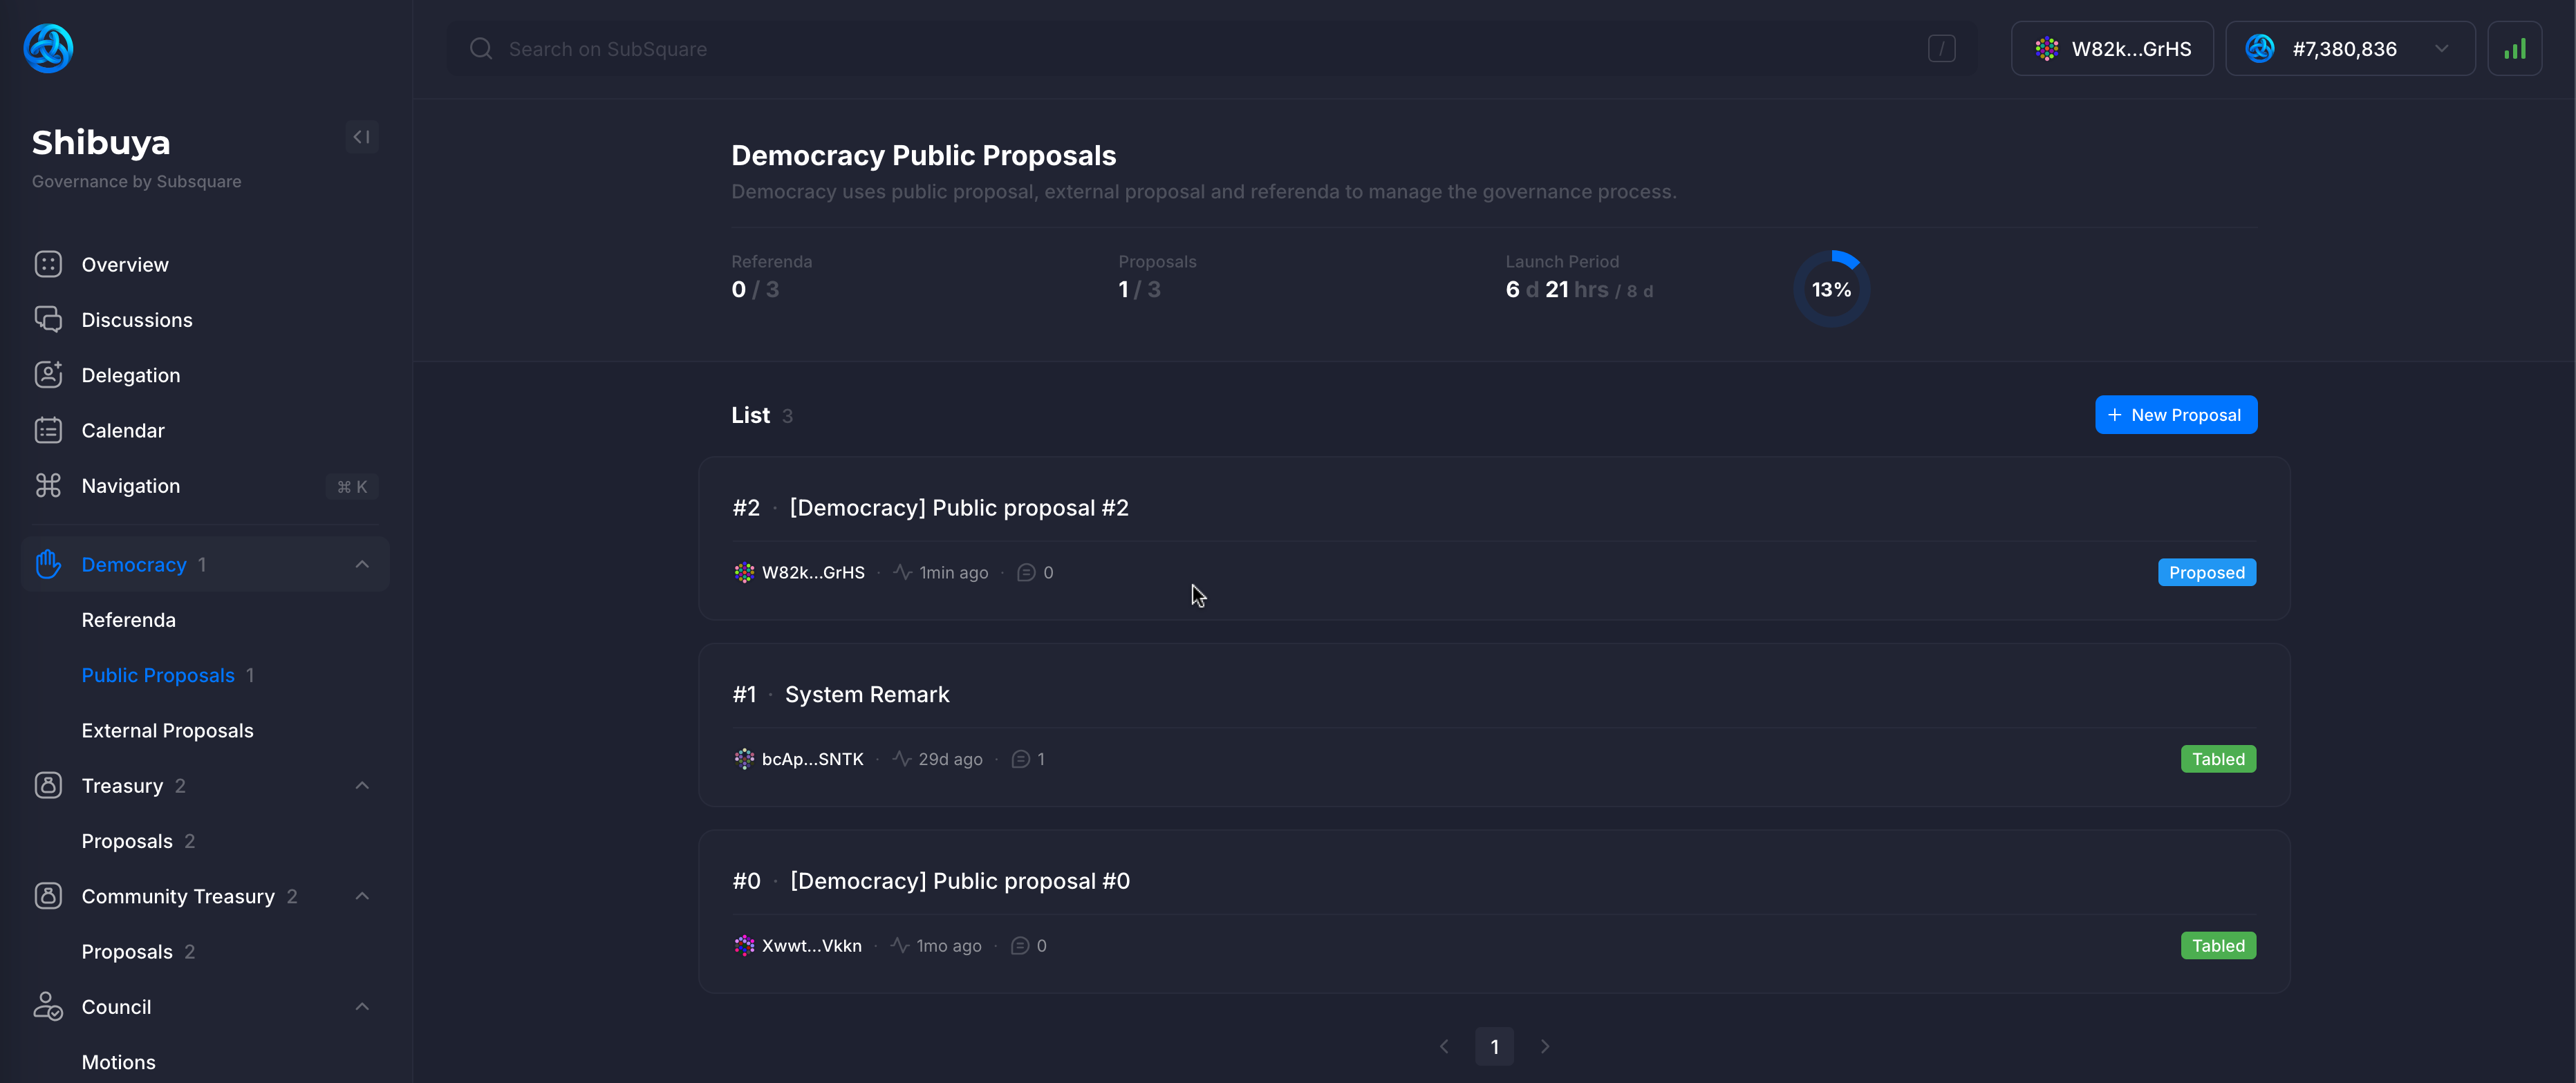
Afterwards, it can be observed under the list of public proposals.
The status will be marked as Proposed, since it hasn't been tabled (or canceled) yet.
Clicking on the proposal will display more details, and allow to take further actions.
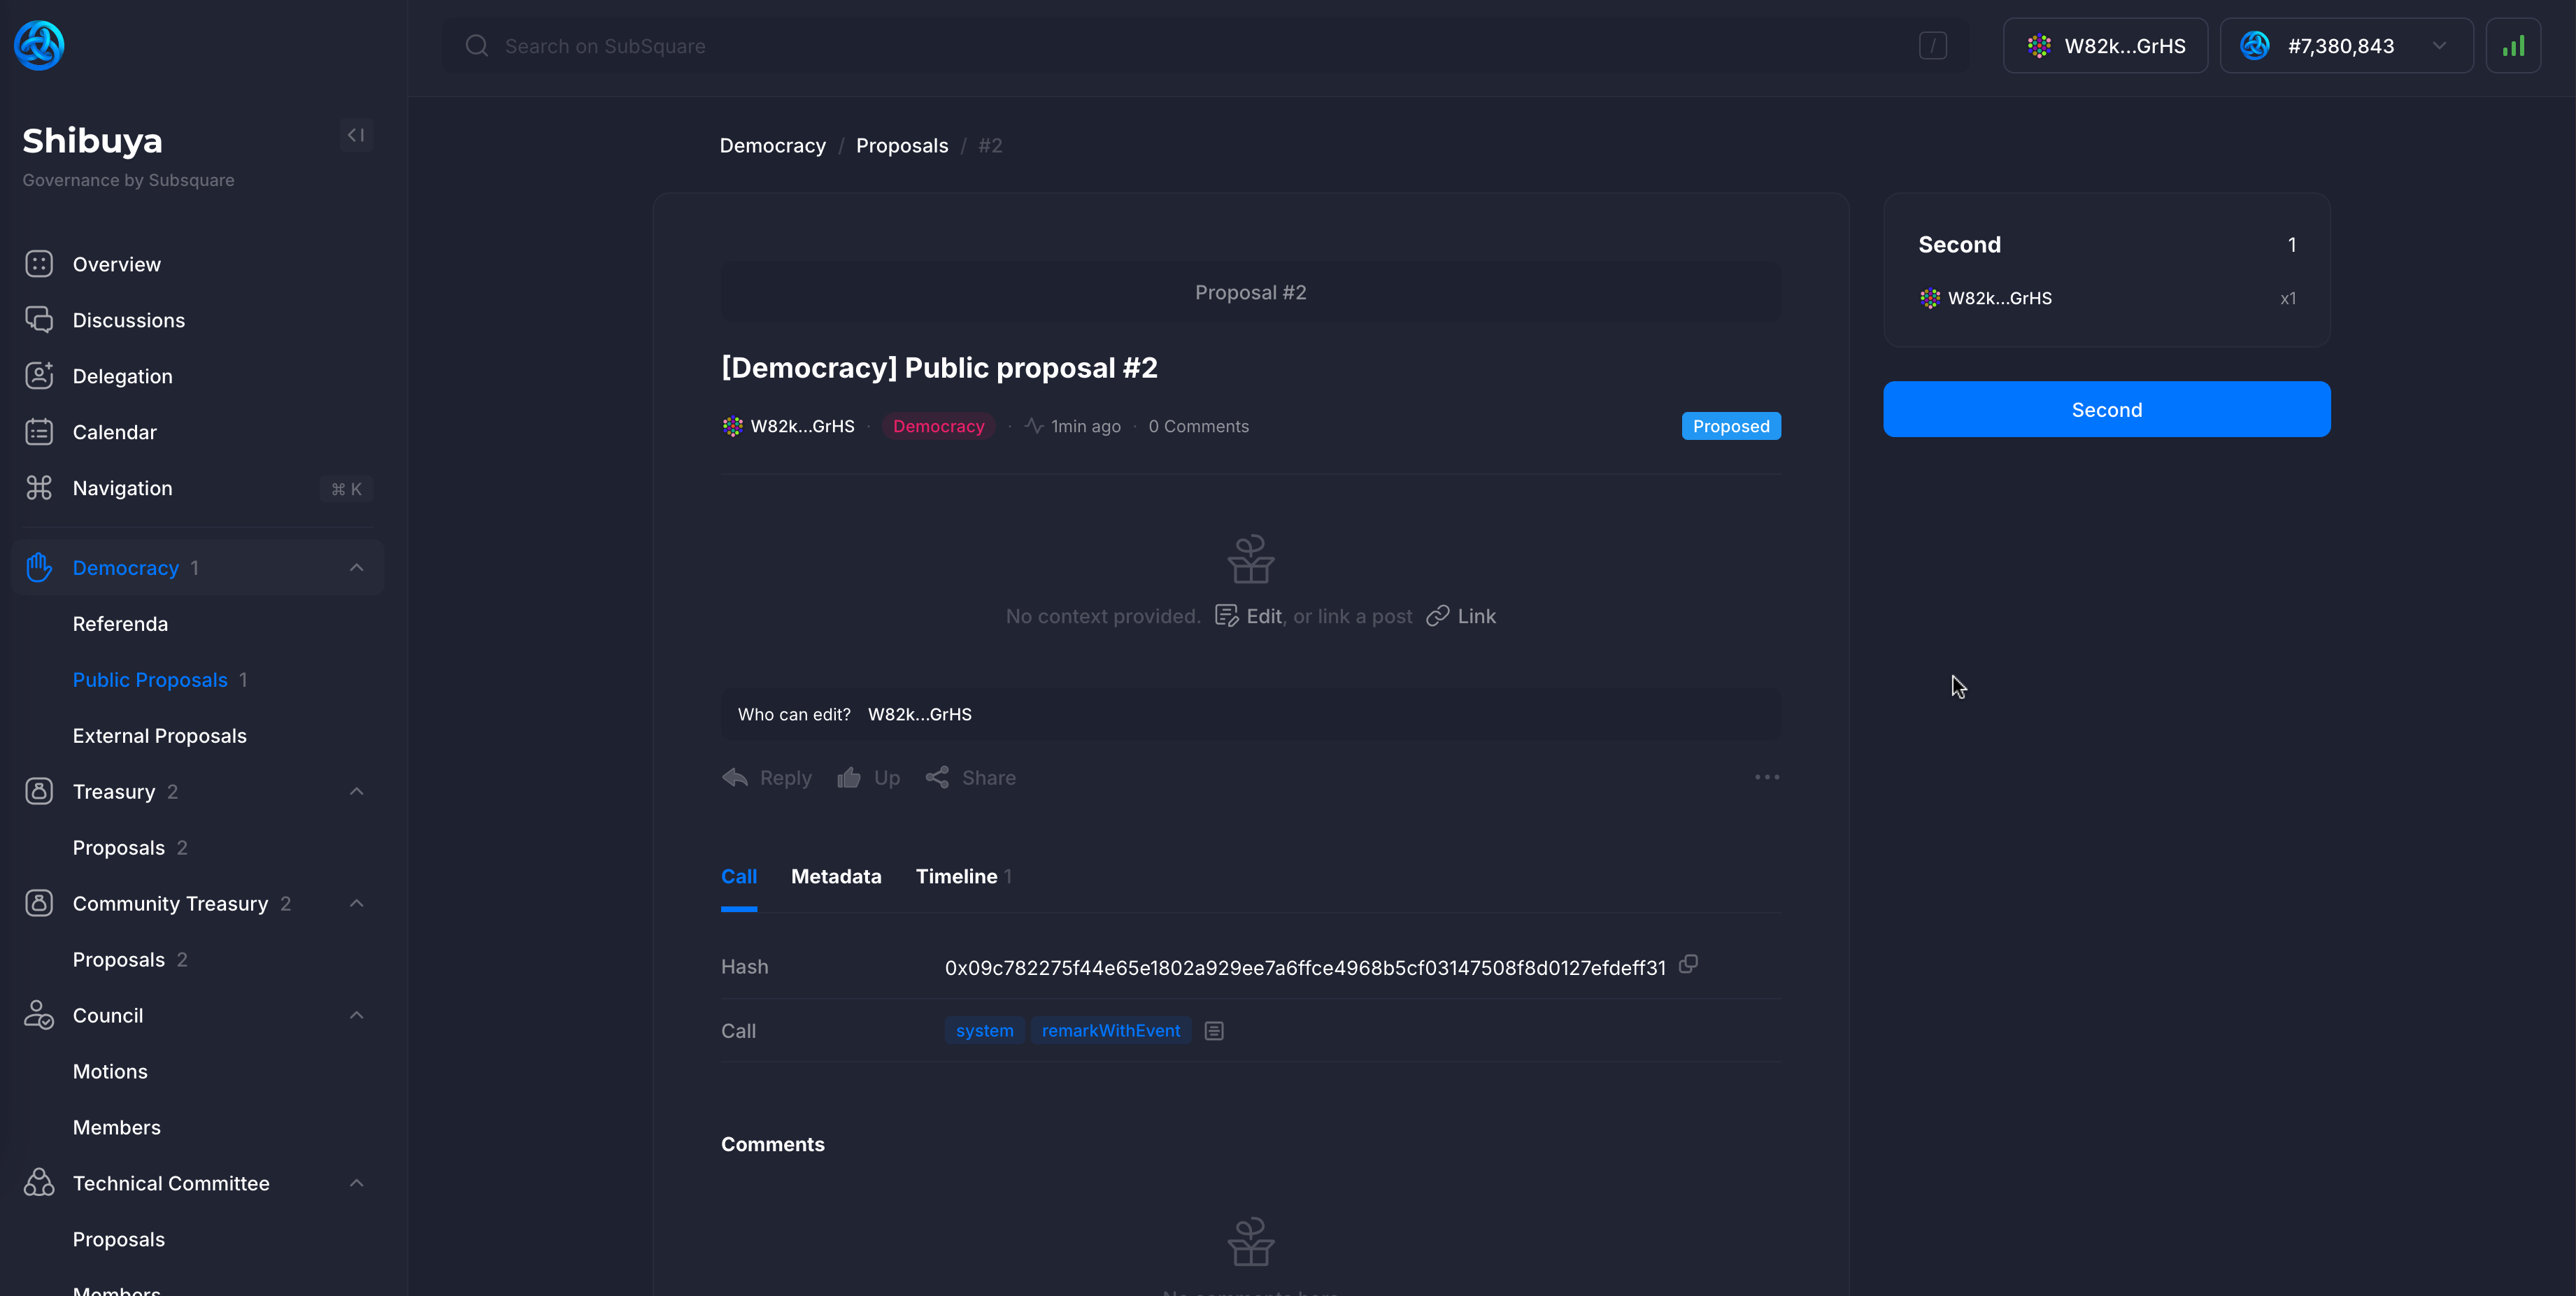
Proposals can be edited by clicking on the Edit button. Title and description can be changed, even a graphic image can be uploaded.
Users can discuss the proposal in the comments section.
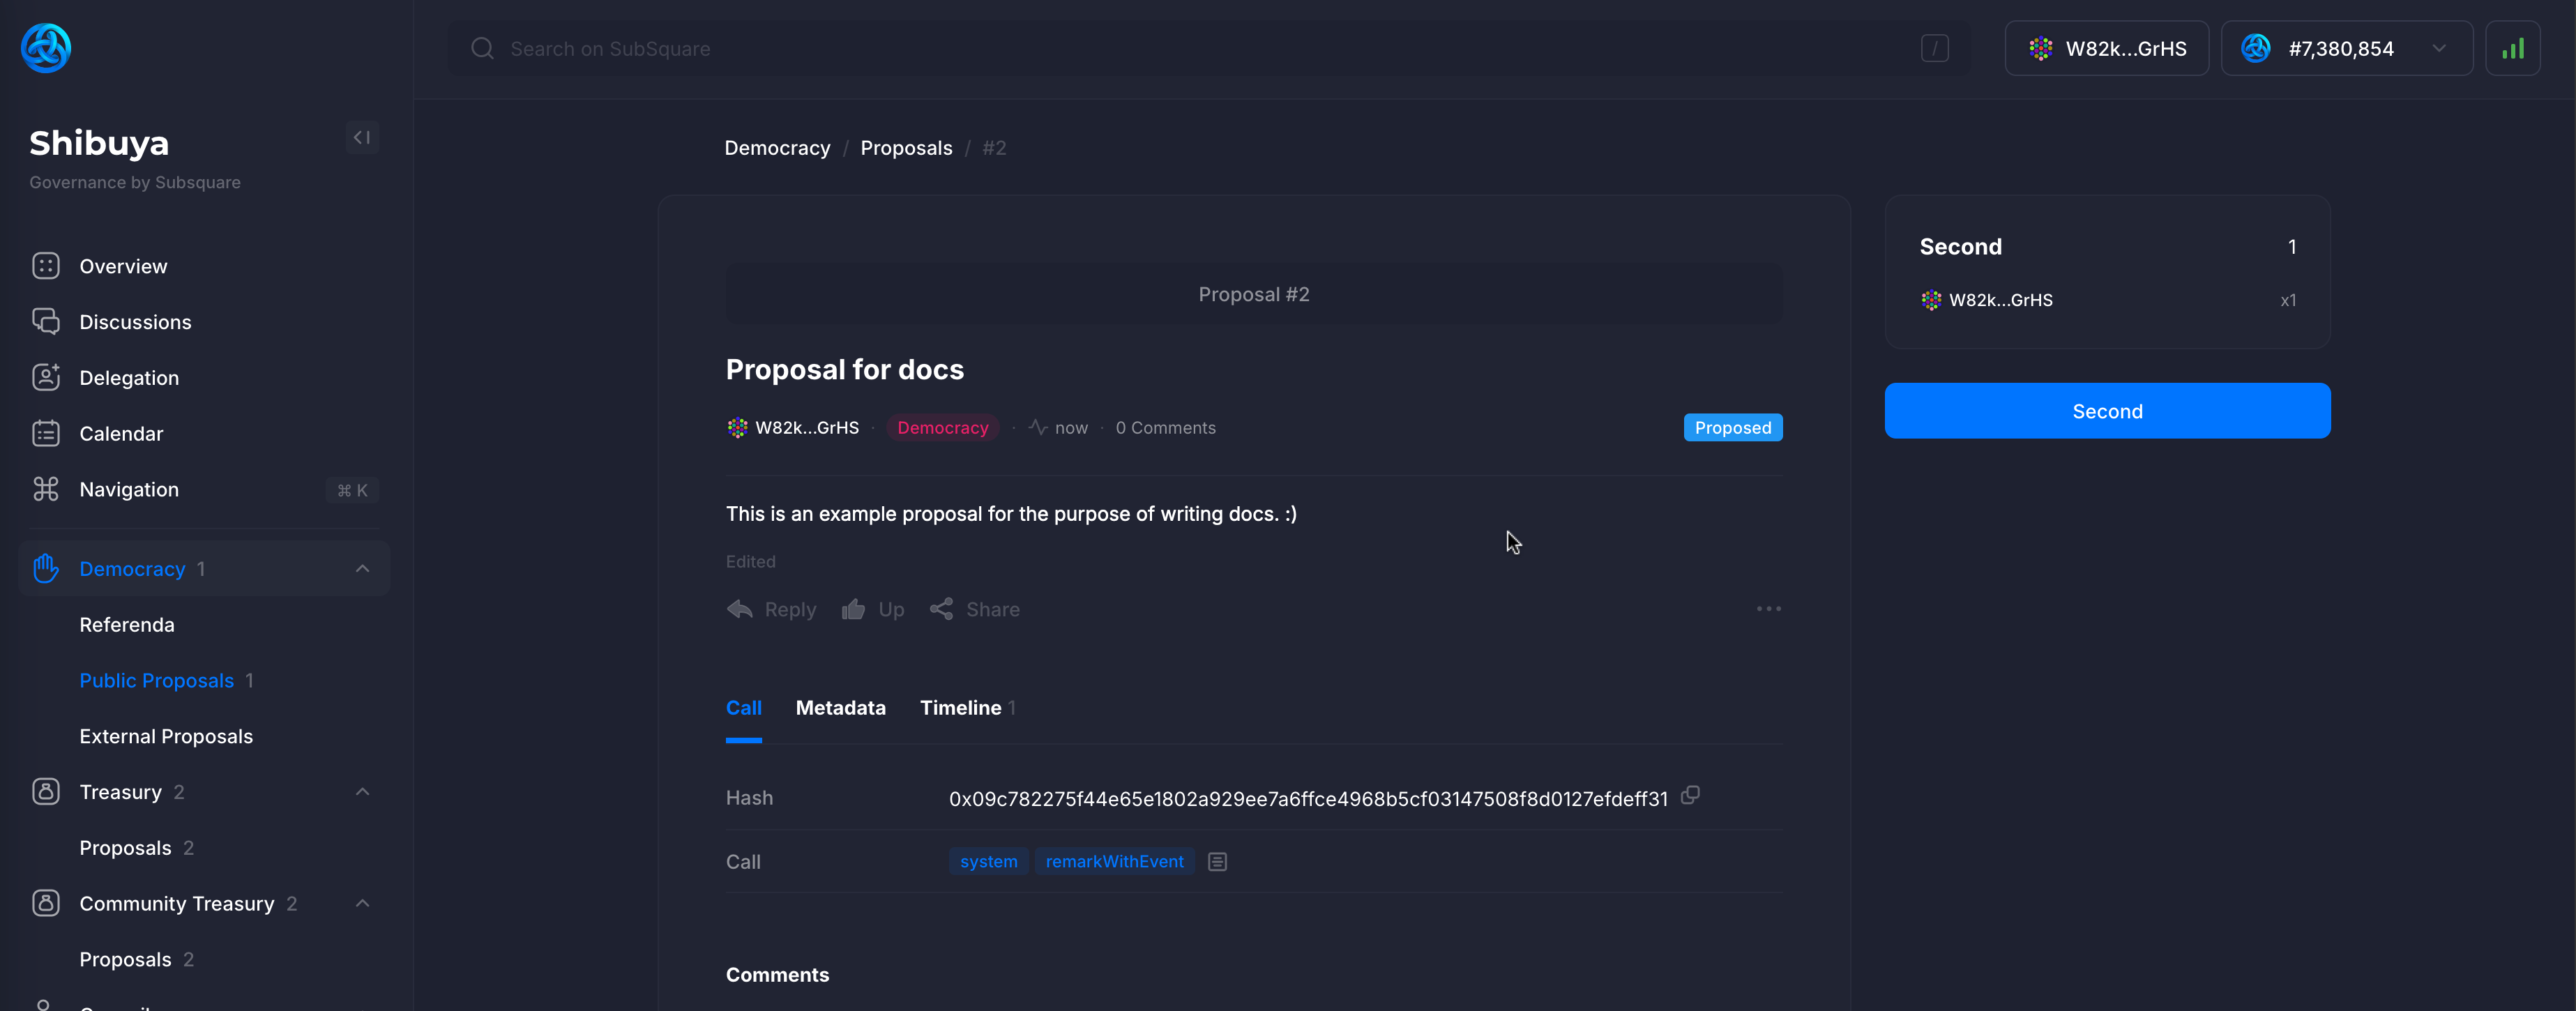
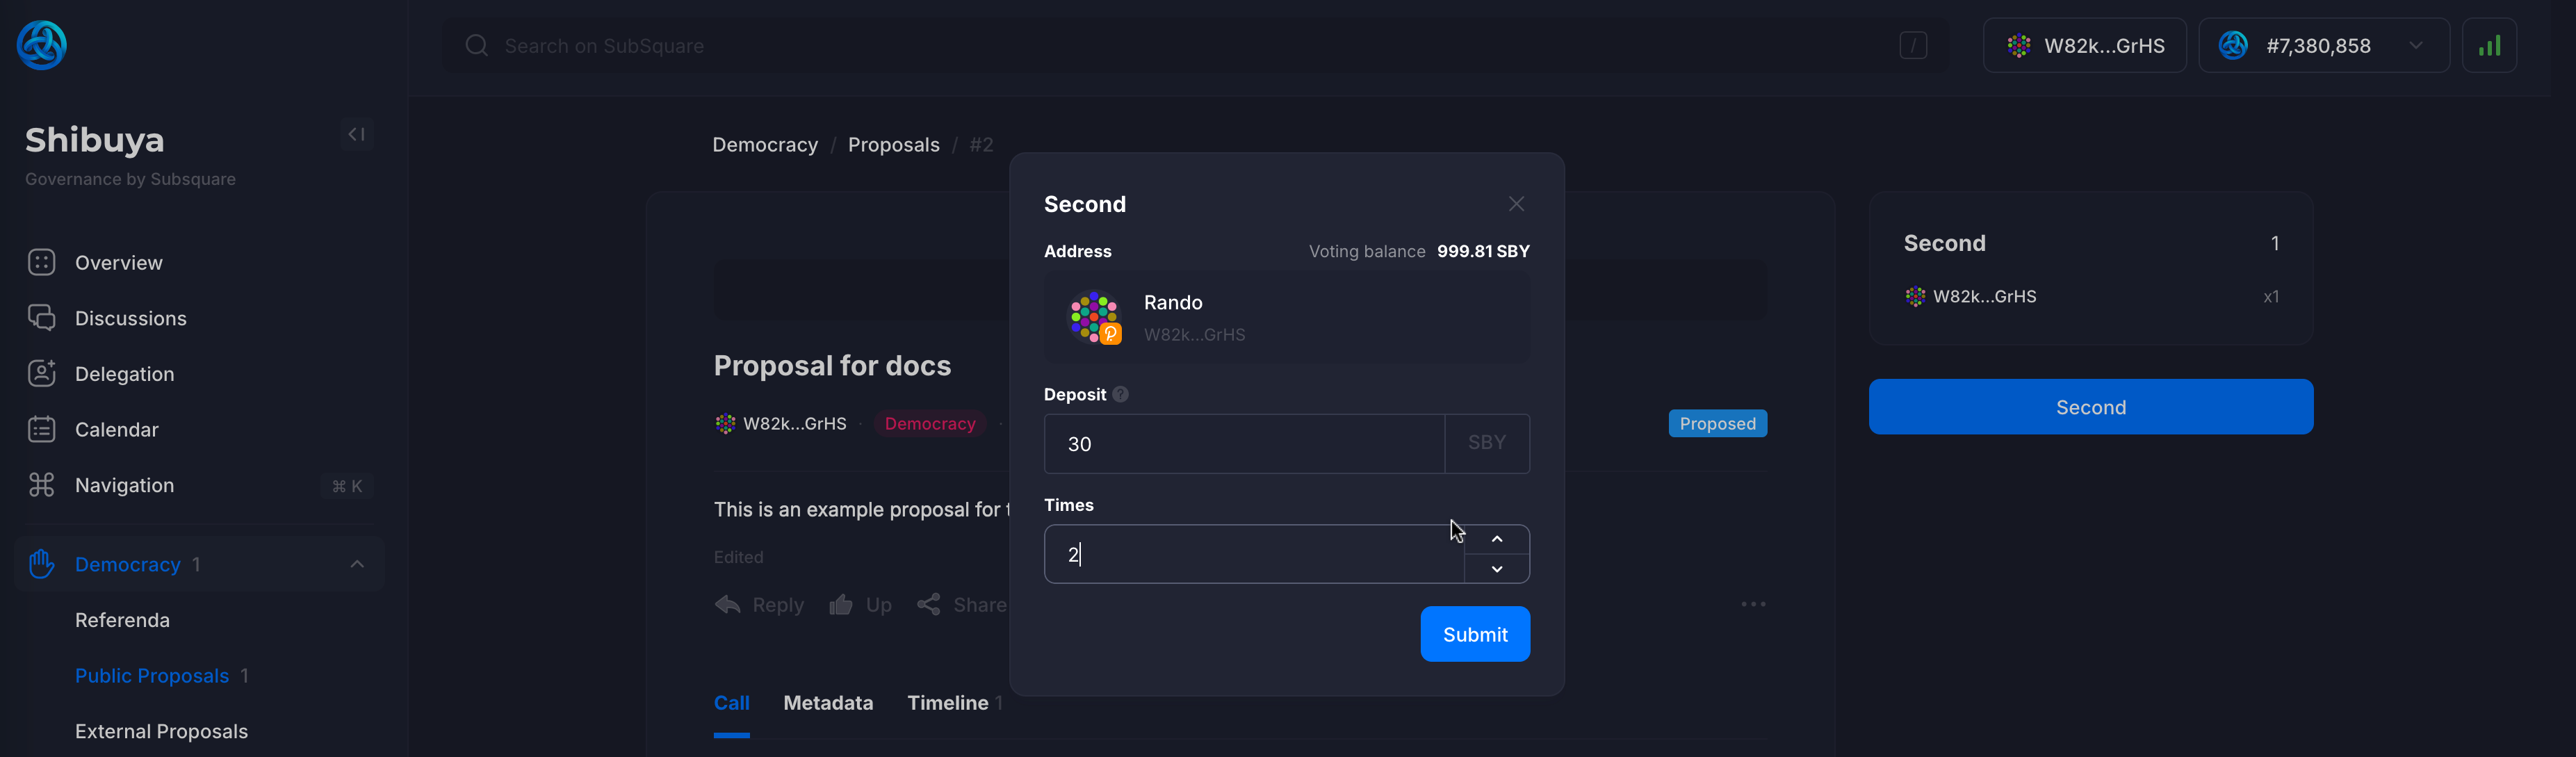
Clicking the Second button to support the proposal, increase its chances of being tabled and upgraded to a referendum.
The user has to match the deposit of the proposal, which is displayed on the page.
It is possible to second a proposal multiple times.
Treasury
Clicking on the Treasury tab on the sidebar will display the current state of the treasury & spending requests.
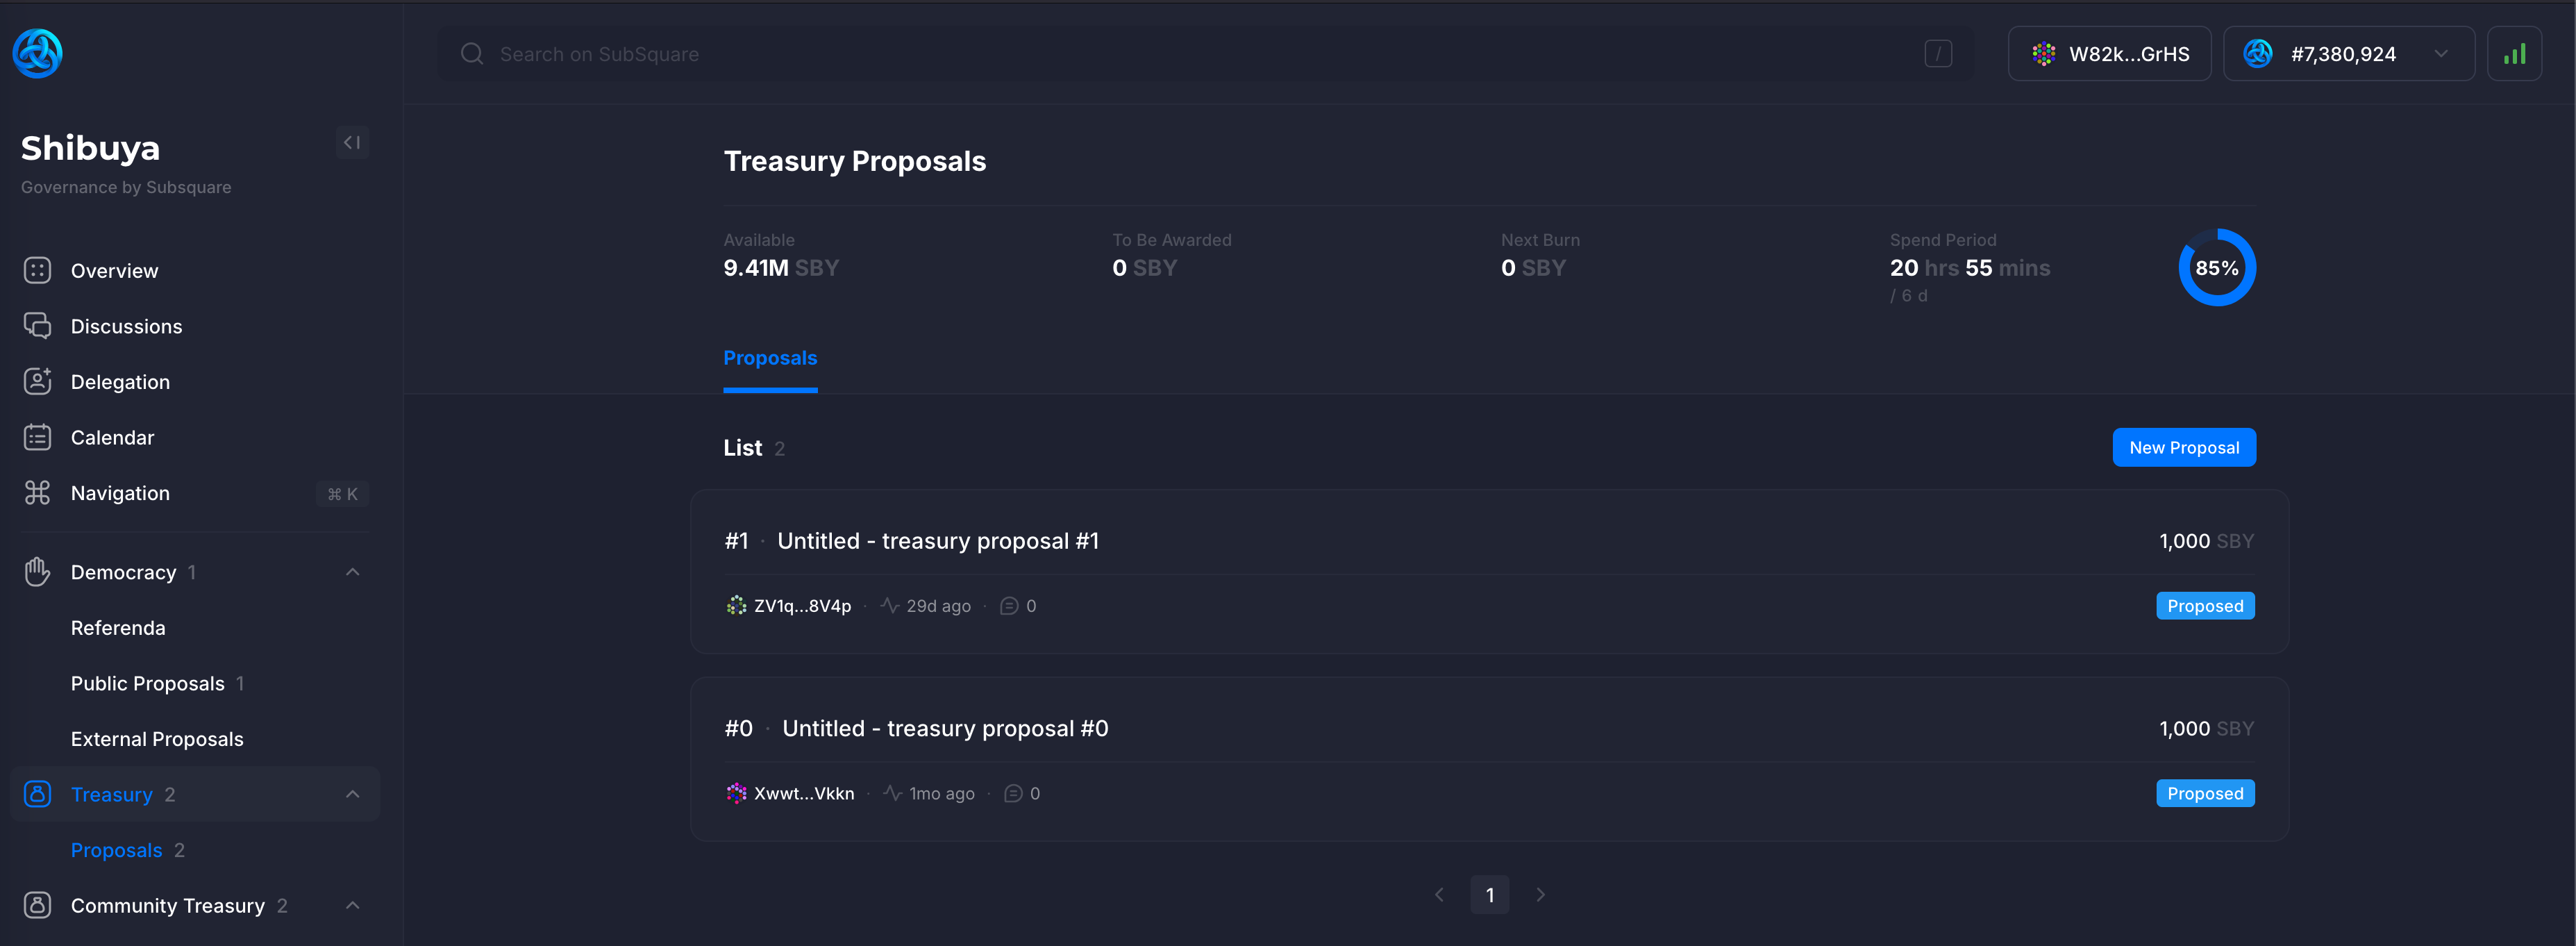
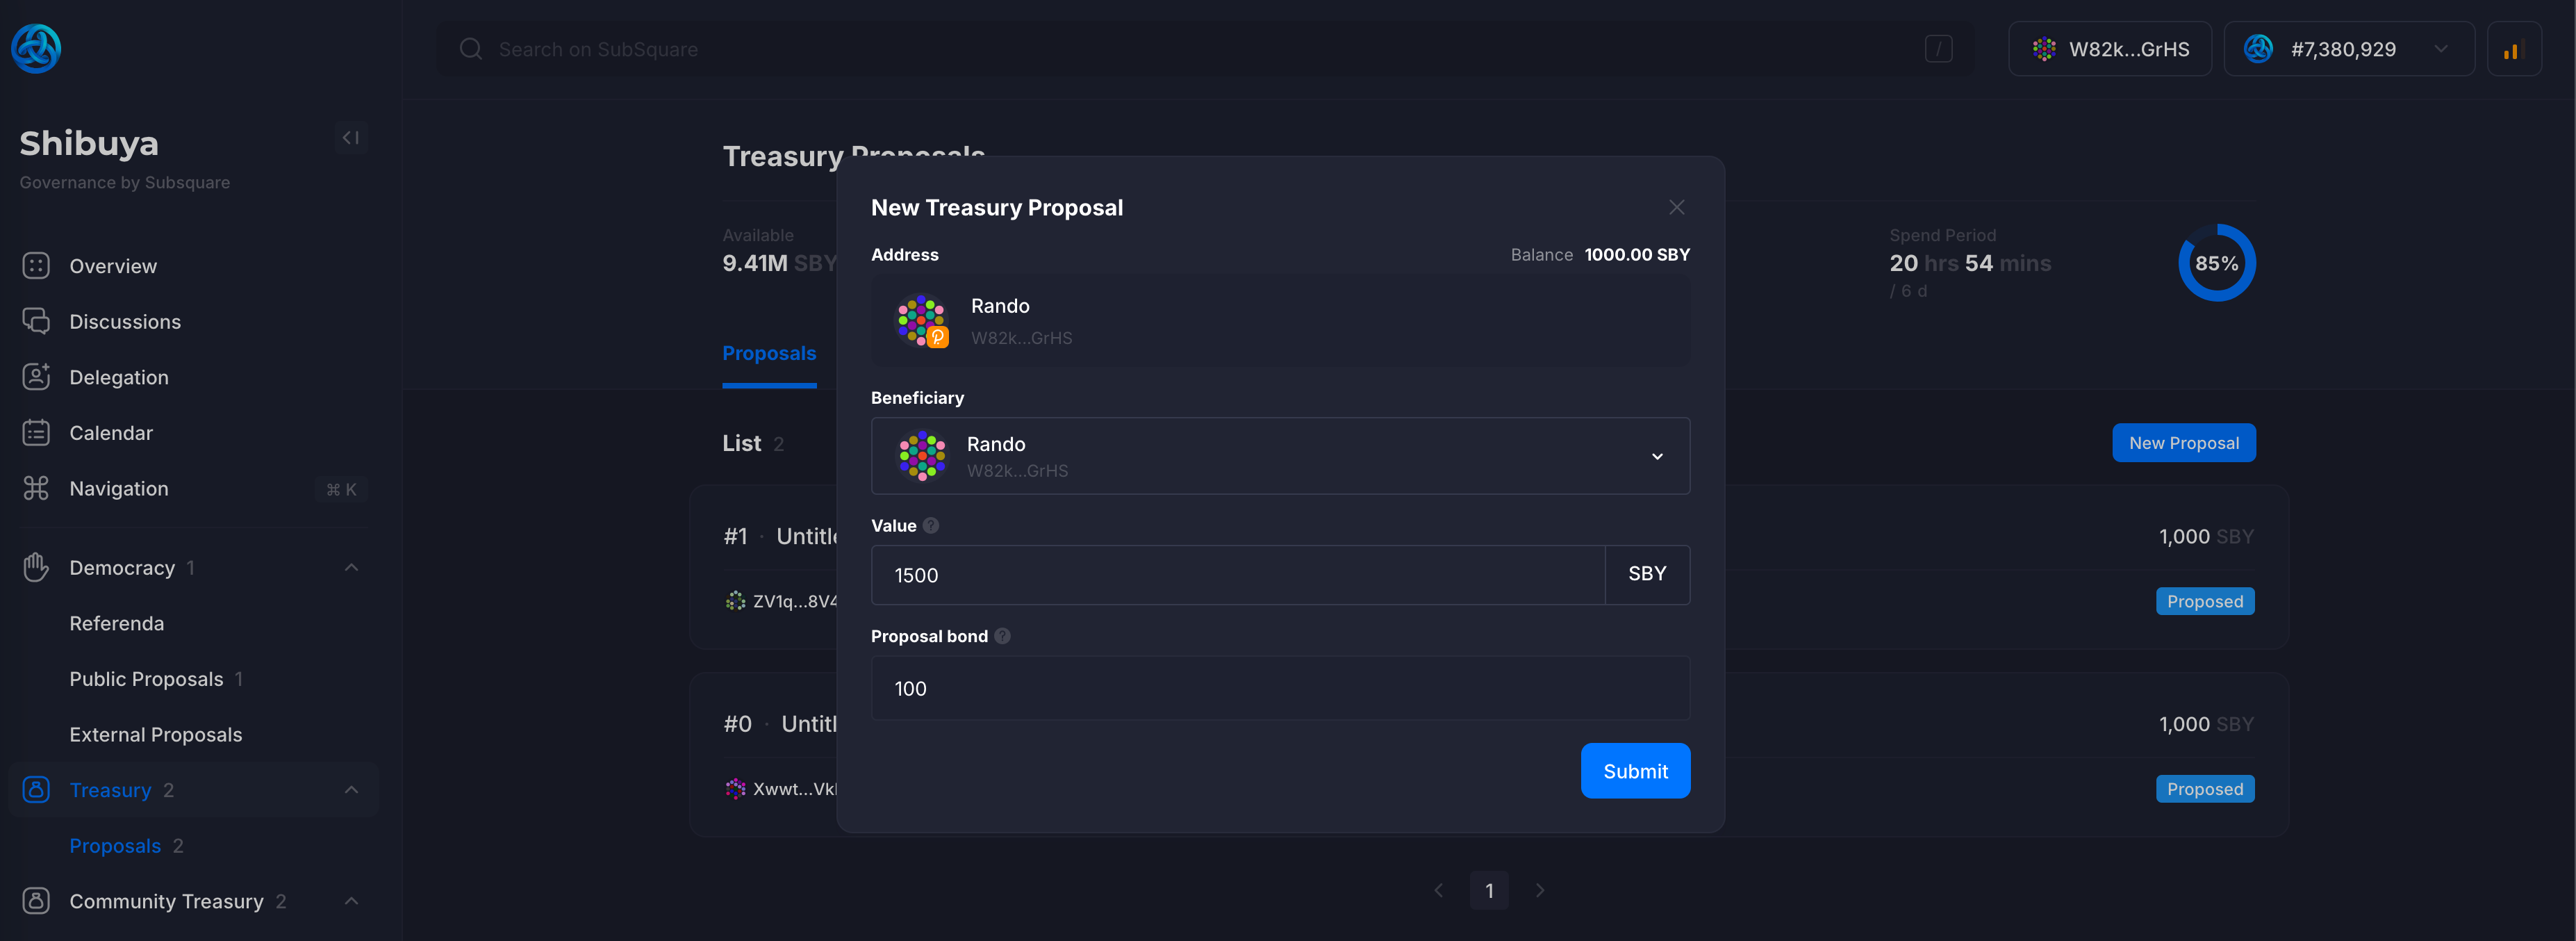
Clicking on the New Proposal button will allow the creation of a new spending proposal.
User needs to pick the payout amount & the beneficiary.
The Proposal bond refers to the amount that needs to be deposited in order to create the proposal.
If the proposal is rejected, the bond will be slashed.
Otherwise, the bond will be refunded.
After submitting the proposal, it will be displayed on the treasury page. The proposal name & description can be edited.
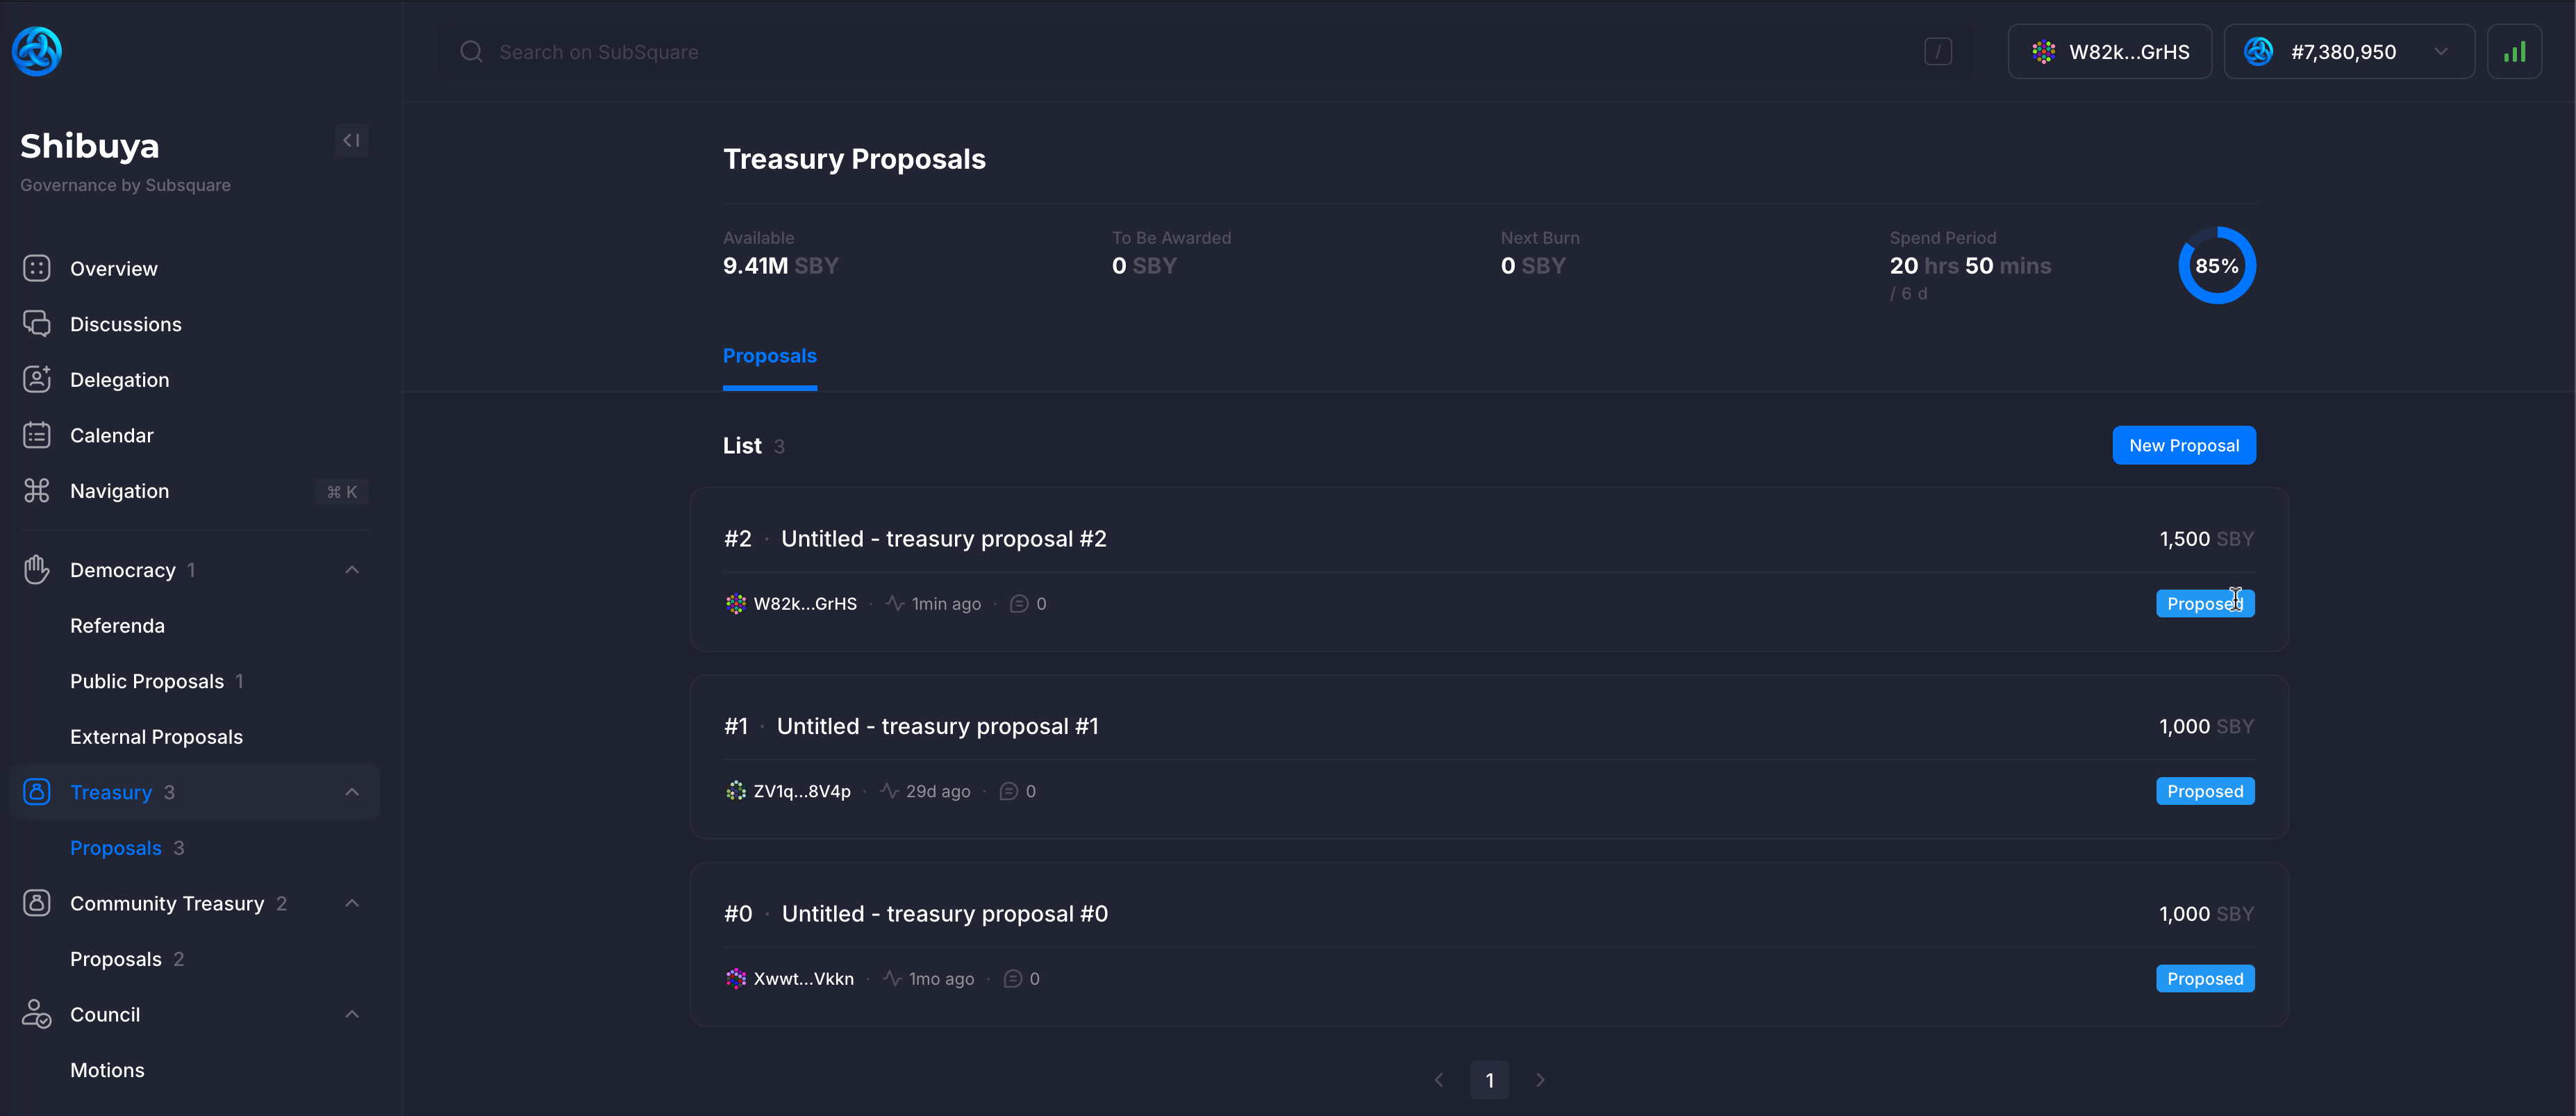
You can reuse the exact same steps for community treasury proposals.
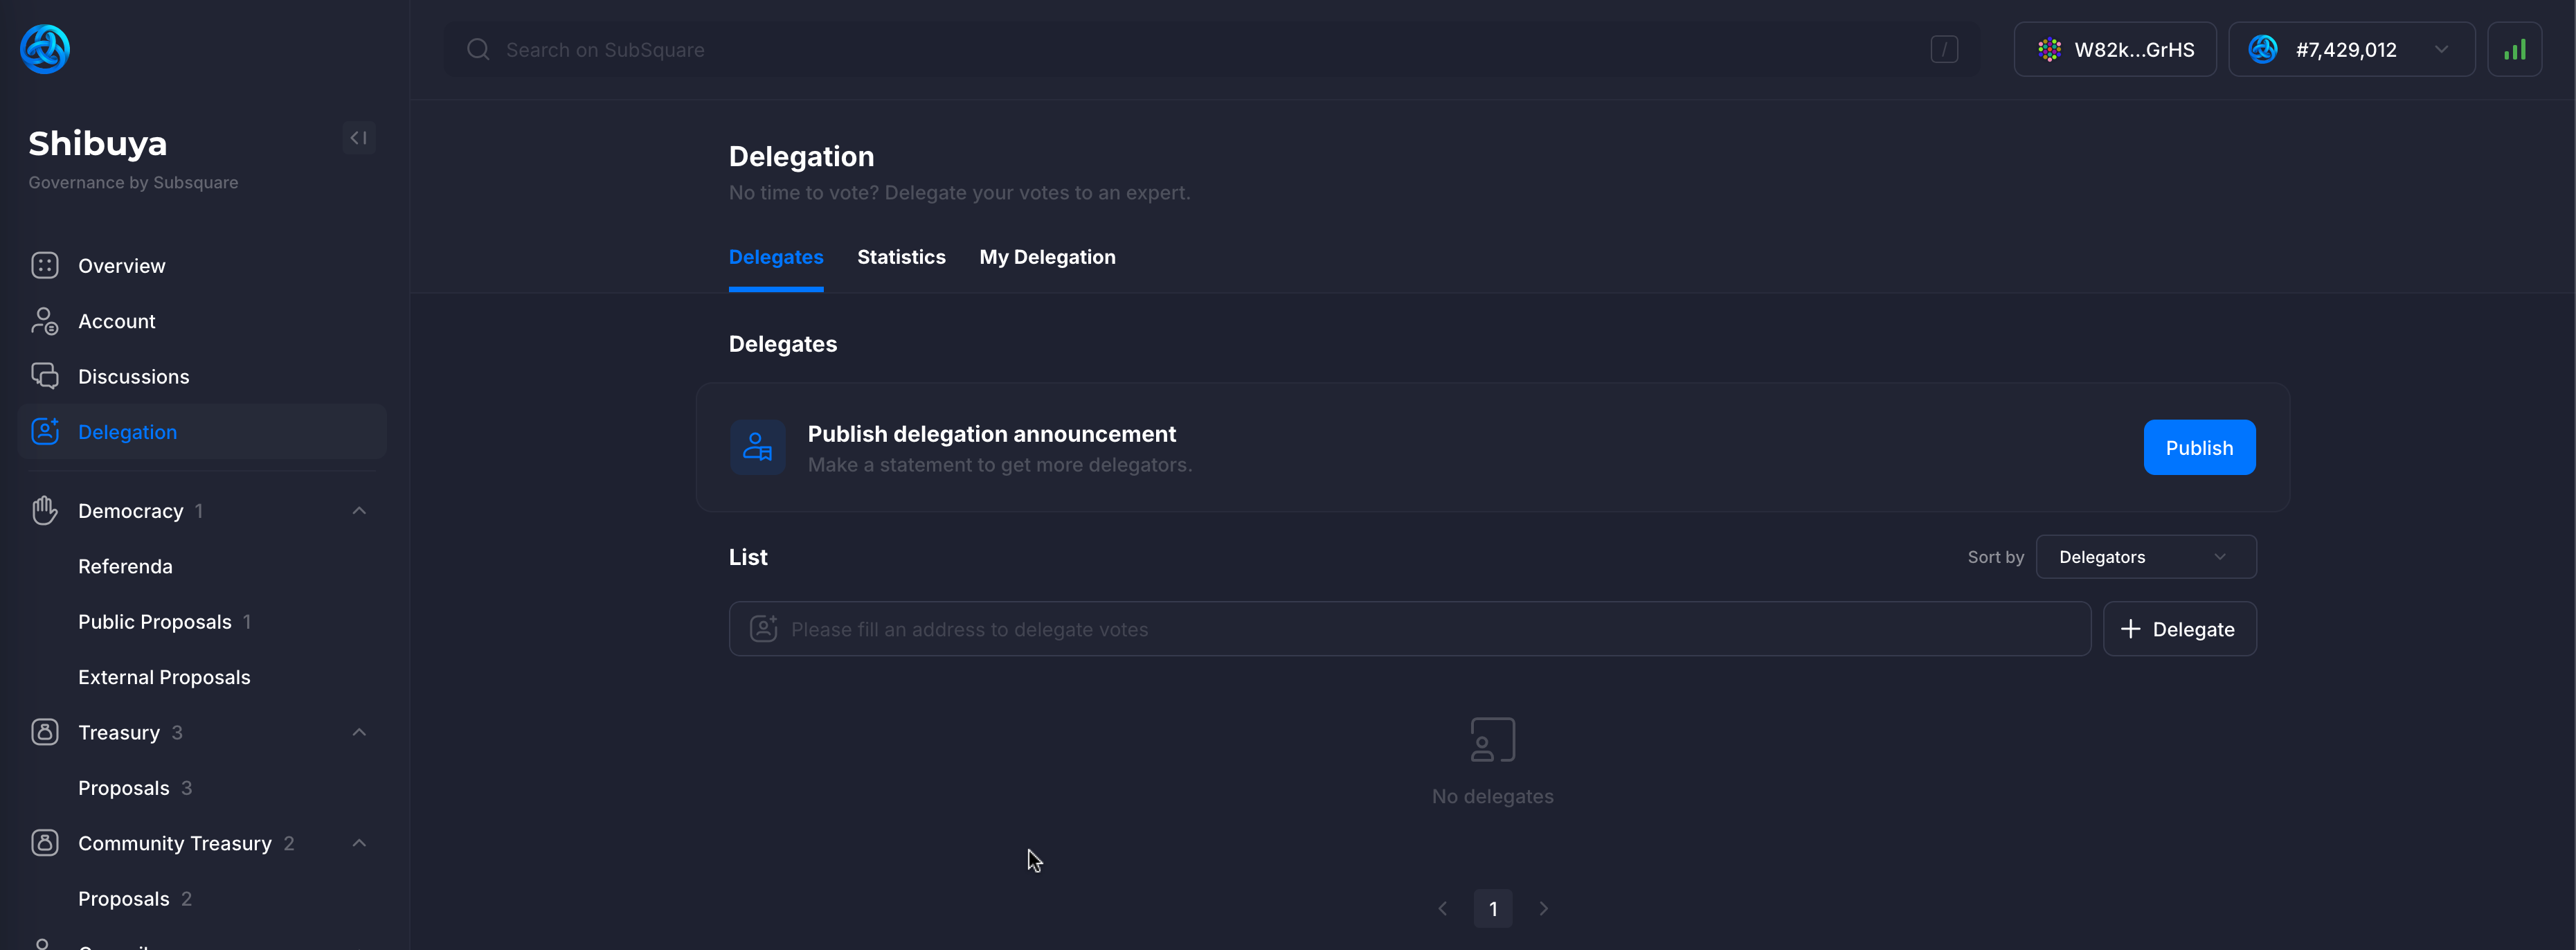
Vote Delegation
Click on the Delegation tab on the sidebar to access the vote delegation page.
This is an overview of delegation related actions and statistics.
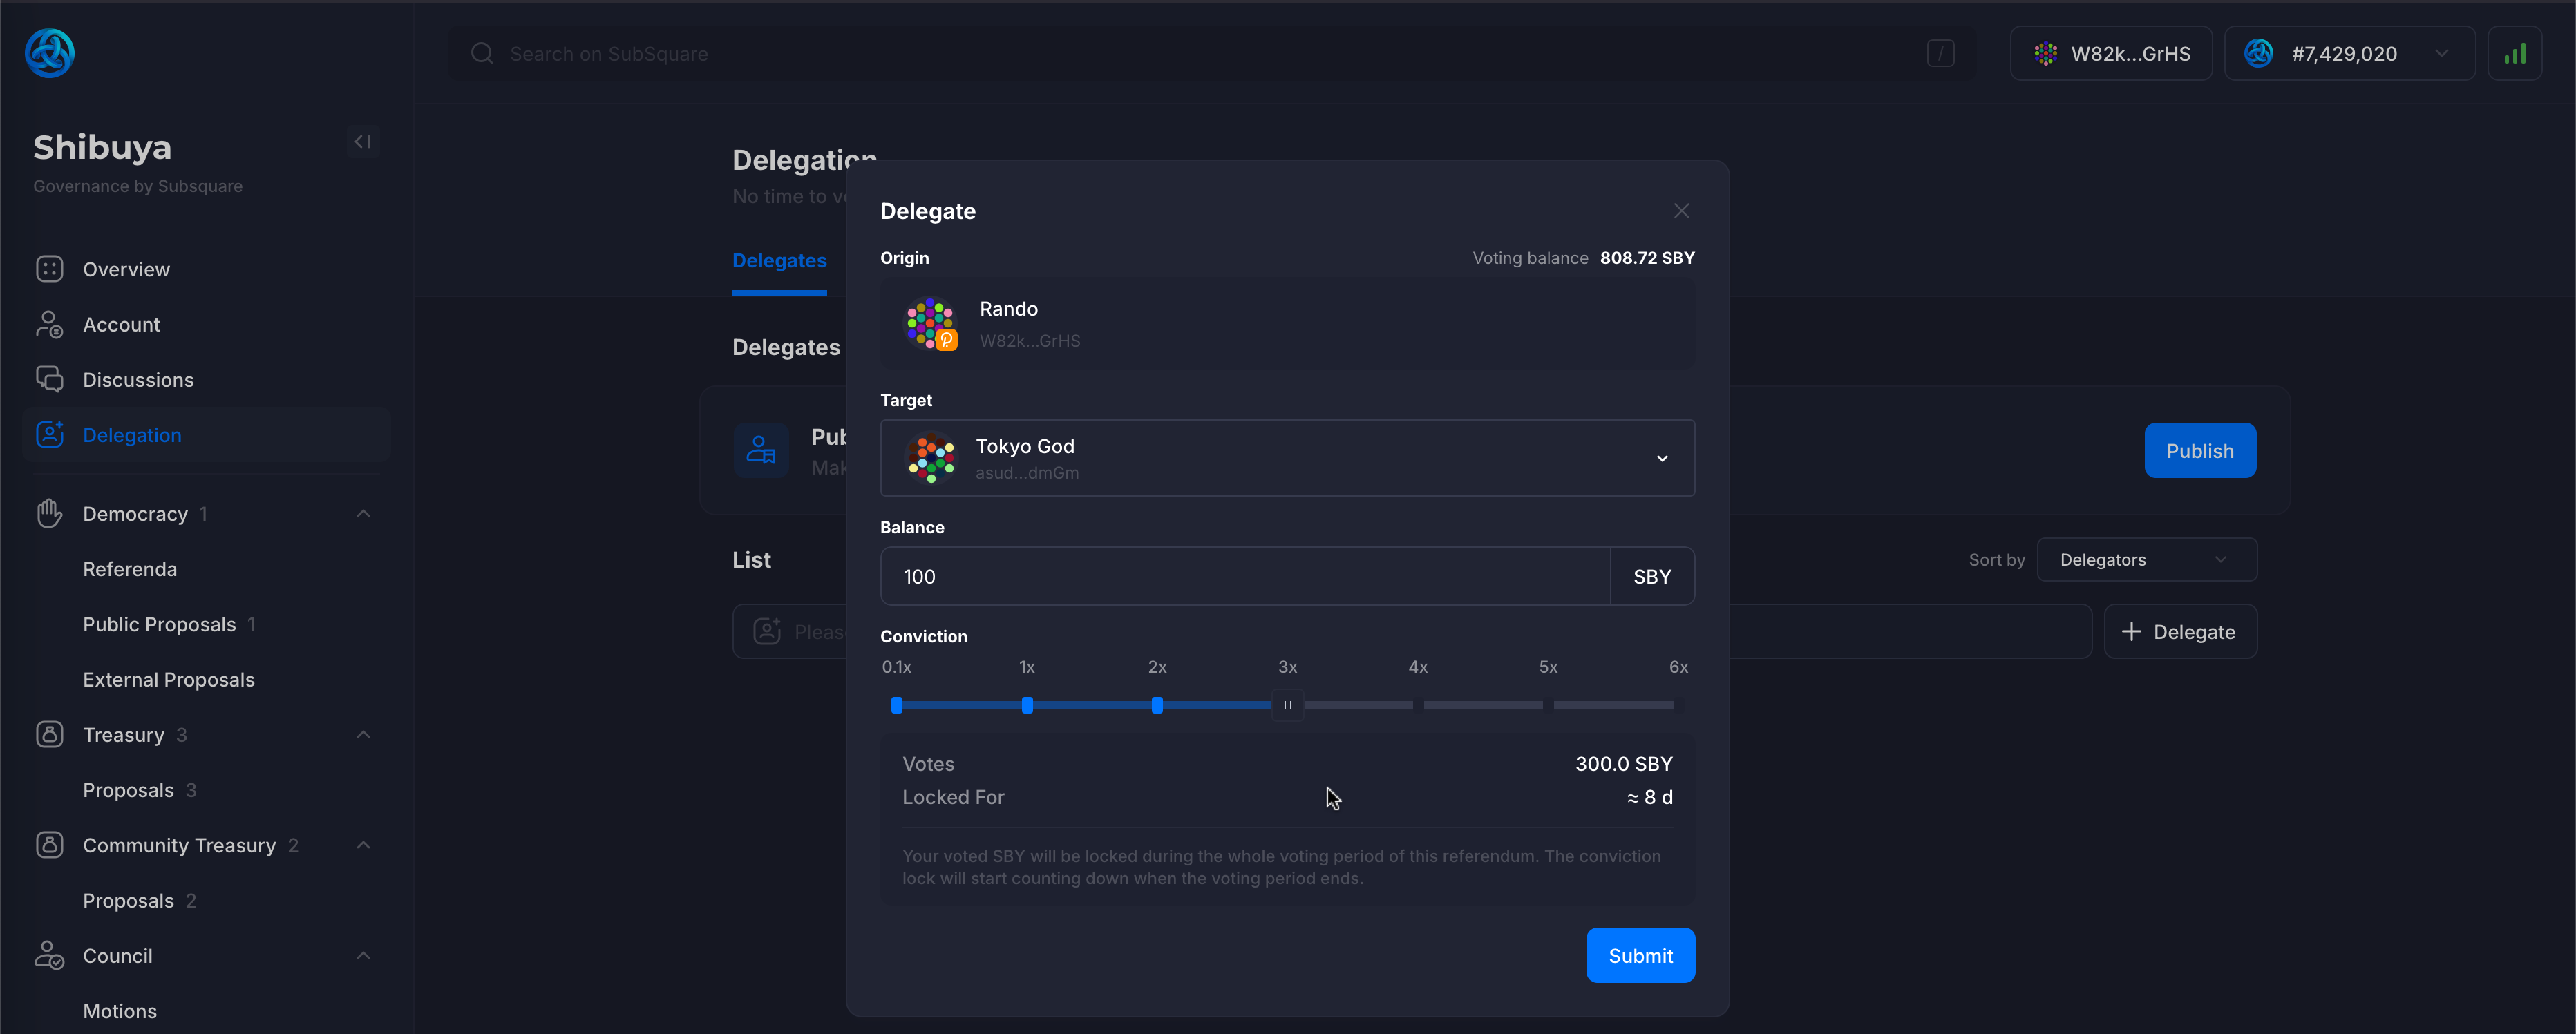
Clicking on the + Delegate button allows you to delegate votes to another account
The Target is the account to which the votes are being delegated to.
The Balance is the amount of native currency we're delegating. This is the amount that will be locked.
The action of delegating voting power DOES NOT transfer the ownership of the tokens. They are merely locked for normal use, but remain in the ownership of the delegator.
The Conviction setting determines how much your voting power is amplified in exchange for a longer token lock period.
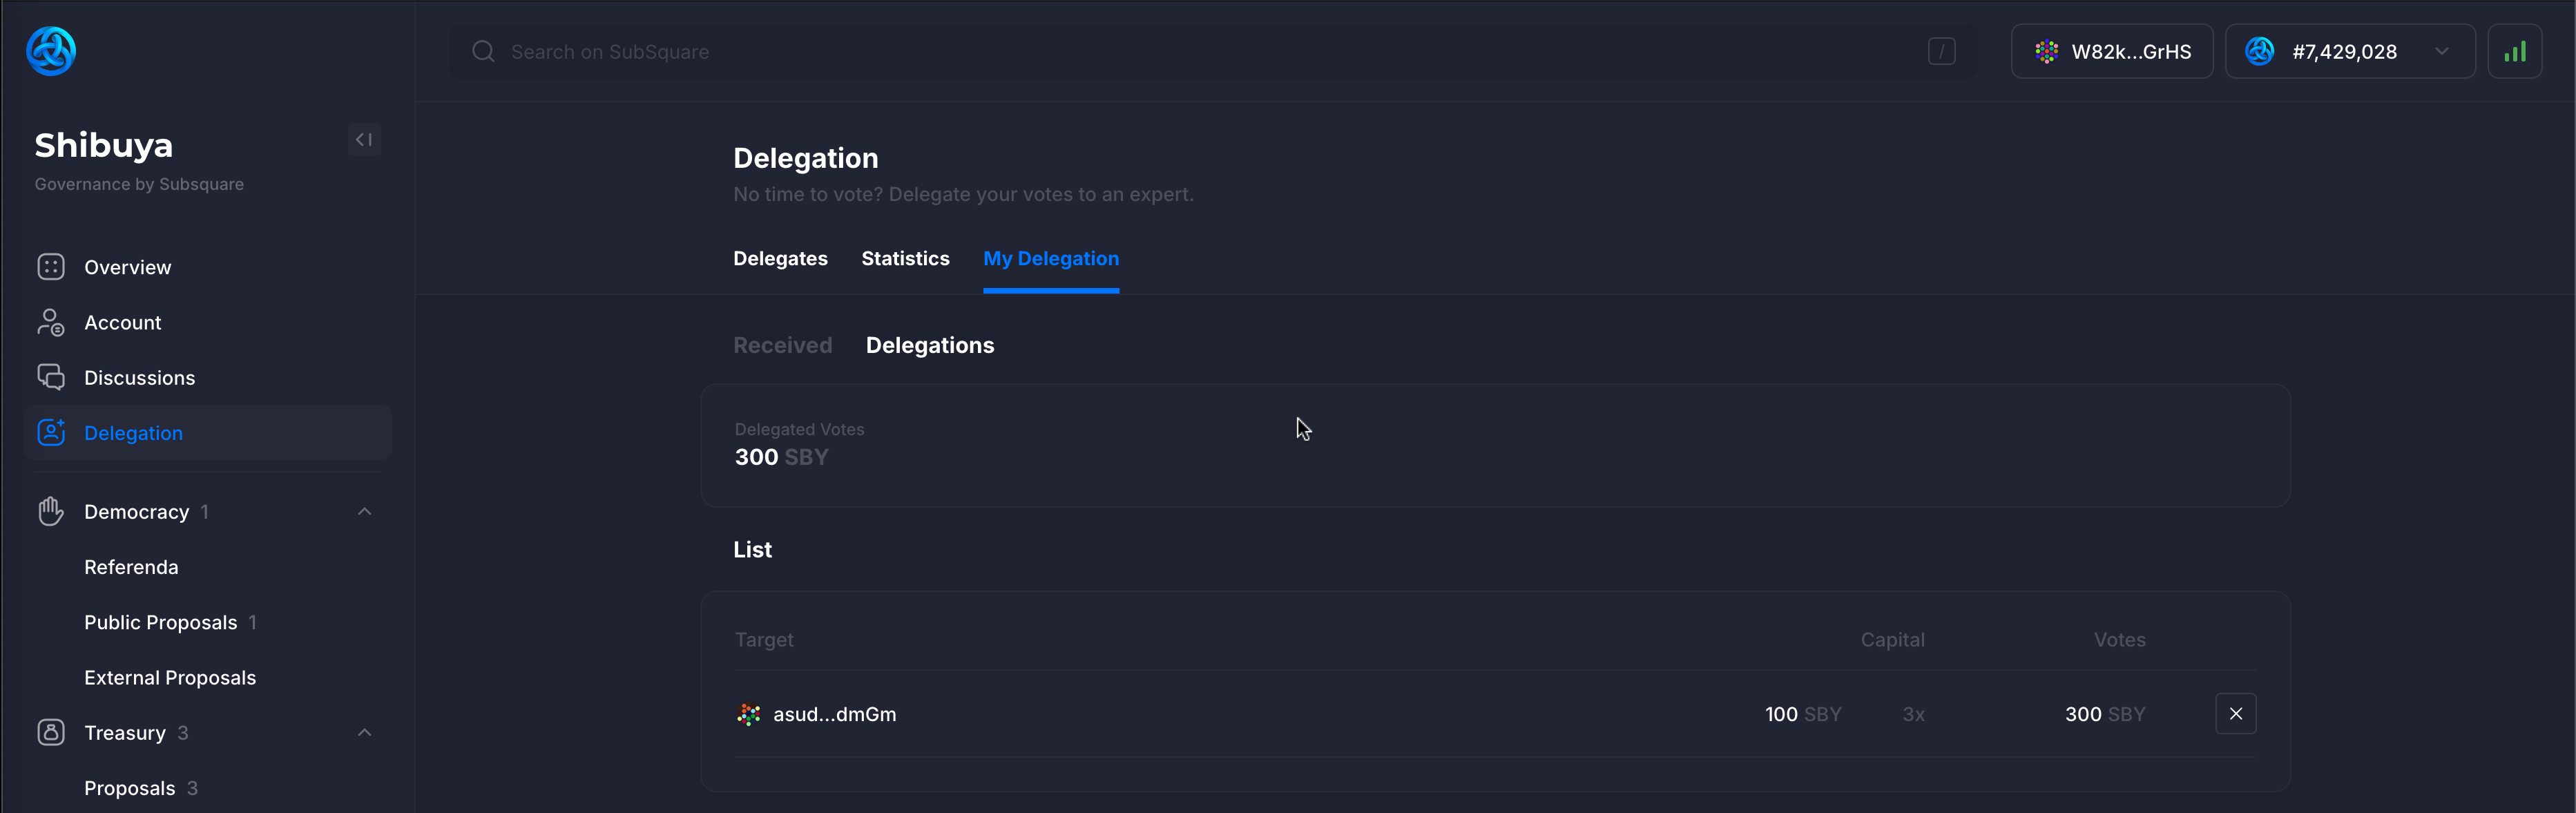
Once the delegation has been submitted, it will be displayed on the delegation page.
Clicking on the Details label will display more information about the delegation.
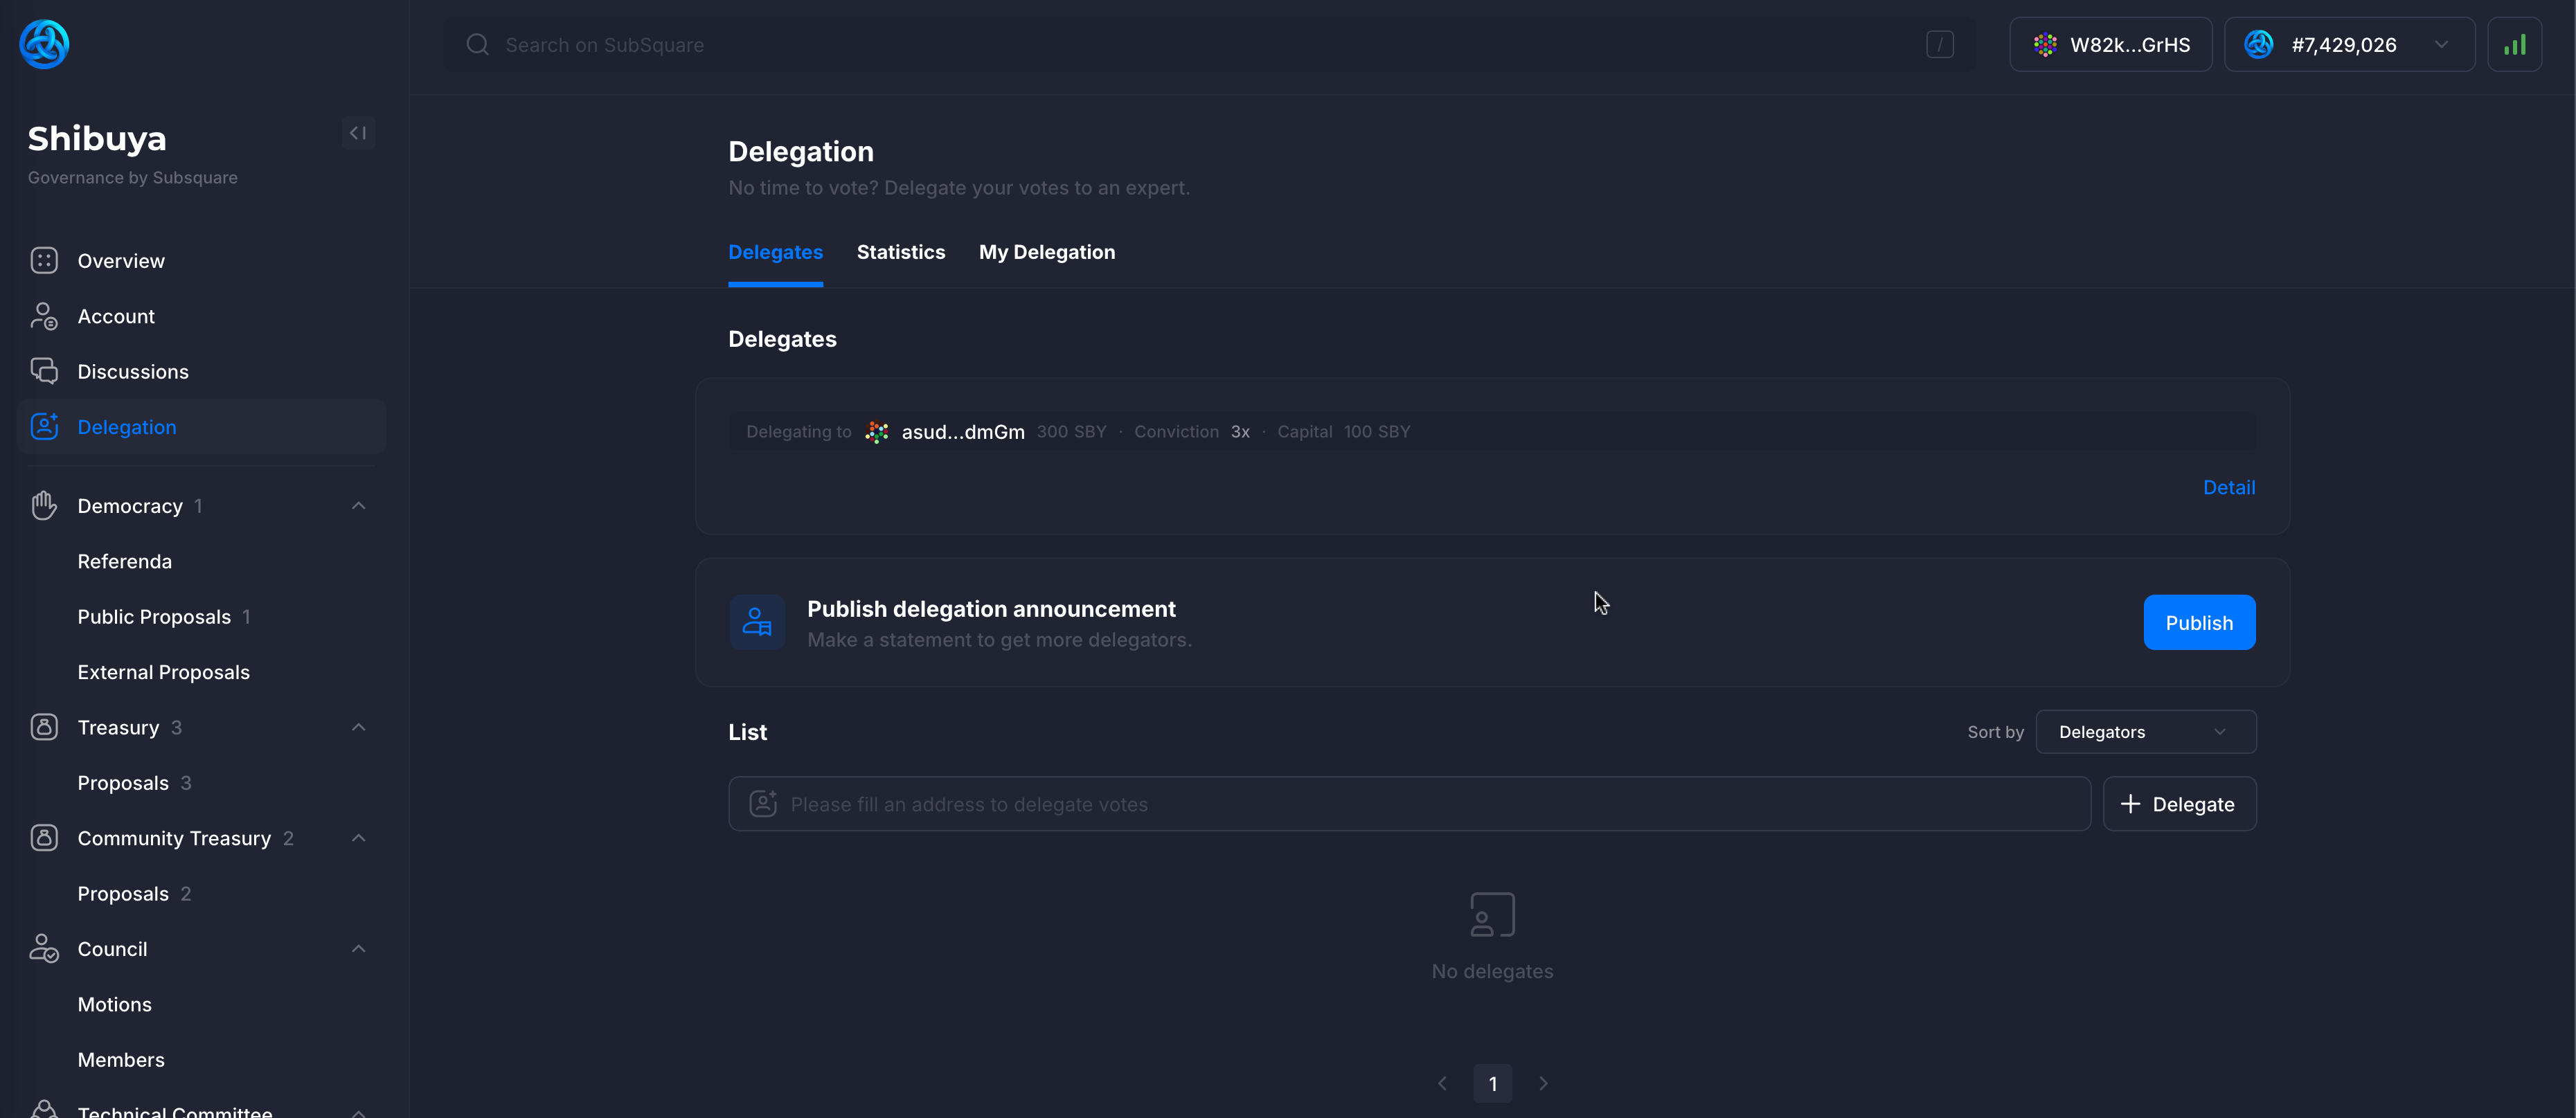
The amount and conviction are displayed.
Clicking on the X button allows to undelegate the votes, which will begin the unlocking period for the tokens.
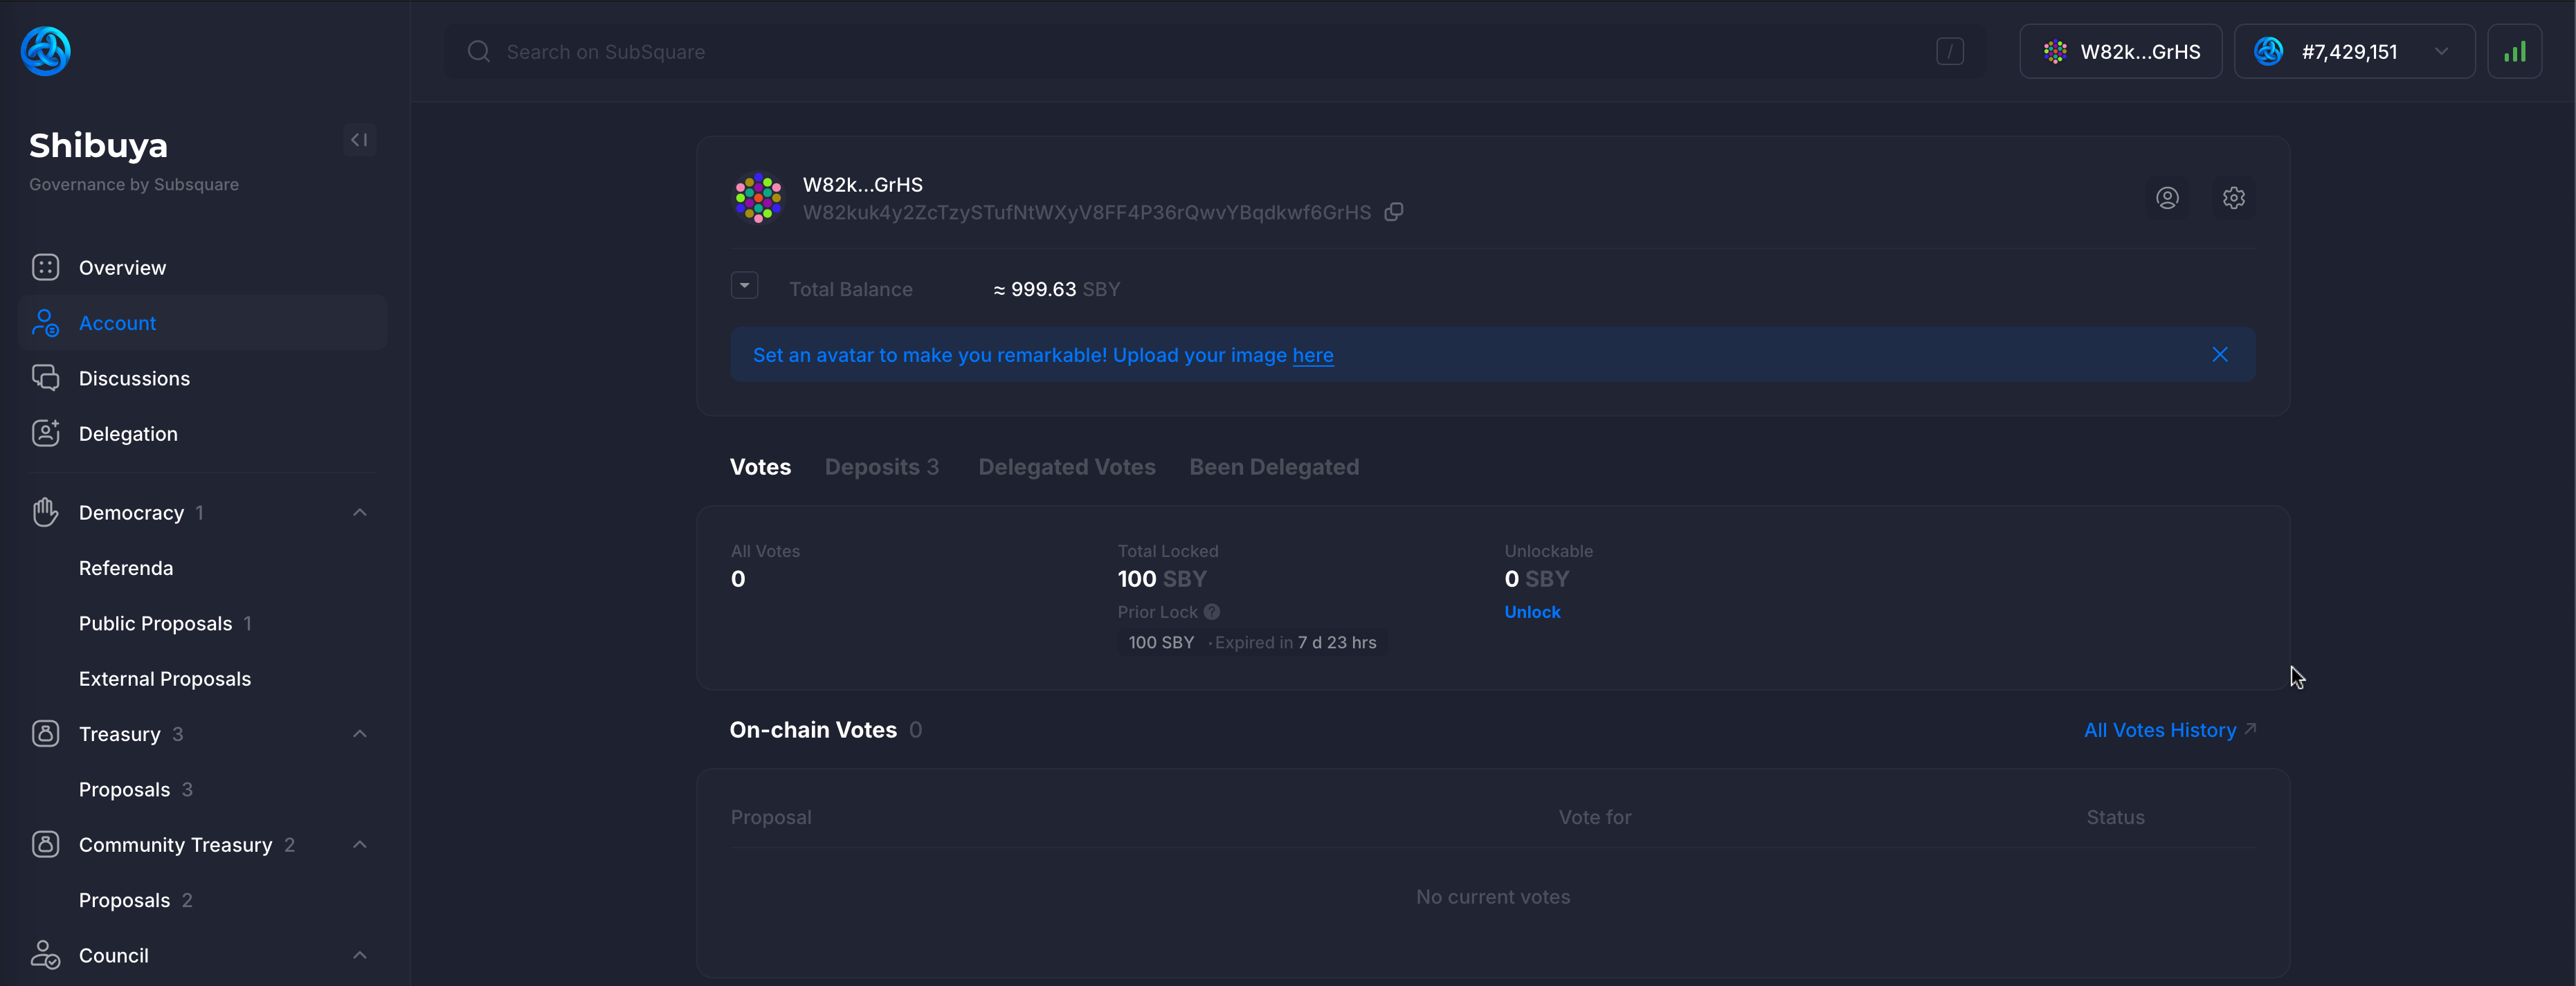
Clicking on the Account tab on the sidebar will display the account details.
The 100 SBY locked in previous steps with conviction set to 3 is displayed - equaling a total of 8 days of unlocking period.
Voting
Clicking on the Referenda tab on the sidebar, under the Democracy tab, will display all of the referenda, including the ongoing ones, failed ones & executed ones.
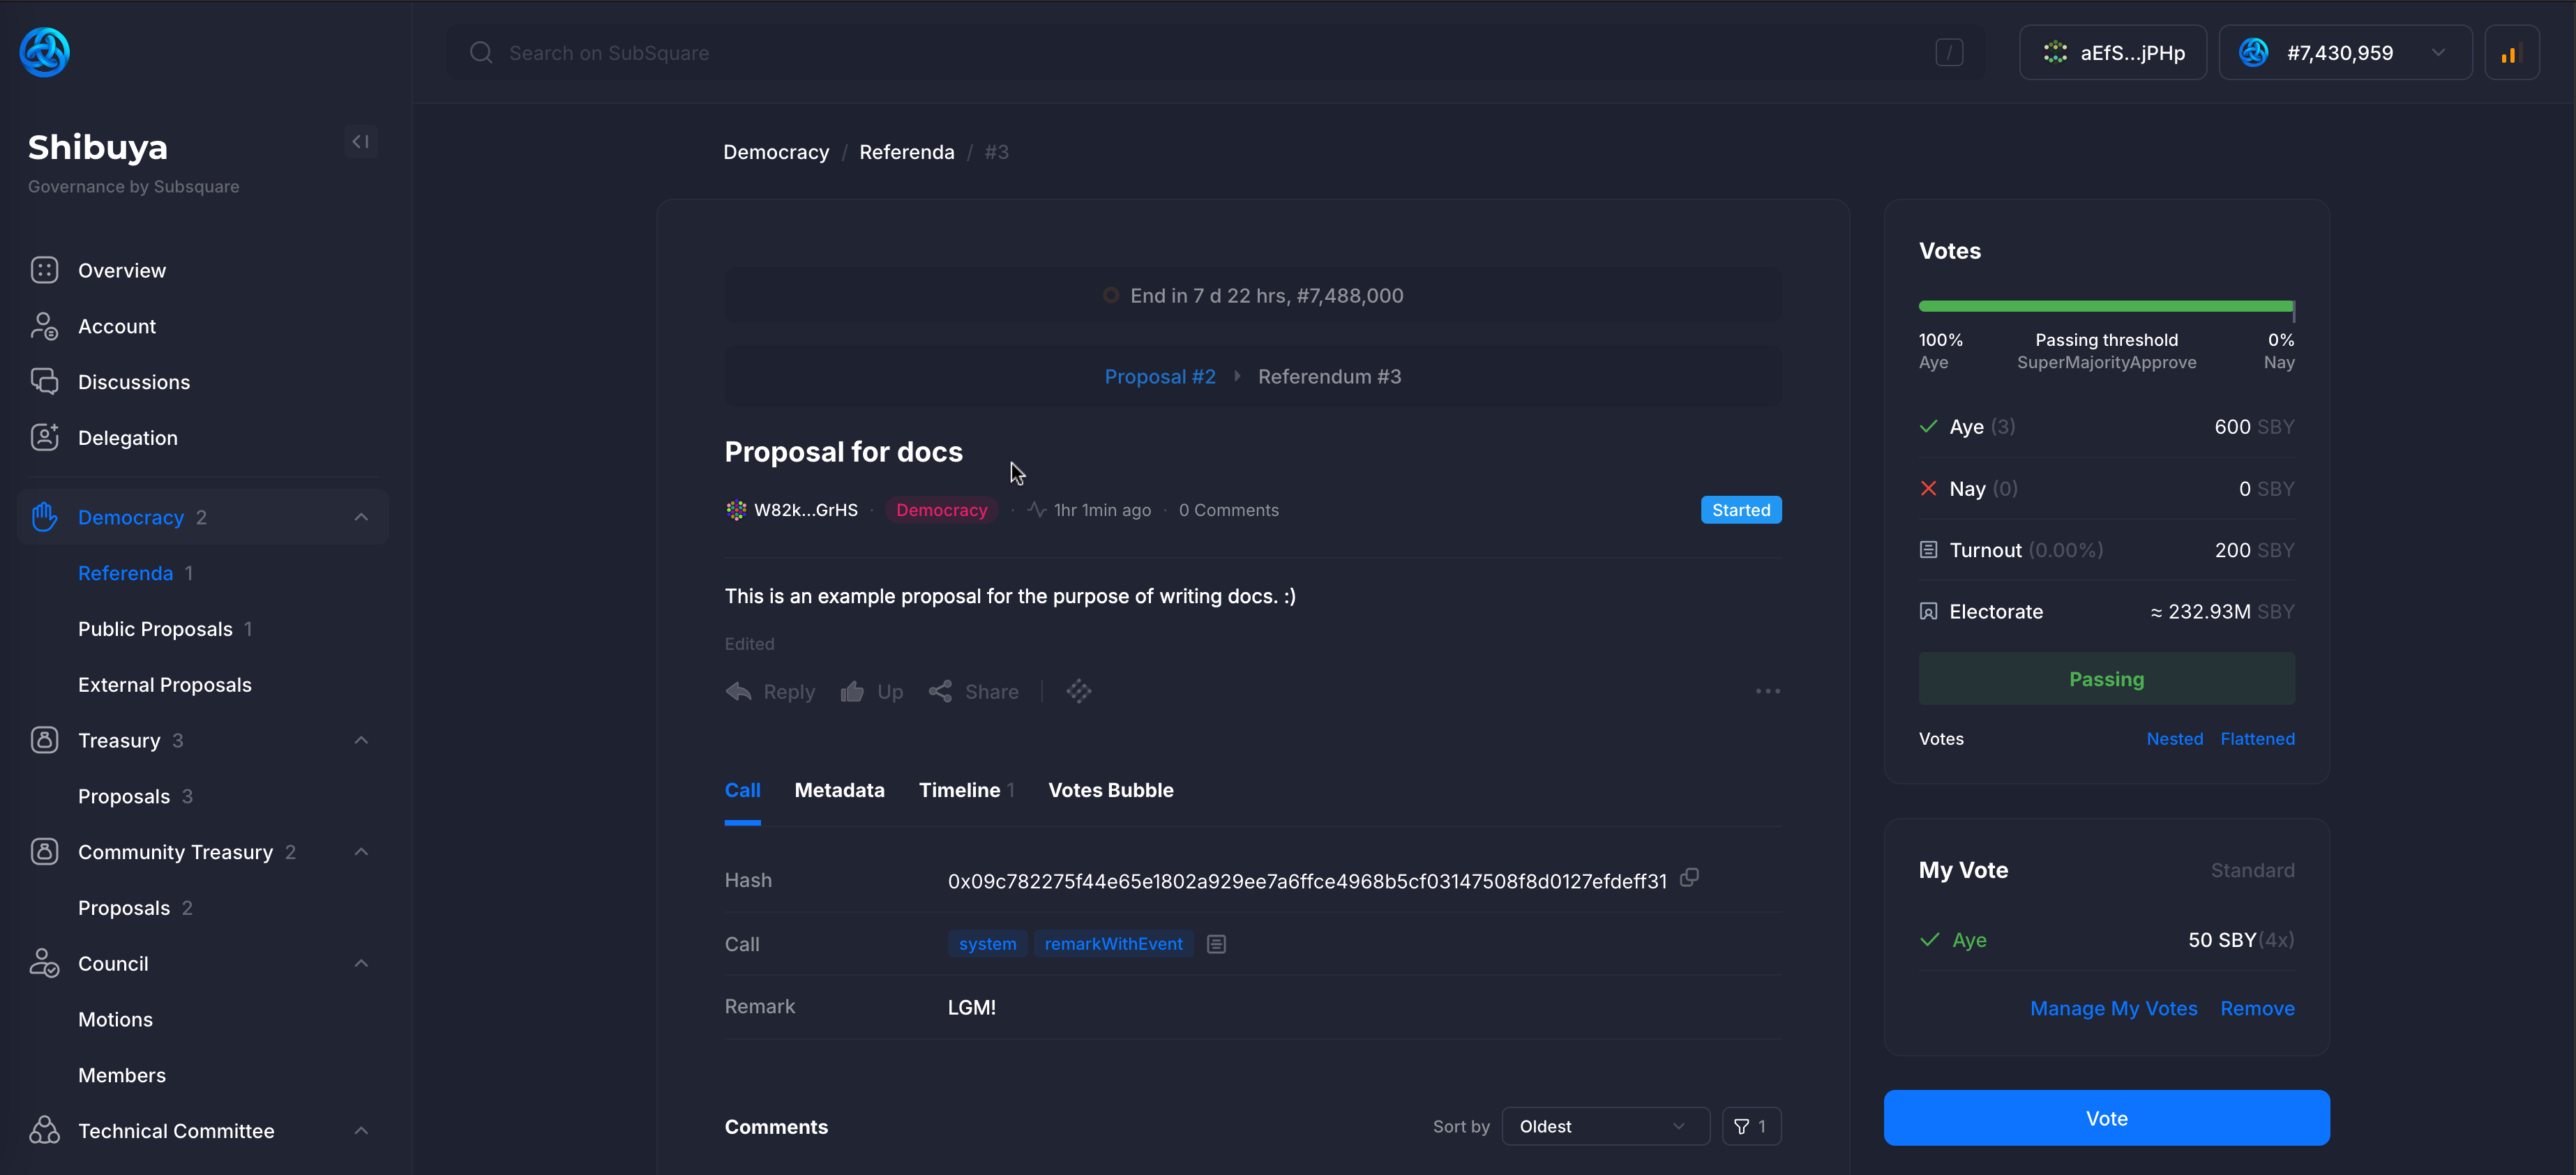
For the sake of this example, the referendum named "Proposal for docs" will be used.
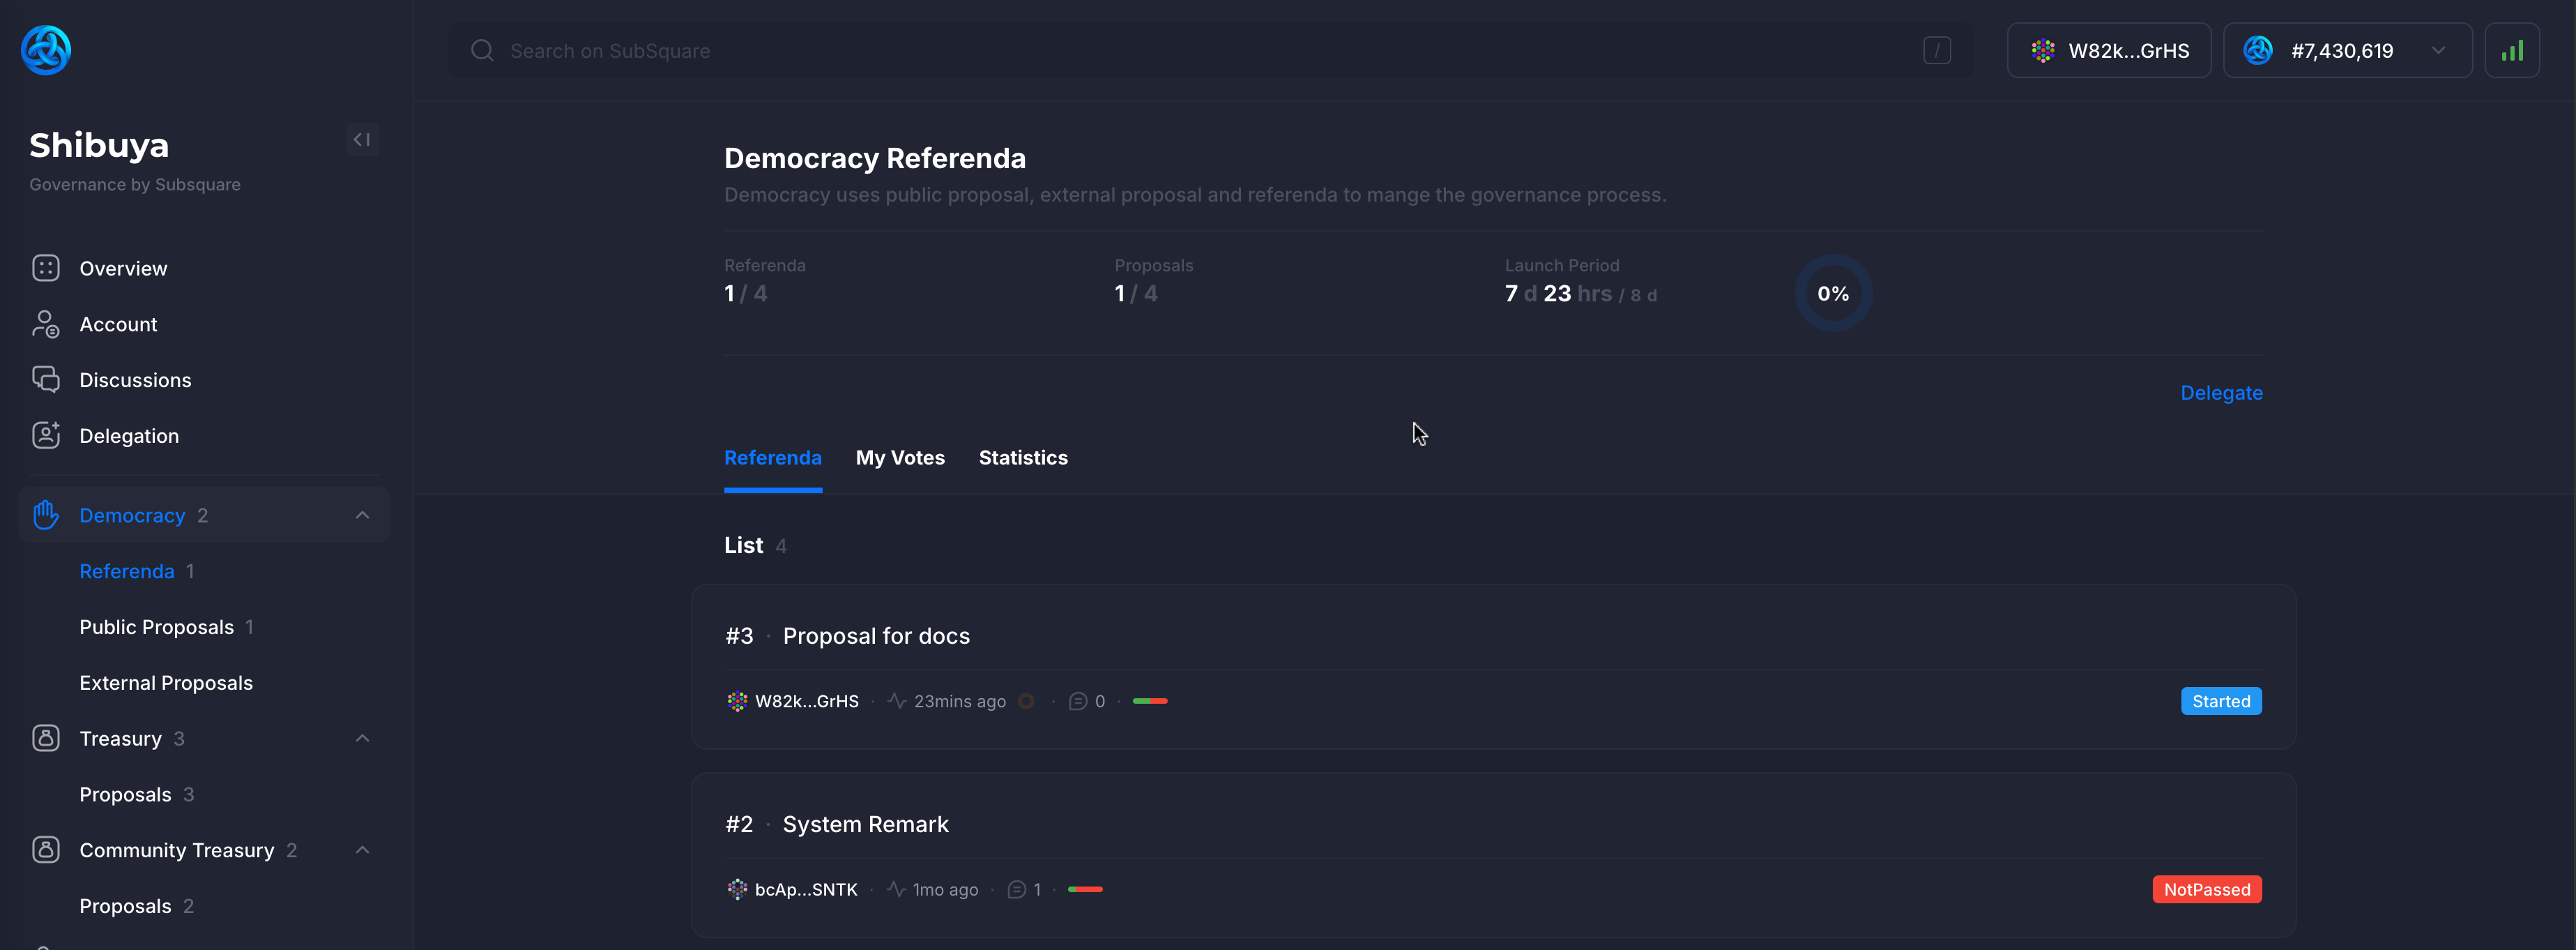
Clicking on it will display more details about the referendum as can be seen below.
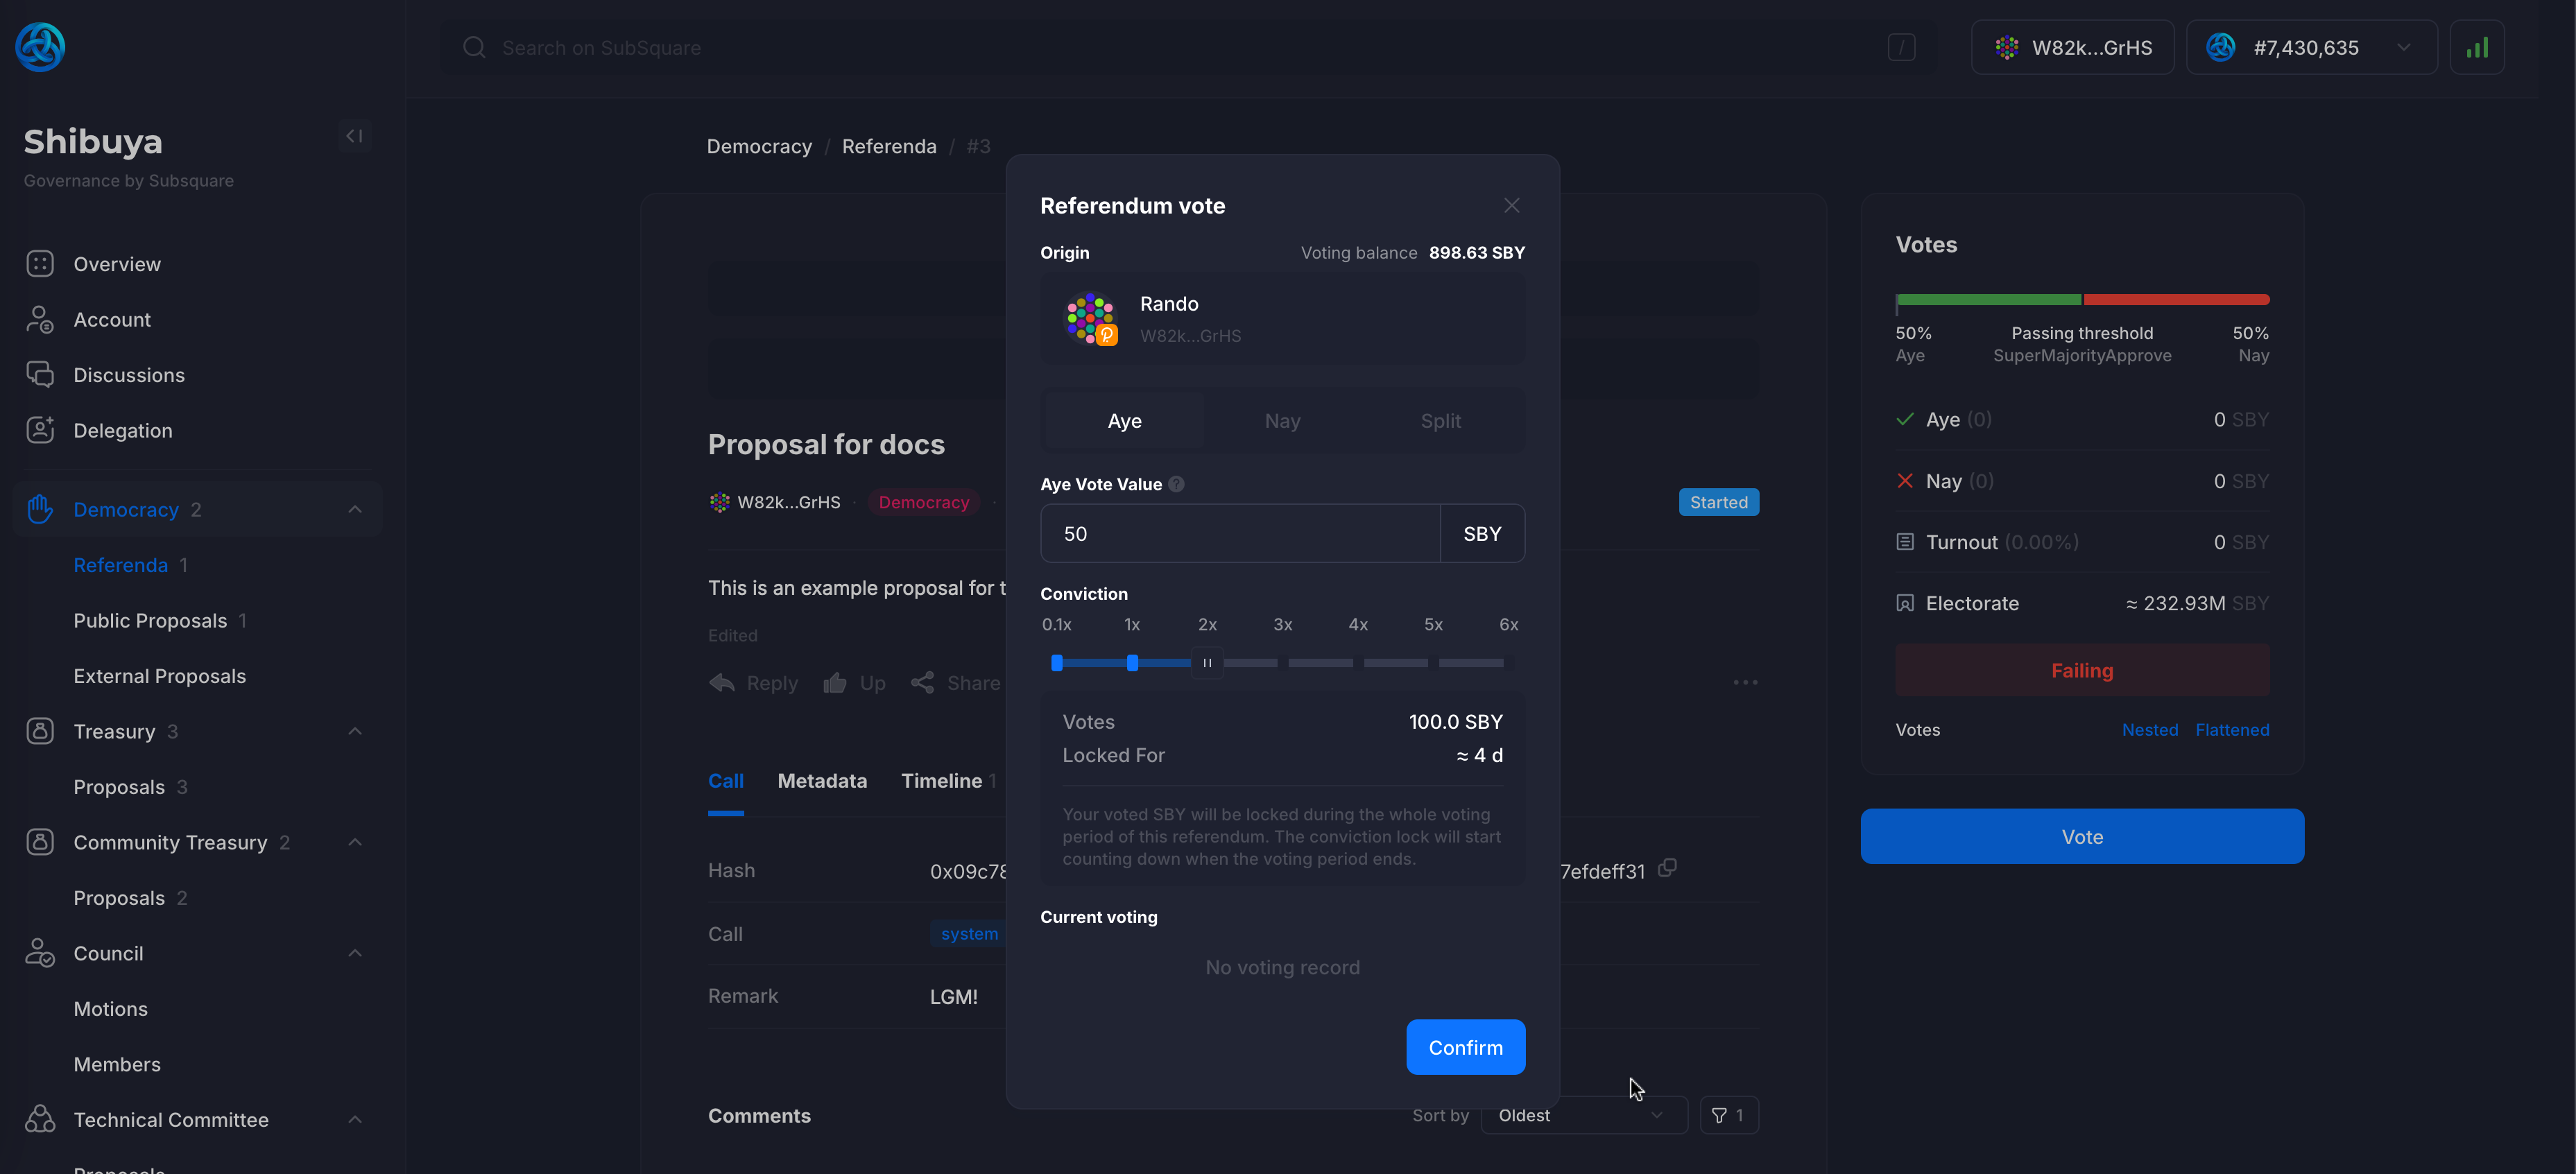
The user can decide to vote by clicking on the Vote button.
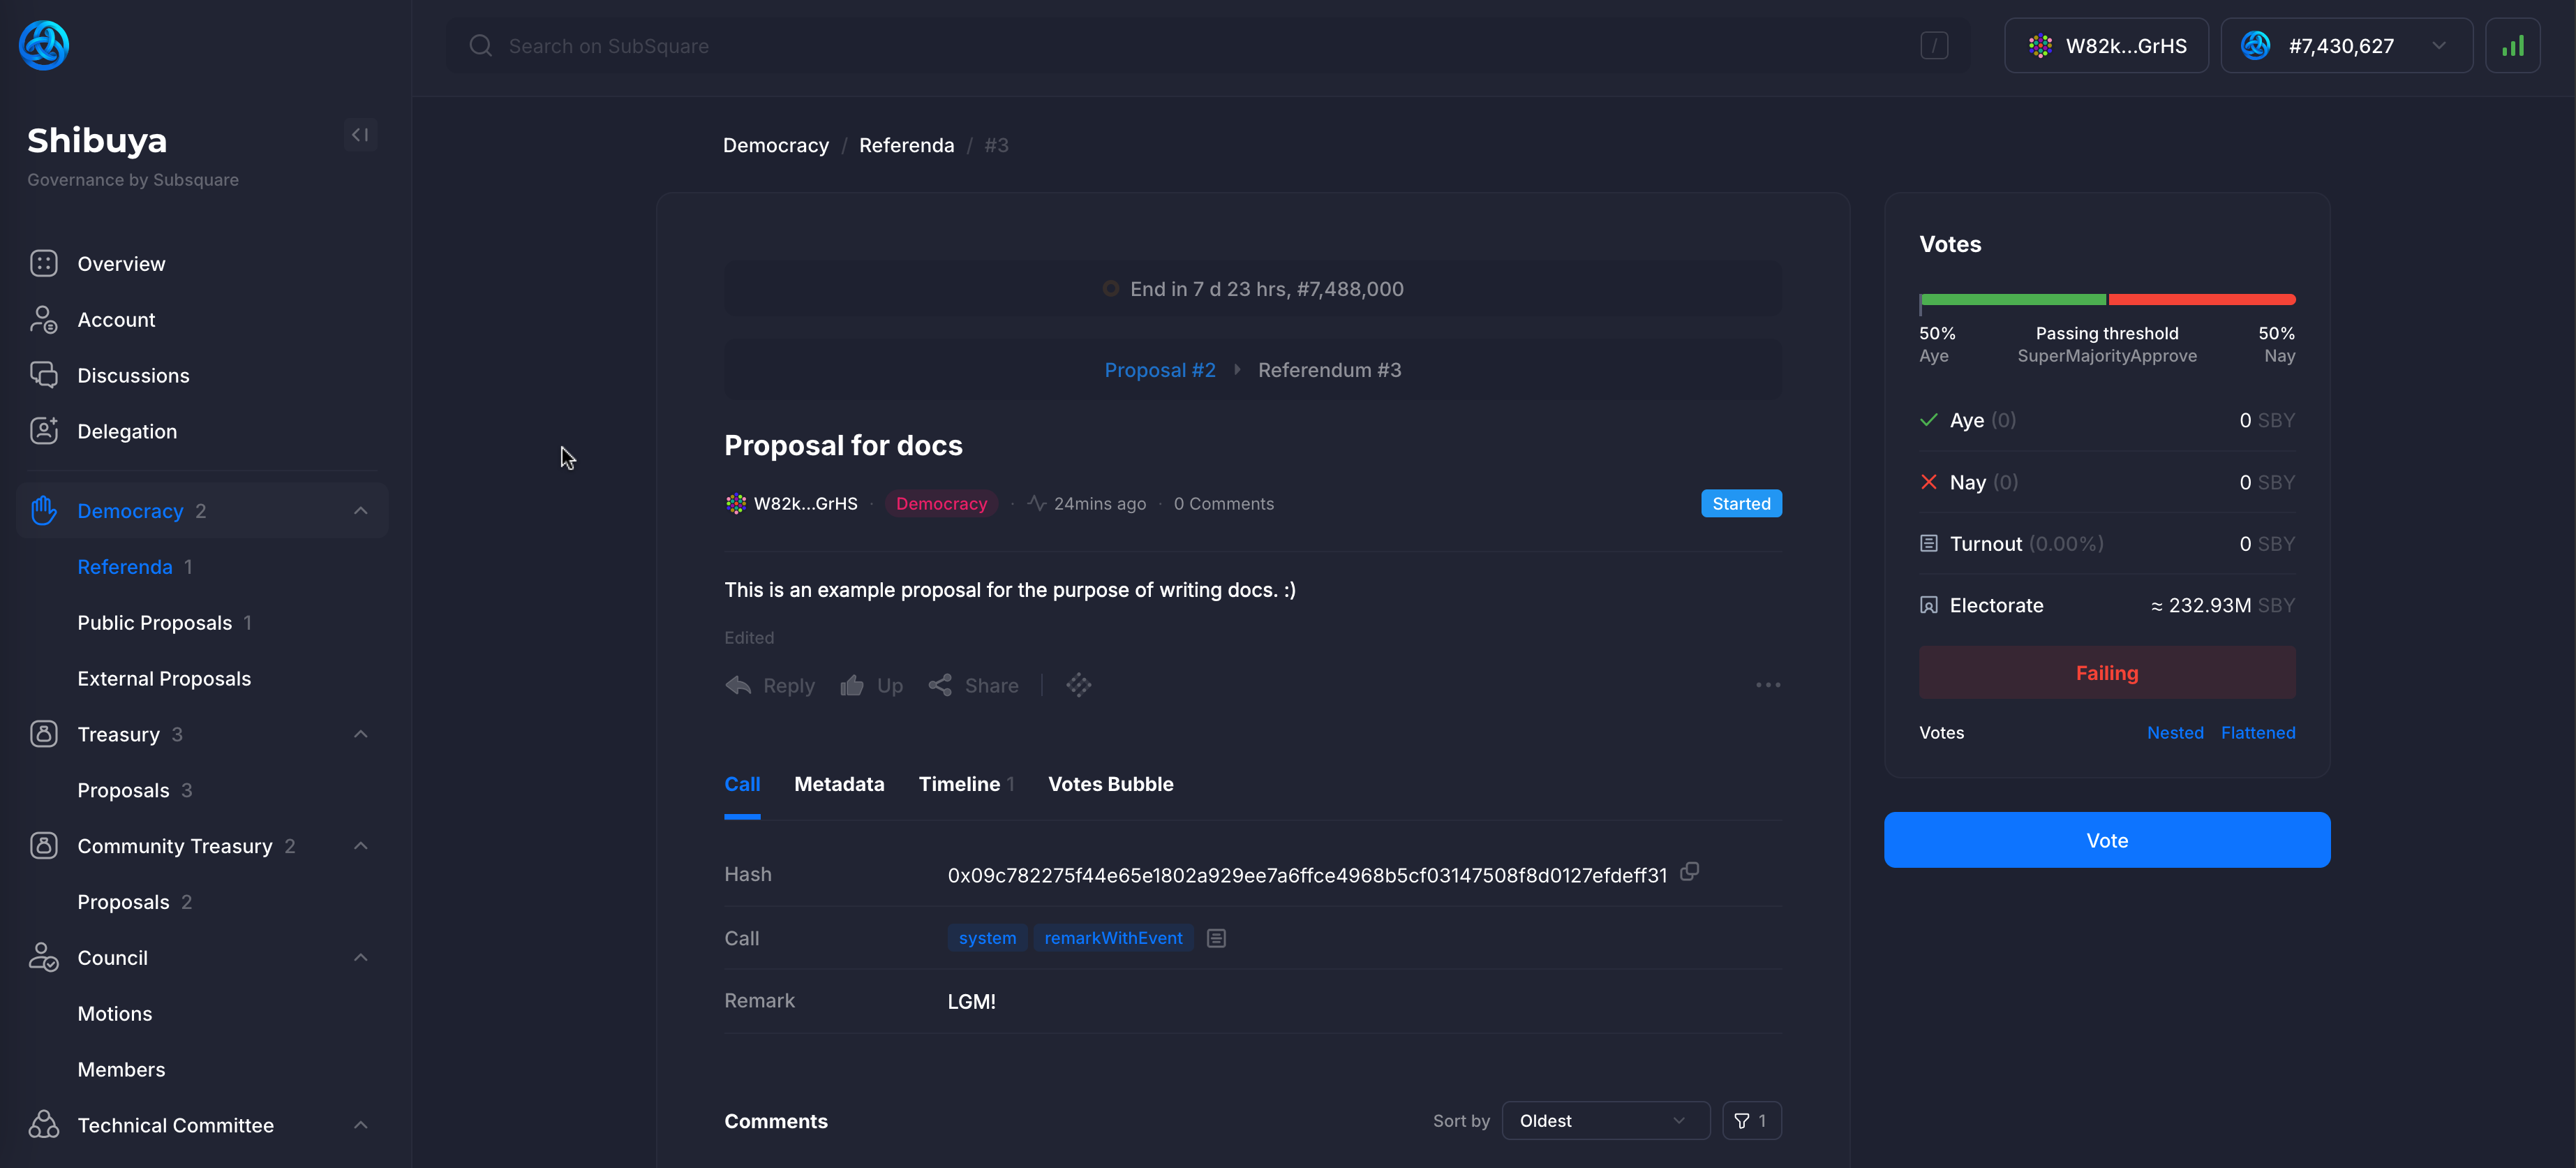
Vote can be aye or nay, or can even be split between the two options if the user desires.
The token amount to be used for voting needs to be specified - this is the amount that will be locked for the duration of the referendum and more if the referendum passes in the favor of the users vote. E.g. voting aye for a referendum, and having it fail will result in the tokens being immediately unlockable, without any waiting period.
Conviction can be set to amplify (or diminish) the voting power, at the expense of a longer (or shorter) unlocking period.
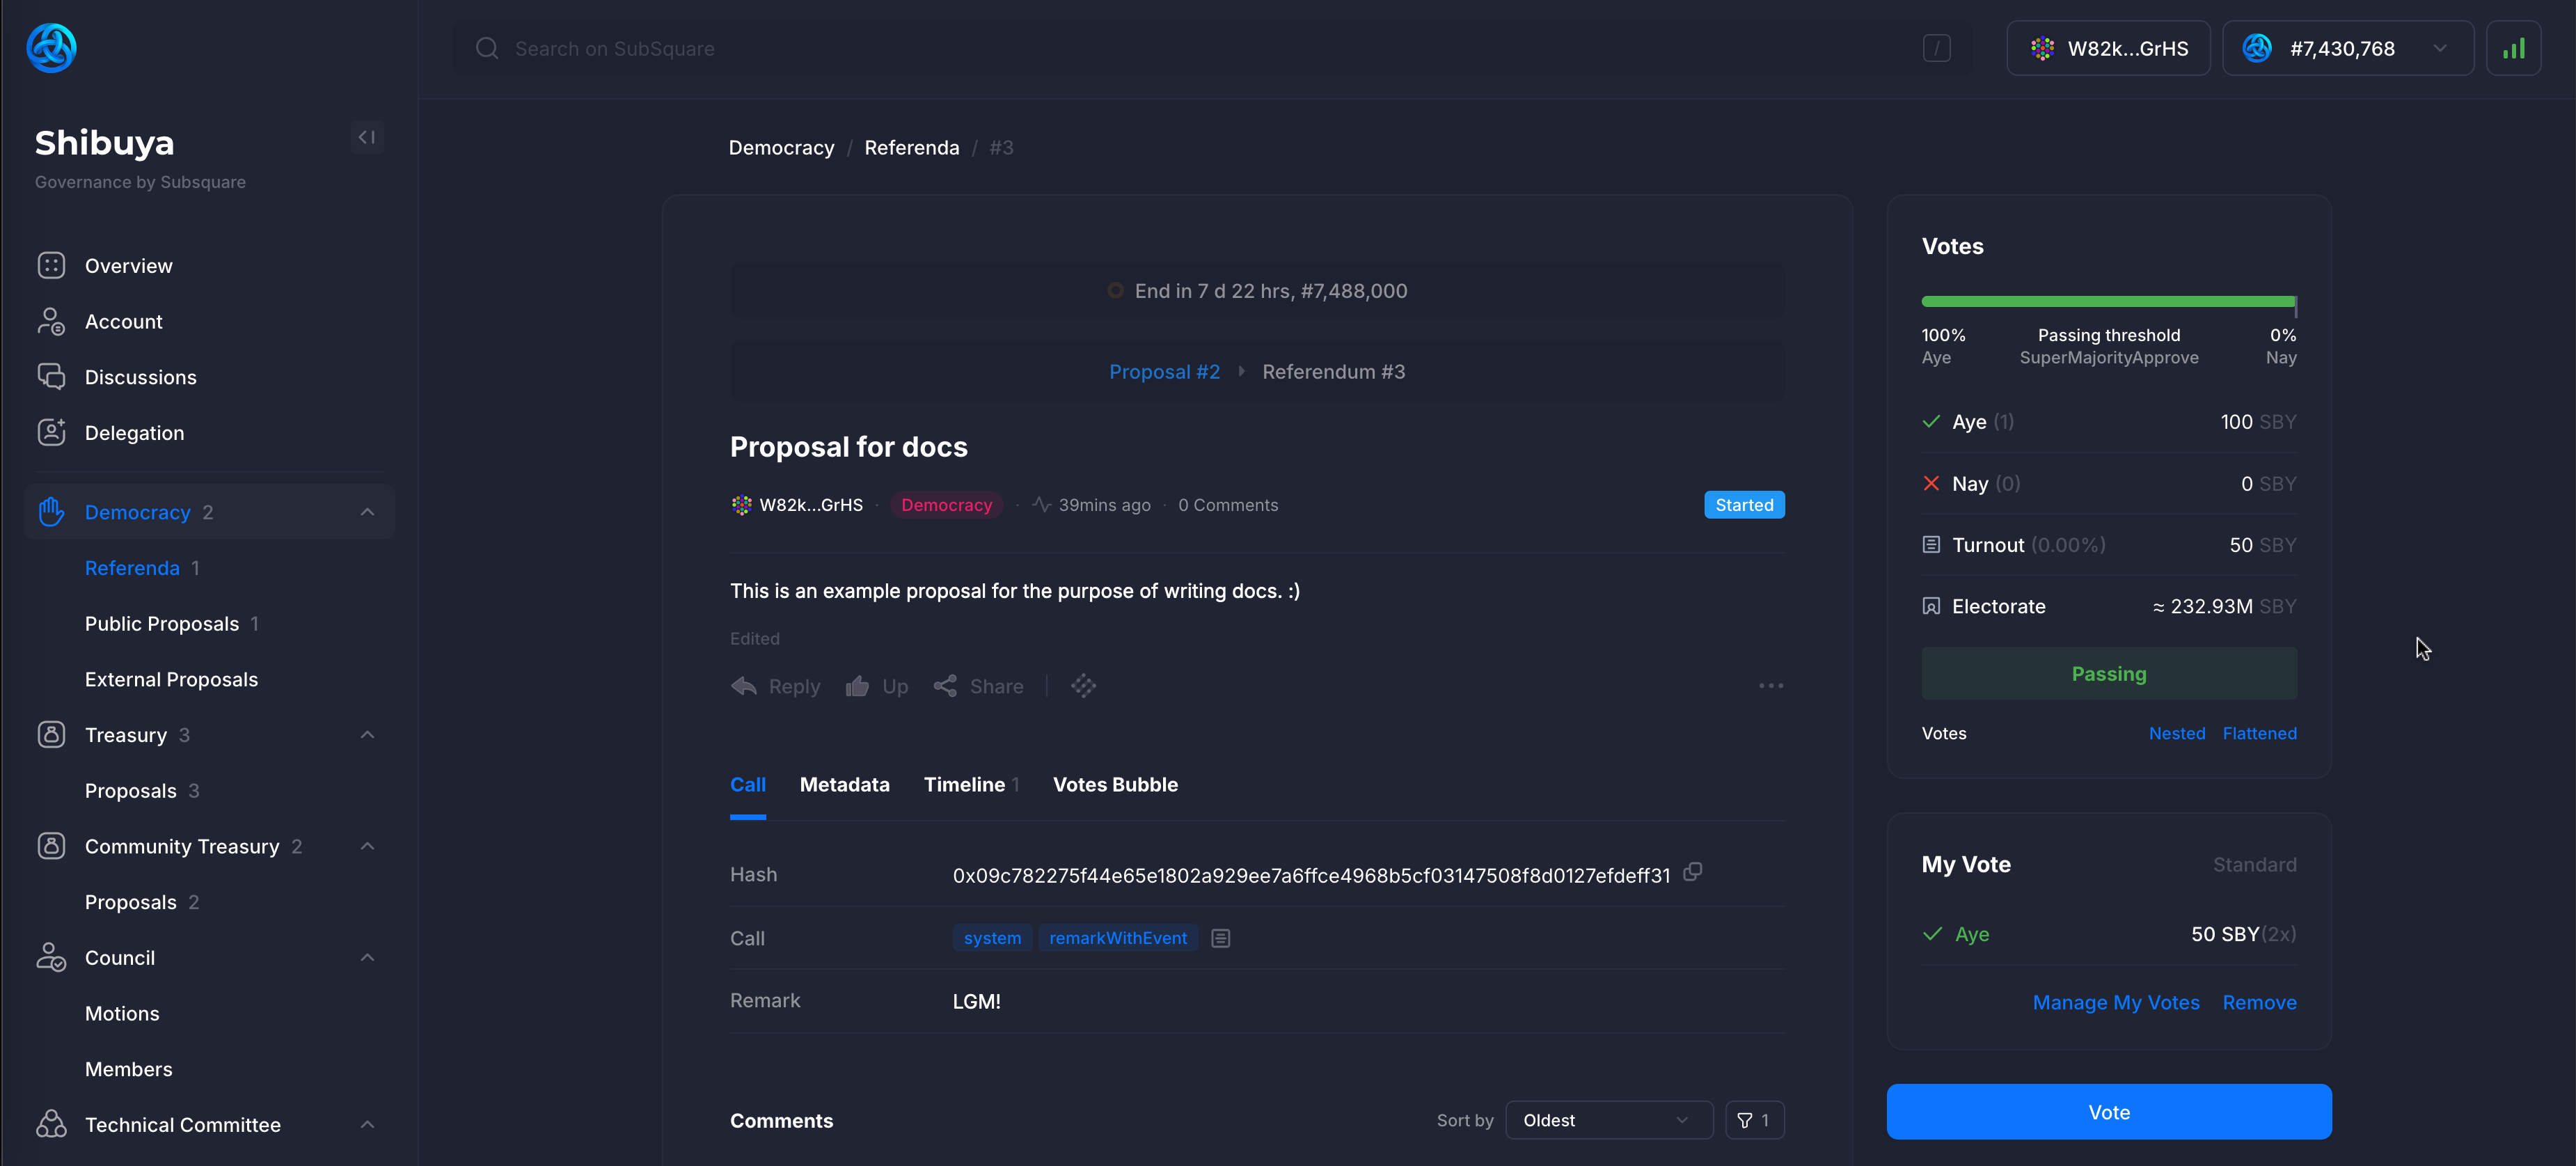
After the transaction is confirmed and finalized, the vote will be displayed on the referendum page. Since only one user has voted (us), the total sum of the aye votes is equal to the amount we've voted with.
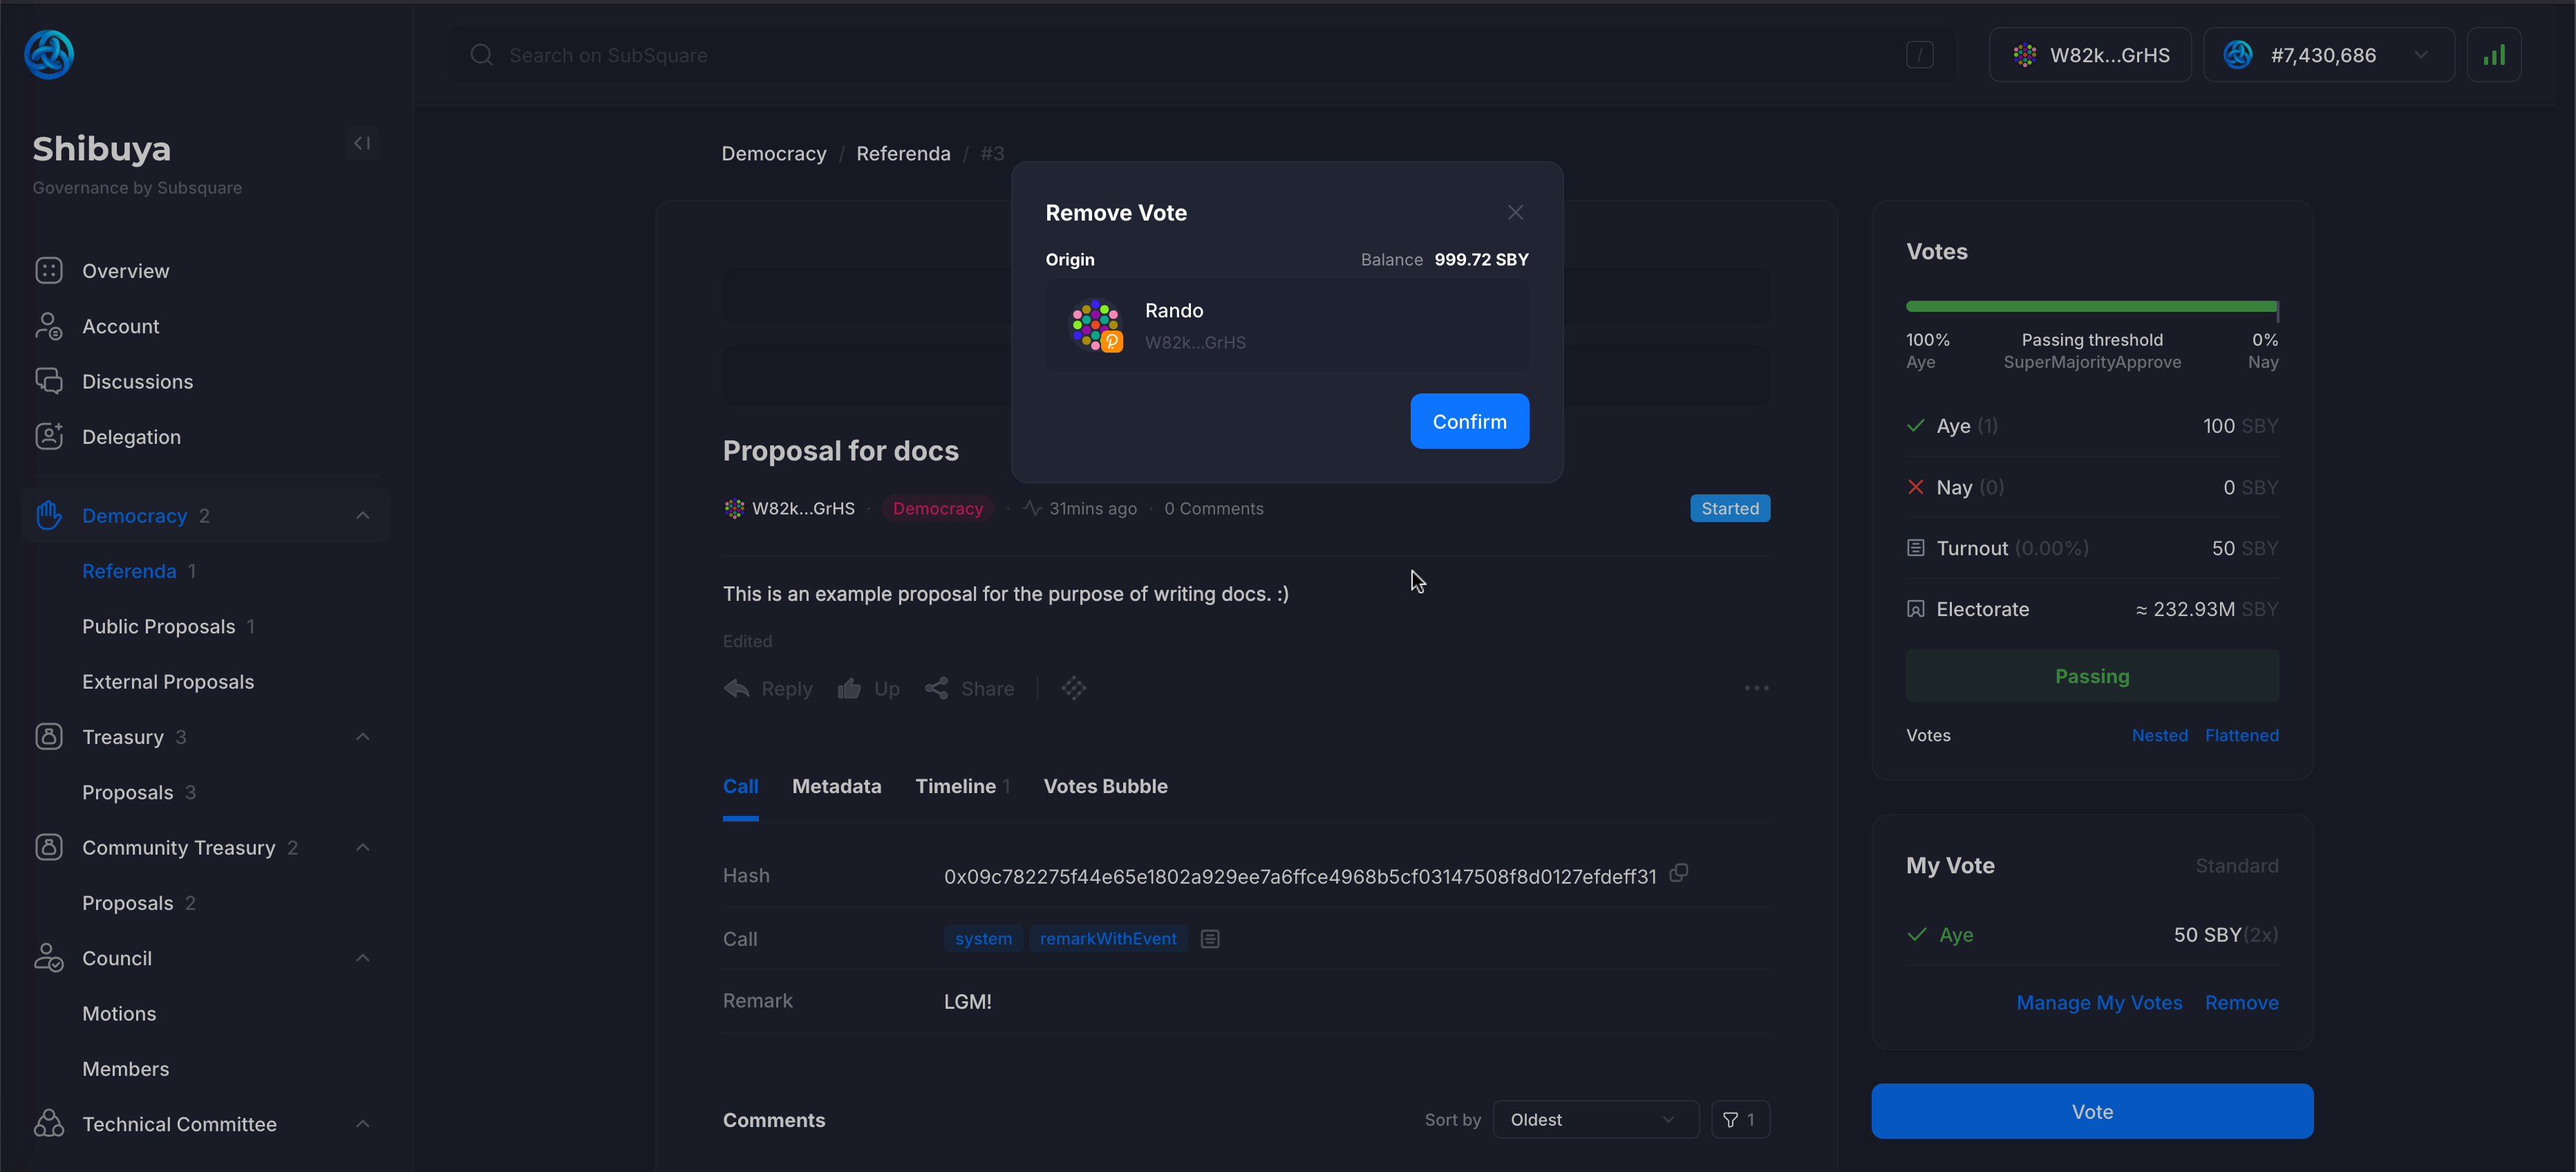
In case a user changes their mind, the vote can be removed by clicking on the Remove Vote button.
This won't trigger any unlocking period and the user is free to cast their vote again.
This is an example of an account that is voting but has some votes delegated to it. In this particular situation, the account has:
- 100 SBY free balance
- 300 SBY worth of voting power delegated to it.
Although not visible on this image, the account who delegated the votes did it with 100 SBY and conviction set to 3.
The account votes with 50 SBY, conviction set to 4. This means that the total amount of votes for this account will be: 50 SBY x 4 + 300 SBY = 500 SBY.
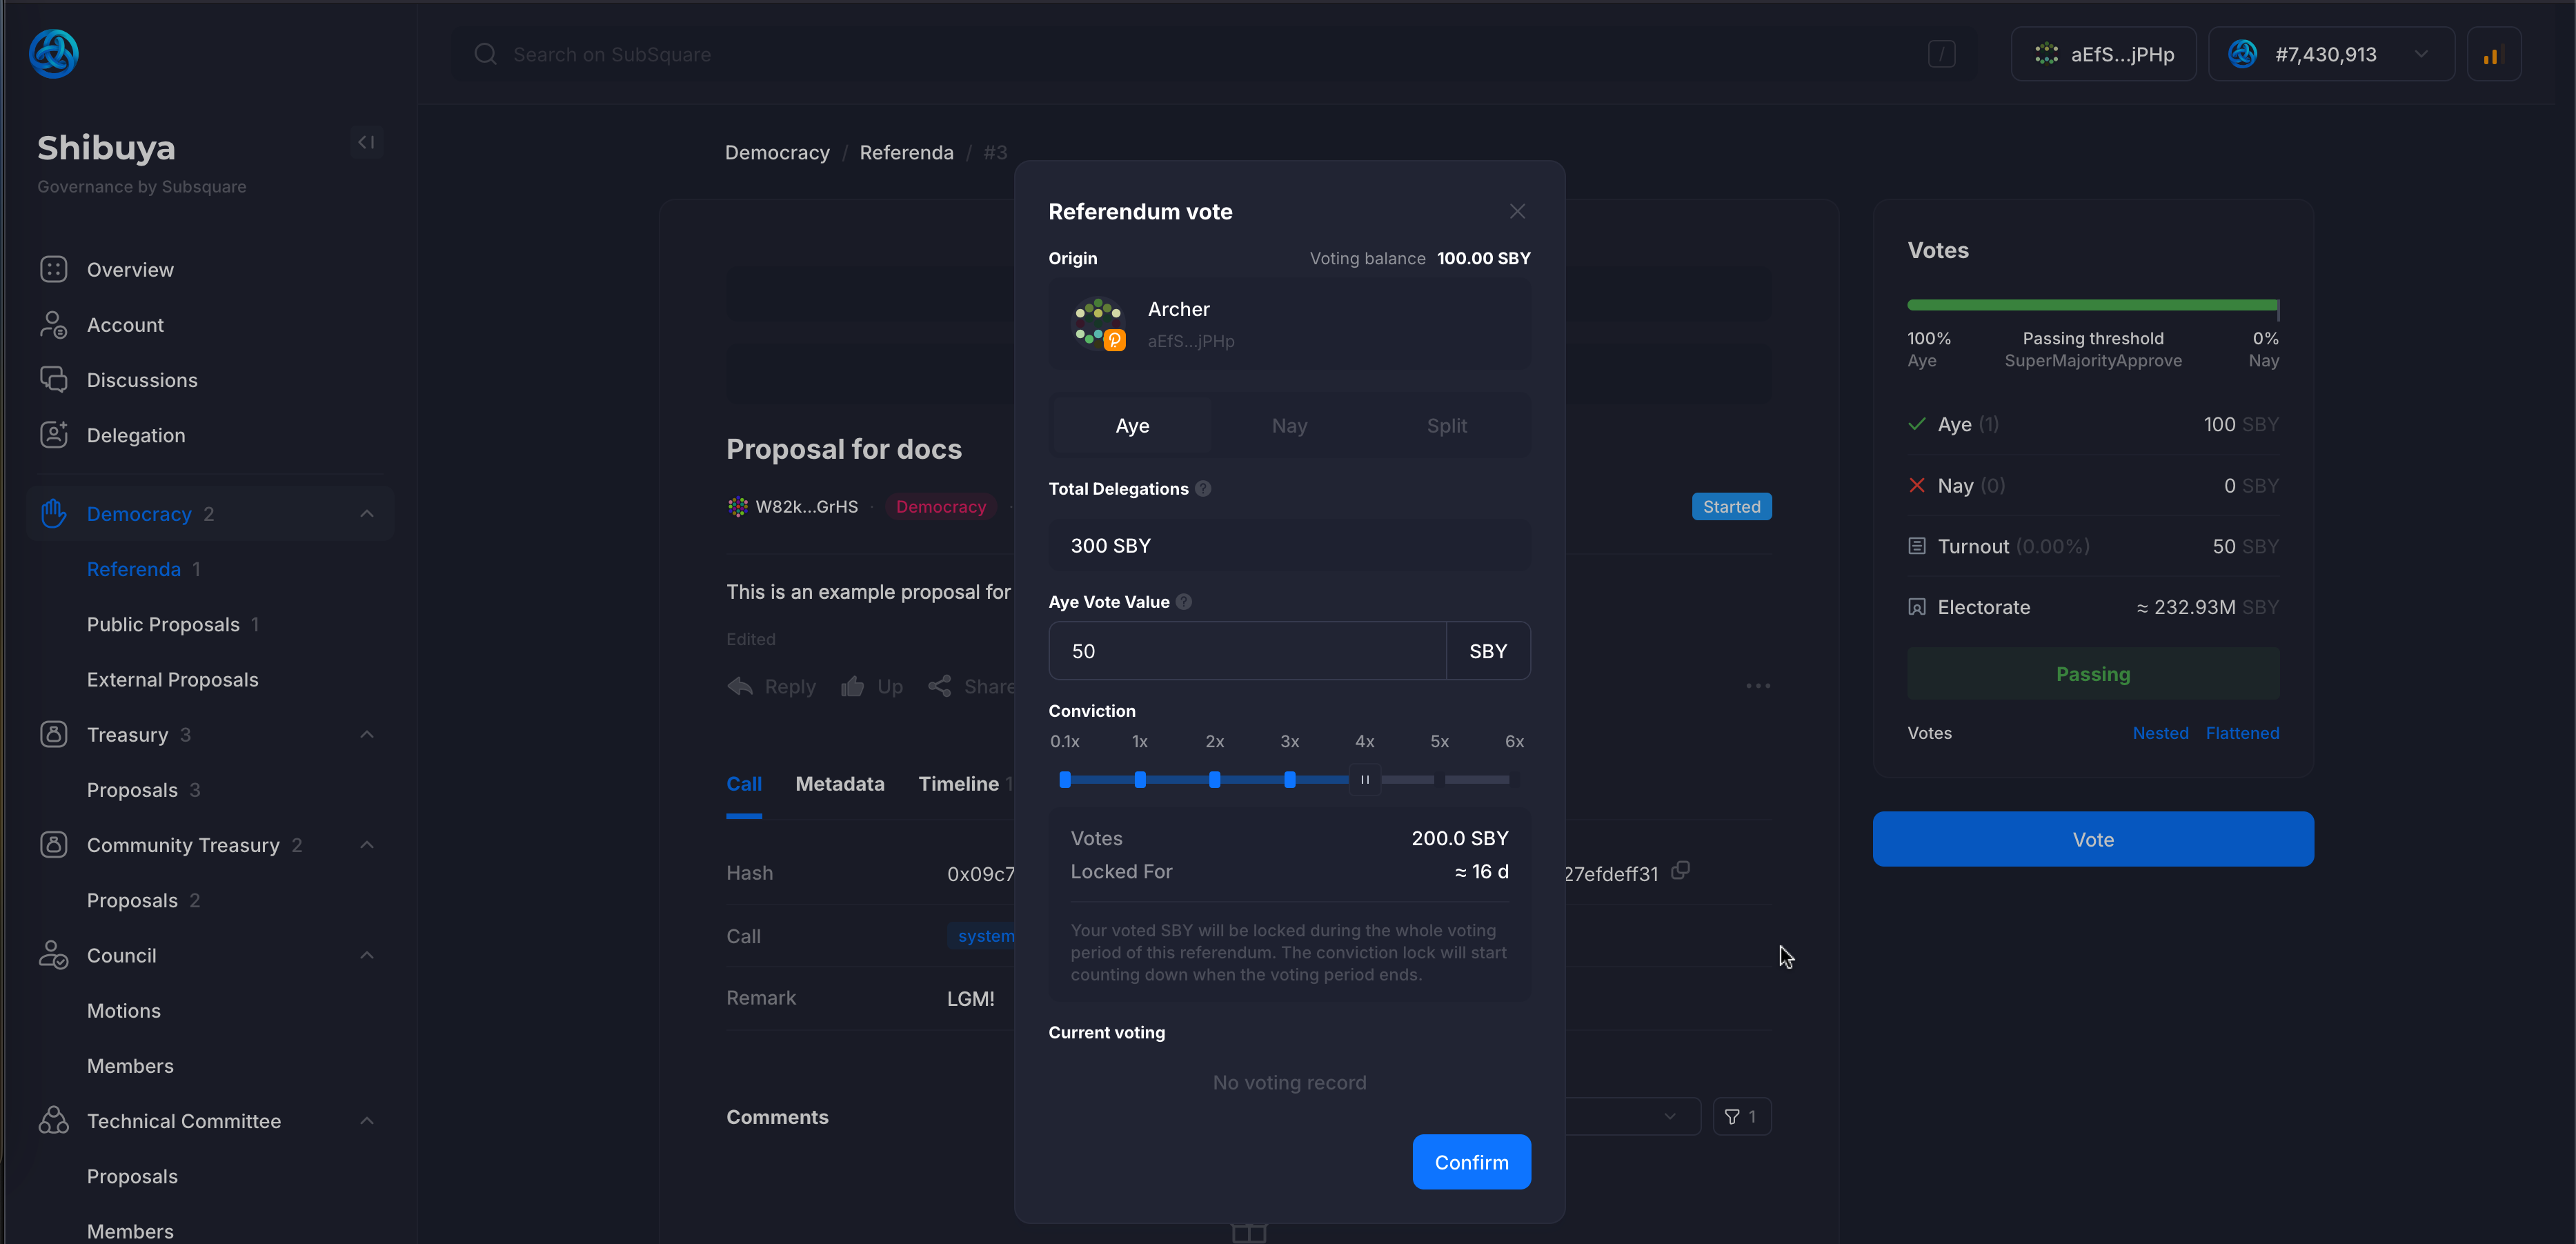
The new total turnout is 200 SBY - 50 SBY from the first aye vote, another 50 SBY from the second aye vote, and 100 SBY from the delegated vote.
The total votes toward aye is 600 SBY in total - 100 SBY from the first aye vote, and another 500 SBY from the second aye vote.
Community Council
Treasury Spending Approval
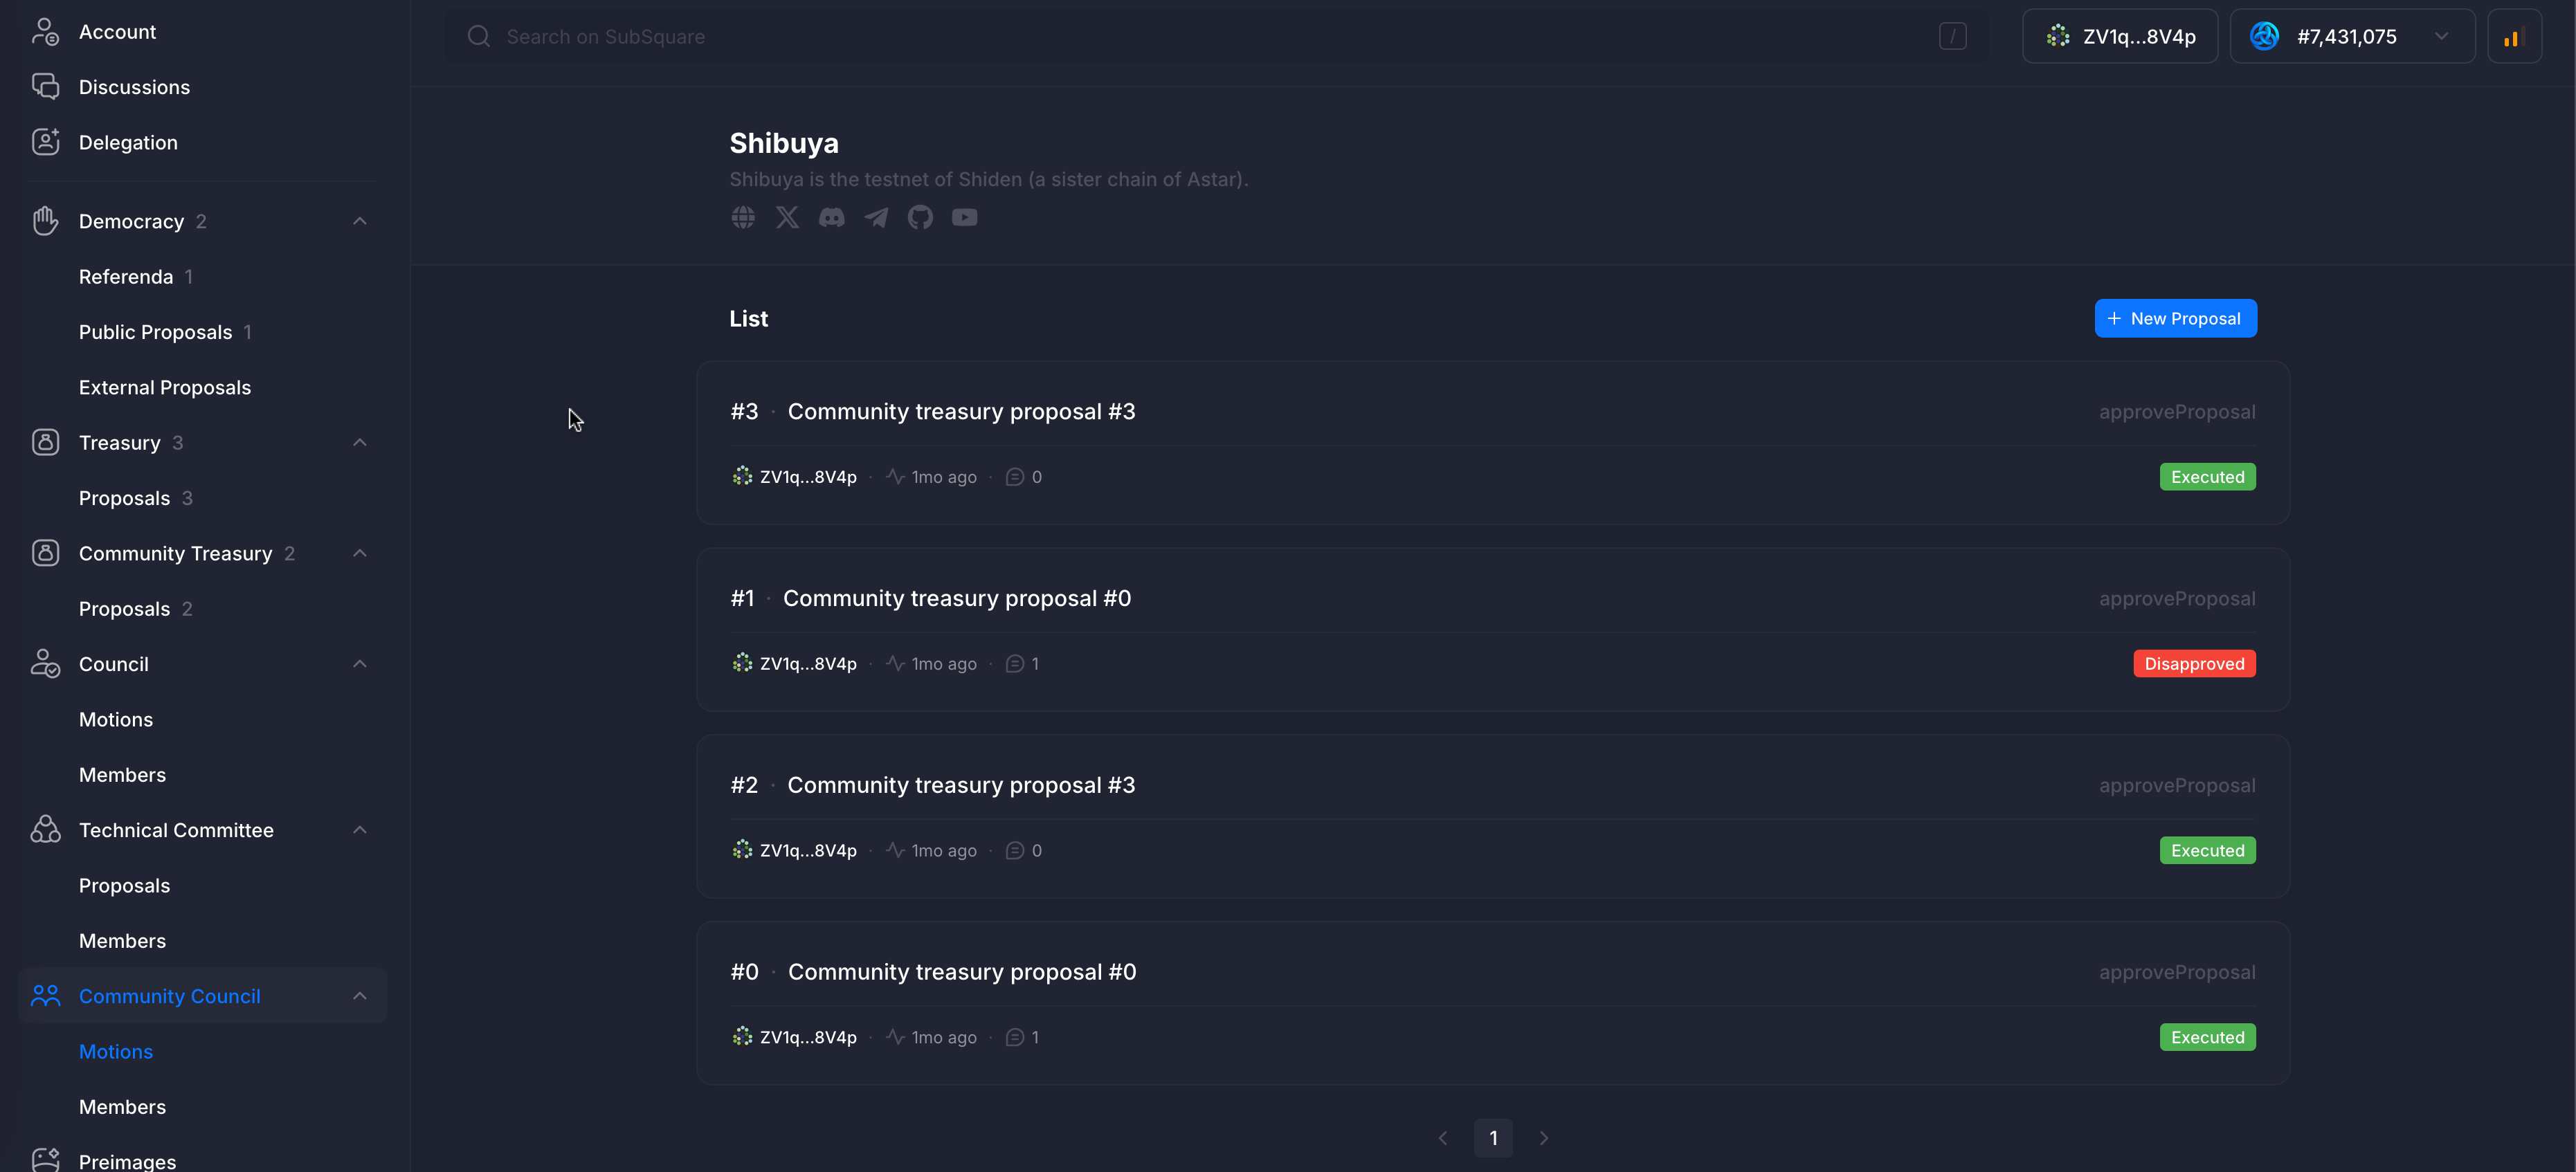
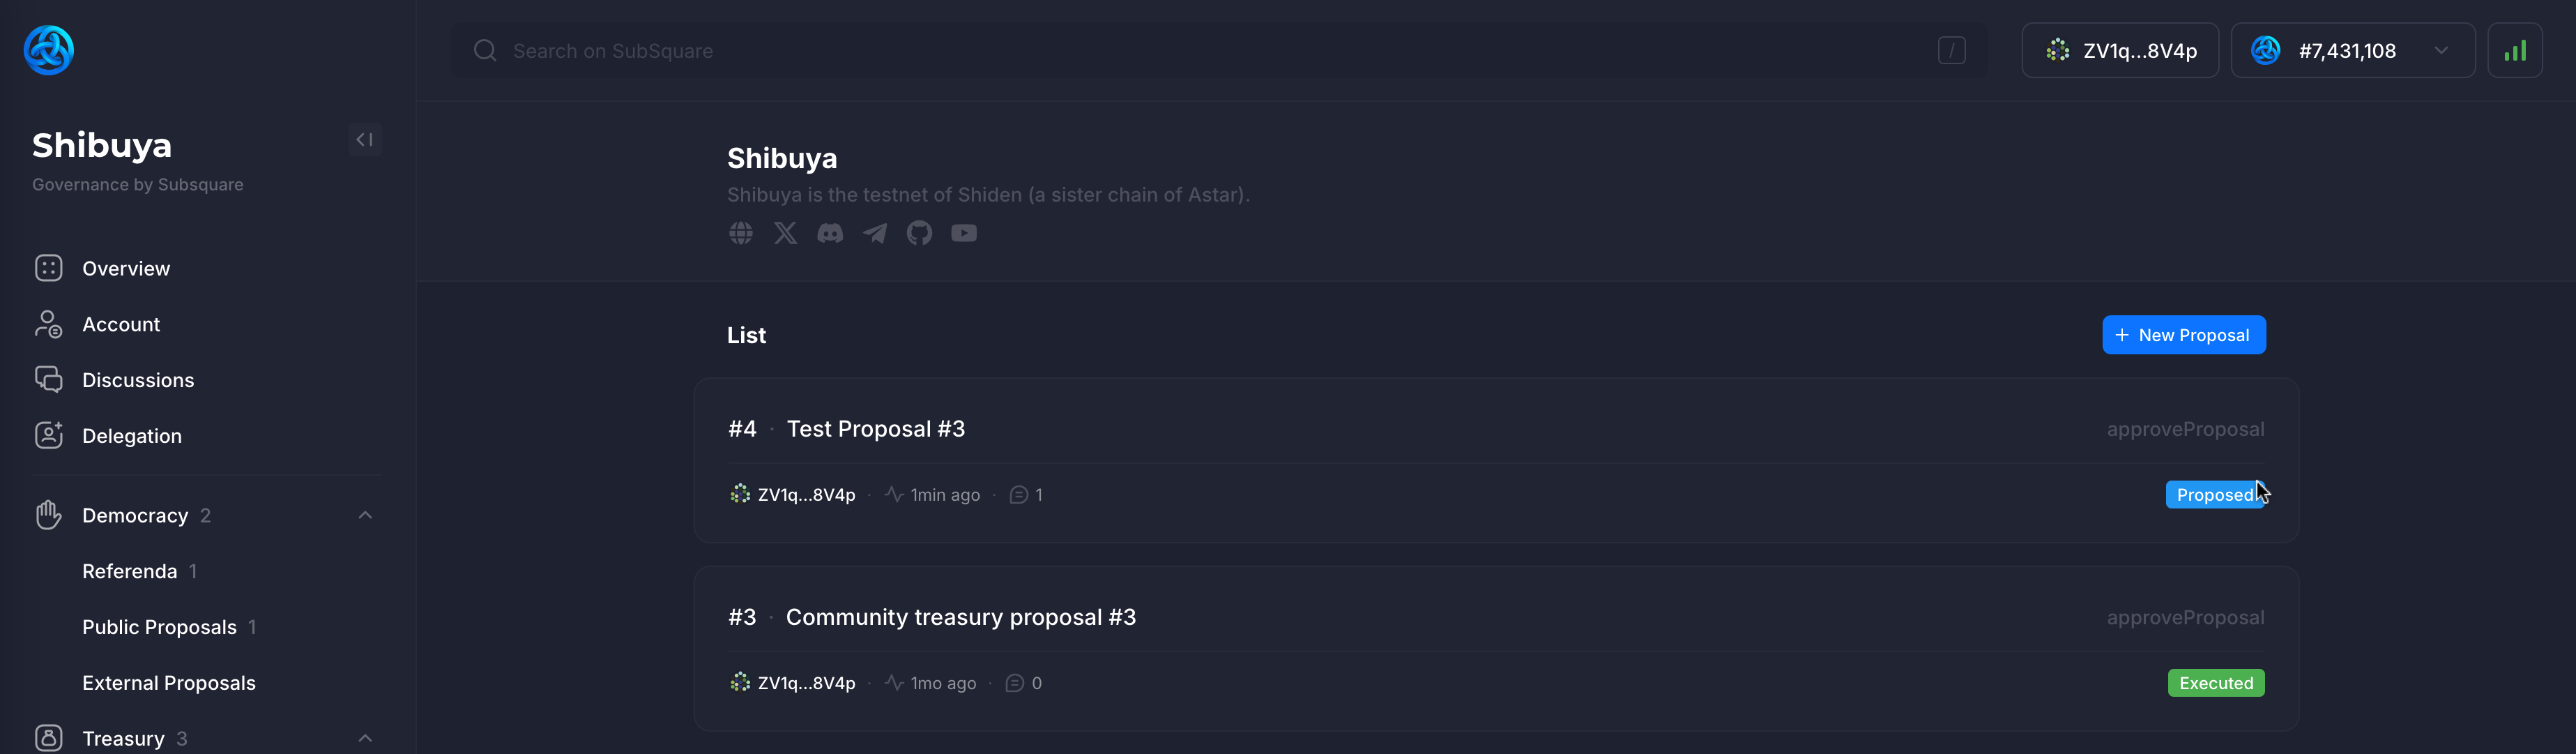
Clicking on the Motions tab under the Community Council sidebar tab will open a view of the Community Council motions.
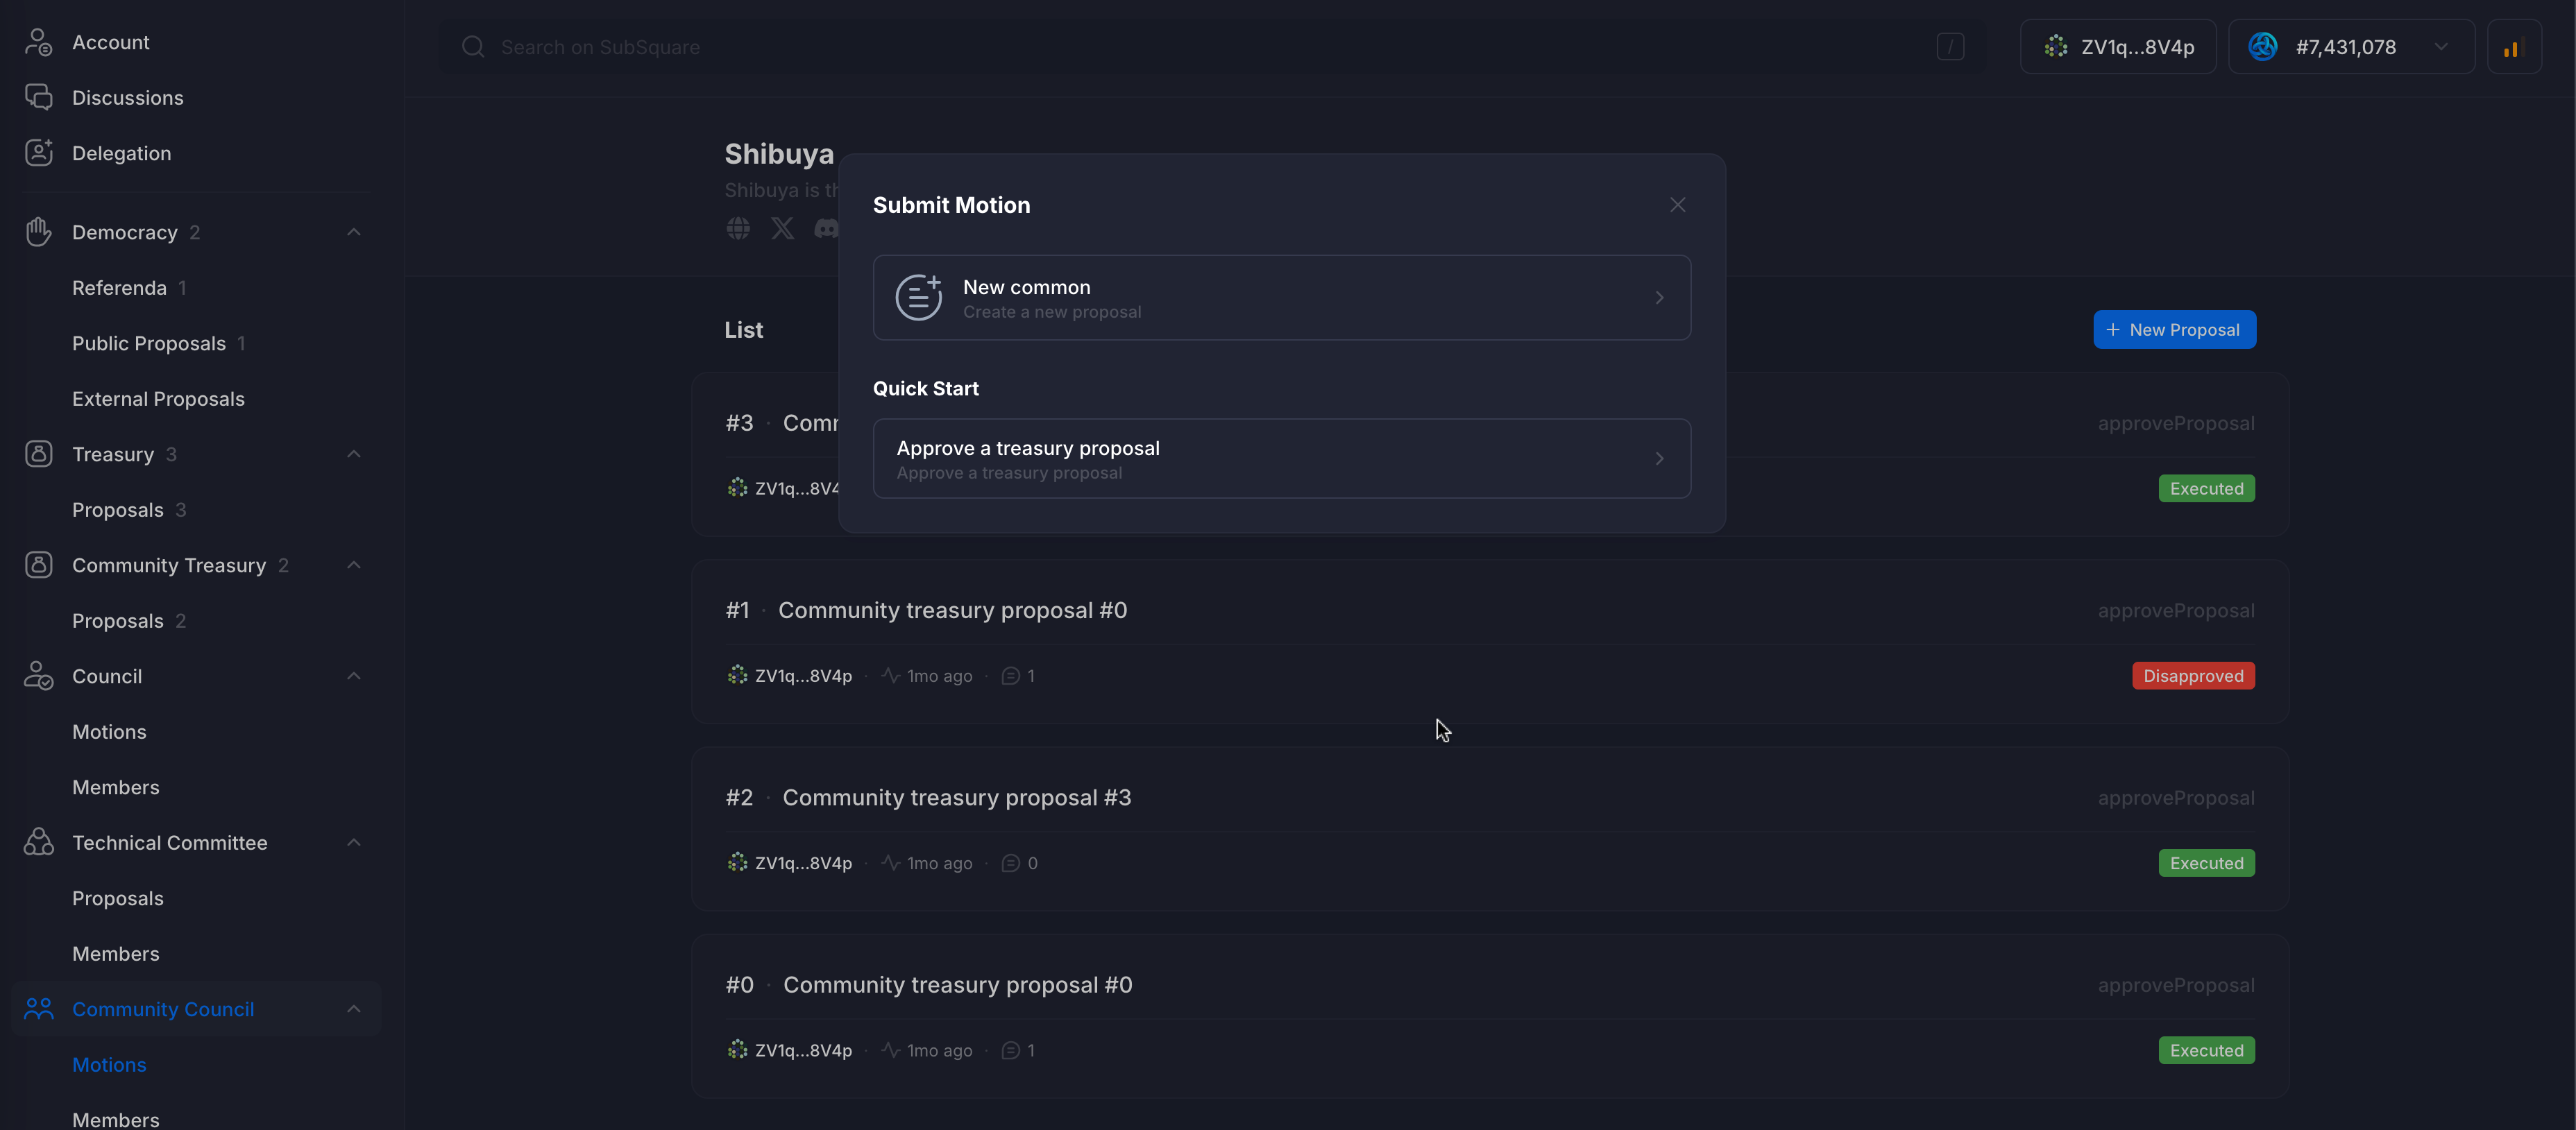
Clicking on the New Proposal button will prompt the user to create a new motion.
The focus of this example is community treasury spending approval.
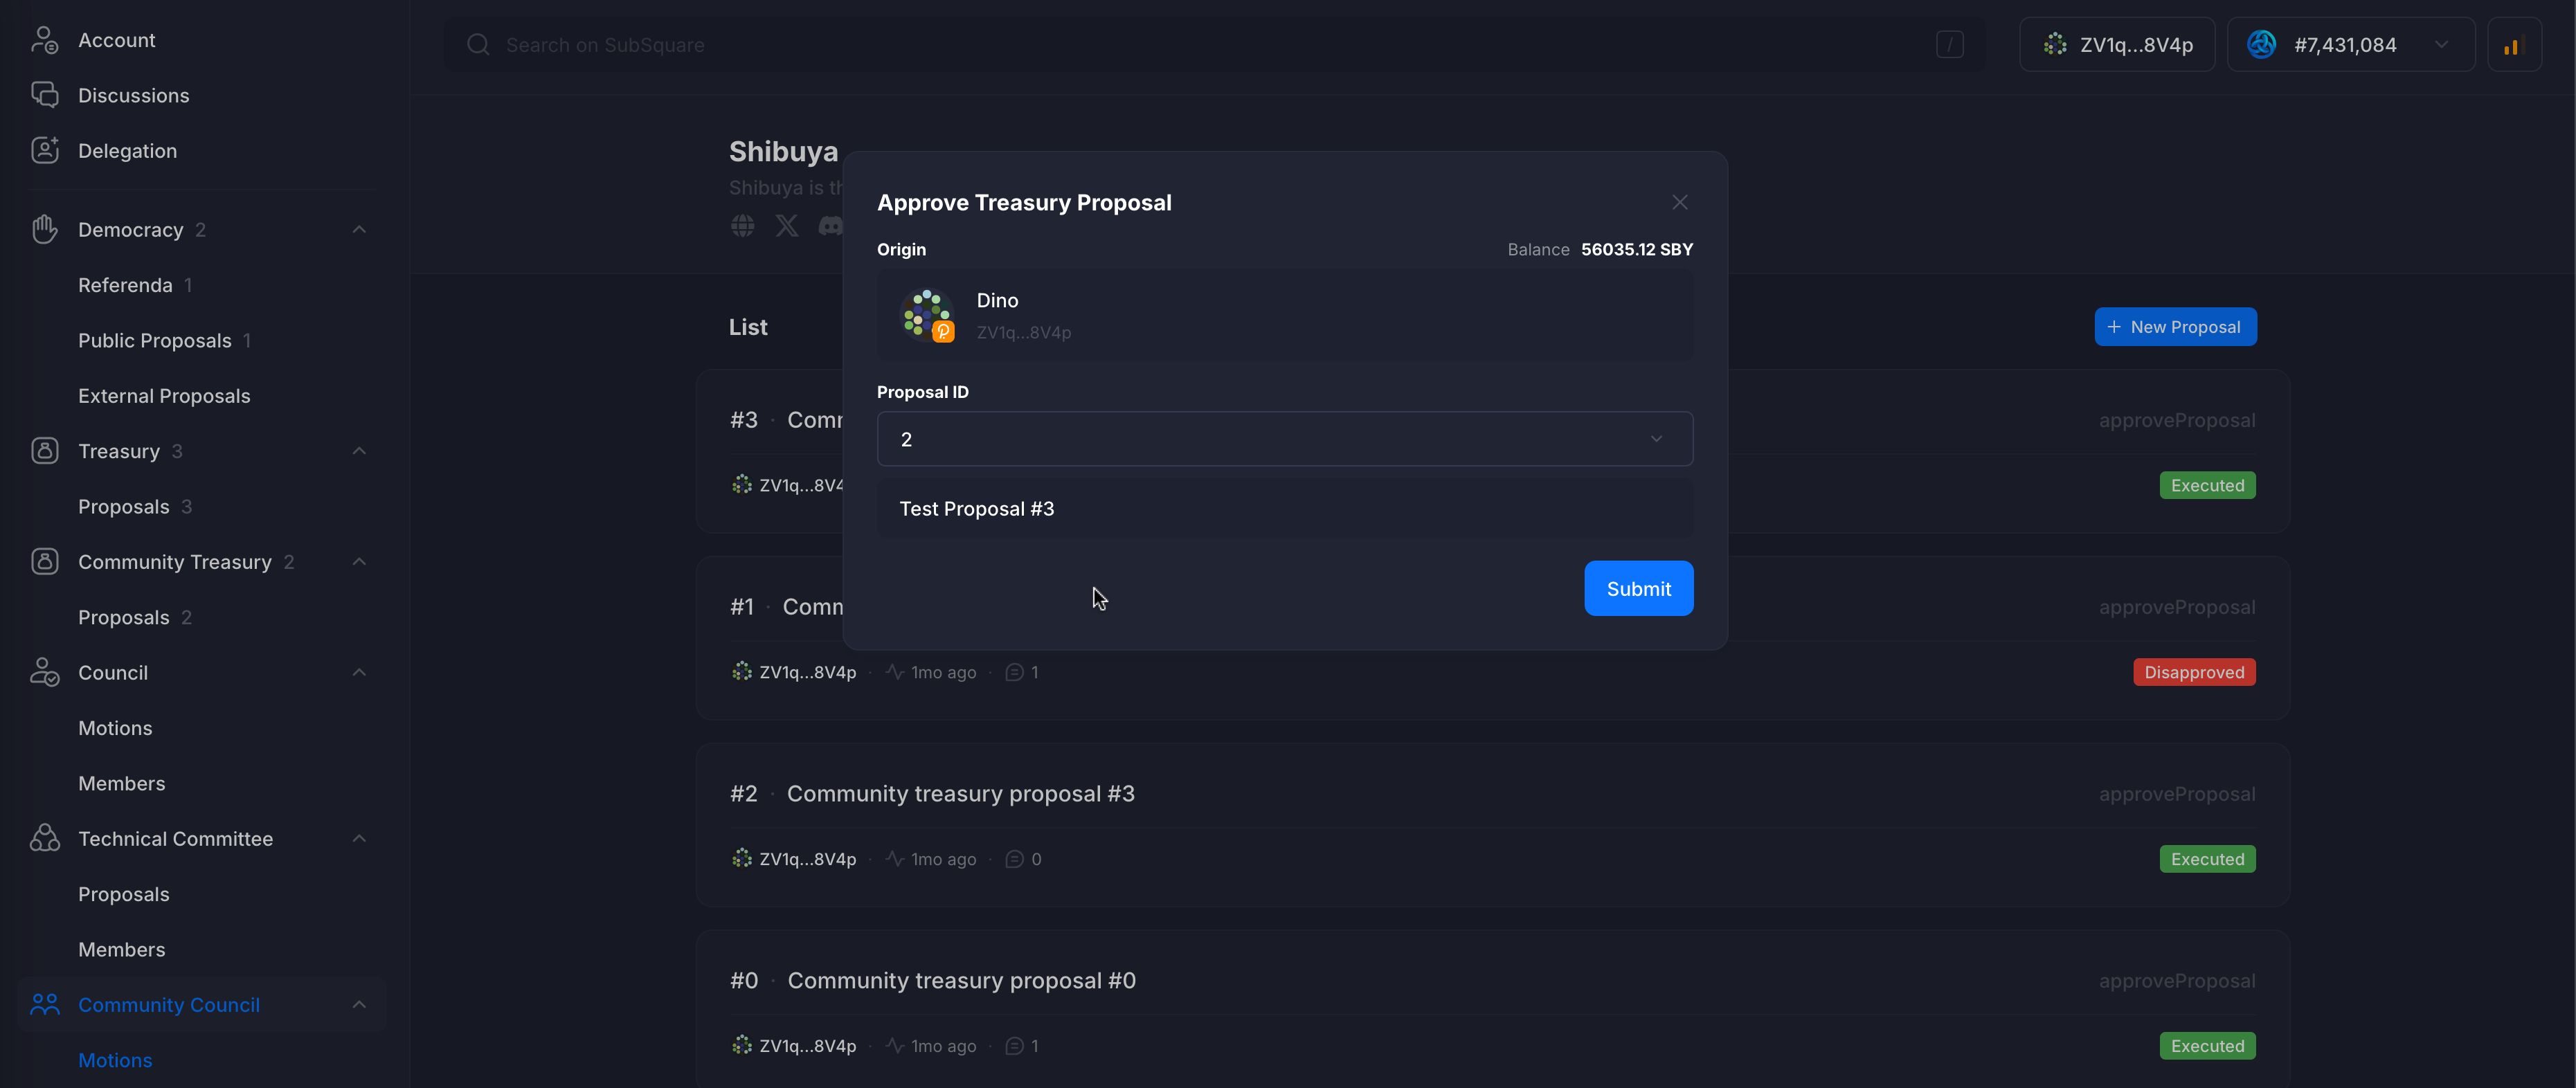
The proposal Id (can be checked under the Community Treasury tab) is required to create a new motion. Selecting an Id will display the proposal name, which also links to the proposal details. Community council members should ensure they're proposing and voting on the correct proposal.
Once the proposal creation is submitted, it will be displayed on the Motions page.
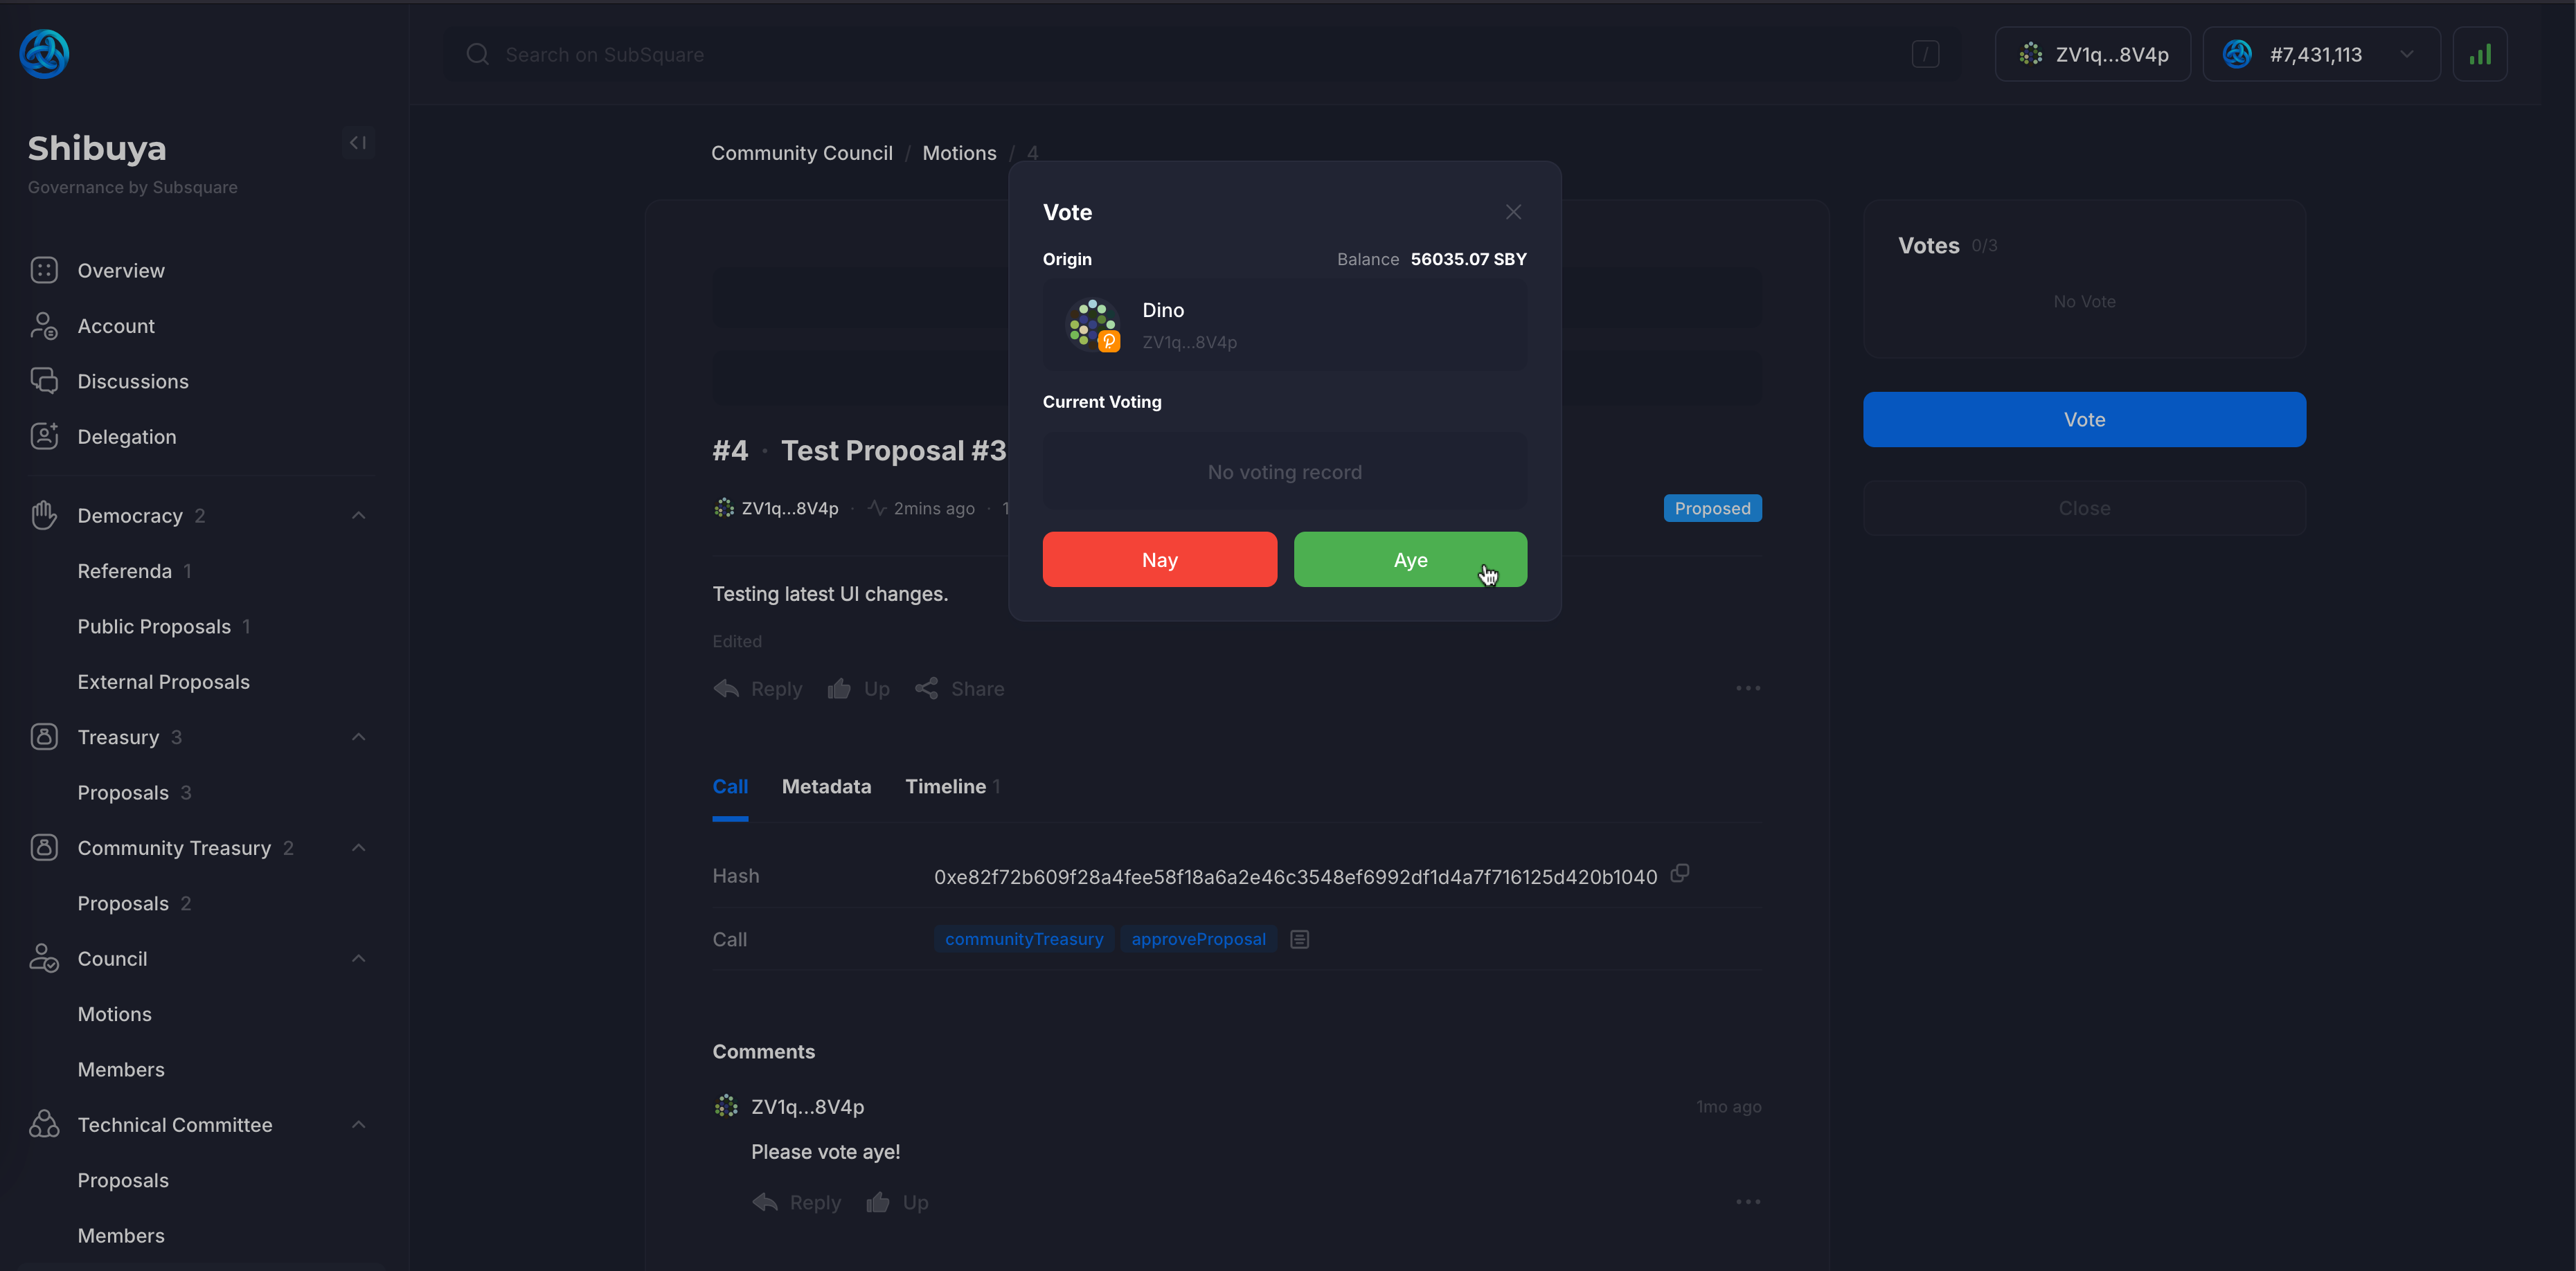
Clicking on it will display more details, and allow for a vote to be cast.
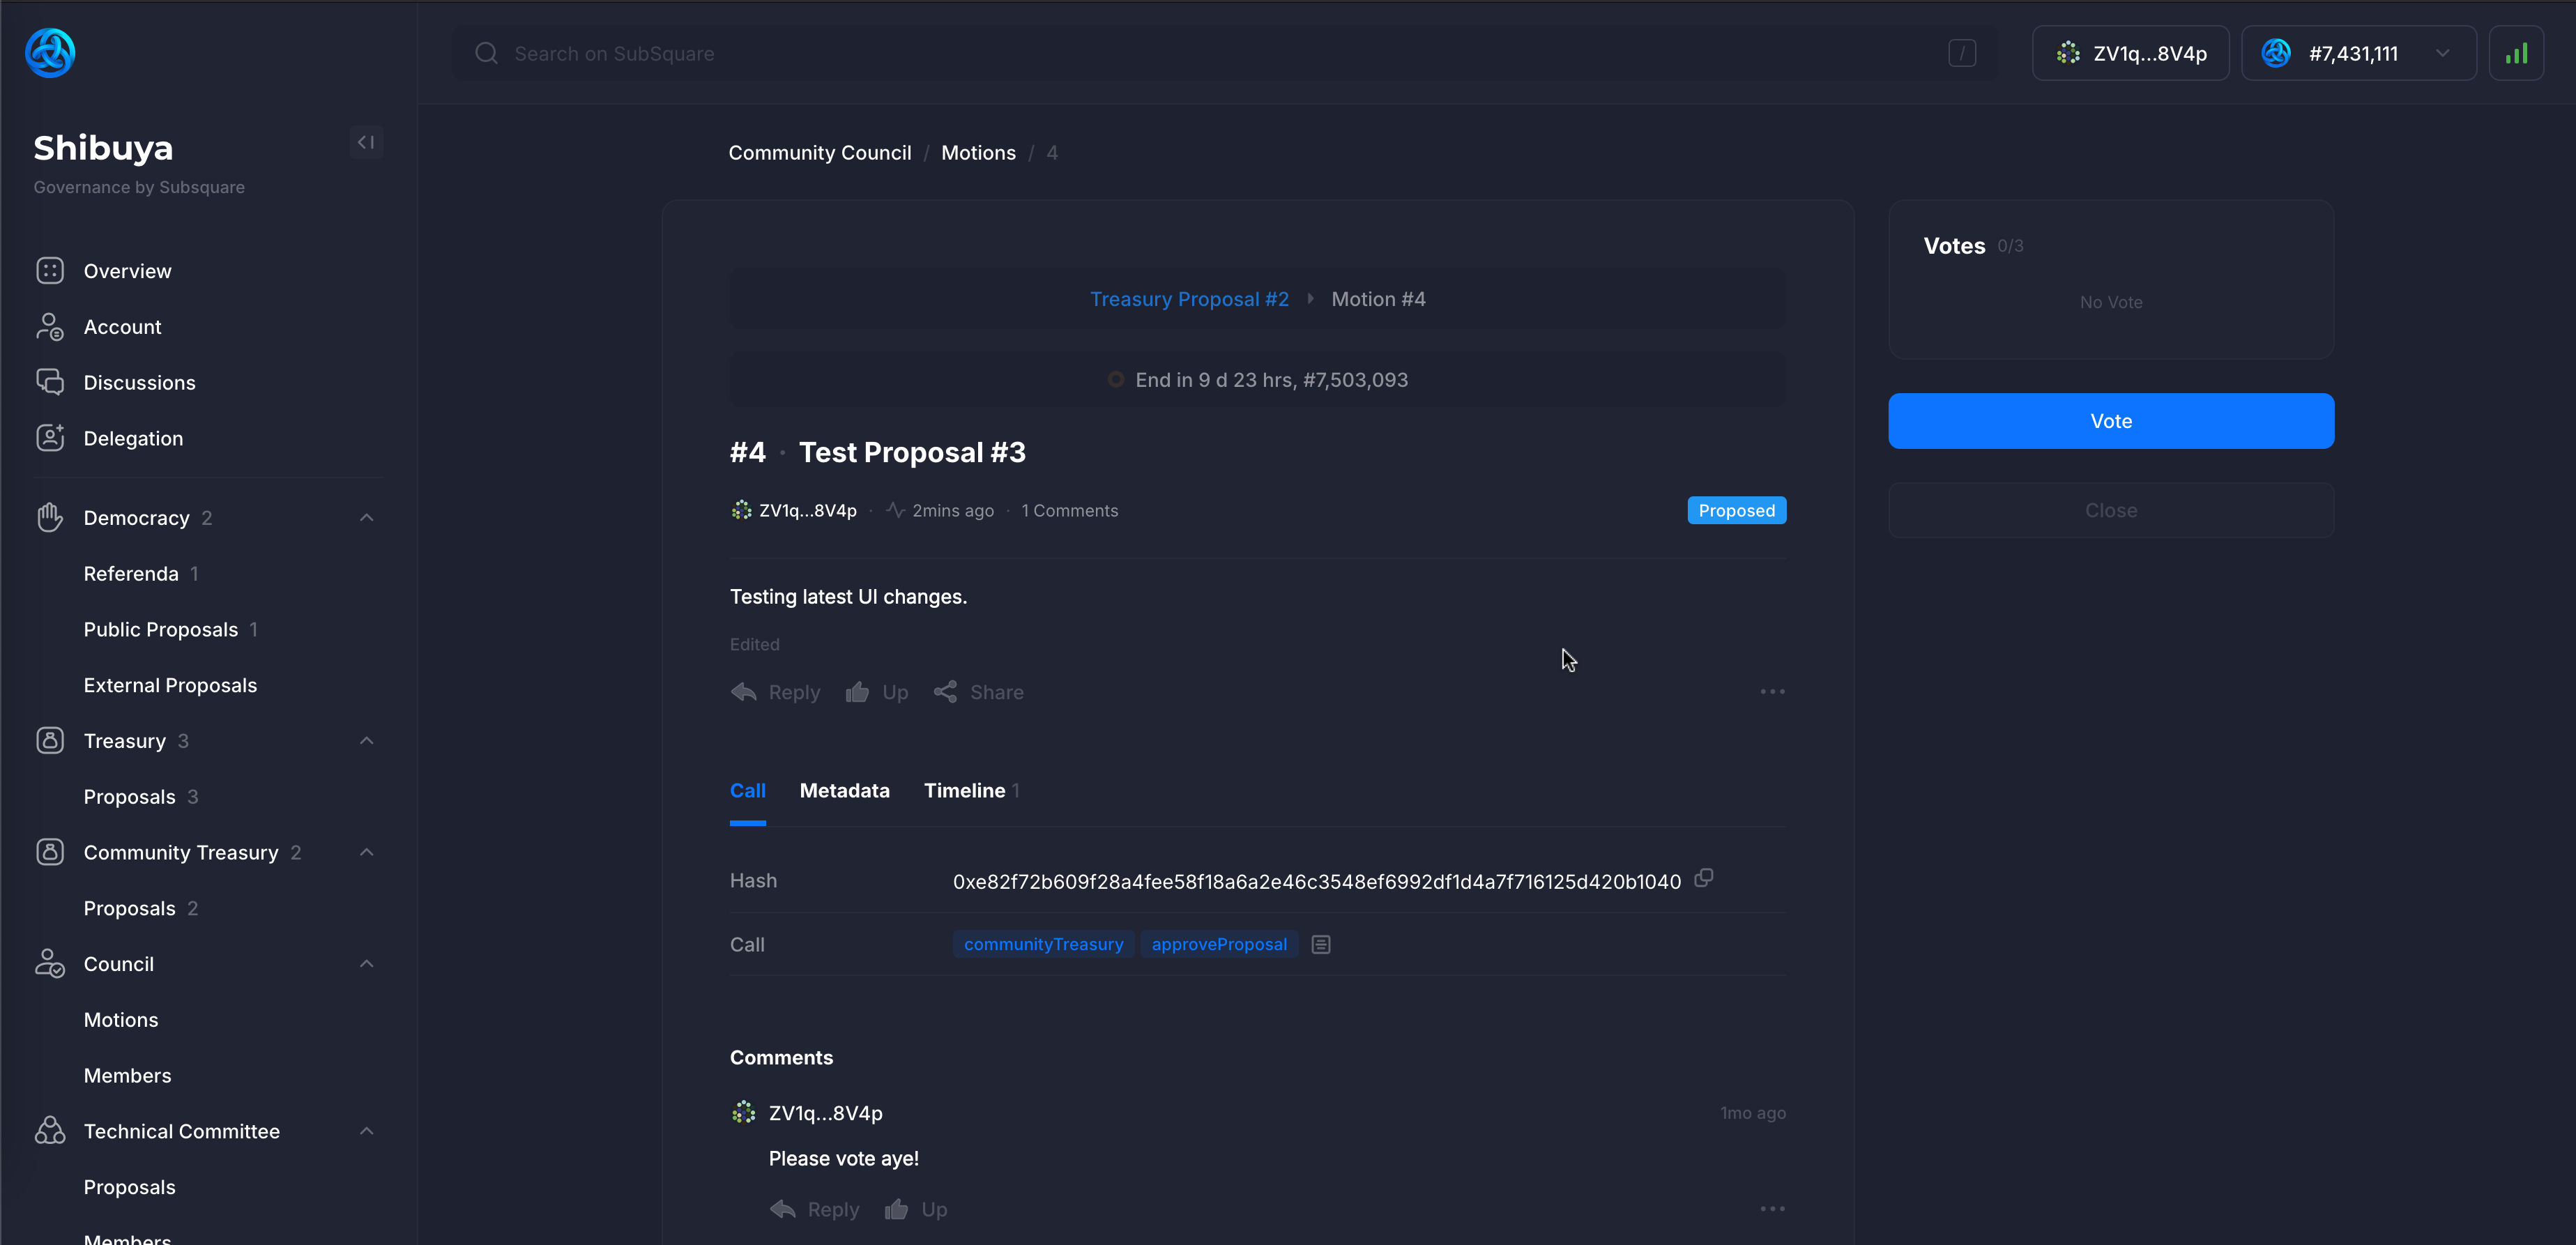
In this case, one of the council members votes aye.
dApp Staking With Community Treasury
This is more complex since it requires the user to understand the basics of dApp staking backend. The proposal call needs to be manually crafted and submitted to the blockchain.
The first thing to select is the threshold. This can be calculated by taking the expected vote threshold (e.g. 50% or 2/3 of the quorum) and comparing it to the total number of members in the council. For this particular case, the threshold is set to 2/3 of the council members and we have 3 council members so we set it to 2.
The next is the call builder.
When utilizing the community treasury, the call needs to start with collectiveProxy -> executeCall.
After that, the dApp staking call needs to be built. It's possible, and encouraged, to use the batch calls to simplify the voting process.

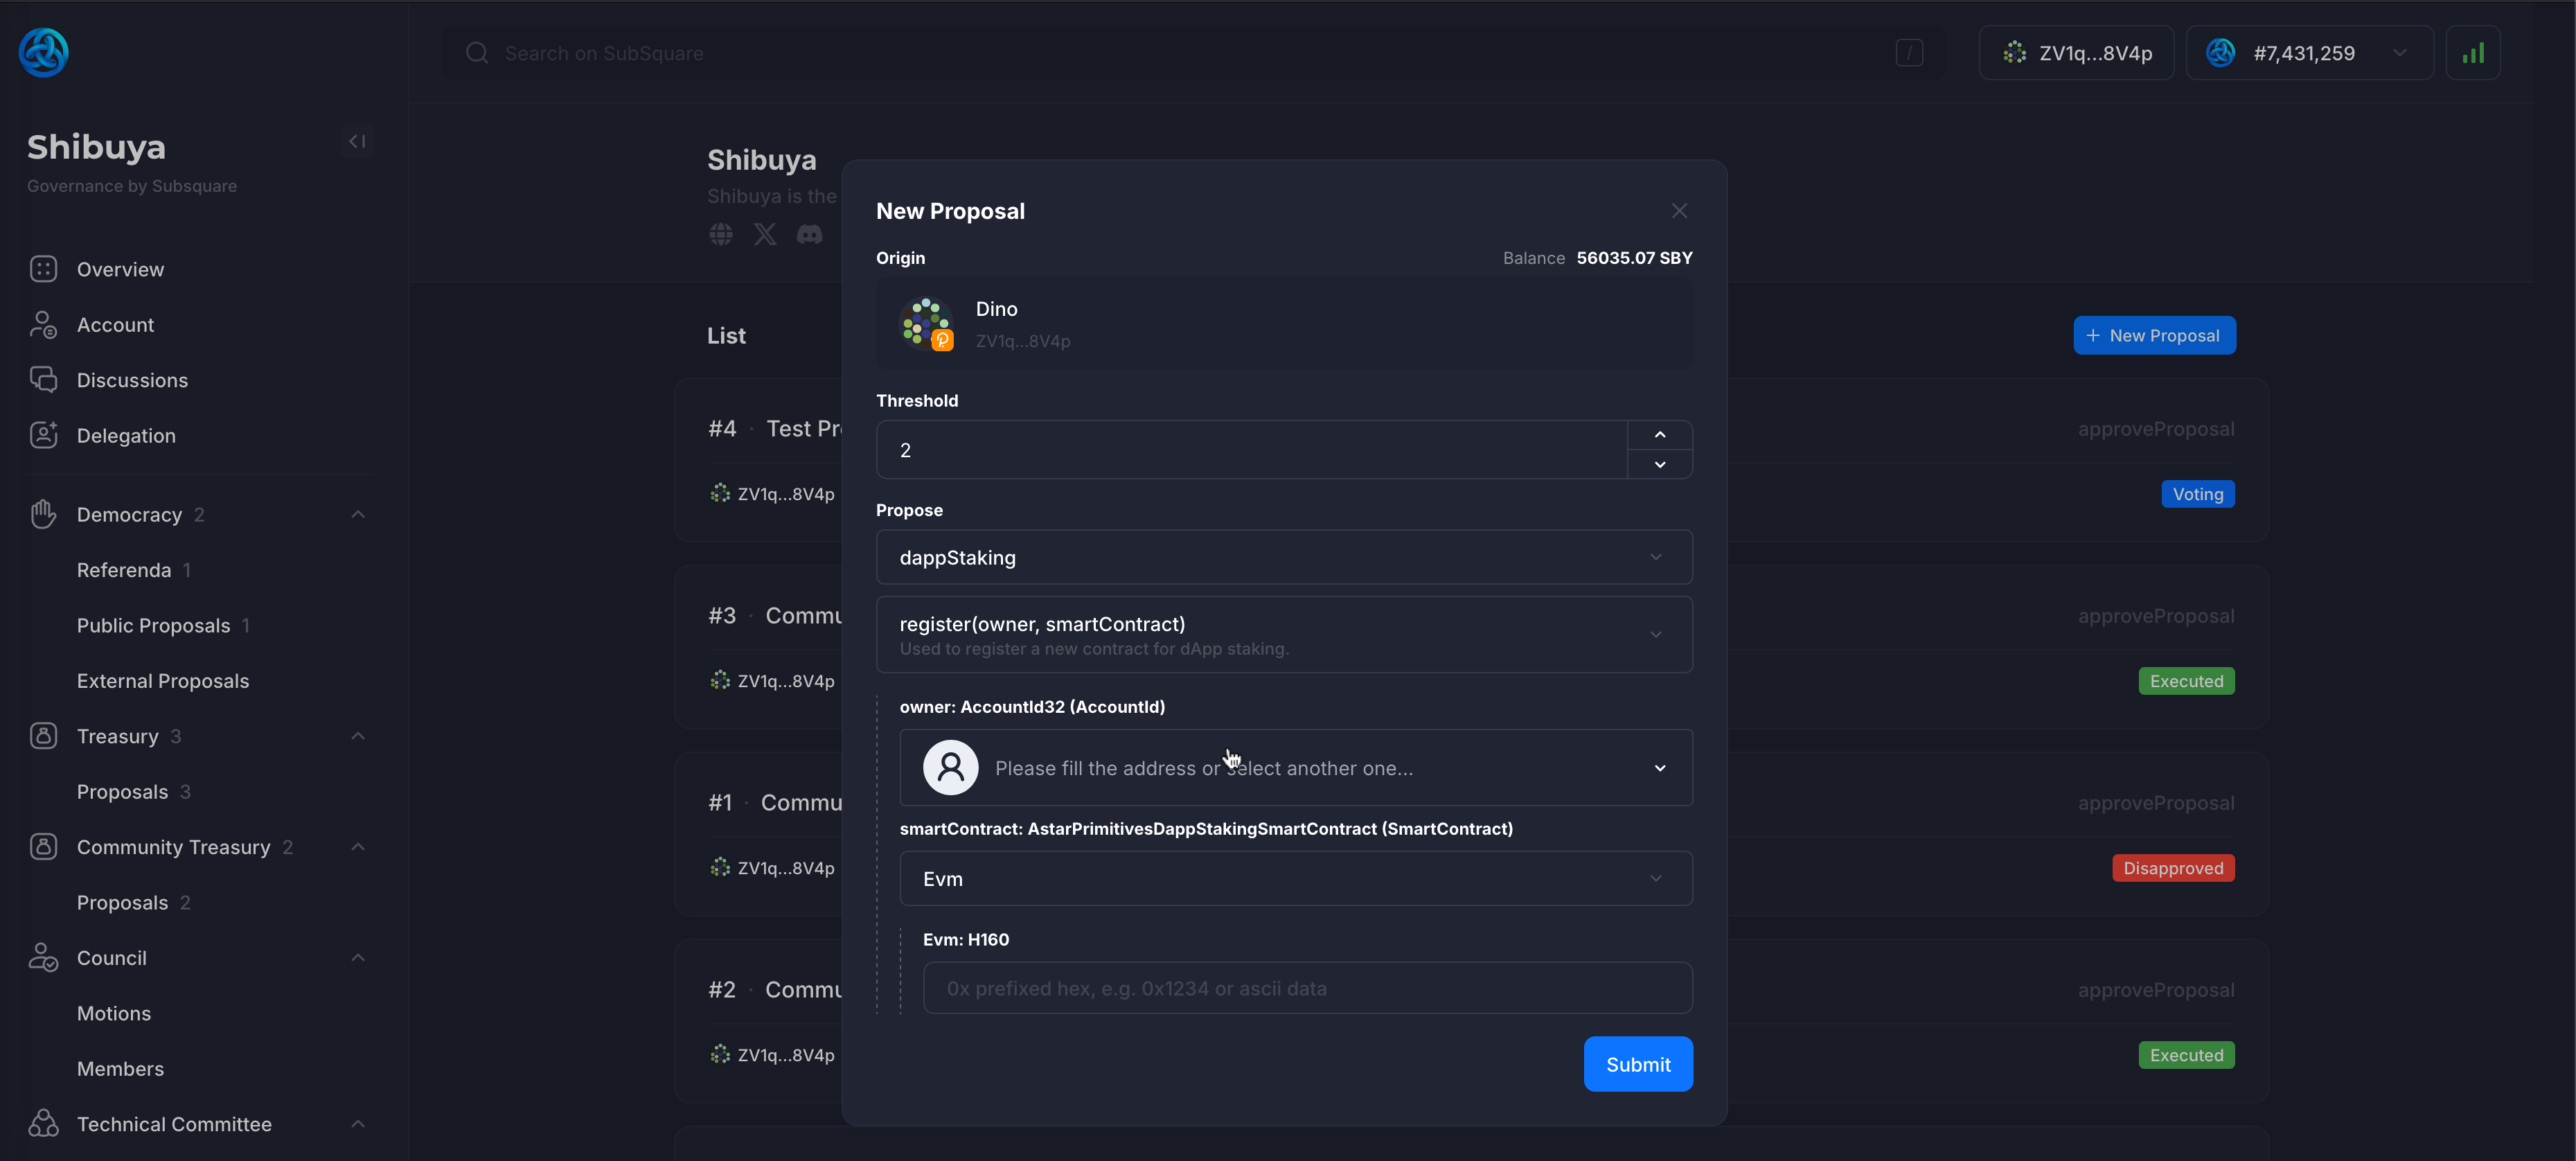
Registering a New dApp
Unlike the actual staking with the community treasury, registering a new dApp does not require the collectiveProxy.
Instead, the call should directly propose dappStaking -> register.
Main Council
The Main Council UI support is rudimentary at the moment.
They can approve & reject main treasury spending proposals, same as the Community Council.
However, other actions require building the call manually.
Please refer to the technical guide for more information on how to construct these calls using the Polkadot-js App interface.
Calls can also be constructed using the Subsquare interface, but users should refer to the linked technical guide for more information.
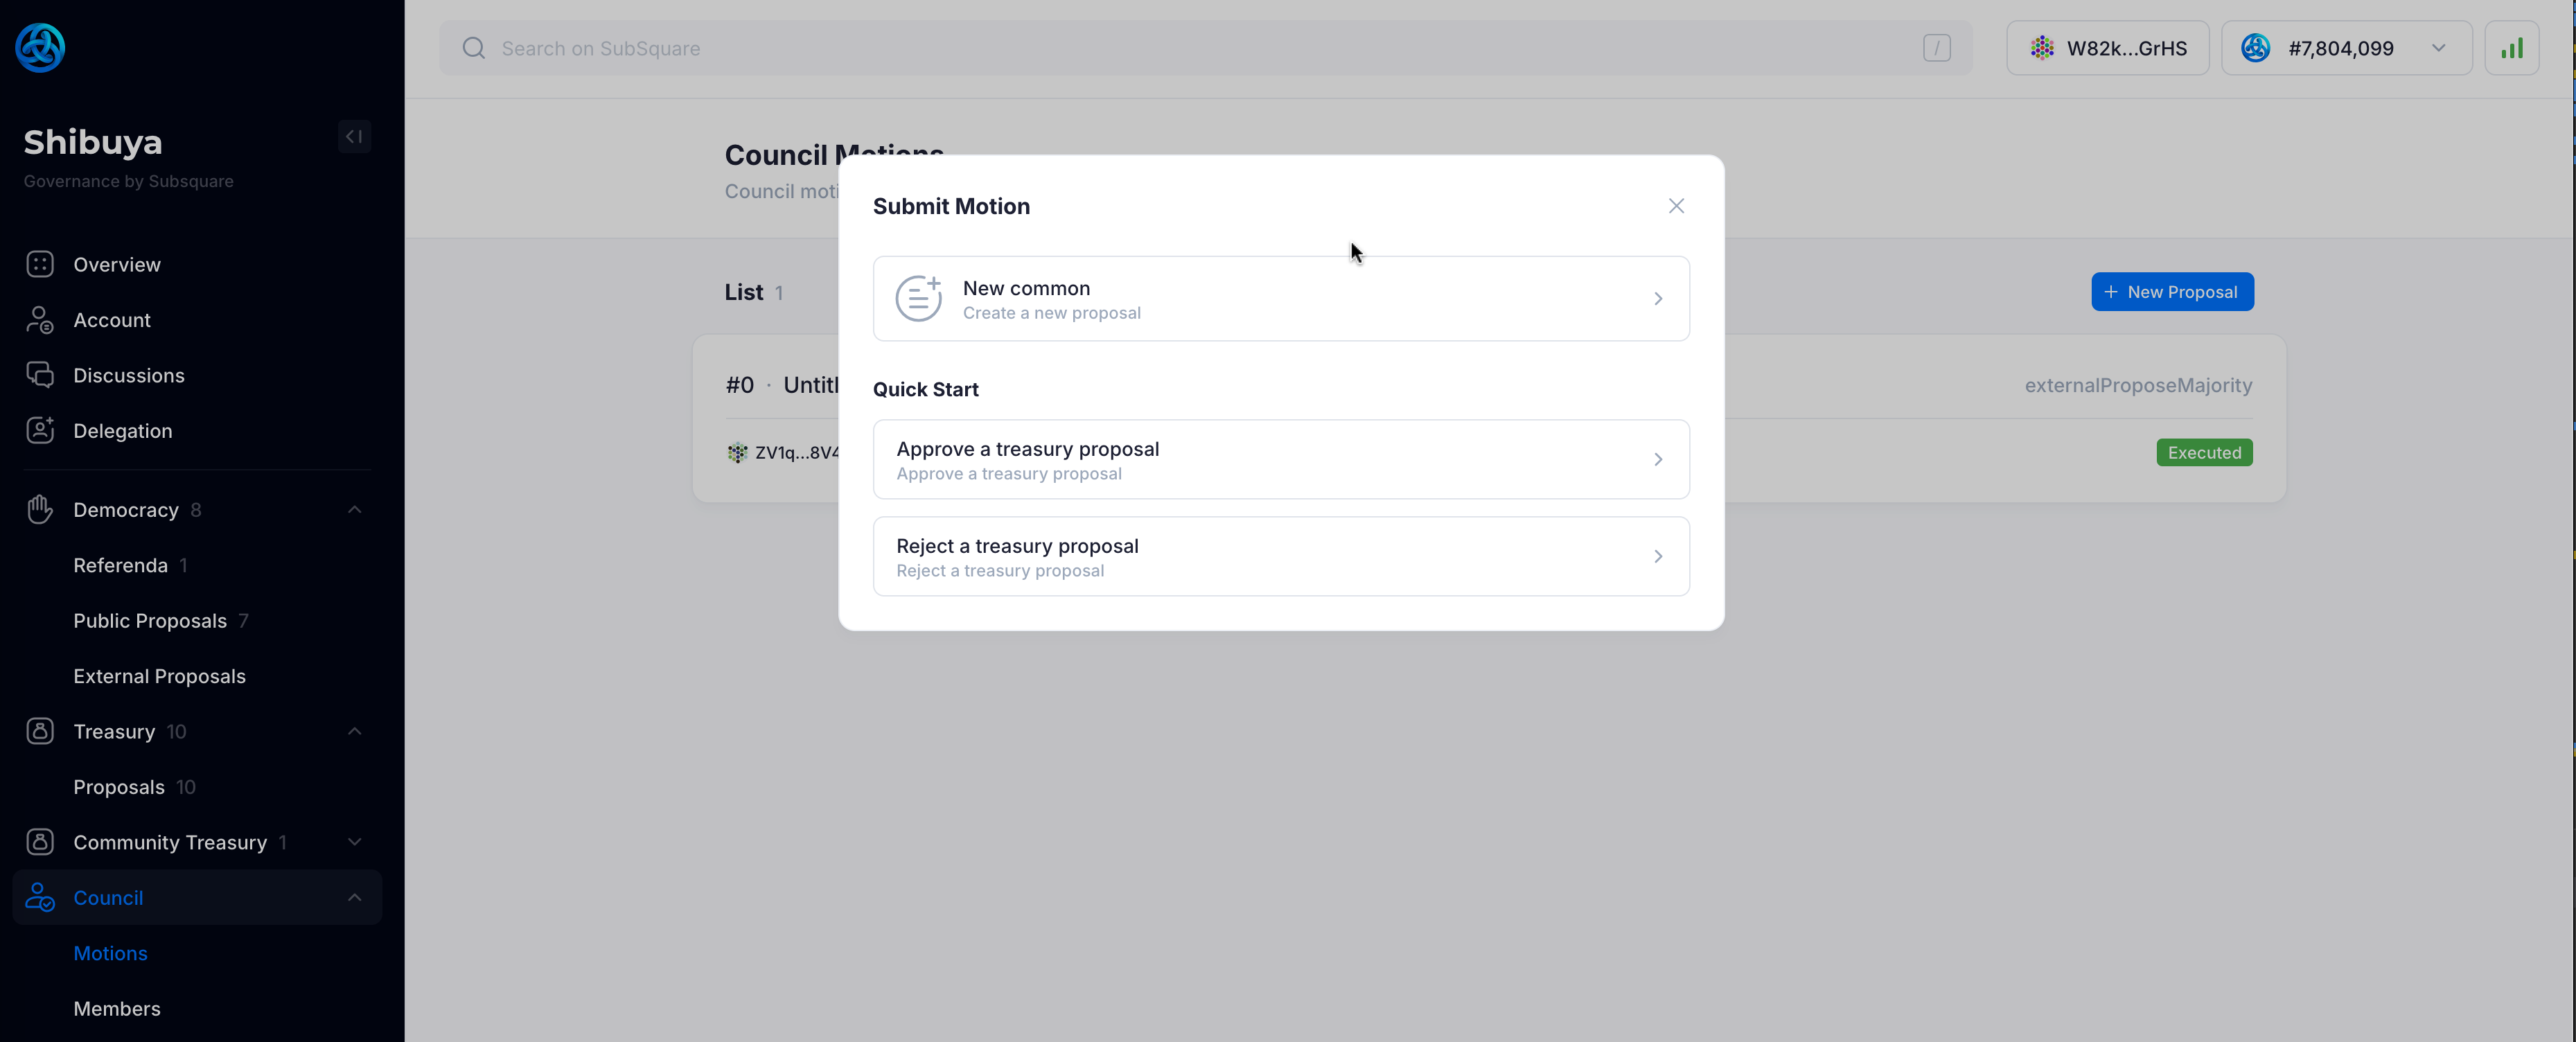
Clicking on New Common will allow the council member to create a new motion.
It's important to keep the threshold number in mind, since requirement may differ between different calls.
For external proposals, it is recommended to use the Polkadot-js App interface.
Technical Committee
The Technical Committee UI support is rudimentary and requires manual call construction.
Please refer to the technical guide for more information on how to construct this calls using the Polkadot-js App interface.
The assumption is that technical committee members are technically proficient and will refer to the linked technical guide for more information.