How to set up a Zombienet for XCM testing
TL;DR
Zombienet is a testing framework for Substrate-based blockchains, providing a simple CLI tool that allows users to spawn any Substrate-based blockchains including Astar, with the Polkadot relaychain. The assertions used in the tests can include on-chain storage, metrics, logs, and custom javascript scripts that interact with the chain.
To test XCM-related features, there are mainly two options: Rococo or a local Zombienet. But some parachains may not deploy testnets to Rococo, or some XCM-related testings (XC-20 asset registration, HRMP channel opening, etc.) may require sudo access to the testnet which is in the testnet operator’s hands. Thus, the ideal choice for XCM testings is local Zombienet.
In this guide, we will support you on how to set up Zombienet, how to spawn and configure the testnet with the latest release of the Polkadot relaychain, Astar, and how to test XCM-related features with local Zombienet.
What is Zombienet?
Zombienet is a testing framework for Substrate-based blockchains, providing a simple CLI tool that allows users to spawn any Substrate-based blockchains including Astar, and the Polkadot relaychain. The assertions used in the tests can include on-chain storage, metrics, logs, and custom javascript scripts that interact with the chain.
In this guide, we are setting up a local testnet environment with Polkadot relaychains with our parachains connected.
What is XCM?
Cross-Consensus Message Format (XCM) aims to be a language to communicate ideas between consensus systems. One of Polkadot's promises is interoperability, and XCM is the vehicle through which it will deliver this promise. Simply, it is a standard that allows protocol developers to define the data and origins that their chains can send and receive from, including cross-chain asset transfer between parachains.
Set up Zombienet CLI
In this section, we will set up Zombienet CLI using a binary. You can also set up Zombienet with docker, kubernetes, and more using the guide here.
-
Let’s create a folder in the root directory to hold the binaries
mkdir cookbook-zombienetcd cookbook-zombienet -
Go to Zombienet and download the binary built for your local environment.
- Please don’t forget to replace the release version number in the command line to the latest release.
- In this cookbook, we are using Zombienet v1.3.22
-
Move the binary to our guide folder.
mv ~/downloads/zombienet-macos ~/cookbook-zombienet -
Add execution permission to the Zombienet CLI binary file.
Note: if you are using a Mac, you may need an extra step to configure the security settings:- Go to Apple menu > System Settings > Privacy & Security.
- Under security, add the
astarbinary file that you just downloaded to the whitelist. - Continue with the following command.
chmod +x zombienet-macos -
Confirm if the binary is executable in your local environment.
./zombienet-macos --help -
When the Zombienet CLI is installed correctly, you should see the following info:
Usage: zombienet [options] [command]Options:-c, --spawn-concurrency <concurrency> Number of concurrent spawning process to launch, default is 1-p, --provider <provider> Override provider to use (choices: "podman", "kubernetes", "native")-m, --monitor Start as monitor, do not auto cleanup network-d, --dir <path> Directory path for placing the network files instead of random temp one (e.g. -d /home/user/my-zombienet)-f, --force Force override all prompt commands-h, --help display help for comma
Build the polkadot binary file
In order to spawn a testnet with a relaychain and two parachains, we need the corresponding binary files for Polkadot relaychain and Astar Network. In this section, we will build the polkadot binary file.
-
First, let’s clone the
polkadotsource codegit clone https://github.com/paritytech/polkadot -
Make sure you have the latest Rust and the support tools installed so that you can compile the
polkadotsource code smoothly.rustup updatebrew install protobuf -
Checkout the latest release (v0.9.34 for now), compile the
polkadotsource code, and build thepolkadotbinary file.cd polkadotgit checkout release-v0.9.34cargo build --release -
After the compilation, you will have a
polkadotbinary file. Rename the old Polkadot folder and move thepolkadotbinary to our guide folder.mv ~/cookbook-zombienet/polkadot ~/cookbook-zombienet/polkadot-builtmv ~/cookbook-zombienet/polkadot-built/target/release/polkadot ~/cookbook-zombienet
Download astar-collator binary file
- Download the latest release of the astar-collator for macOS or Ubuntu from https://github.com/AstarNetwork/Astar/releases
Please make sure you are running a macOS or Ubuntu with the appropriate version. For macOS, please use the versions above MacOS 12.0.
-
Move the binary file to our cookbook folder.
mv ~/downloads/astar-collator ~/cookbook-zombienet -
Add execution permission to the binary file
Note: if you are using a Mac, you may need an extra step to configure the security settings:- Go to Apple menu > System Settings > Privacy & Security.
- Under security, add the
astarbinary file that you just downloaded to the whitelist. - Continue with the following command.
chmod +x ./astar-collator
Download the configuration file for Zombienet
In order to spawn the Zombienet, we need to add a configuration file to specify the configurations. We have a configuration file ready that is configured to two parachains named shiden-dev and shibuya-dev, and a relaychain named rococo-local: here.
- Download the configuration file from here.
curl -o multi_parachains.toml https://raw.githubusercontent.com/AstarNetwork/Astar/master/third-party/zombienet/multi_parachains.toml
Start the Zombienet with the configuration file
-
Start the Zombienet with the configuration file
./zombienet-macos -p native spawn multi_parachains.toml -
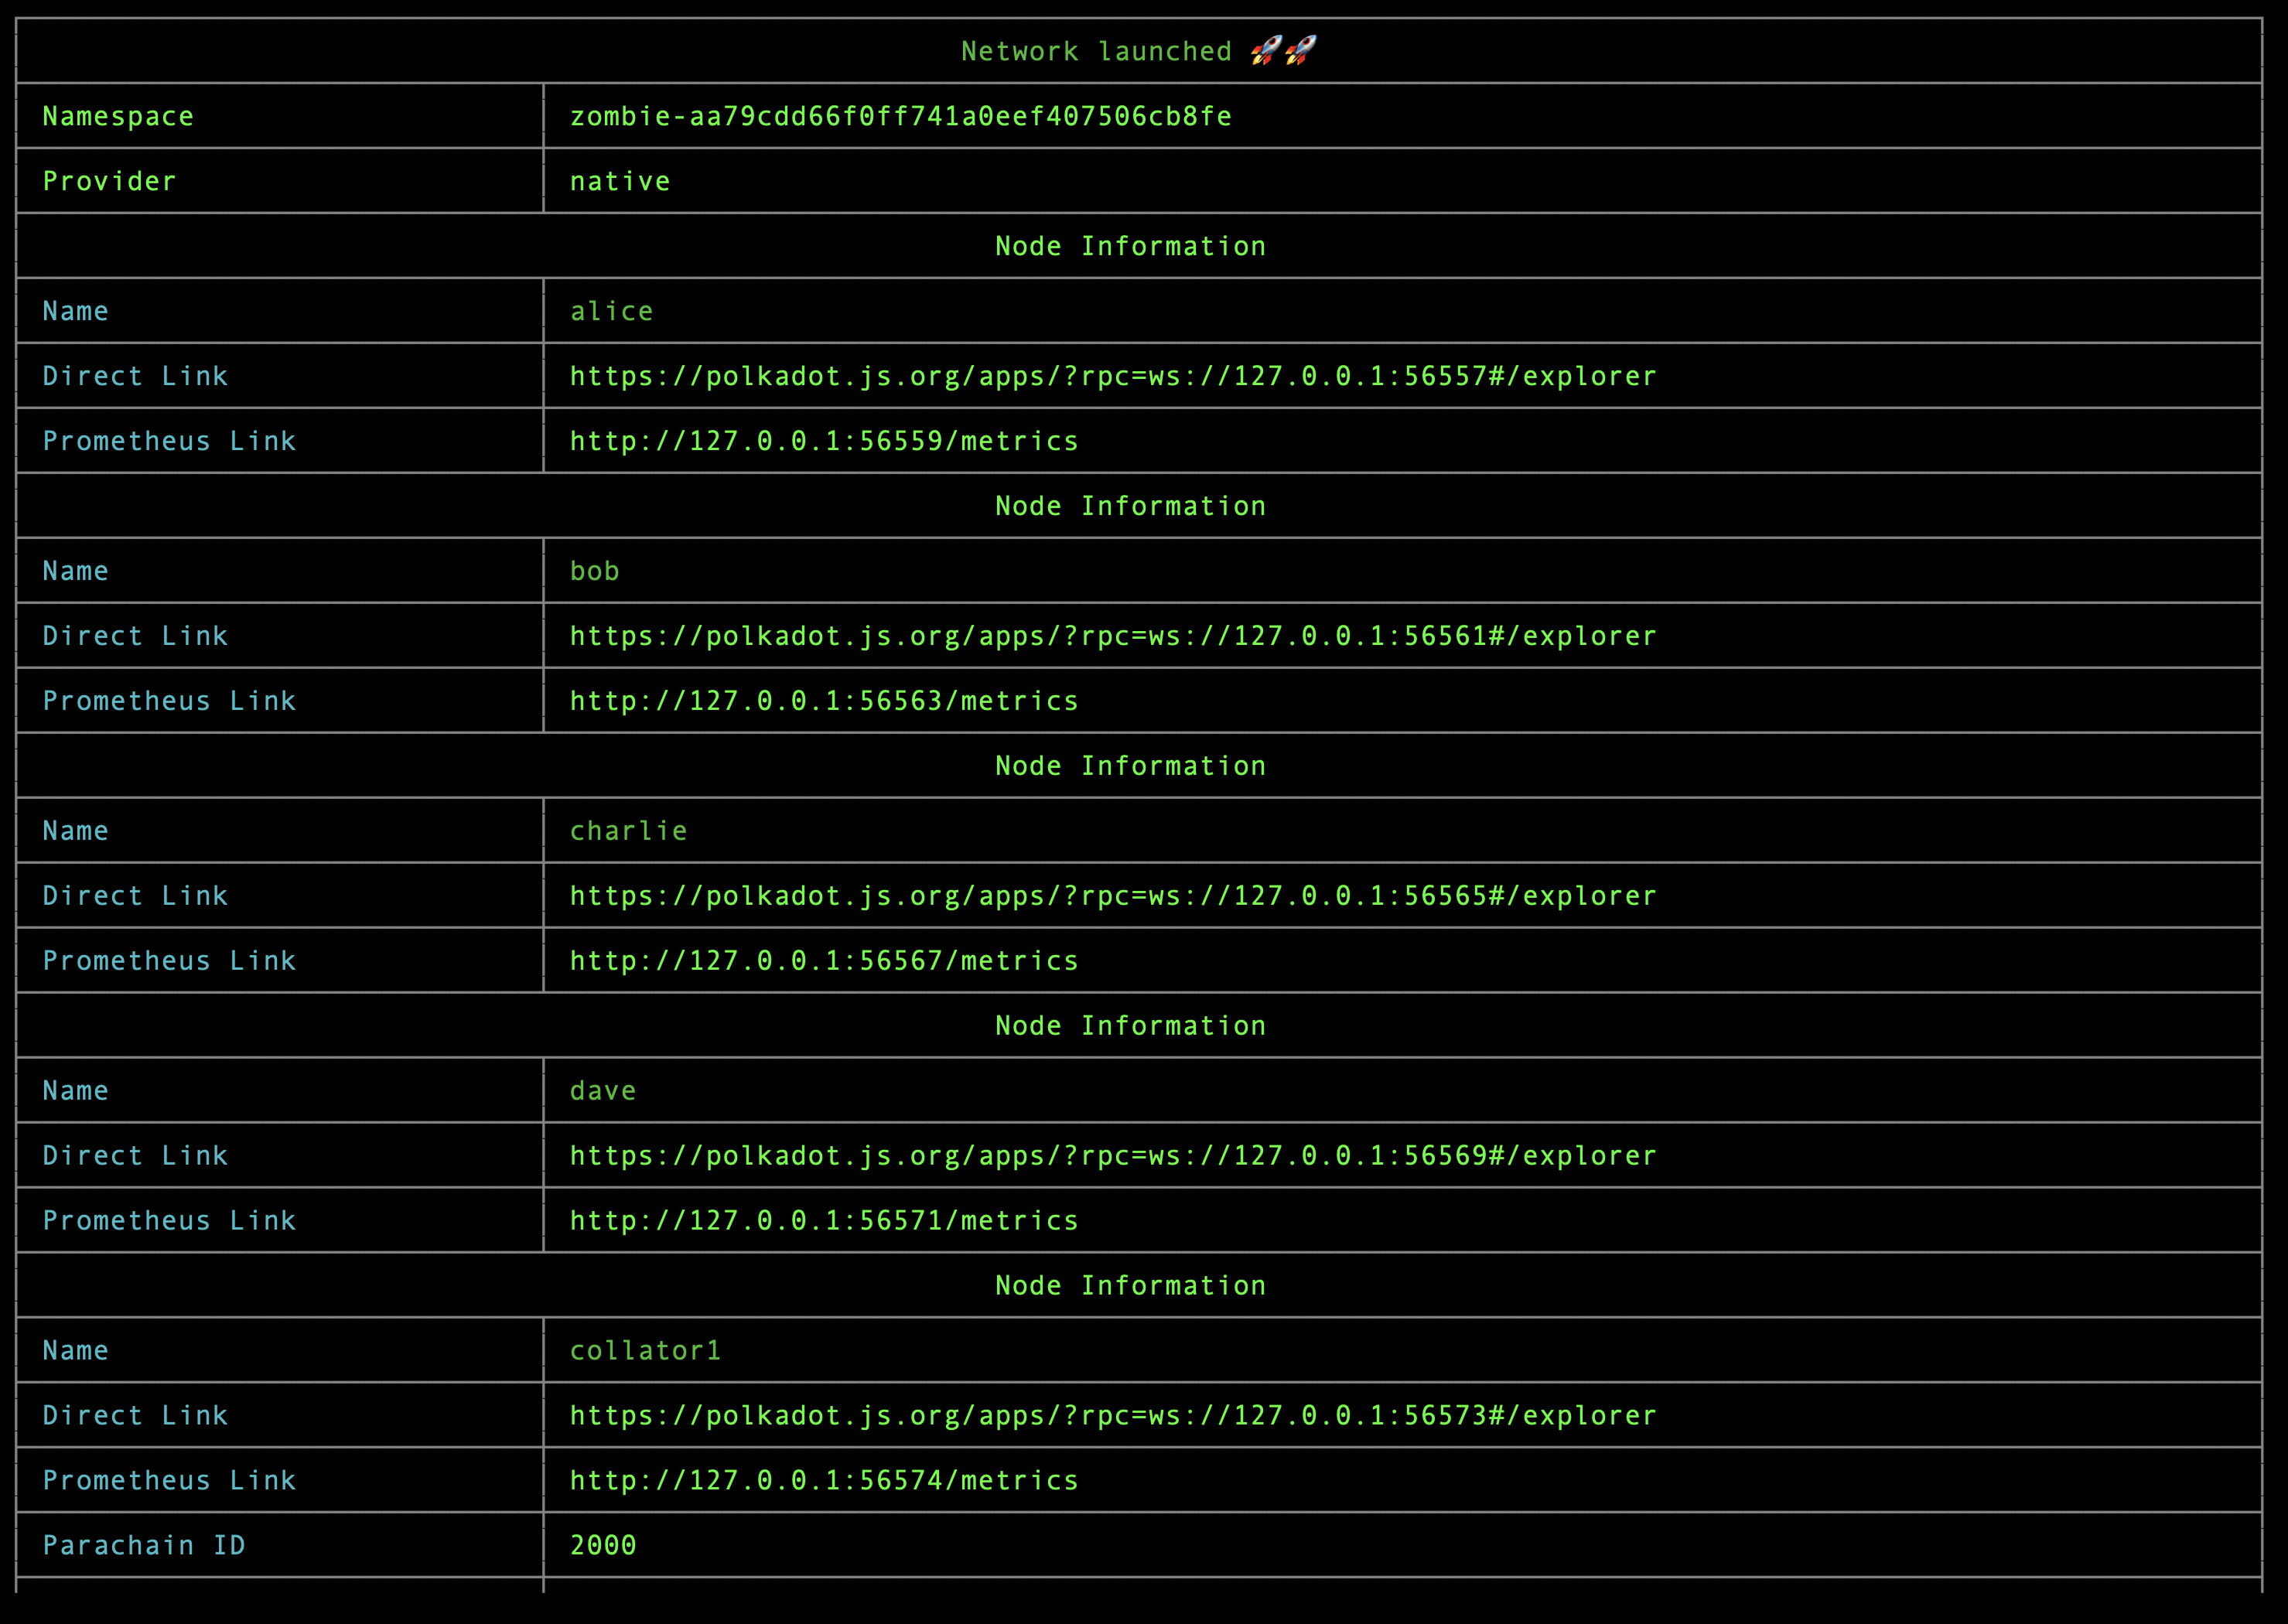
After starting the Zombienet successfully, you will be able to see the local testnet endpoint and explorer link as shown below:
Set up cross-chain assets on two parachains
The HRMP channels between shiden-dev and shibuya-dev are opened as configured in the multi_parachains.toml configuration file.
To proceed to the next step of XCM testing, we only need to register the native assets of shiden-dev and shibuya-dev on each other to pay for XCM execution on the remote chain.
-
Go to Polkadot.JS Explorer (or the link specified in
Direct Linkofcollator1)- Click
Developer → Extrinsics → Decodeand input the following call data, to registerxcSDNonshibuya-dev. Please make sure to submit the extrinsics viaAlice's account which have enoughSBYbalance.
0x63000b02102401910100d43593c715fdd31c61141abd04a99fd6822c8558854ccde39a5684e7a56da27d0102093d002410910114786353444e14786353444e12003600010101005d1f91013601010101005d1f02286bee - Click
-
Go to Polkadot.JS Explorer (or the link specified in
Direct Linkofcollator2)- Click
Developer → Extrinsics → Decodeand input the following call data, to registerxcSBYonshiden-dev. Please make sure to submit the extrinsics viaAlice's account which have enoughSDNbalance.
0x63000b02102401210300d43593c715fdd31c61141abd04a99fd6822c8558854ccde39a5684e7a56da27d0102093d00241021031478635342591478635342591200360001010100411f2103360101010100411f02286bee - Click
Execute a simple remote call from Shiden to Shibuya
In this section, we will create an XCM remote call that will send an instruction from shiden-dev to execute System::remark_with_event on shibuya-dev.
For more details on how to create a remote execution call and how the derived account works, we will explain in another guide.
-
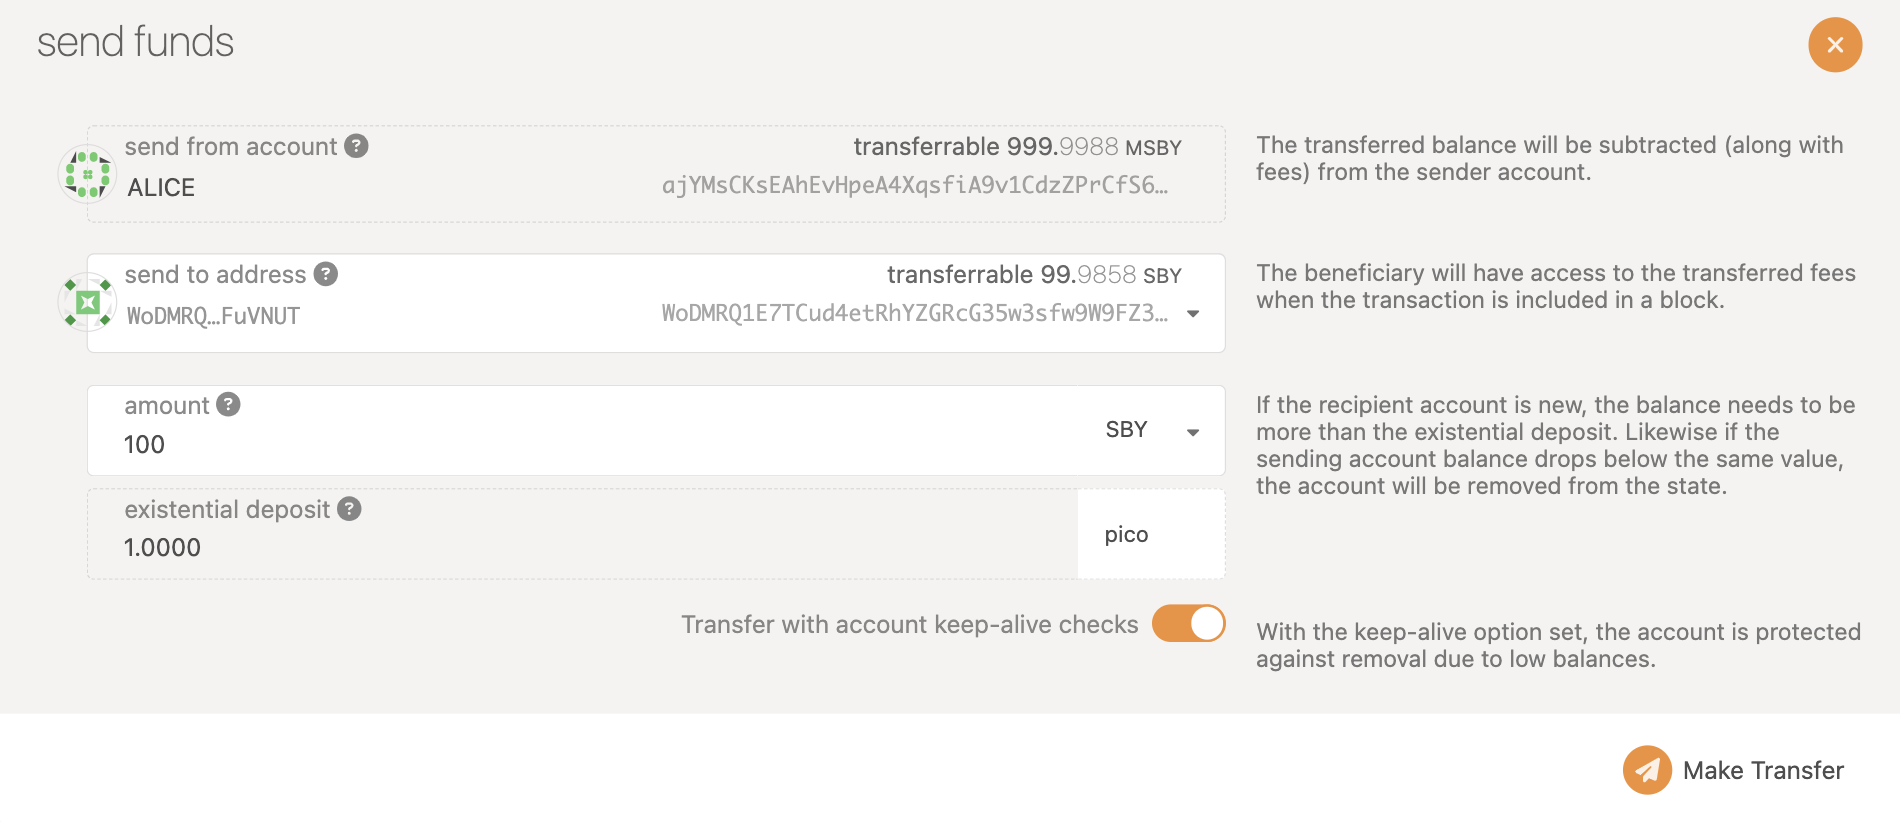
Send some
SBYto Alice’s derived account on Shibuya -5Cvcv8RvSsp6go2pQ8FRXcGLAzNp5eyC8Je7KLHz5zFwuUyTto pay for the gas fee of executingSystem::remark_with_event.- The remote call won’t be executed via Alice's account on Shibuya directly, but with a new derived account. Thus, we need to send
SBYto the derived account.
- The remote call won’t be executed via Alice's account on Shibuya directly, but with a new derived account. Thus, we need to send
-
Initiate the remote call by inputting the following call data in Shiden’s
Developer → Extrinsics → Decode.0x330001010100411f021400040000000013000064a7b3b6e00d130000000013000064a7b3b6e00d00060102286bee140a0808abba140d010004000101002611a3b92e2351f8b6c98b7b0654dc1daab45b2619ea357a848d4fe2b5ae1863 -
After 2 blocks, you will be able to observe the executed
System::remark_with_eventin Shibuya’s explore under the recent blocks.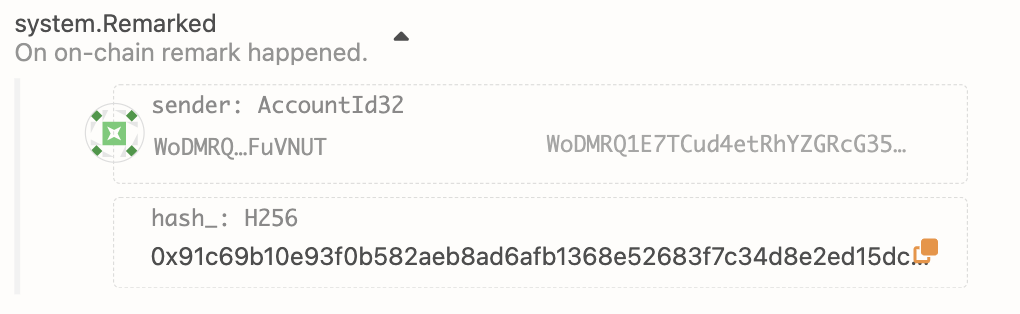
FAQ
Please join our Discord for technical support.