Subsquid
Subsquid is an indexing framework supporting both Substrate and EVM-based chains. It is extremely flexible and offers high syncing speeds.
Subsquid indexer projects (or "squids") can be made from templates either manually or with squid generation tools. The tools make ready-to-use indexer projects out of contracts' ABIs. The generated squids decode events and transactions of user-specified contracts, then serve the data over a GraphQL API or store it as a dataset on a filesystem. At the moment EVM/Solidity contracts are supported, with WASM/ink! contracts in the pipeline. Consider this route if your use case does not require any nontrivial transformations of blockchain data.
Implementation-wise, squids are just regular NodeJS processes that can be extended with regular Typescript code. They can apply arbitrary transformations to the data, query the contract state (EVM/WASM) or mix in some data from external sources like APIs or IPFS. Mixing data from multiple chains is supported. If a squid is serving its data over a GraphQL server, that can be extended too with custom queries and simple access control. Check out Subsquid's extensive documentation to learn more about its features.
Squids can run either on your infrastructure or in Subsquid Cloud (former Aquarium). The service has and will always have a free tier. For more demanding applications it offers paid plans.
Prerequisites
- NodeJS v16 or newer
- Subsquid CLI
- Docker (if you want your data in PostgreSQL and/or served via a GraphQL API)
EVM/Solidity
There are two primary ways to index EVM contracts deployed to Astar networks with Subsquid:
-
With a Substrate processor utilizing its support for the Frontier EVM pallet. This is useful when both EVM and Substrate data is required. If that is your use case, check out this tutorial.
-
With a native EVM processor. This simpler and more performant approach will be the focus of this section. Within it, you can choose to either
- develop a squid from a template or
- auto-generate it.
Take the latter approach to obtain the decoded events and/or transactions data from a fixed set of contracts rapidly, but be aware that the autogenerated squids are not meant to be used for further development.
Subsquid supports the following Astar networks for native EVM indexing:
astarshidenshibuya
Developing an EVM/Solidity squid from a template
Retrieve the evm squid template and install dependencies:
sqd init my-evm-squid -t evm
cd my-evm-squid
npm ci
Verify that the template squid works by starting it, then follow the Development Flow guide. Your major tasks will be:
- Setting the source network.
- Requesting the raw data by further configuring the EVM processor.
- Defining the data model of outbound data (GraphQL/PostgreSQL or file-based).
- Decoding EVM events and transactions.
- Transforming the decoded data within the batch handler.
Check out the tutorial on indexing BAYC for a step-by-step guide into developing an EVM-native squid. If you want to save your data to a file-based dataset, take a look at the tutorials on writing to CSV or to Apache Parquet files. If you are a contract developer you can follow this guide to index contracts deployed to local EVM development environments, for pre-deployment integration tests.
Generating an EVM/Solidity squid
A squid indexing events and calls listed in a contract ABI can be generated with the @subsquid/squid-gen tool. Begin by creating a new project with the tool's complementary template, abi, and installing dependencies:
sqd init my-evm-squid -t abi
cd my-evm-squid
npm ci
Next, obtain any contract ABIs and save them to the ./abi folder. I will be indexing the PancakeFactory and PancakeRouter contracts of Arthswap, taking their ABIs from the Blockscout pages ("Code" tab, "Contract ABI" section) and saving them to ./abi/factory.json and ./abi/router.json, correspondingly.
Next, make a squidgen.yaml configuration file like this one:
archive: astar
target:
  type: postgres
contracts:
  - name: pancakeFactory
    abi: "./abi/factory.json"
    address: "0xA9473608514457b4bF083f9045fA63ae5810A03E"
    events: true
    functions:
      - feeTo
      - feeToSetter
  - name: pancakeRouter
    abi: "./abi/router.json"
    address: "0xE915D2393a08a00c5A463053edD31bAe2199b9e7"
    events: true
    functions: true
Here,
- archive is an alias or an endpoint URL of a chain-specific data lake responsible for the initial ingestion and filtration of the data. Aliases for Astar networks are
astar,astar-zkatana,shibuyaandshiden. - target section describes how the scraped data should be stored. The example above uses a PostgreSQL database that can be presented to users as a GraphQL API or used as-is. Another option is to store the data to a file-based dataset.
- contracts is a list of contracts to be indexed.
name,abiandaddressfields are requred.events: truerequests that all events listed in the ABI are decoded and indexed;functions: truemeans the same for function calls. You can also list individual events and calls for a more compact squid.
Generate the squid code with
npx squid-gen config squidgen.yaml
and give your new squid a test run.
WASM/ink!
Subsquid supports indexing ink! contracts deployed to the following Astar networks:
astarshidenshibuya
Developing a WASM/ink! squid from a template
Retrieve the ink squid template and install dependencies:
sqd init my-ink-squid -t ink
cd my-ink-squid
npm ci
Verify that the template squid works by starting it, then follow the Development Flow guide. Your major tasks will be:
- Setting the source network.
- Requesting the raw data by further configuring the Substrate processor, particularly subscribing to the relevant ink! events.
- Defining the data model of outbound data (GraphQL/PostgreSQL or file-based).
- Decoding ink! contract events and possibly other Substrate events, calls, storage items or constants.
- Transforming the decoded data within the batch handler.
You can also check out the end-to-end ink! contract indexing tutorial maintained by Subsquid.
Starting the squid
Once you've retrieved a template or generated a squid it is time to give it a local test run.
If you used a postgres target prepare the database and migrations by running
sqd up # starts a database container
sqd migration:generate
Skip this if you used a parquet target.
Next, start a squid processor - the process that ingests data from the archive:
sqd process
You should see the processor apply the migrations and start the ingestion, producing messages like
05:26:16 INFO  sqd:processor 3483256 / 3483256, rate: 1045307 blocks/sec, mapping: 294 blocks/sec, 261 items/sec, ingest: 10 blocks/sec, eta: 0s
05:26:35 INFO  sqd:processor 3483257 / 3483257, rate: 157368 blocks/sec, mapping: 211 blocks/sec, 169 items/sec, ingest: 10 blocks/sec, eta: 0s
05:26:56 INFO  sqd:processor 3483259 / 3483259, rate: 79846 blocks/sec, mapping: 151 blocks/sec, 101 items/sec, ingest: 9 blocks/sec, eta: 0s
If the data is stored to the database, it should appear there almost instantaneously. Check it out with
PGPASSWORD=postgres psql -U postgres -p 23798 -h localhost squid
For file-based targets synchronization takes longer.
If you want to serve the scraped data over GraphQL you will need to start a separate GraphQL server process. Processor blocks the terminal, so open another one, navigate to the squid project folder and run
sqd serve
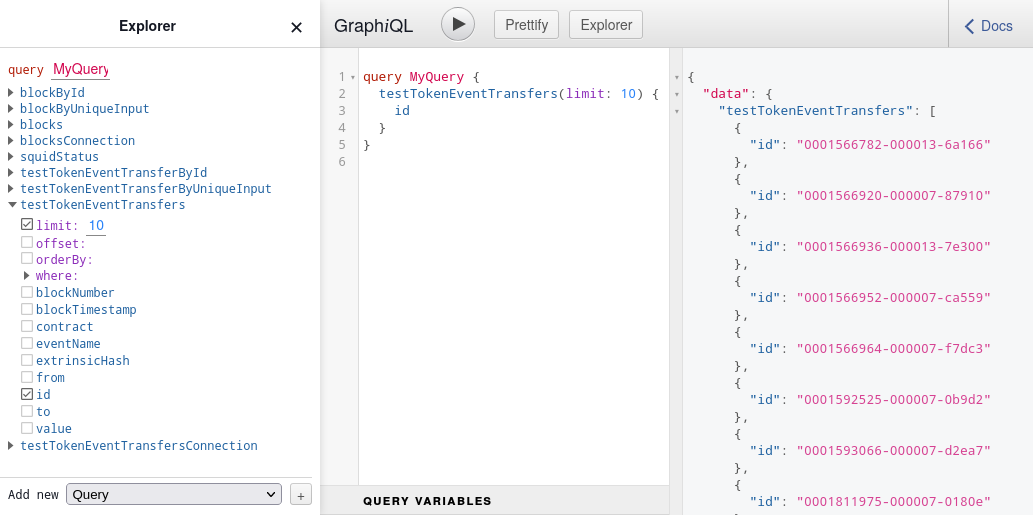
The server will listen at localhost:4350, with a GraphiQL playground available at http://localhost:4350/graphql:
Next steps
Once you've developed and tested your squid, you can run it on your own infrastructure or use Subsquid Cloud. In the simplest case, the deployment can be done with just
sqd deploy .
after authenticating with Cloud. For more complex scenarios see the Deploy a Squid section of the framework documentation.
Subsquid team can be reached via Telegram and Discord. Feel free to stop by and chat!