Ask! Smart Contracts
Ask! eDSL has many limitations and issues which are actively worked upon but at this moment it is not recommended for PRODUCTION environment. Please consider ink! if you are building a contract for production.
This guide will help you set up your local environment and deploy a simple Ask! contract on our testnet, Shibuya.
What will we do?
We will setup the local environment for developing ask! smart contract and deploys it Shibuya Testnet.
What is Ask!?
Ask! is a framework for AssemblyScript developers to write Wasm smart contracts for pallet-contracts, otherwise known as the Wasm Virtual Machine. Its syntax is similar to TypeScript. The current project is funded by Polkadot treasury, and still under active development.
Prerequisites
This tutorial targets developers who are new to ask! and AssemblyScript. Prior knowledge of using/setting up typescript/javascript project is helpful but not needed.
Setup Environment
Install yarn package manager.
We will be using yarn package manager to manage our ask! project. For installation instructions read here
npm install --global yarn
Clone the ask-template repo
Simply clone the template provided by ask! team - ask-template.
Execute the below commands to clone the repository and cd into it.
git clone https://github.com/ask-lang/ask-template.git
cd ask-template
After executing above commands you will have a following project structure.
ask-template
├── asconfig.json               (assemblyscript config)
├── askconfig.json              (ask-lang config)
├── build                       (build targets, configurable, see asconfig.json and askconfig.json)
│   └── metadata.json           (Ask! contract metadata)
├── flipper.ts                  (Ask! contract code)
├── index.d.ts                  (typescript definition file, used for syntax and code hinting)
├── LICENSE
├── node_modules
├── package.json                (npm package config)
├── README.md
├── tsconfig.json               (typescript config)
└── yarn.lock
The command above sets you a simple Ask! contract in flipper.ts. You are good to go now!
Flipper Contract
flipper.ts file
Below is the content of flipper.ts file. It contains a very basic flipper contract which has only two contract methods, flip()
and get().
/* eslint-disable @typescript-eslint/no-inferrable-types */
import { env, Pack } from "ask-lang";

@event({ id: 1 })
export class FlipEvent {
  flag: bool;

  constructor(flag: bool) {
    this.flag = flag;
  }
}

@spreadLayout
@packedLayout
export class Flipper {
  flag: bool;
  constructor(flag: bool = false) {
    this.flag = flag;
  }
}

@contract
export class Contract {
  _data: Pack<Flipper>;

  constructor() {
    this._data = instantiate<Pack<Flipper>>(new Flipper(false));
  }

  get data(): Flipper {
    return this._data.unwrap();
  }

  set data(data: Flipper) {
    this._data = new Pack(data);
  }

  @constructor()
  default(flag: bool): void {
    this.data.flag = flag;
  }

  @message({ mutates: true })
  flip(): void {
    this.data.flag = !this.data.flag;
    let event = new FlipEvent(this.data.flag);
    // @ts-ignore
    env().emitEvent(event);
  }

  @message()
  get(): bool {
    return this.data.flag;
  }
}
Contract Structure
/*
 * @event() is use to define Event, that can be emitted using env().emitEvent().
 */
@event({ id: 1 })
export class FlipEvent {}

/*
 * This is the smart contract storage
 */
@spreadLayout
@packedLayout
export class Flipper {}

/*
 * @contract is use declare a smart contract, contains the functional logic.
 */
@contract
export class Contract {}
Storage
@spreadLayout
@packedLayout
export class Flipper {
  flag: bool;
  constructor(flag: bool = false) {
    this.flag = flag;
  }
}
The Flipper class is our contract's storage. The @spreadLayout and @packedLayout are used to describe how it will
be stored internally, see for more details - here.
Callable functions
@contract
export class Contract {
  @constructor()
  default(flag: bool): void {}

  @message({ mutates: true })
  flip(): void {}

  @message()
  get(): bool {}
}
-
@constructor- This is used for bootstrapping the initial contract state into the storage when contract is deployed for first time. -
@message()- This marks a function as publicly dispatchable, meaning that it is exposed in the contract interface to the outside world.
Events
Events in ask! are simple classes that are anointed with @event() decorator with id specified.
Note:- No two events can have same id
@event({ id: 1 })
export class FlipEvent {
  flag: bool;

  constructor(flag: bool) {
    this.flag = flag;
  }
}
env().emitEvent() is used to emit events in ask!, just like in flip() method of contract.
let event = new FlipEvent(this.data.flag);
// @ts-ignore
env().emitEvent(event);
Build
Run the command below, which will build the template contract.
# Install dependencies and Build the template contract
yarn && yarn build flipper.ts
The above command will generate the Wasm code and metadata file for the contract in flipper.optimized.wasm, and metadata.json, respectively.
ask-template
├── asconfig.json               (assemblyscript config)
├── askconfig.json              (ask-lang config)
├── build
│   └── metadata.json           generated by Ask!, configurable by `askconfig.json`
│   └── flipper.optimized.wasm  generated by AssemblyScript, configurable by `asconfig.json`
│   └── flipper.wat             generated by AssemblyScript, configurable by `asconfig.json`
Deploy
Now we will deploy this smart contract on our testnet.
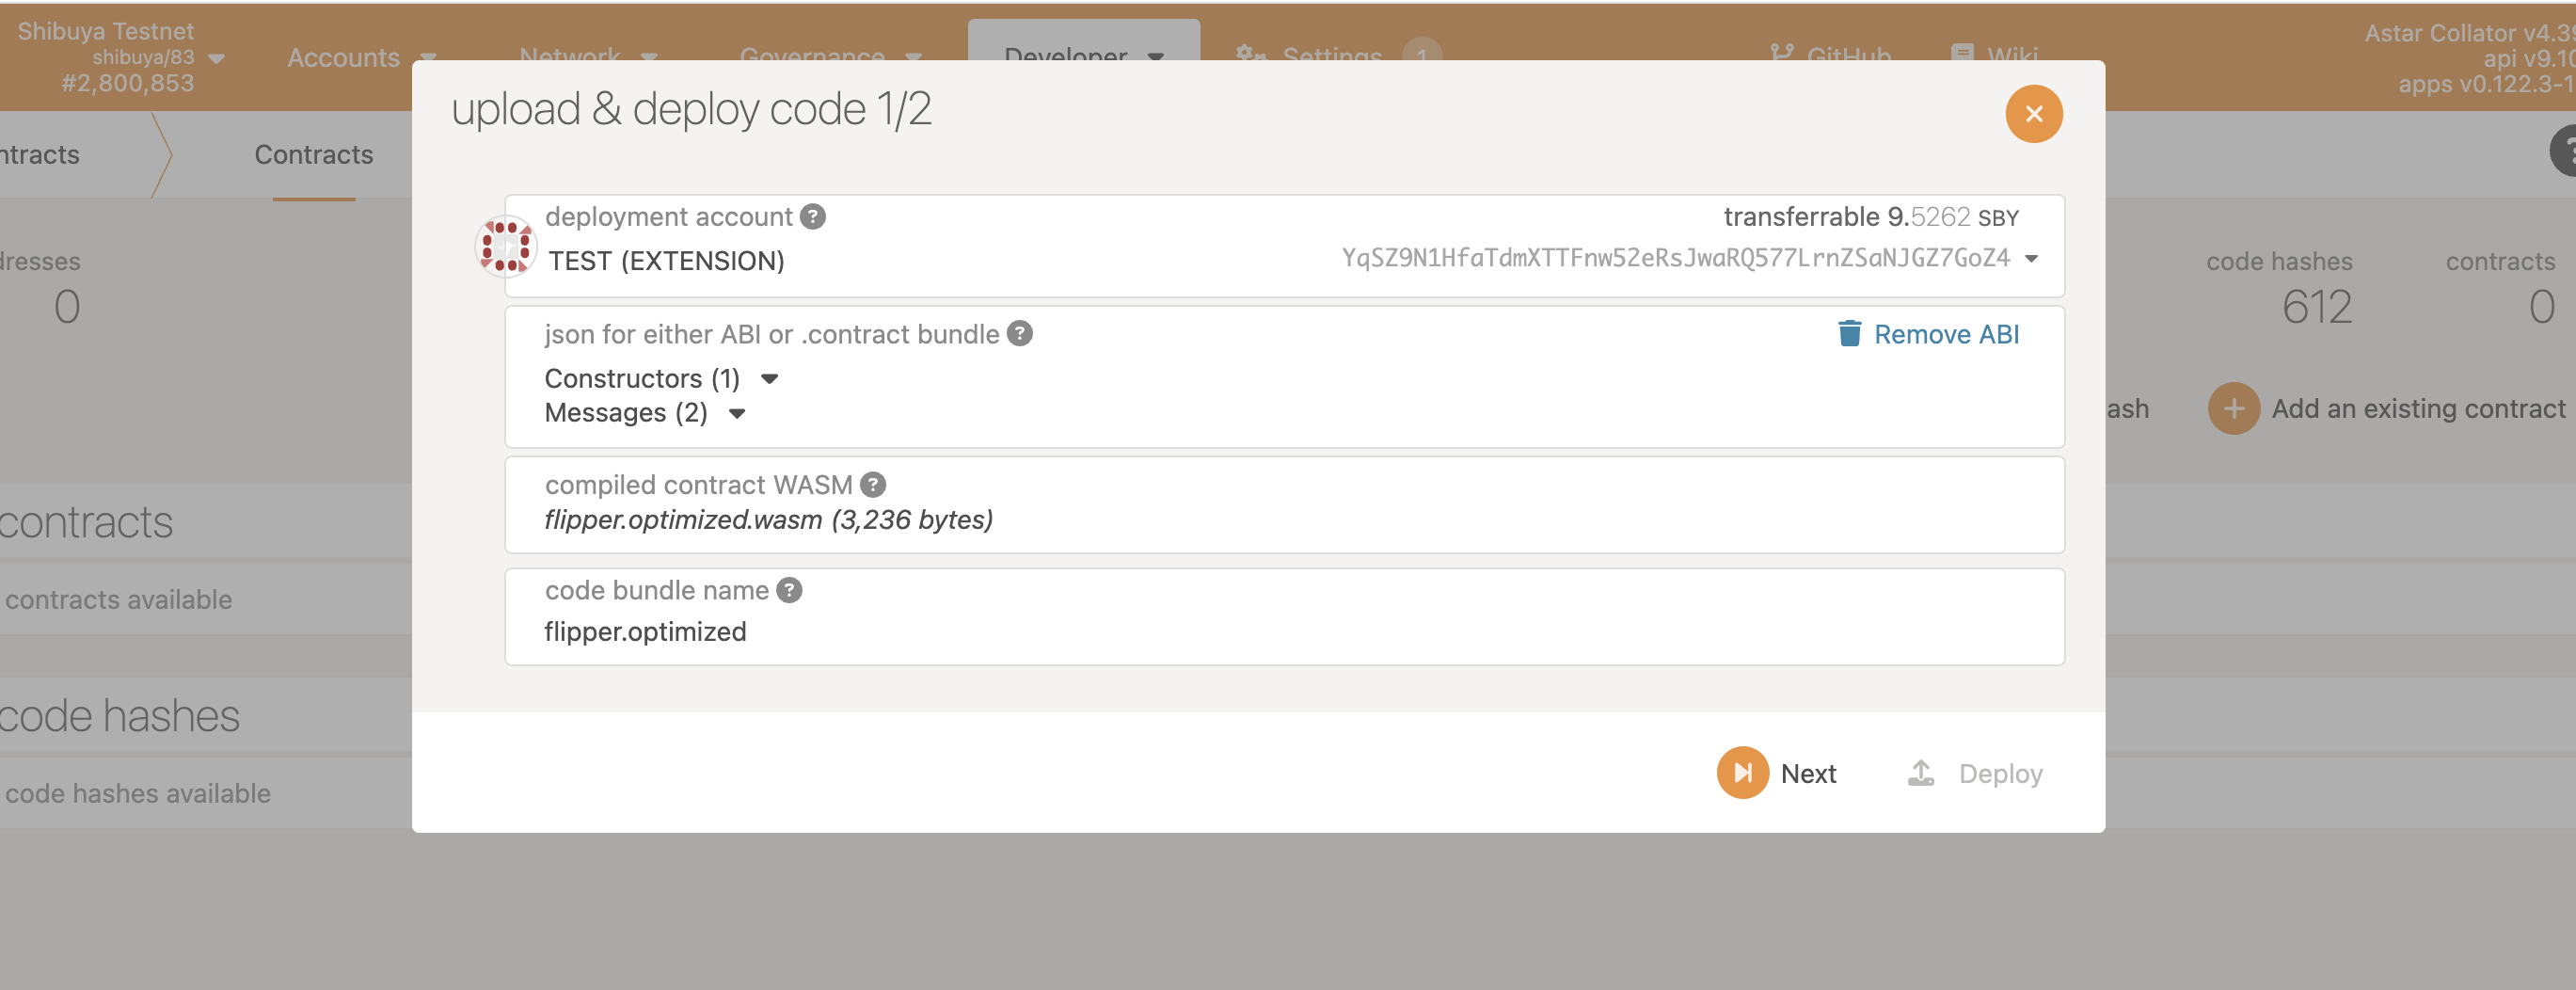
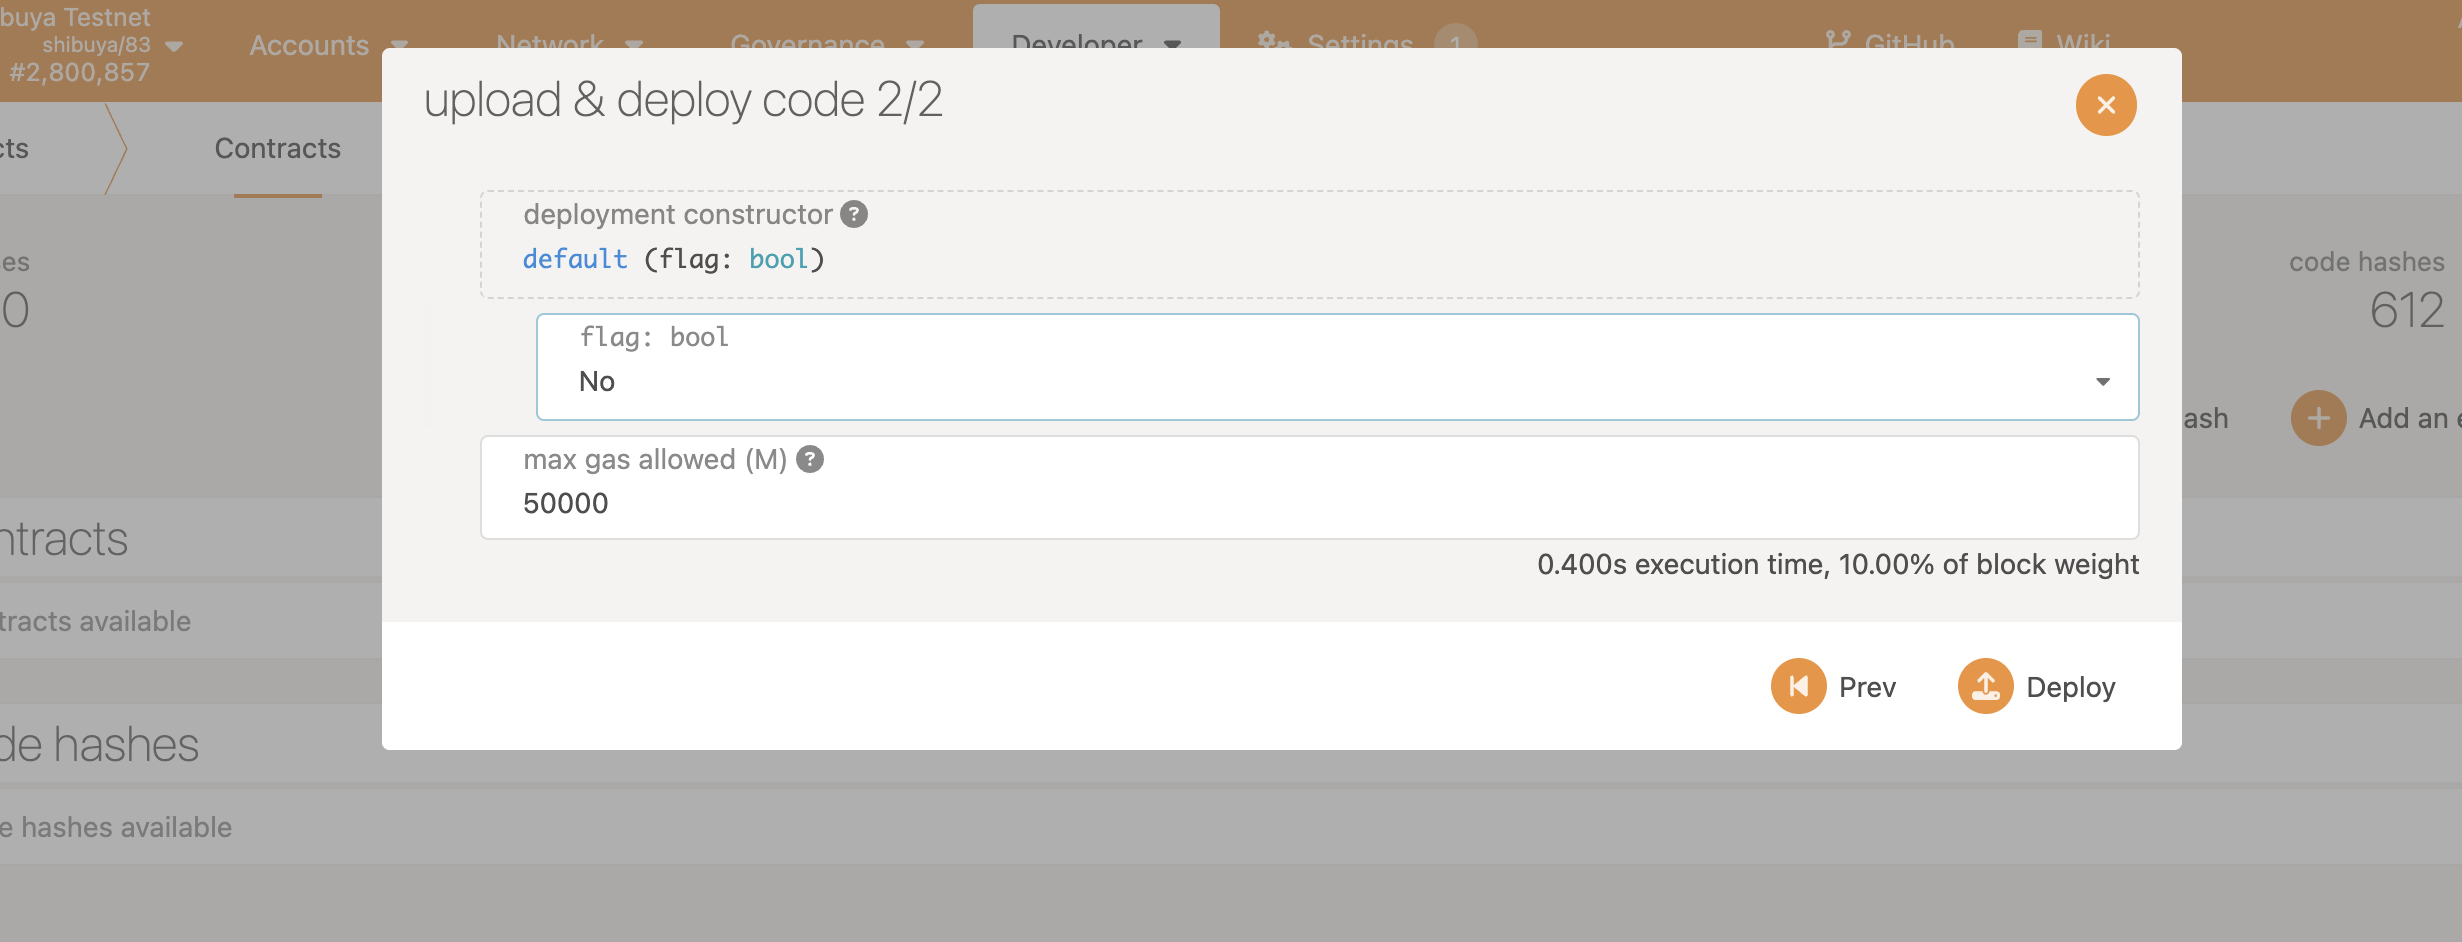
We will access polkadot.js and deploy the smart contract. Select Shibuya testnet and pick metadata.json for “json for either ABI or .contract bundle” section and pick flipper.optimized.wasm for “compiled contract WASM” section.
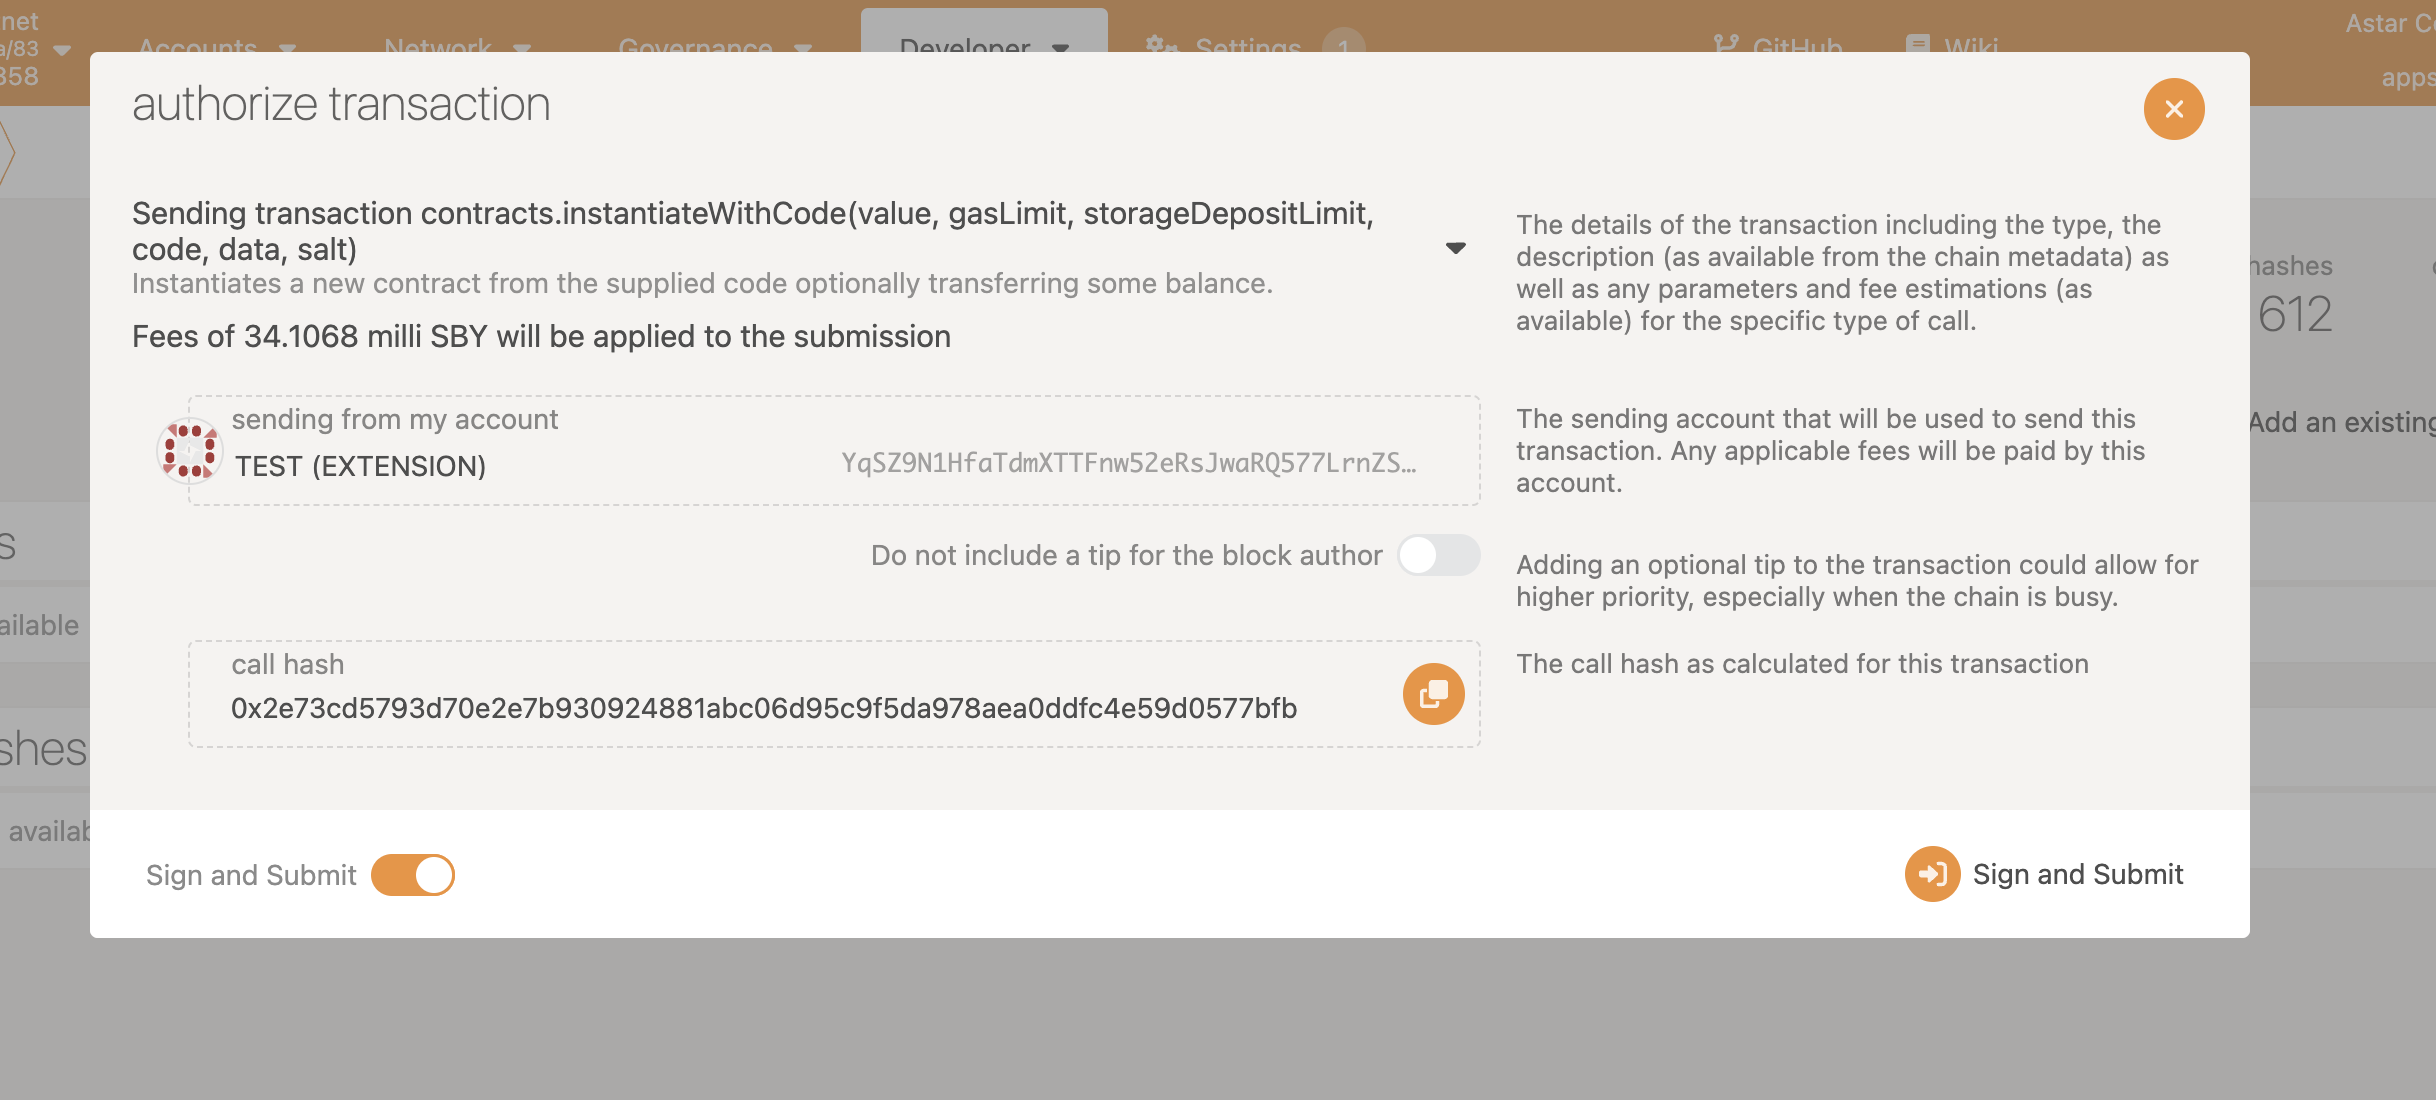
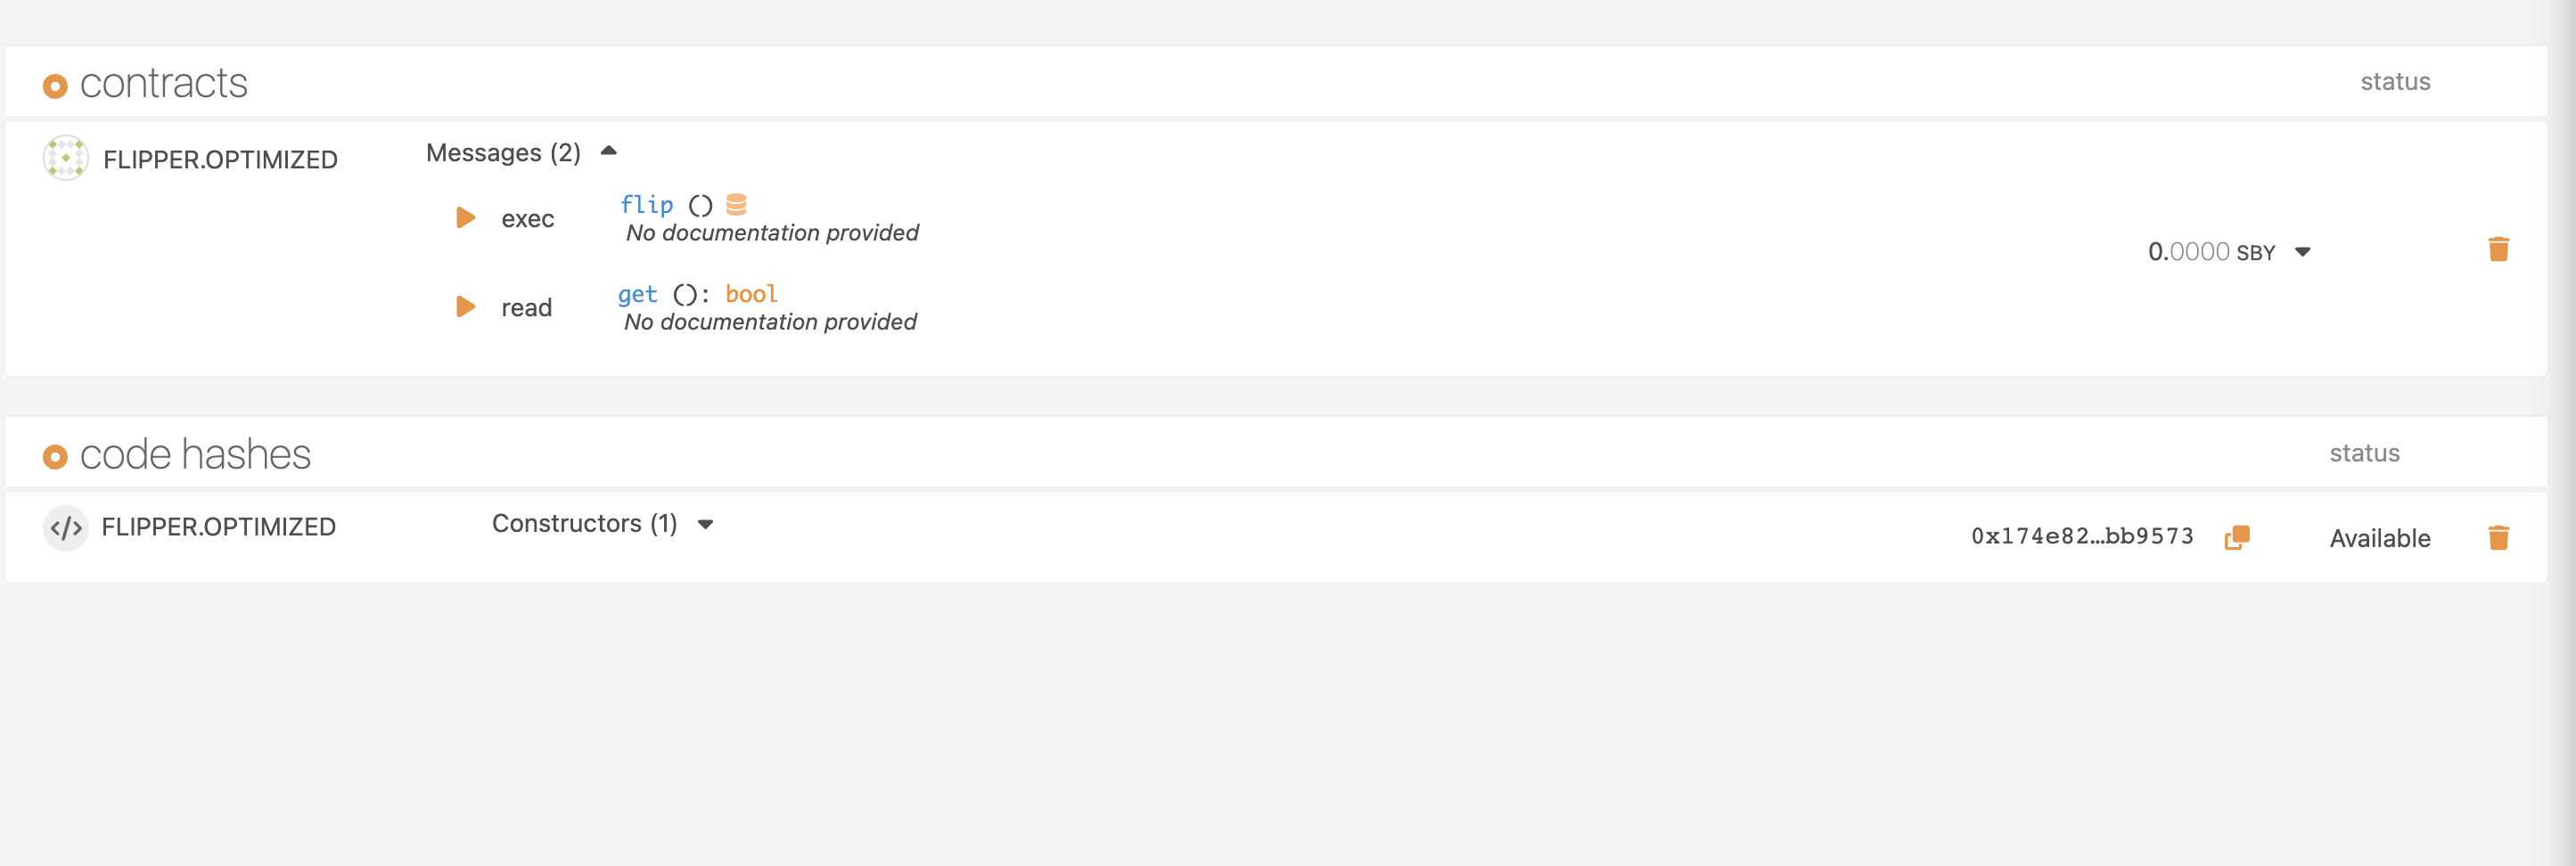
After following the steps above. We can confirm that the contract is deployed on Shibuya testnet.
That’s a wrap! If you have any questions, please feel free to ask us in our official discord channel.