Polkadot.js Apps UI
Deploy a Wasm Smart Contract with Polkadot.js
This is a step by step tutorial that will demonstrate how to deploy a Wasm smart contract with Polkadot.js apps, onto Shibuya testnet.
You can deploy the Wasm blob separately from the metadata, but in this example we’ll use the .contract file which combines both Wasm and metadata files. If you used ink! and cargo contract build you will find the .contract file under:
./target/ink/myProg.contract
Contract Page on Polkadot.js
First, we will deploy the contract:
- Open PolkadotJS Apps in your browser and connect to Shibuya testnet. For connectivity instructions check the Integration chapter within this doc.
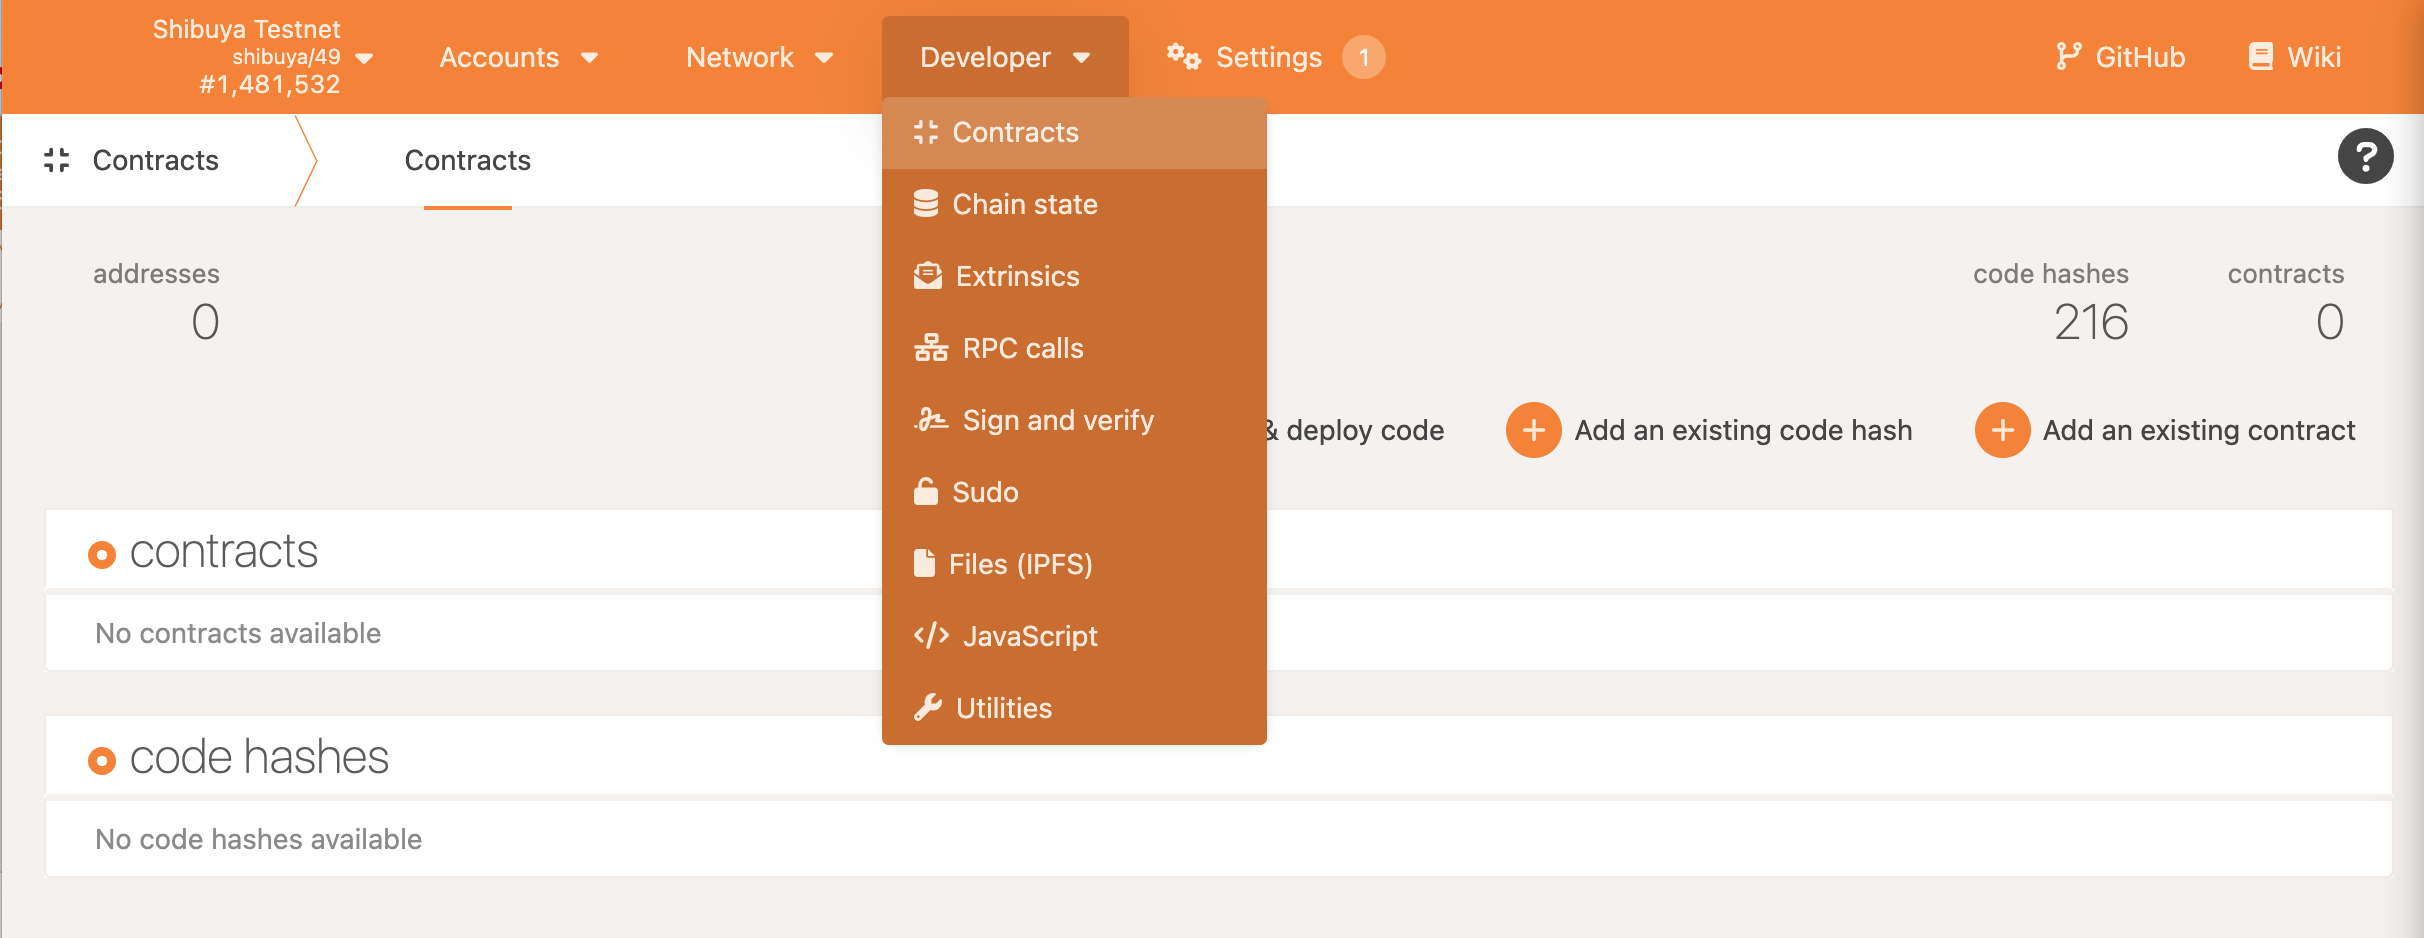
- Go to page
Developers —> Contracts
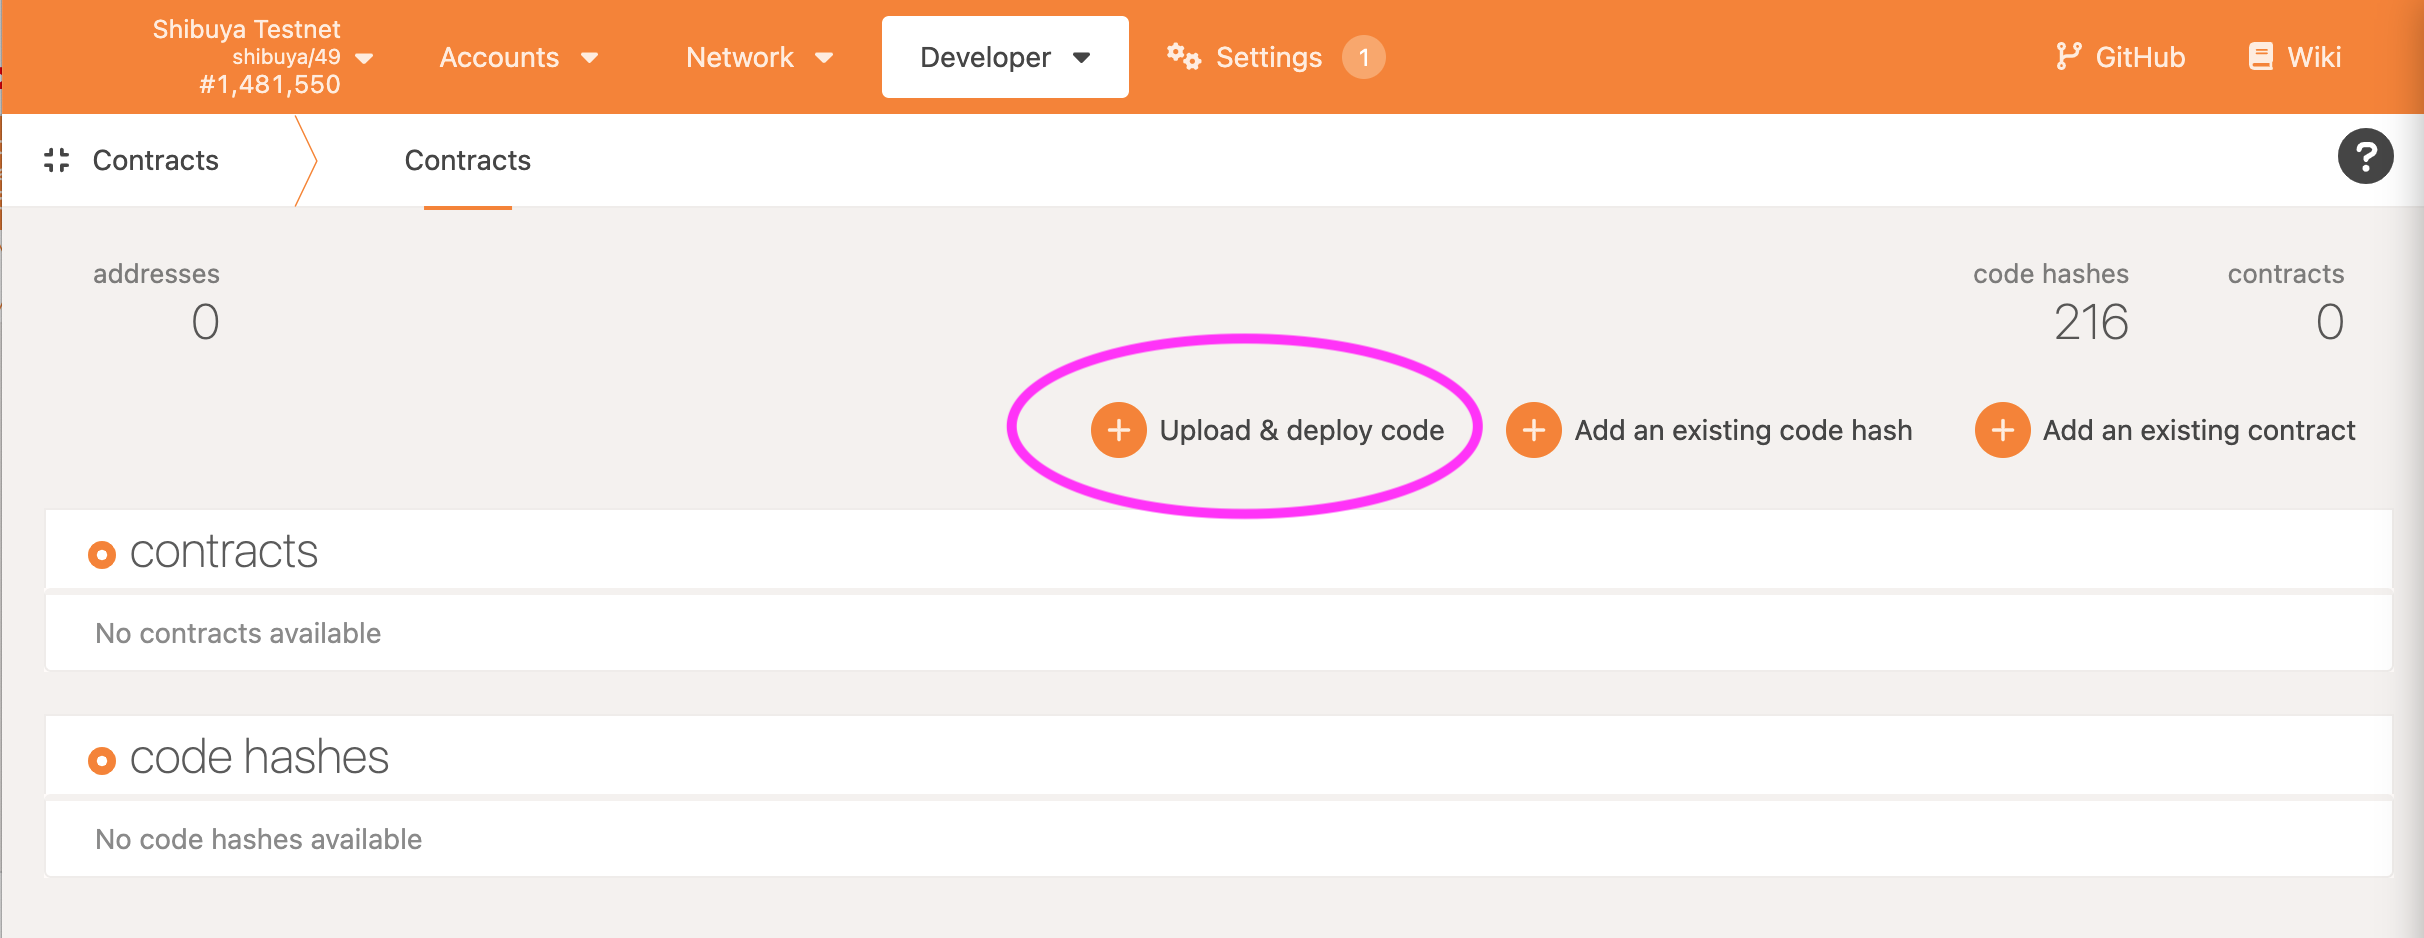
- Upload the contract
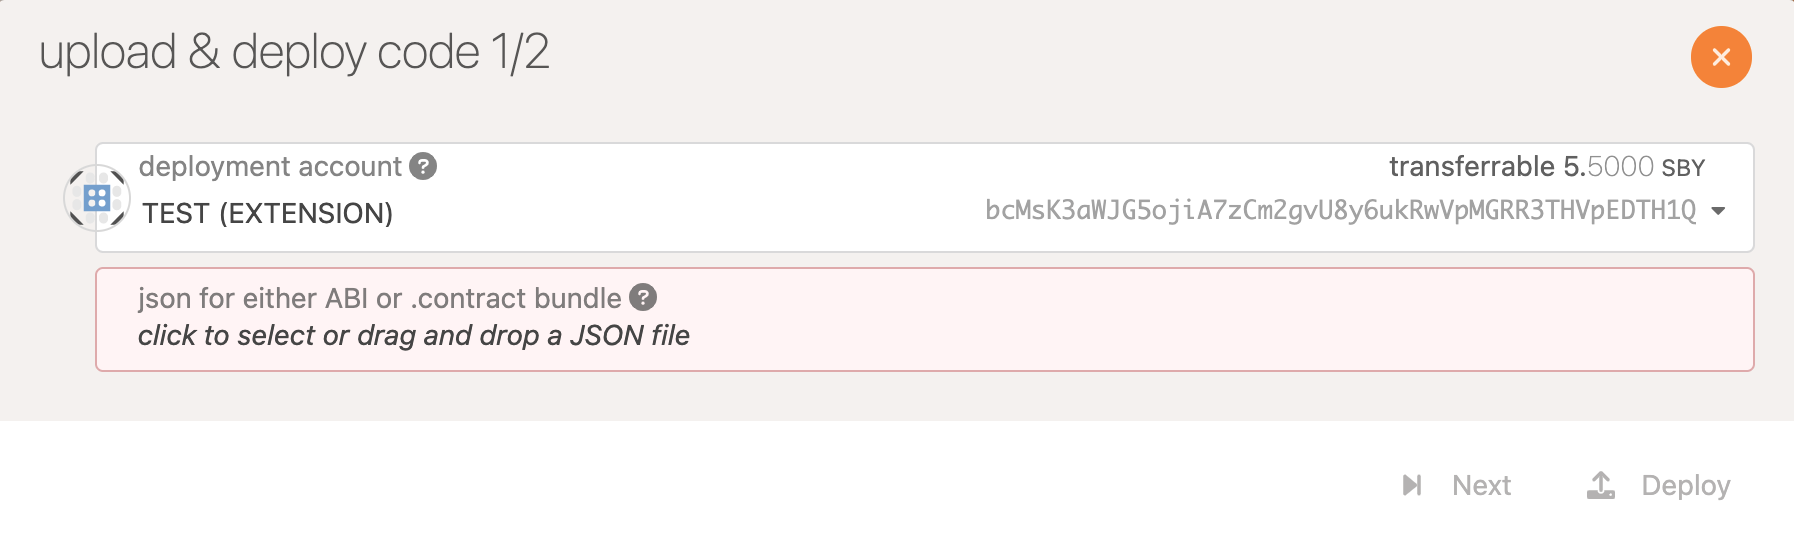
- From the pop-up window upload the
.contractfile:
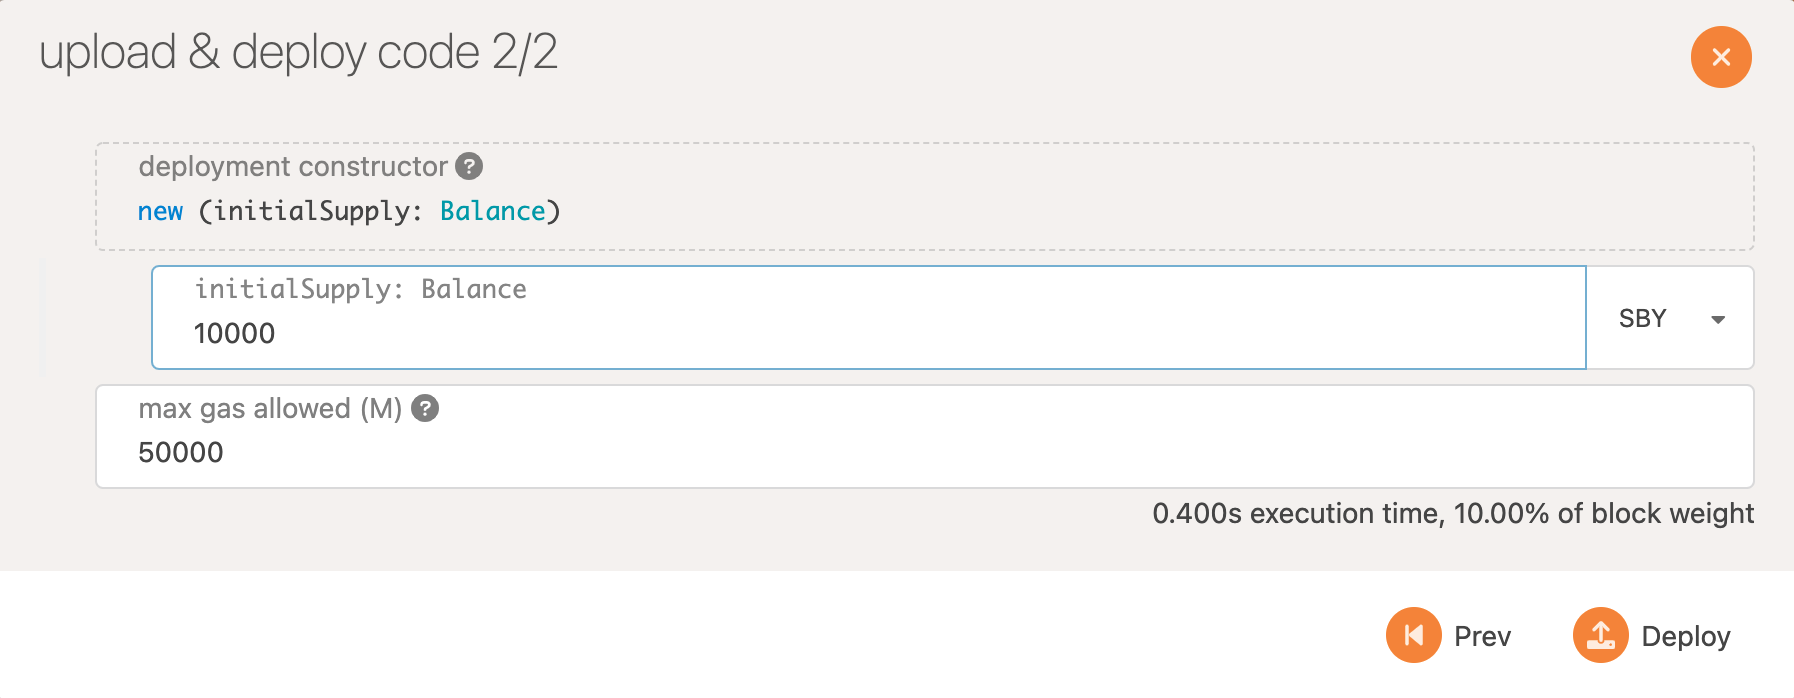
- Set values for the constructor and deploy the contract:
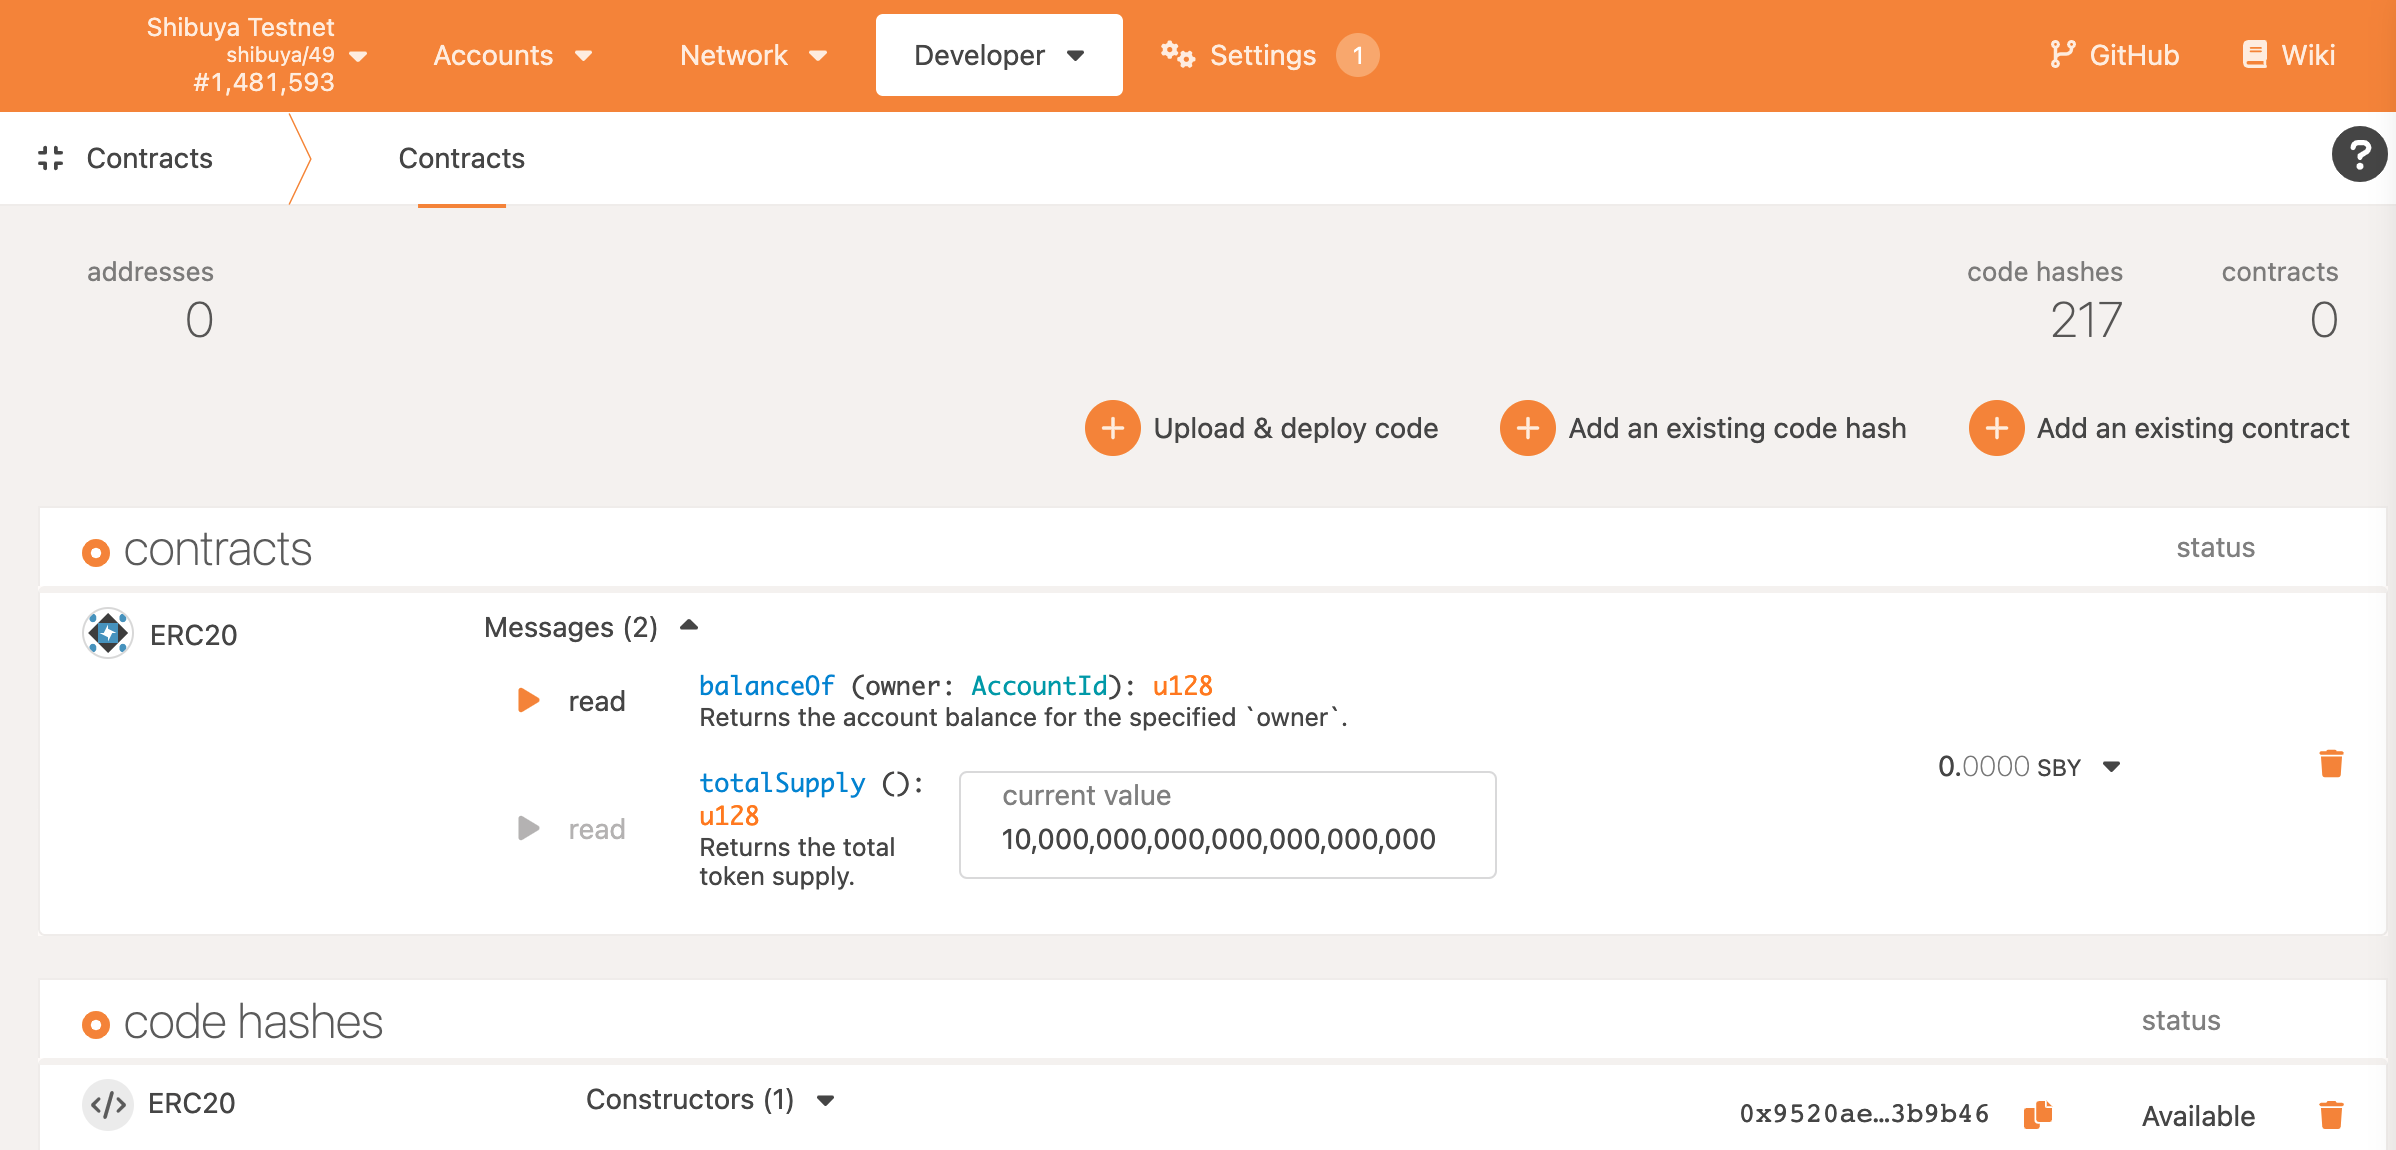
- Now you can interact with the contract:
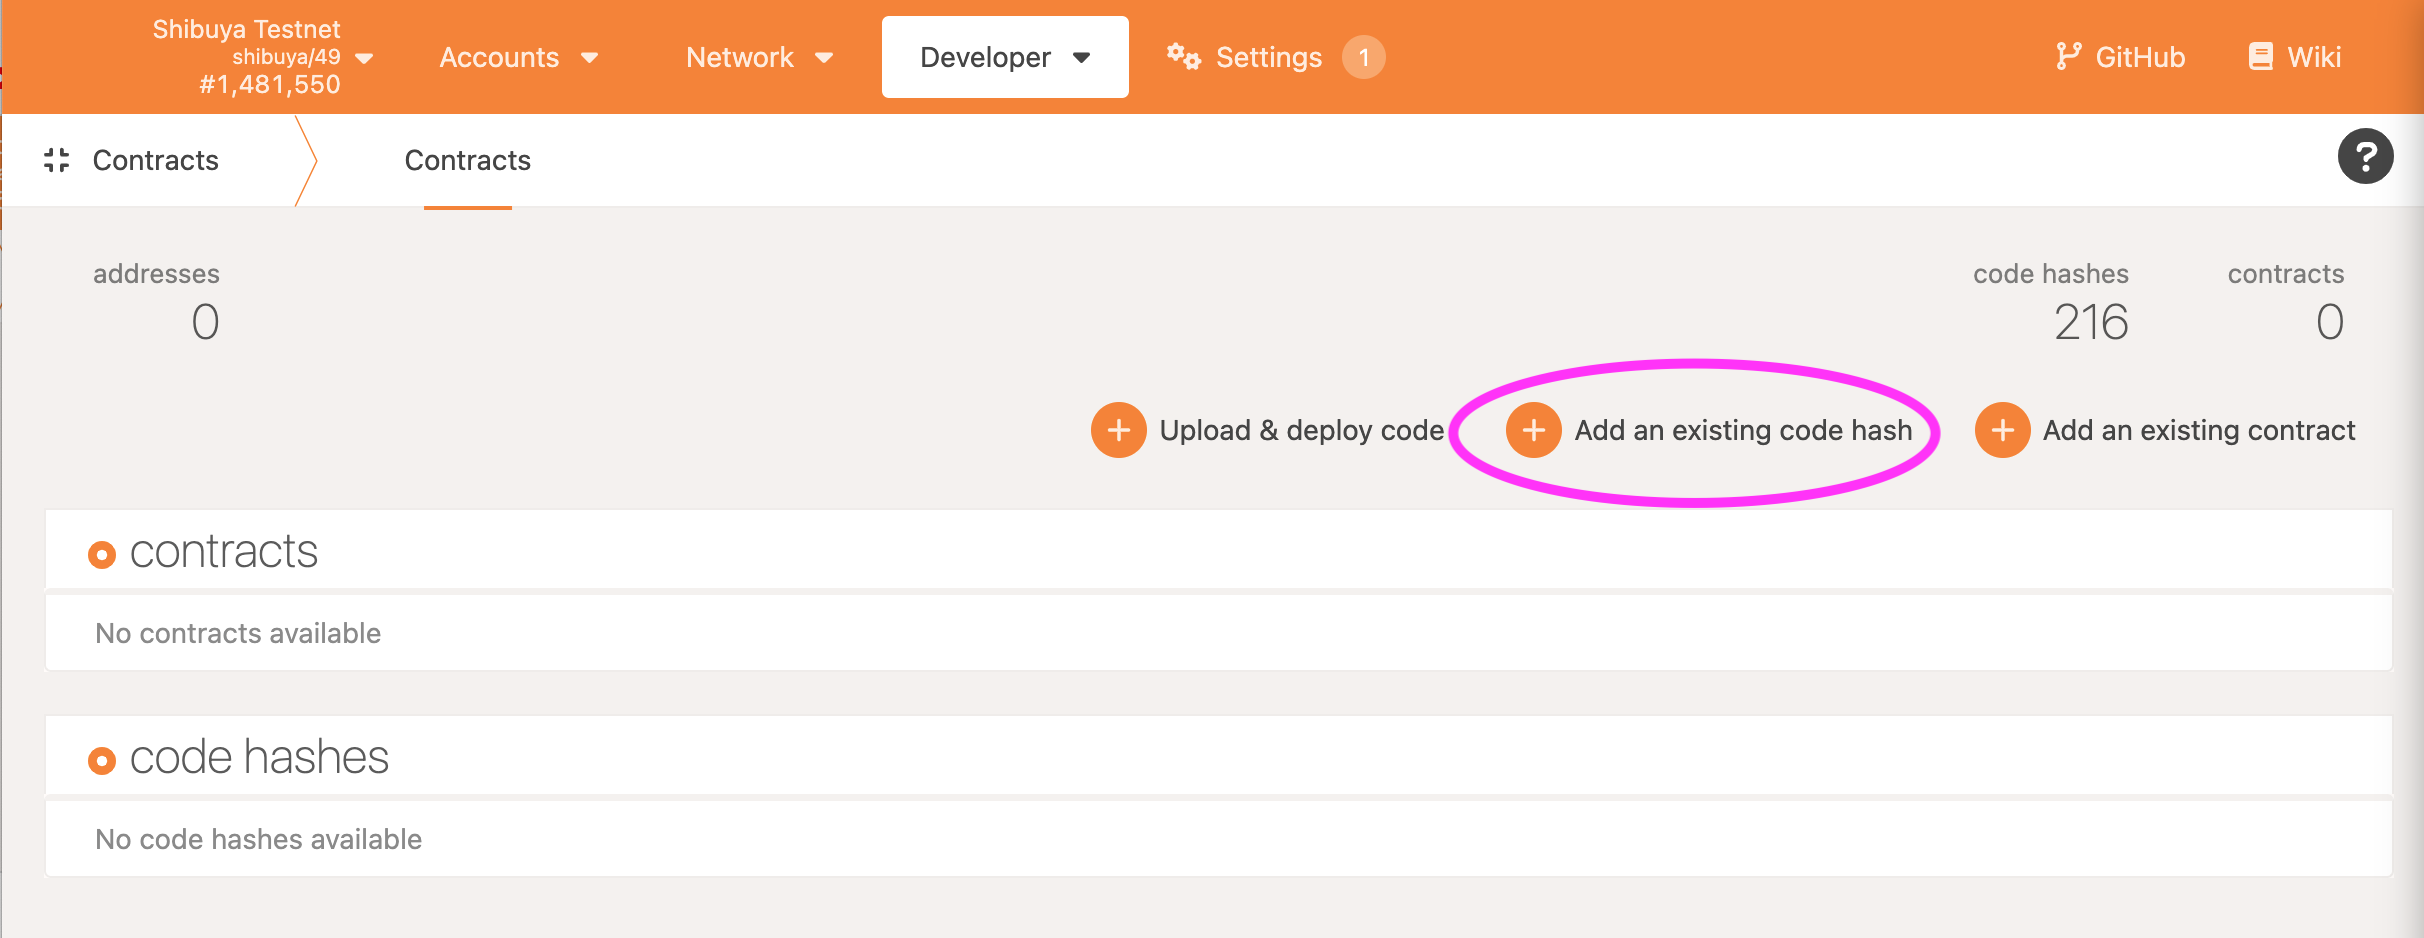
Deploy a contract from an existing code hash
To deploy from an existing code hash, you will need to have the code hash on hand, then click Add an existing code hash.