Create a Proxy Account
This tutorial will be using Polkadot.js Apps for manipulating proxies.
To create a proxy account, follow these steps:
-
Go to the Developer tab: Locate and navigate to the "Developer" tab on the website.
-
Select Extrinsics: Within the Developer tab, find the "Extrinsics" and select it.
-
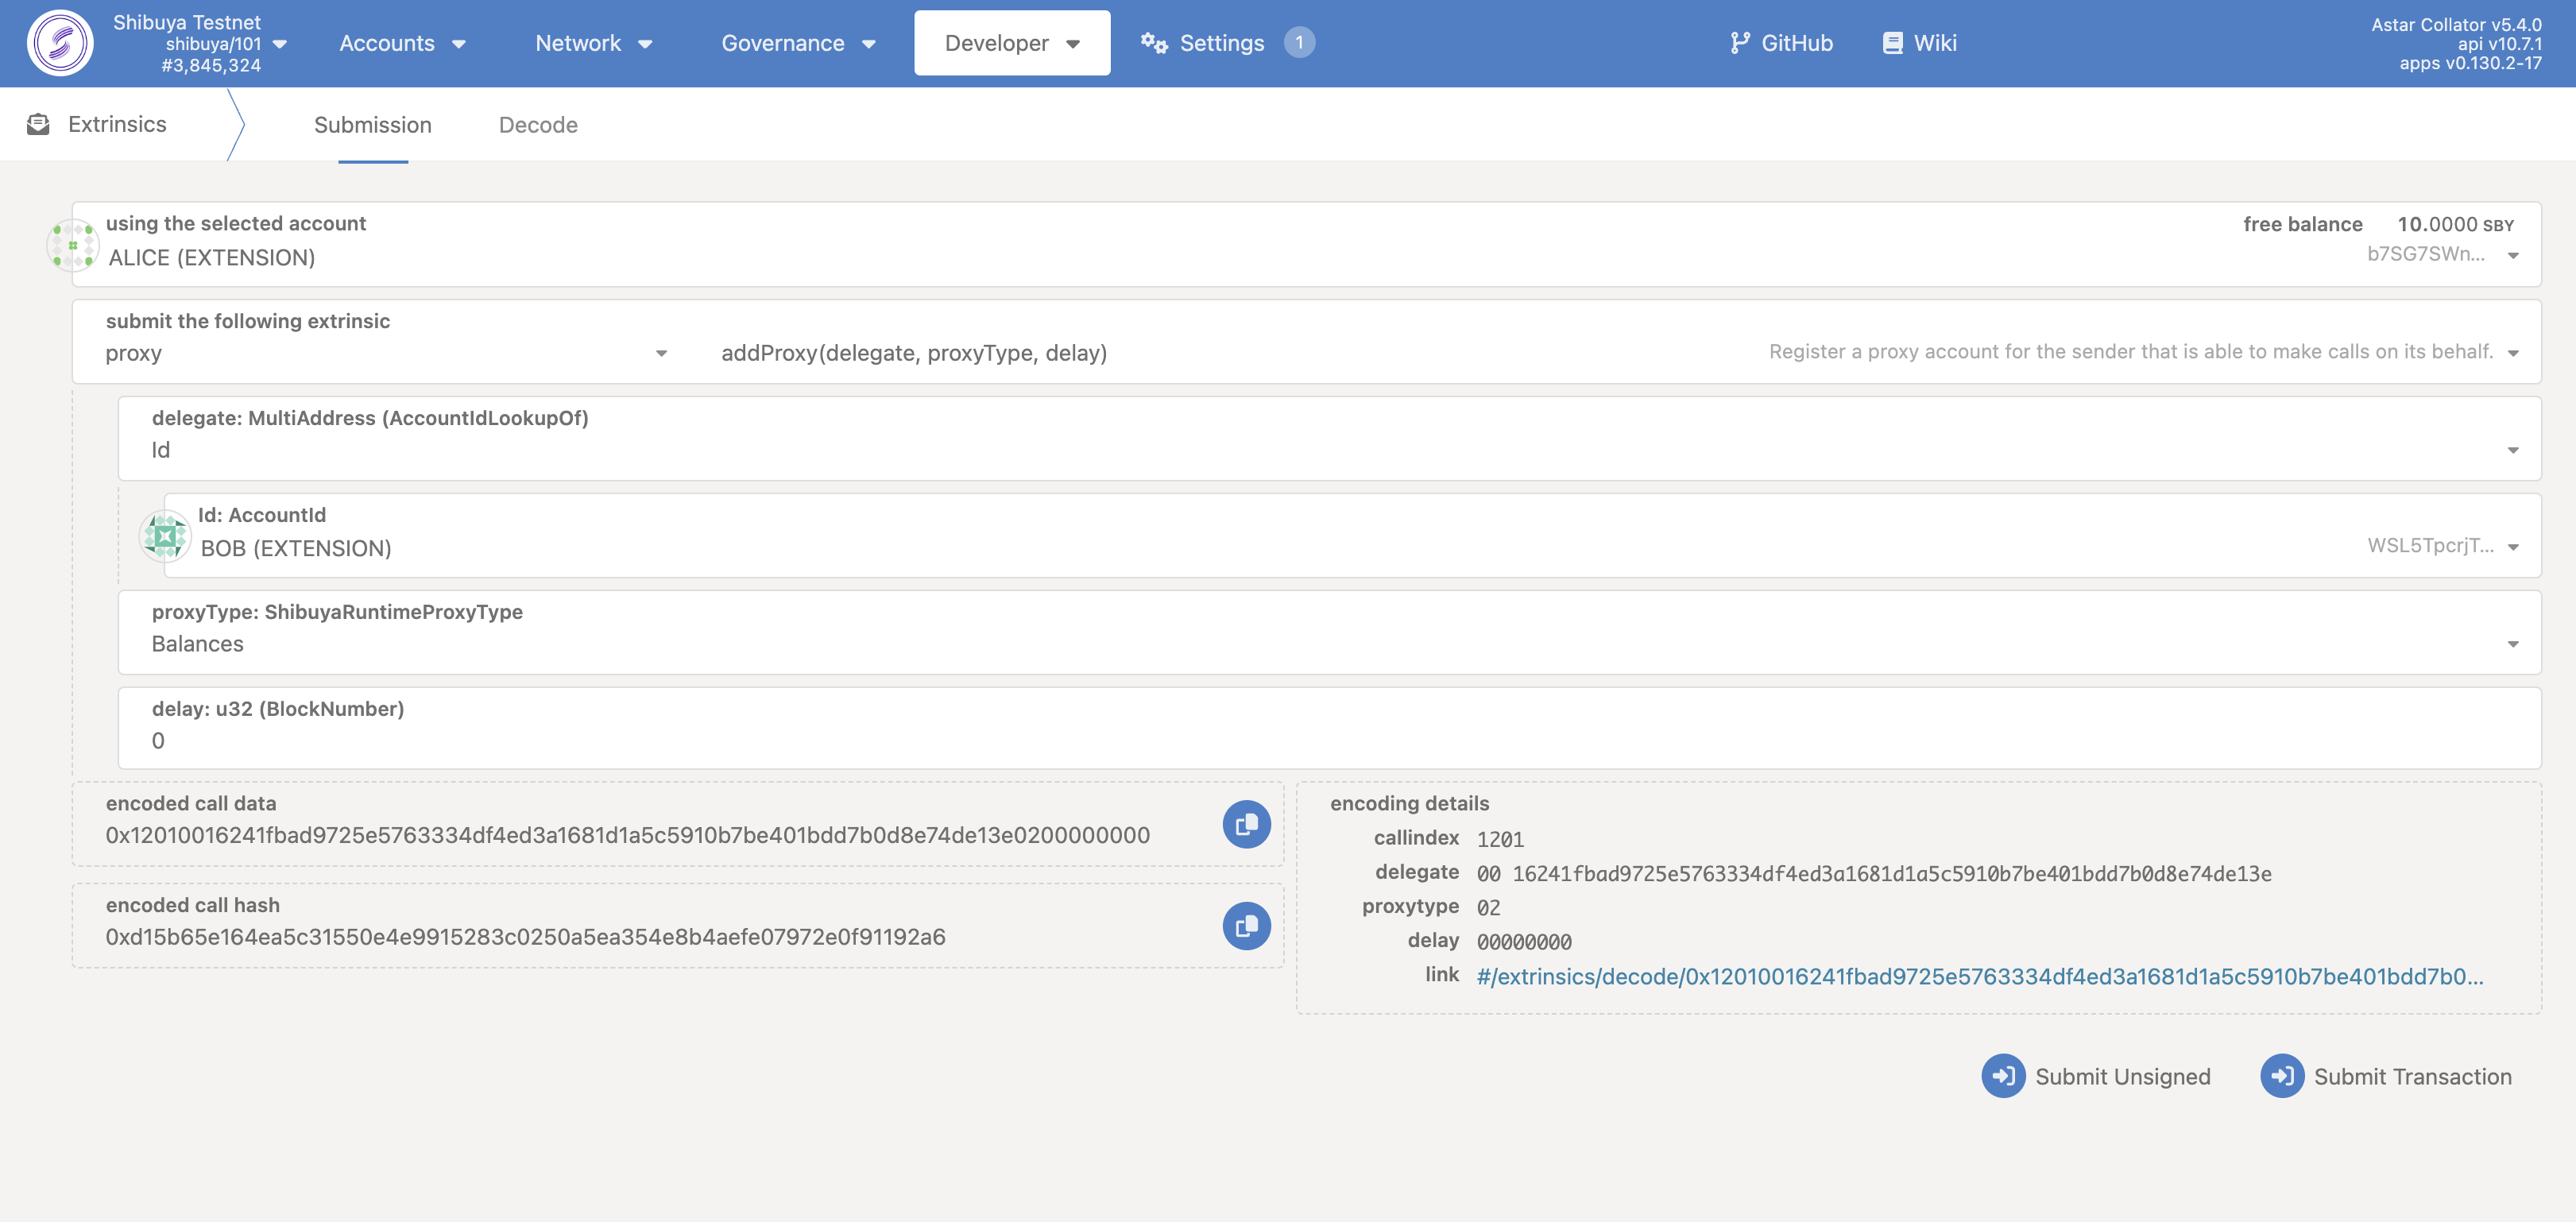
Select the primary account: Choose the primary account for which you want to create a proxy from the list. We will be using ALICE as primary account in this tutorial.
-
Submit the following extrinsic: From the
submit the following extrinsicdropdown, select proxy -
Choose the addProxy extrinsic
-
Select the delegate account for the proxy
-
Choose the proxyType: From the proxyType dropdown, choose Balances
-
(Optional) Add a time delay: If desired, you may have the option to add a time delay to the transaction. This adds an extra layer of security by requiring the primary account to review the pending transaction before it is executed. Specify the desired number of blocks for the time delay.
-
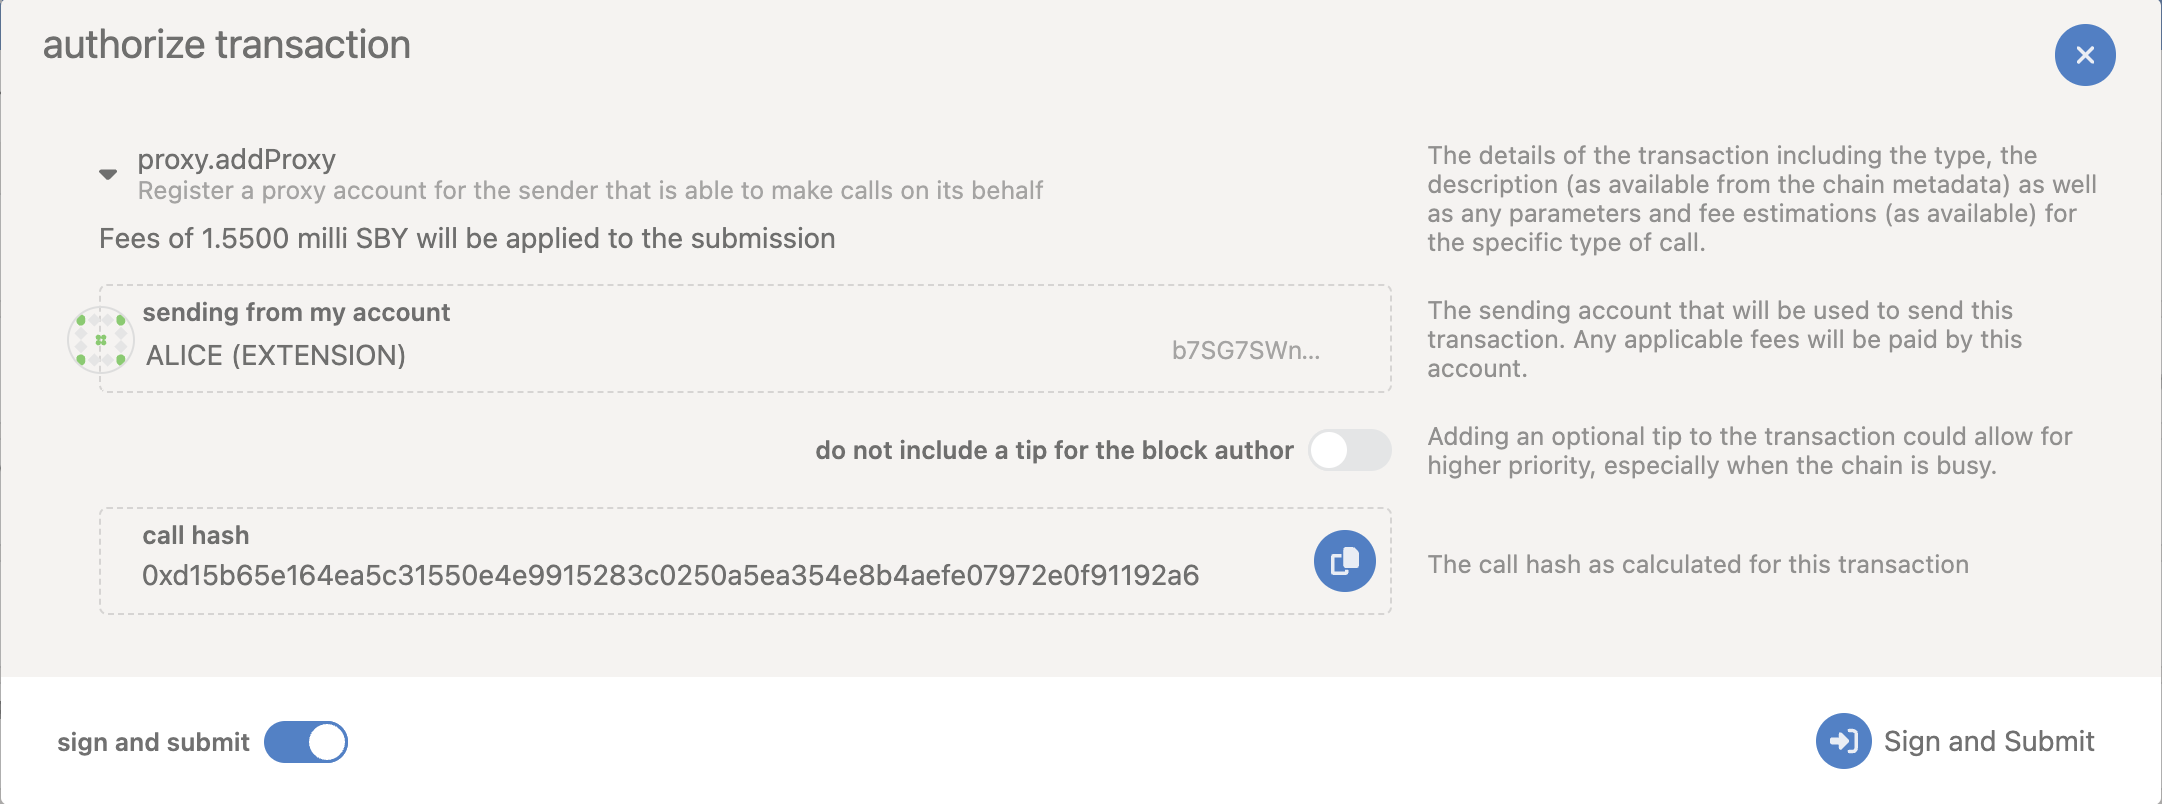
Submit the transaction: Once you have filled in all the necessary details, find the button to submit the transaction. Click on it to initiate the process.
You will then be prompted to authorize and sign the transaction. Go ahead and click Sign and Submit to create the proxy relationship.
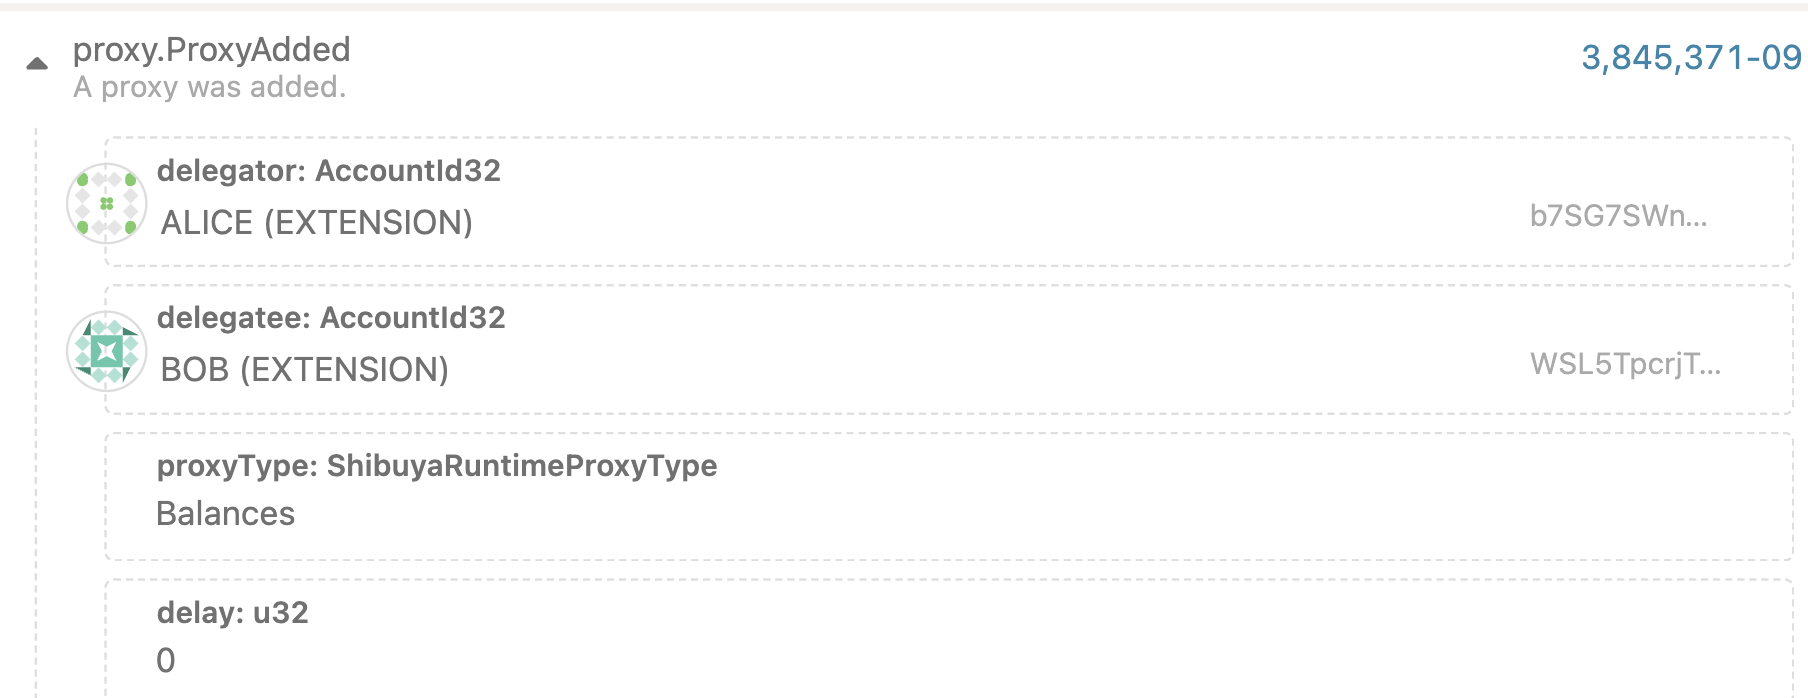
Once the transaction has been successfully submitted, you will receive notifications confirming the transaction.
You can also find the event proxy.ProxyAdded in recently emitted events inside Network > Explorer tab.
Verifying Proxy Account
There are many ways of verifying if your proxy was added or not. Easiest way to do so is using the Accounts page.
-
Navigate to the Accounts page by clicking on Accounts tab and then selecting Accounts.
-
Here find you Primary Account and click on the 3 dots as seen in the provided picture.

- Select Manage proxies option.
Here you can see the list of all proxies that you account has. For this tutorial, it is only Balances proxy that we added in the above section.
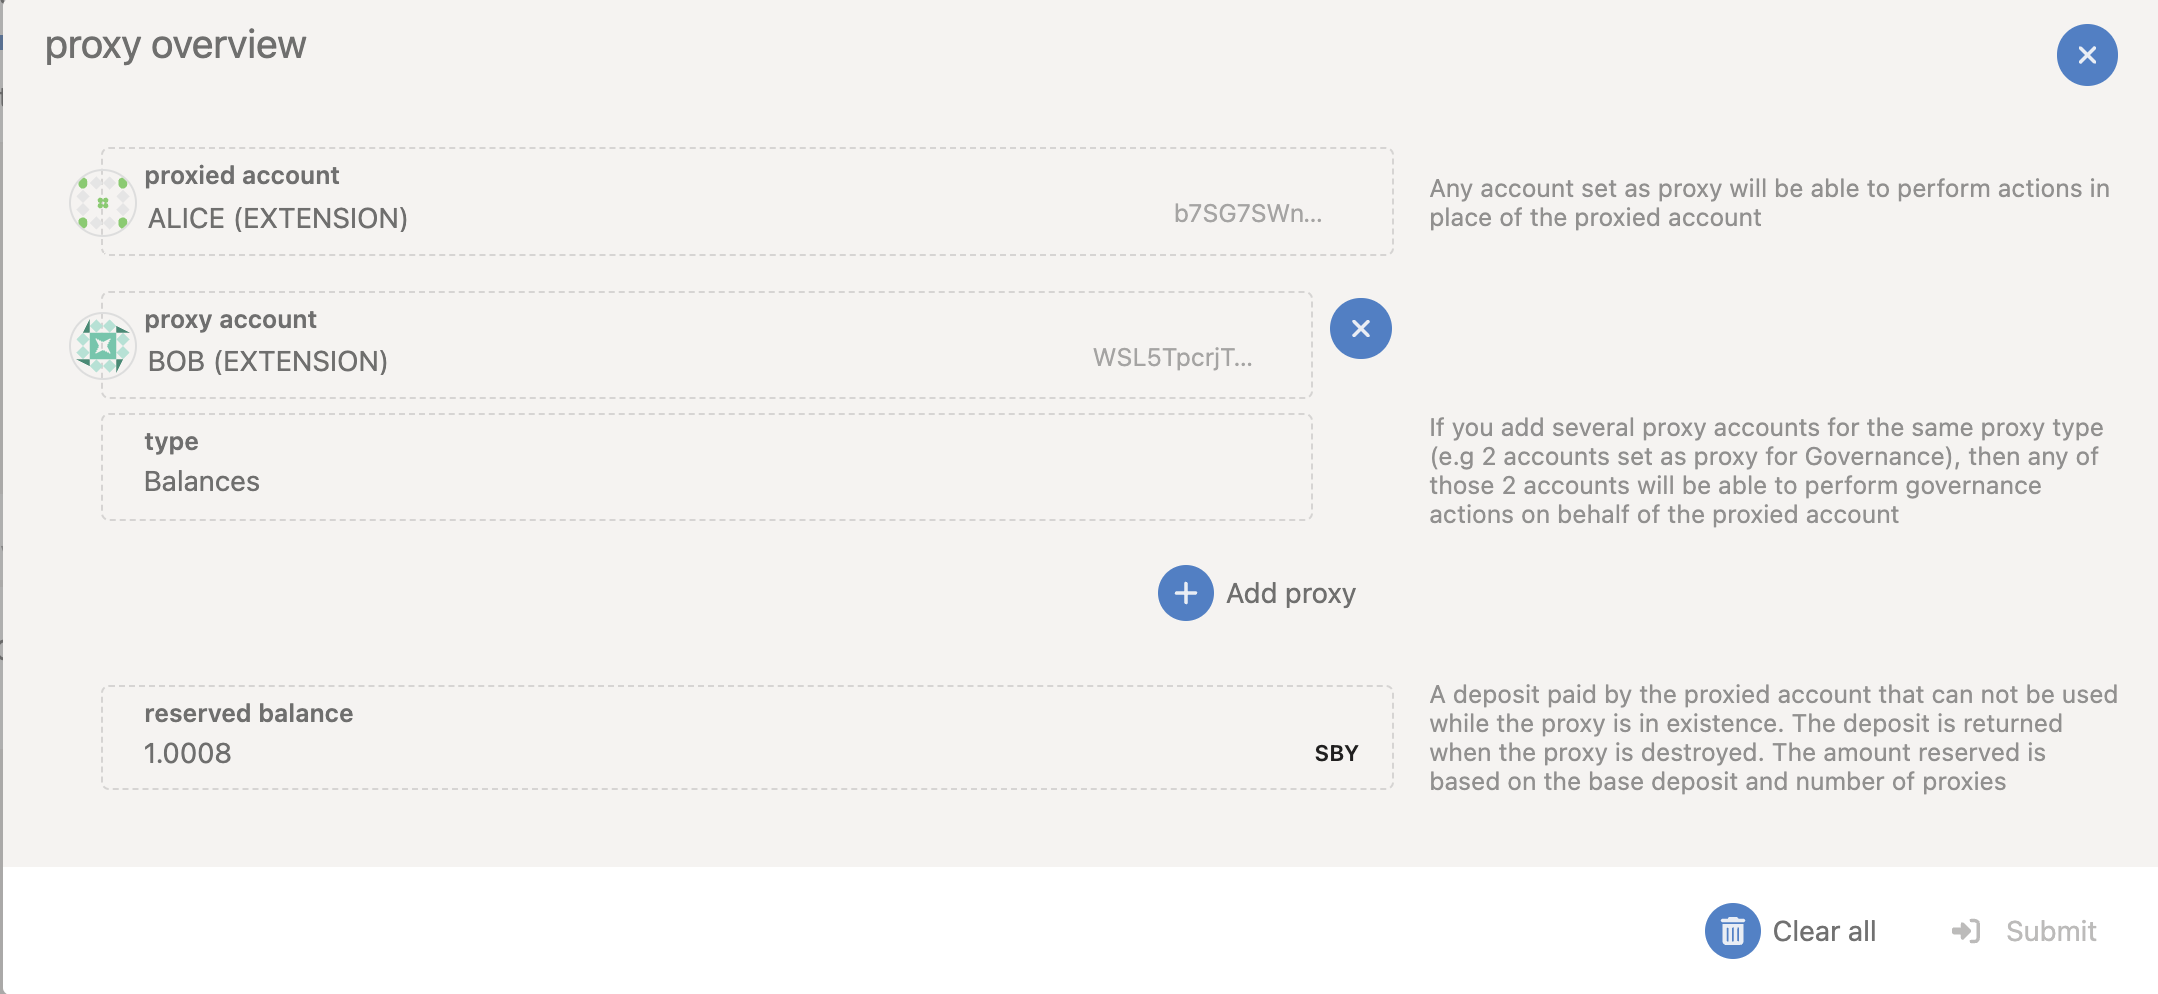
You can also remove the proxy by clicking on the (X) icon next to the proxy account (in our case BOB). After clicking (X) button, the proxy will diappear from the list, Click on Submit.
Once the transaction has successfully been submitted, you can review your current proxies or if you removed all proxies you will notice the proxy icon is no longer being displayed next to the primary account.
Executing a Proxy Transaction
To execute a proxy transaction, go back to the Extrinsic page and do the following:
Submitting a Proxy Transaction
To submit a proxy transaction, follow these steps:
-
Select the proxy account: Choose the proxy account to submit the transaction from using the "Select Account" dropdown.
-
Submit the following extrinsic: From the "Submit the following extrinsic" menu, select "proxy".
-
Choose the proxy extrinsic: Select the "proxy" extrinsic.
-
Select the primary account: From the "real" dropdown, select Id and then select the Primary Account (ALICE in our case)
-
Select the balances call
-
Choose the transfer extrinsic
-
Enter the destination address: In the "dest" field, enter the address where you want to send the funds.
-
Enter the value: In the "value" field, enter the amount of funds to send.
-
Click Submit Transaction: Once you have entered all the necessary details, click on "Submit Transaction" to initiate the transaction.

Congratulations! You've completed the entire process successfully. You have created a proxy account, reviewed all the proxy accounts linked to your primary account, performed a proxy transaction, and even removed a proxy account. Well done!