Use a Multisig Account on Astar Portal
This guide will assist you in utilizing a multisig account on Astar Portal via PolkaSafe.
At the time of this release, PolkaSafe only supports Astar Network.
Prerequisites
-
Install a Substrate wallet extension (such as Polkadot.js, SubWallet, or Talisman) on your browser.
-
Prepare at least two Astar wallet addresses See reference
Understanding the Benefits of Multisig Accounts
Multisig accounts offer several key benefits, particularly in terms of security, control, and flexibility:
- Enhanced Security: The need for more keys reduces the risk of unauthorized access.
- Reduced Risk: You won't lose access to the account even if you lose a single key.
- Access Control: Multisig allows multiple users to share control over an account.
- Flexibility: You can customize the number of required signatures for transactions.
- Dispute Resolution: Multisig prevents unilateral decisions by requiring majority or total agreement.
- Auditability: Multisig accounts provide a clear record of approved transactions.
Creating a Multisig Account on PolkaSafe
PolkaSafe integrates with Polkadot's multisig solution, offering seamless user experience and robust security features for managing assets in the Polkadot ecosystem. You can use the multisig accounts created on PolkaSafe with the Astar Portal.
- Visit PolkaSafe.
- Select Astar network and click 'Connect Wallet.'
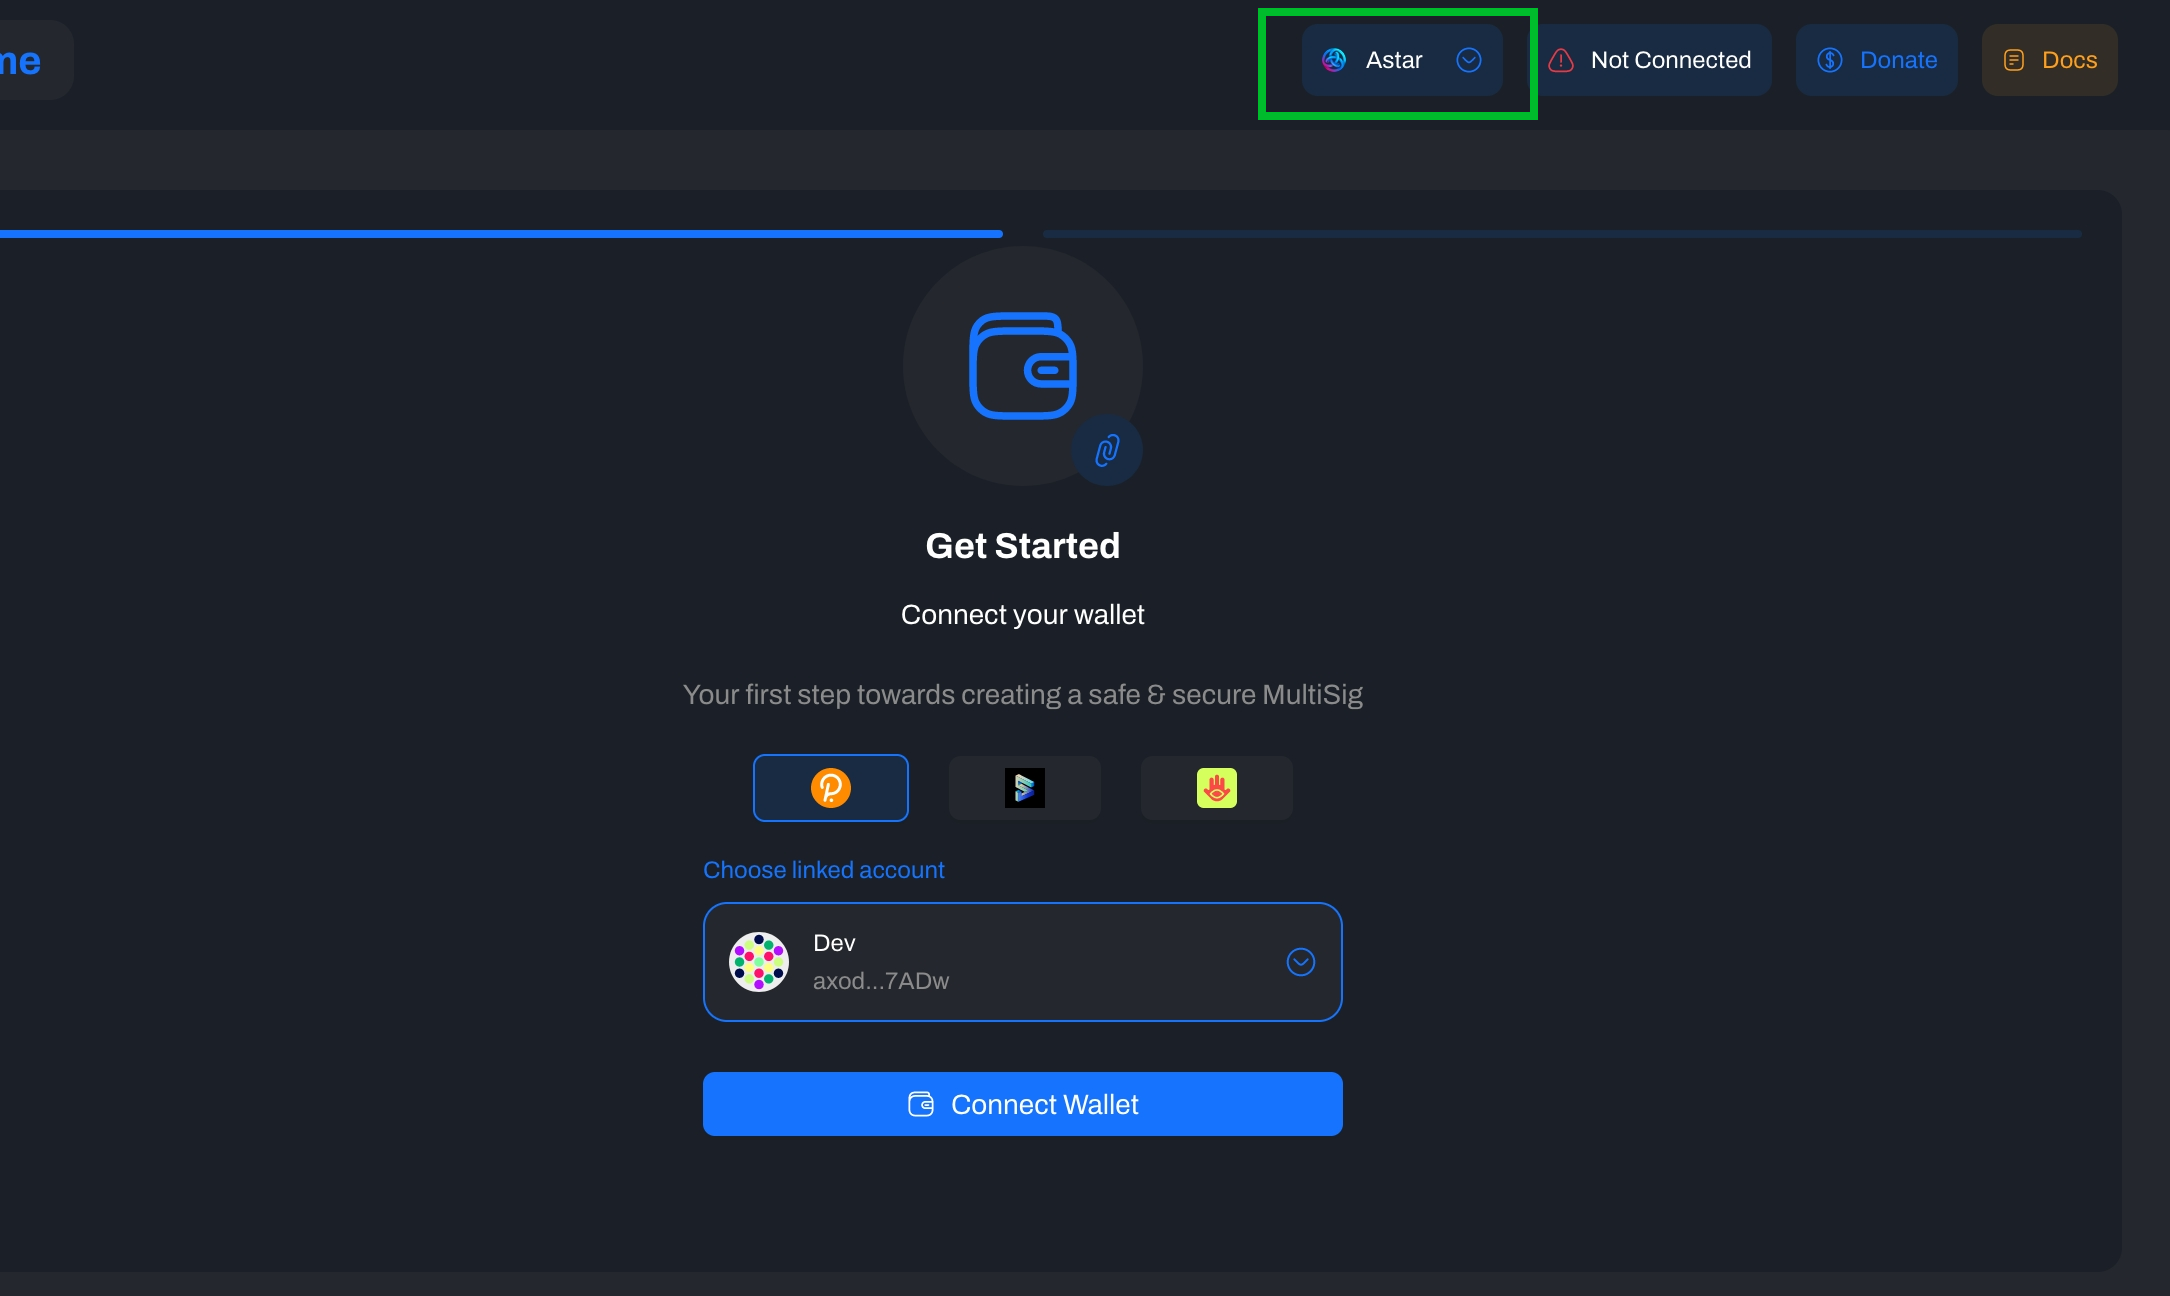
- Choose a wallet and select an account with more than 0 ASTR.
- Sign the message via the wallet extension.
- Select 'Create Multisig.'
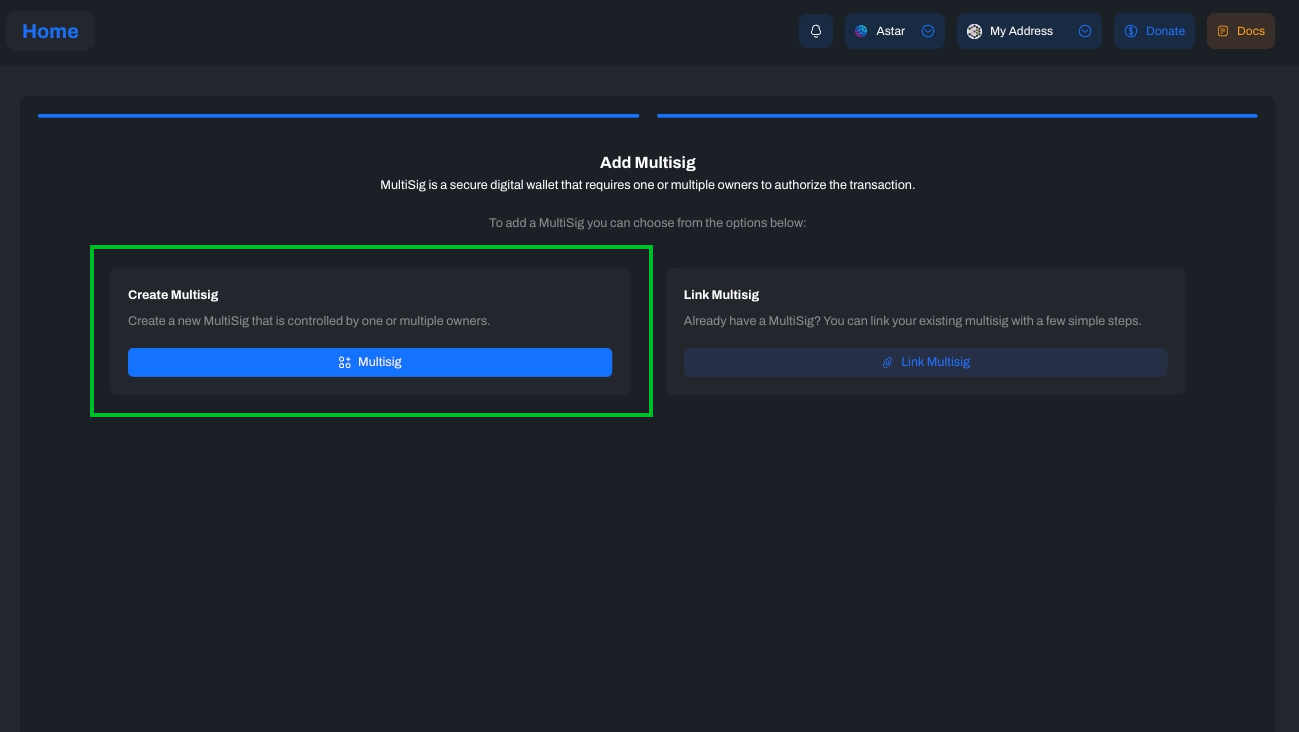
- Choose the signatory addresses to include in the multisig account. You can select from your wallet or add an address manually.
Ledger accounts cannot be multisig signatories
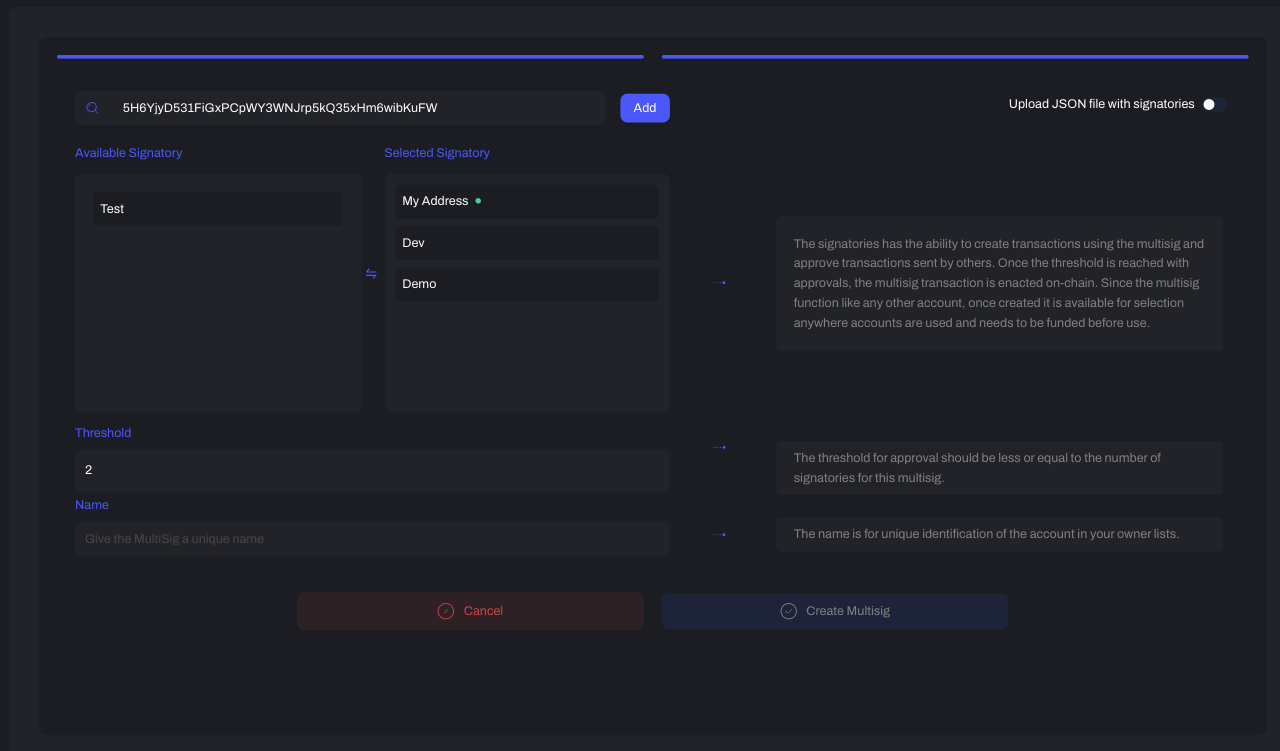 7. Input the threshold number (the minimum required signatures to authorize and execute a transaction) and name the multisig account.
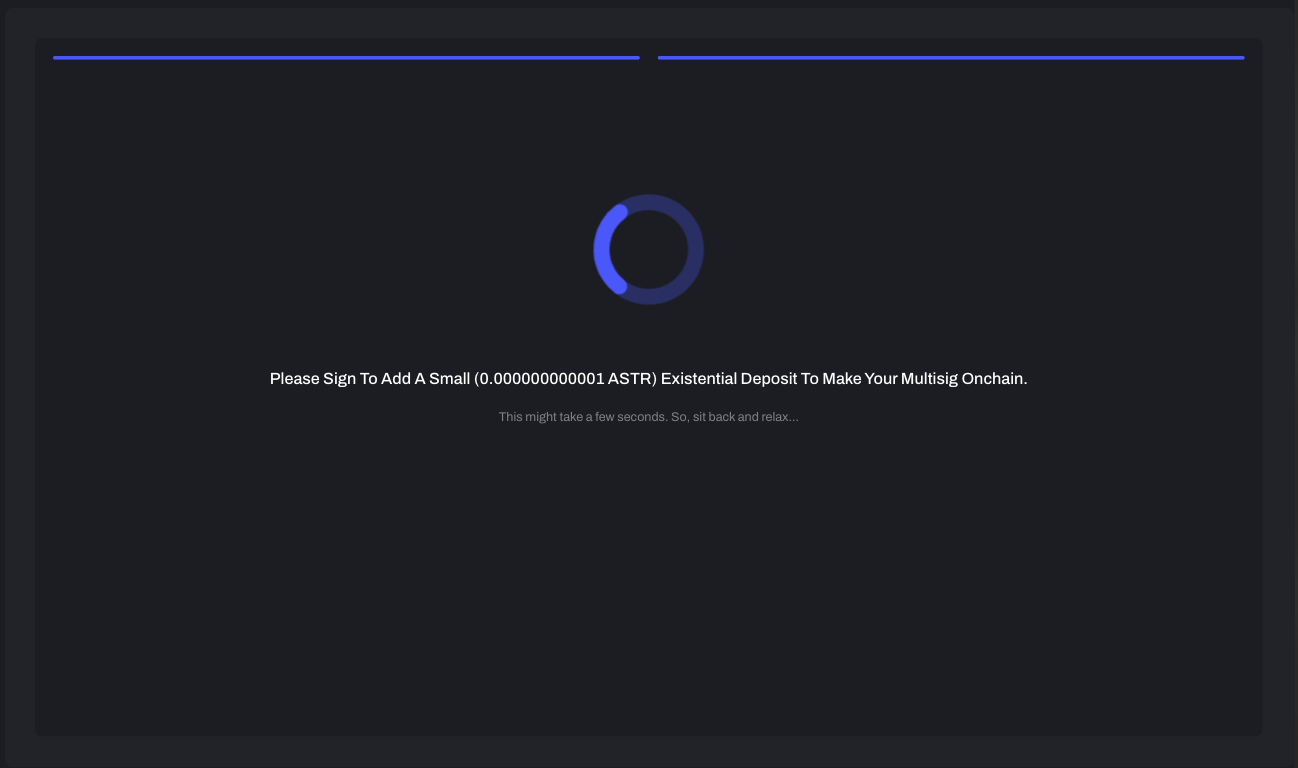
8. Sign the message to add a small Existential Deposit to the multisig account.
7. Input the threshold number (the minimum required signatures to authorize and execute a transaction) and name the multisig account.
8. Sign the message to add a small Existential Deposit to the multisig account.
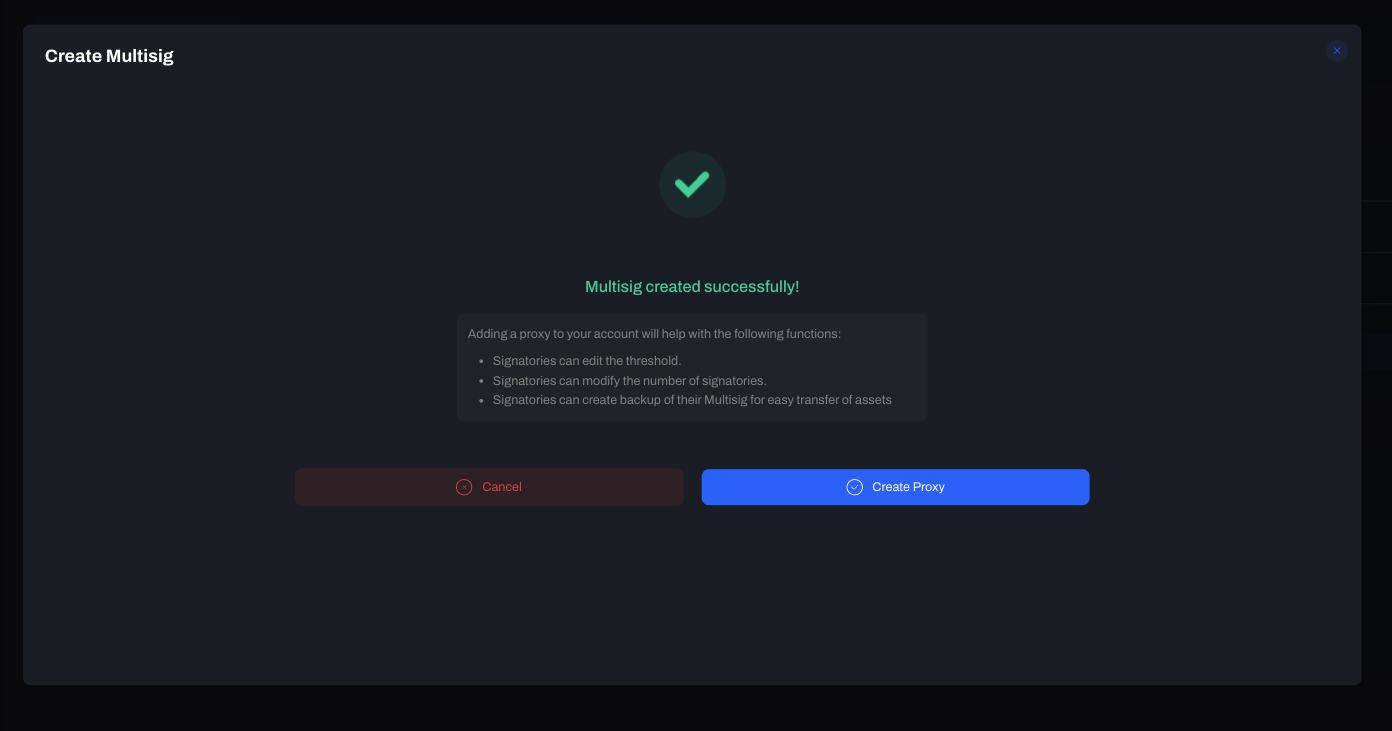
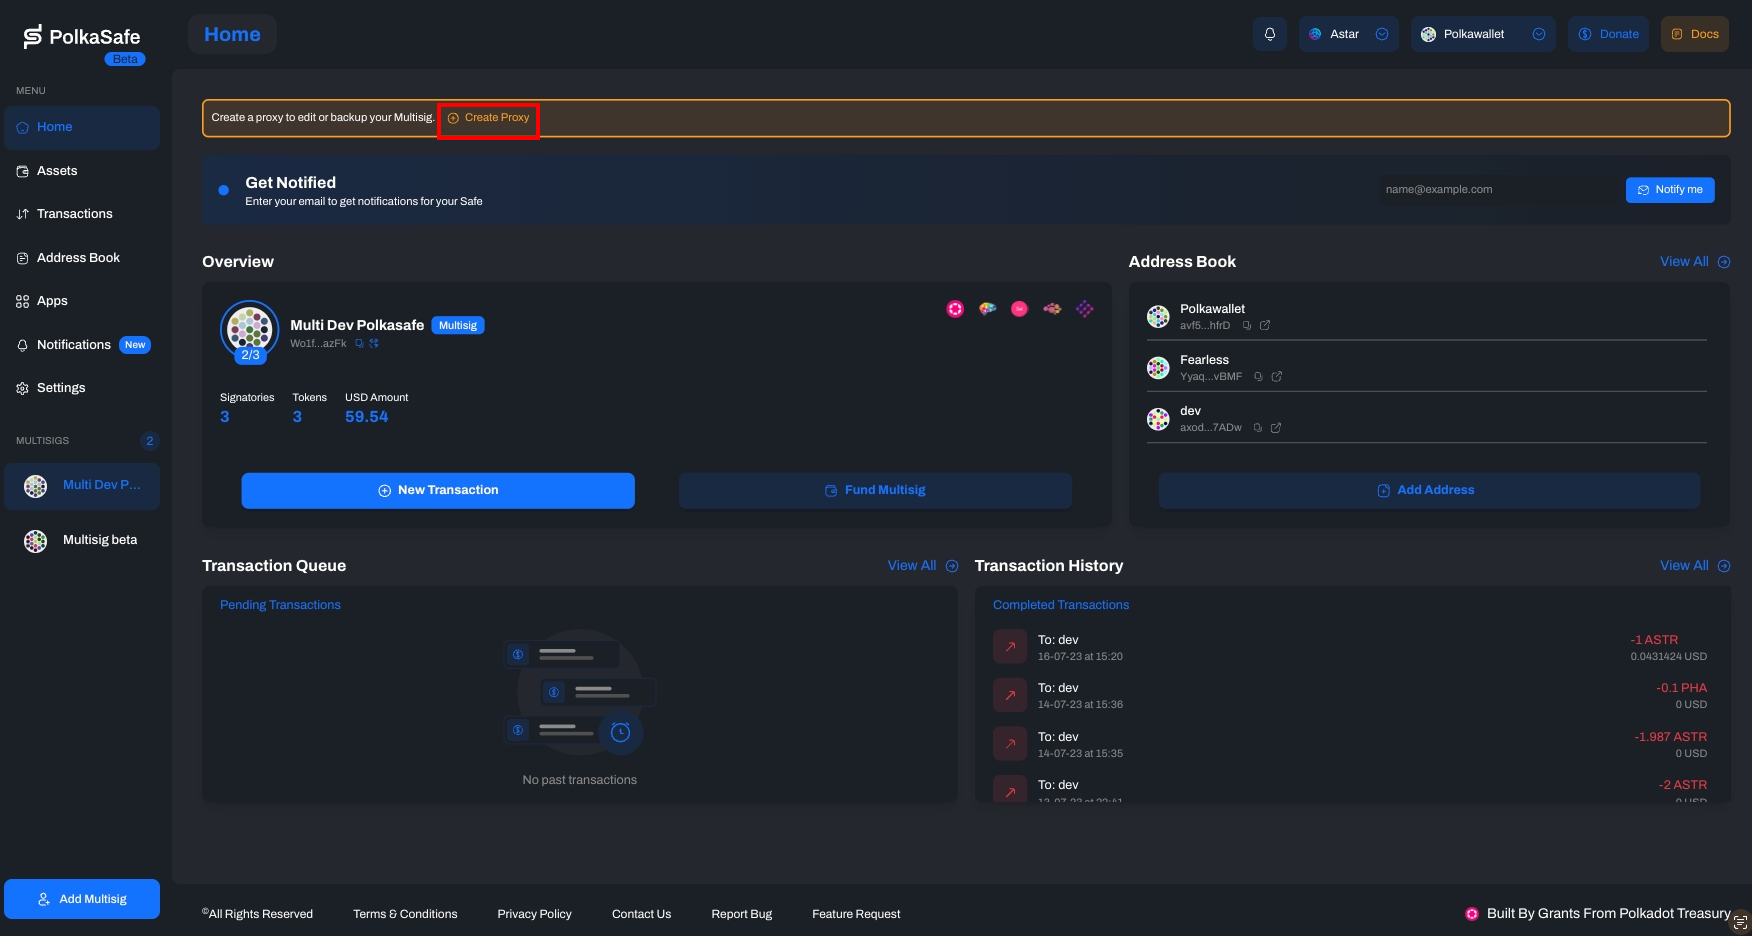
 9. Optionally, you can enable proxy signatory management to allow enhanced functionalities for your multisig account. See reference
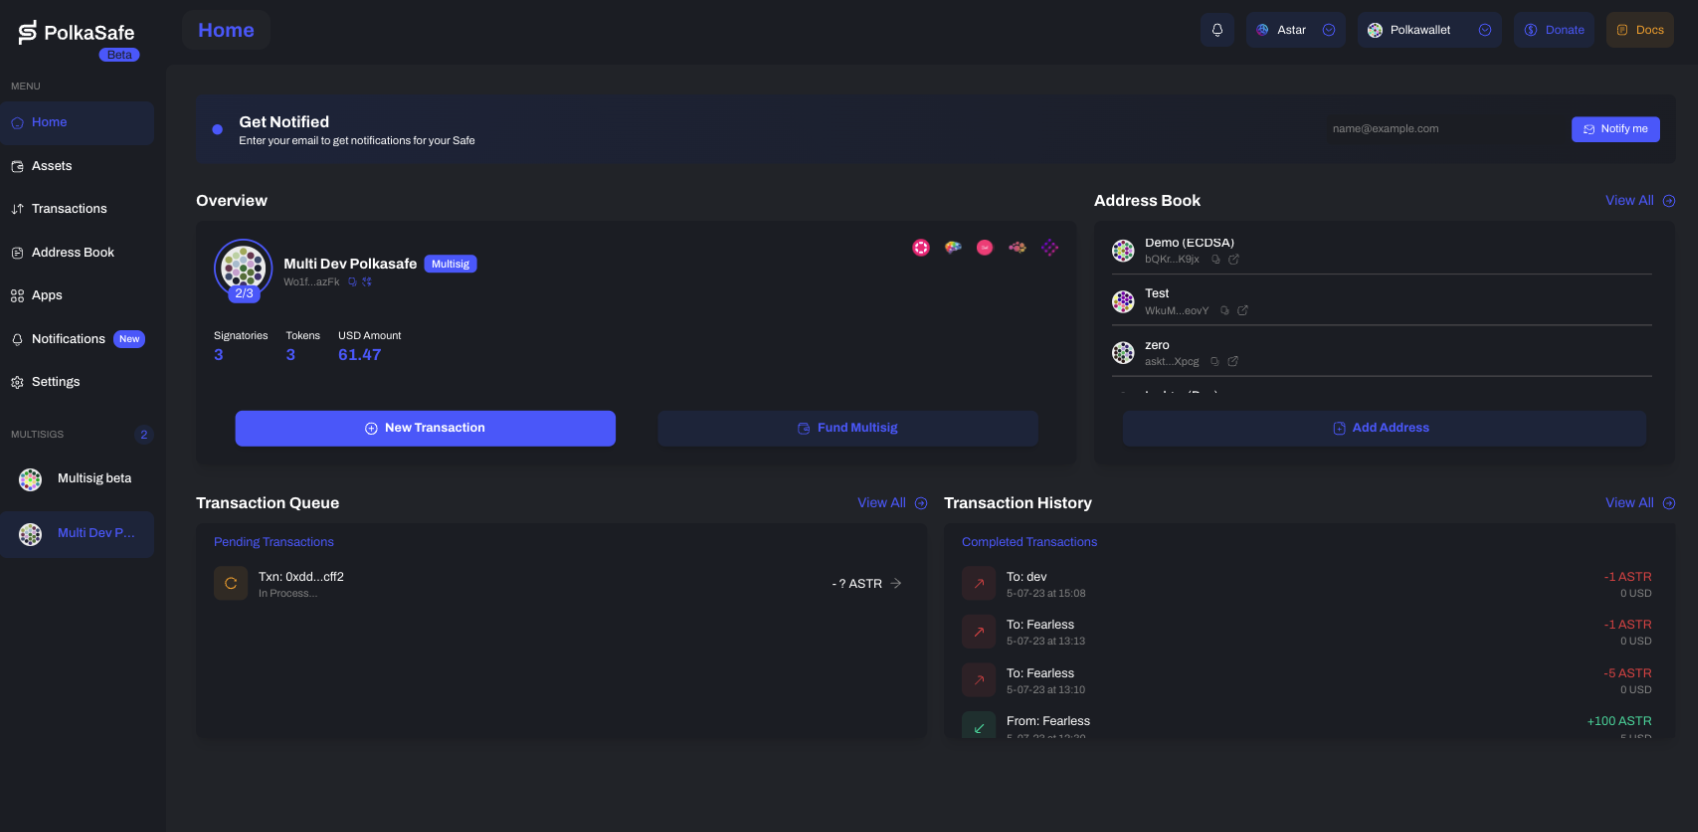
10. Now, you can manage your multisig account on PolkaSafe.
9. Optionally, you can enable proxy signatory management to allow enhanced functionalities for your multisig account. See reference
10. Now, you can manage your multisig account on PolkaSafe.
(Optional) Enabling Proxy Signatory Management for Your Multisig Account on PolkaSafe
Adding a proxy account to your multisig account enhances functionality and flexibility. A proxy allows signatories to alter key parameters and setup account backups. Furthermore, the proxy wallet address remains unchanged even when the multisig account's consensus conditions are modified. A proxy can:
- Edit the Threshold: Alter the number of required signatures for transaction authorization.
- Modify Signatories: Change the signatories of the multisig account.
- Create Backups: Establish a backup of the multisig account, facilitating seamless asset transfers. In other words, all assets will be in the proxy account. This means that when you add or remove any signatory, the multisig address will change, but the proxy address will not. Therefore, assets in the proxy account won't be lost.
You can add a proxy to your multisig account either during multisig creation or from the account dashboard.
Switch to the proxy account by clicking the switch icon.
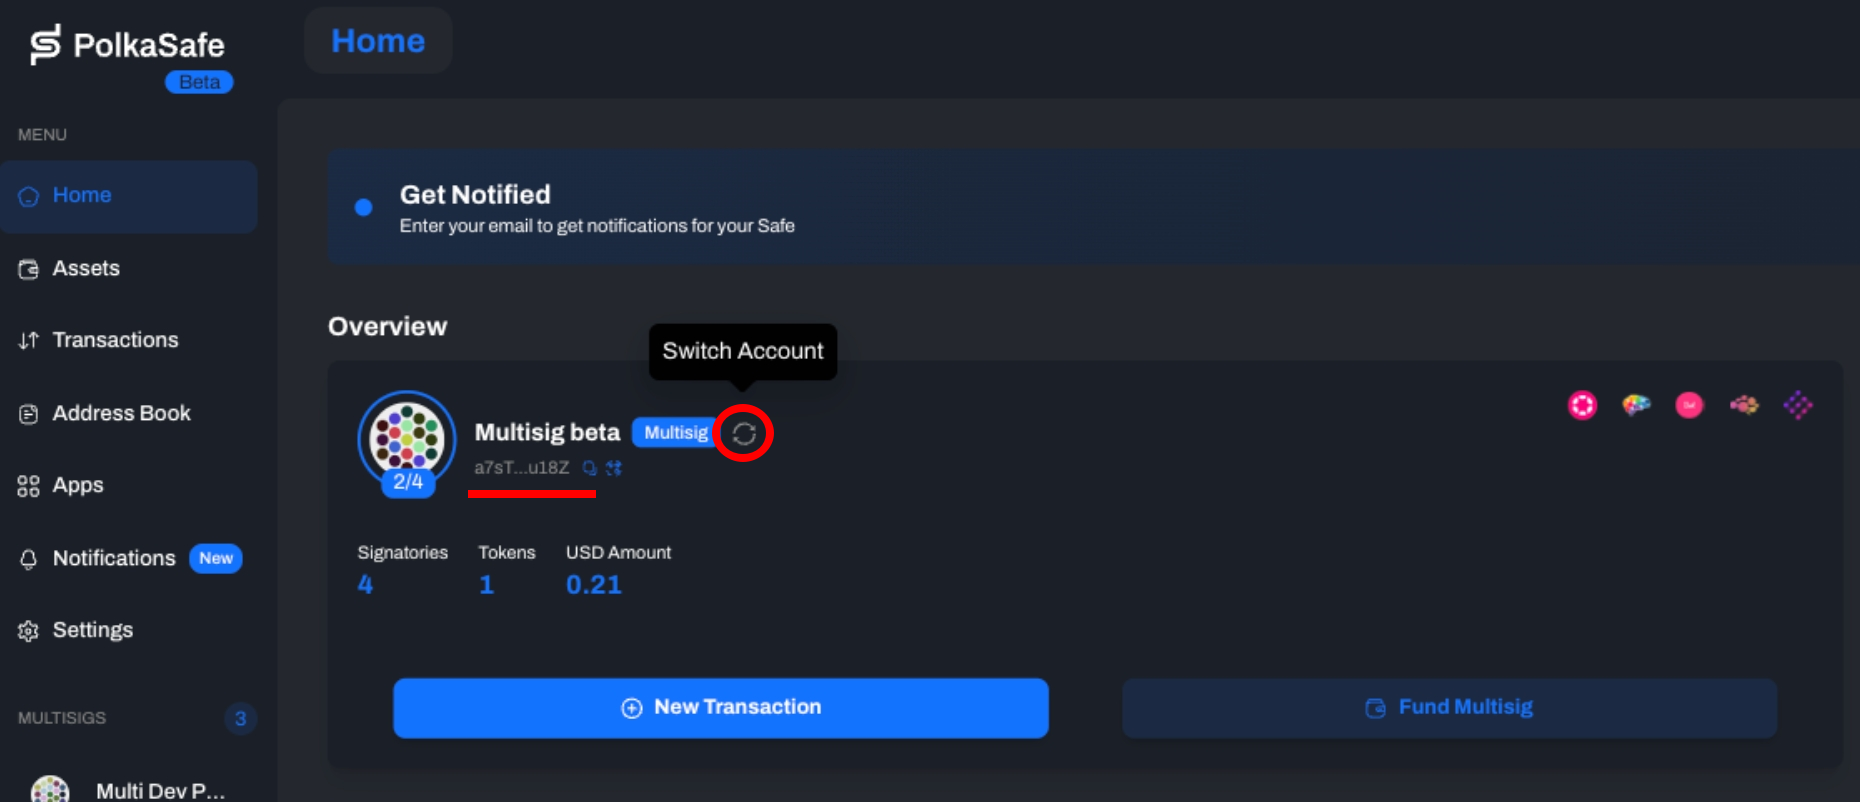
The address should now display as the proxy account.

Editing a multisig account (e.g., adding signatories) creates a new multisig address linked to the existing proxy address. This new multisig lacks an Existential Deposit, so you must add some balance to the new multisig address before initiating transactions.
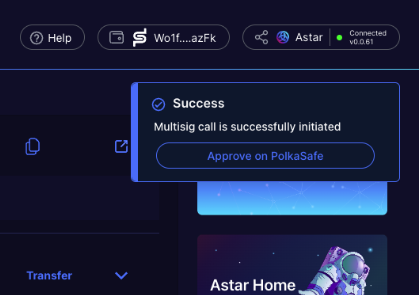
Sending Transactions on Astar Portal and Approving them on PolkaSafe
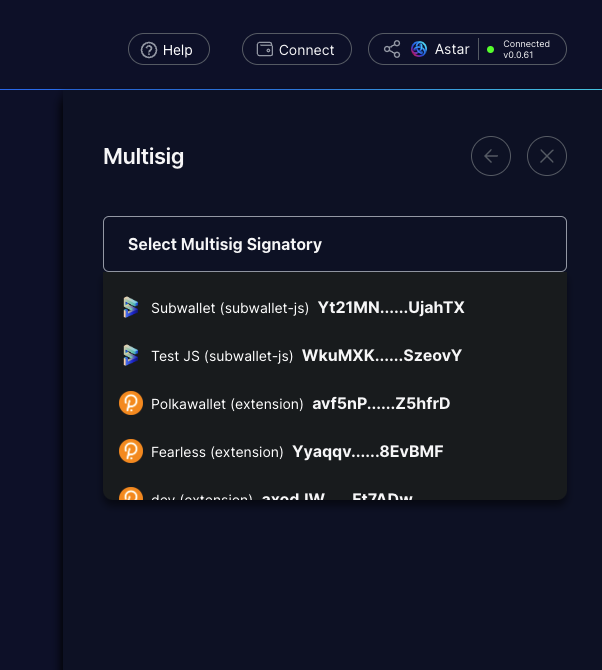
- Go to the Astar Portal and select PolkaSafe.

- Choose one of the signatories (owners) to create multisig transactions.
- Sign the message on the wallet extension (the wallet popup might take a moment to appear).
- Select the multisig account and click Connect.
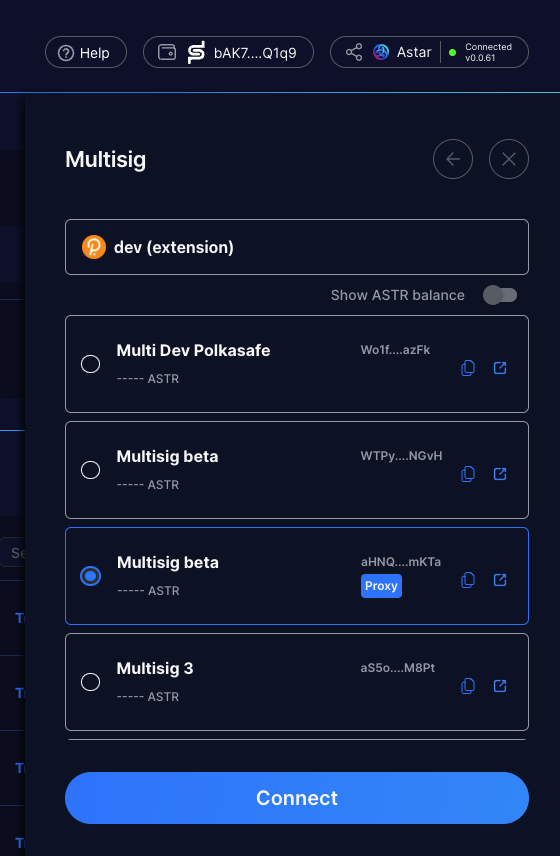
- You can now use the Astar Portal in the same way you would with normal accounts.
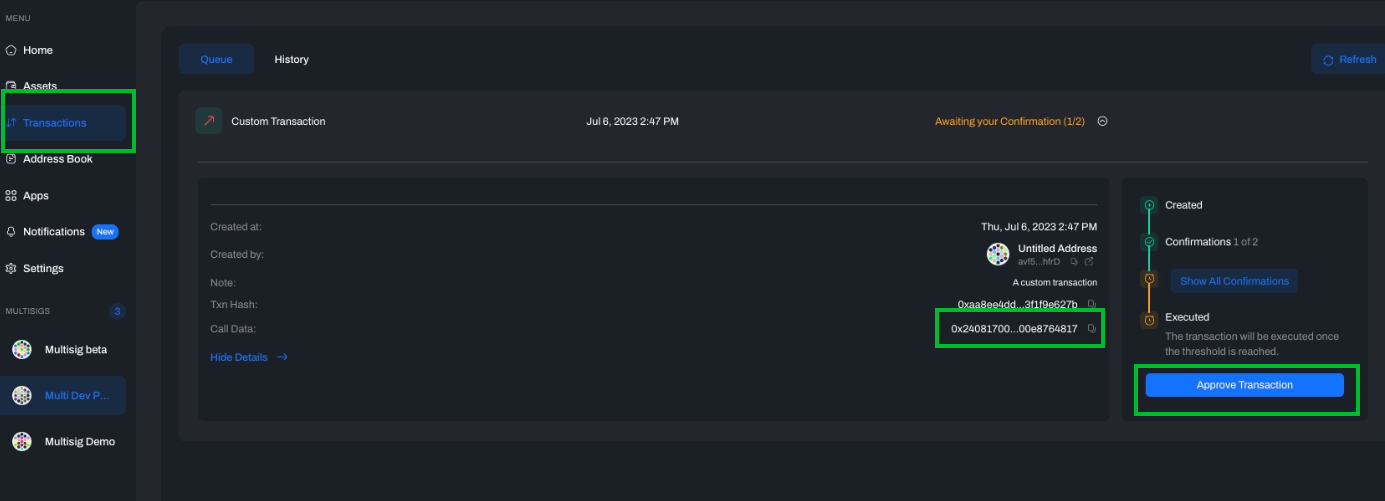
- Once the transaction is completed, click 'Approve on PolkaSafe' and approve the transaction on PolkaSafe. You should connect to signatory accounts other than the one selected on Astar Portal.
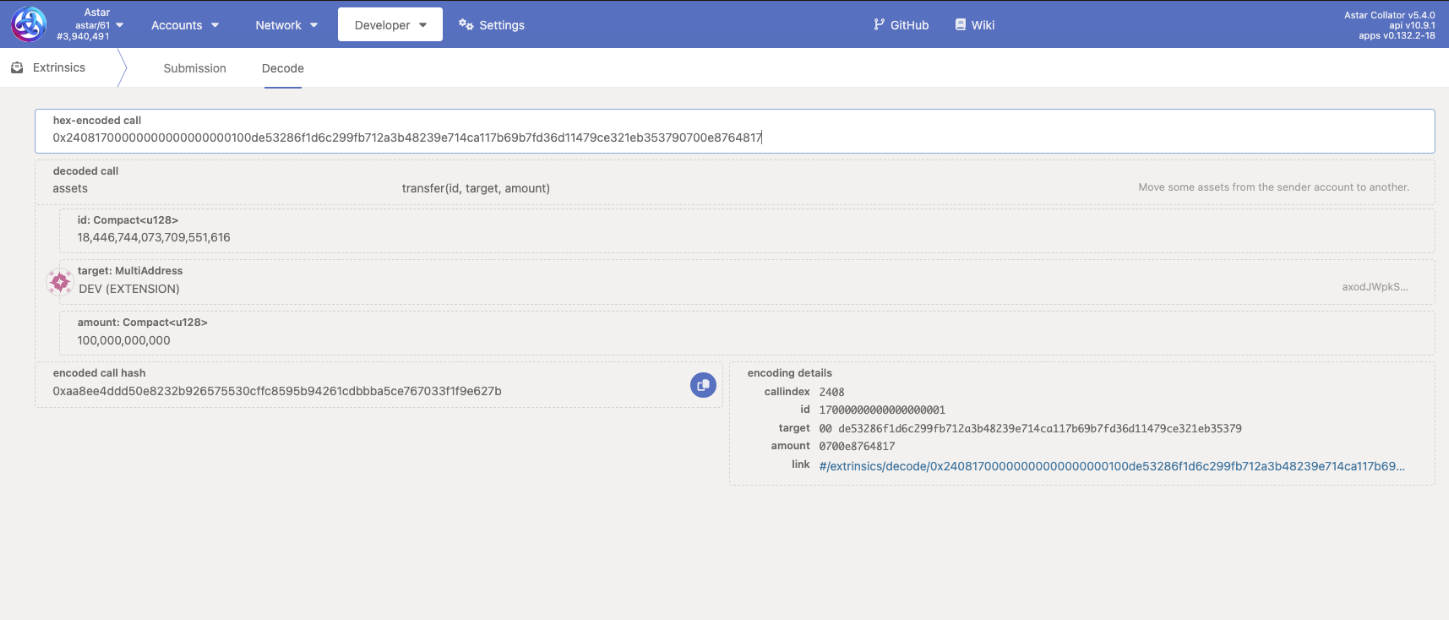
- If you want to understand the transaction details, copy the 'Call Data' and paste it on the Decode page on the Polkadot.js portal.