Connecting SubWallet to Astar
SubWallet is a comprehensive non-custodial wallet solution for Substrate & Ethereum ecosystems. Built on top of Polkadot.js, SubWallet focuses on improving UX & UI. We envision a crypto wallet as a Web3 multiverse gateway through which users can enjoy multi-chain services with utmost ease and absolute security.
This guide will show you how to manage your accounts, your tokens, stake your tokens in-app, and connect to the Astar Portal using SubWallet!
Install SubWallet
SubWallet is available on a range of platforms for you to choose from:
-
A browser extension which is available on Google Chrome, Brave, MS Edge and Firefox.
-
A mobile app which is available on the App Store and Google Play Store.
-
A web dashboard that does not require any downloading and can be accessed through https://web.subwallet.app
For this tutorial, we will walk you through the process of creating a wallet using the browser extension.
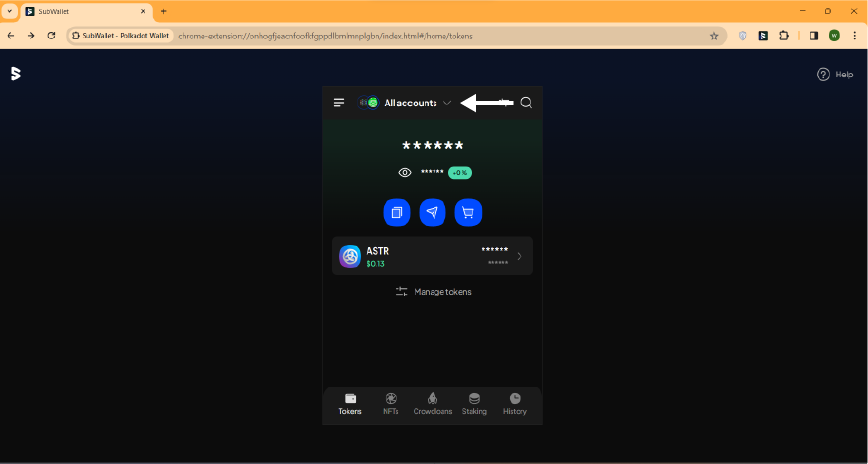
Setup an account
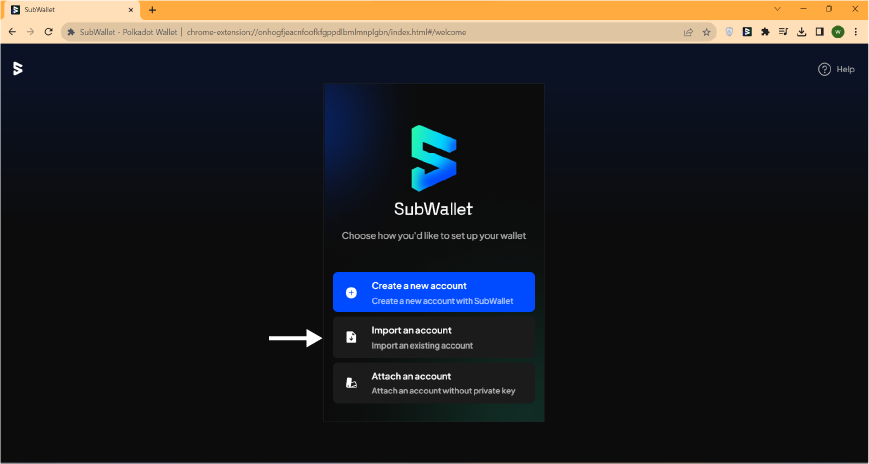
Once you have installed the extension, you'll have the option to create, import or attach an account (Ledger, Keystone, Polkadot Vault and Watch-only account)
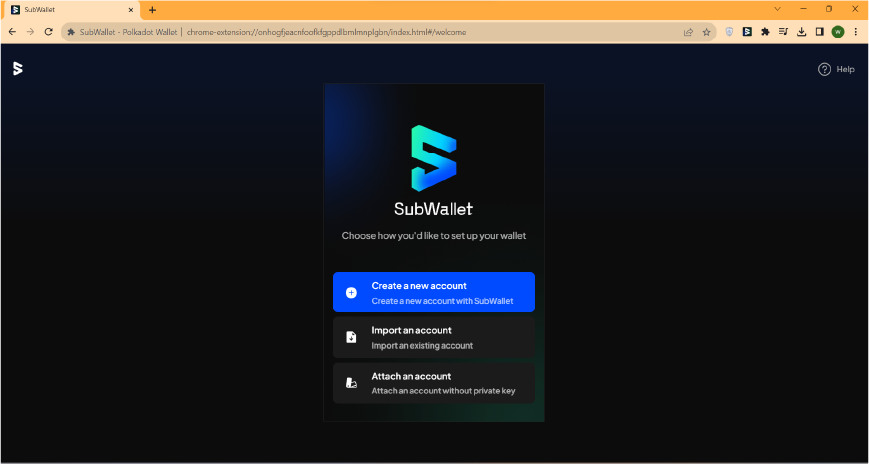
Create a new account
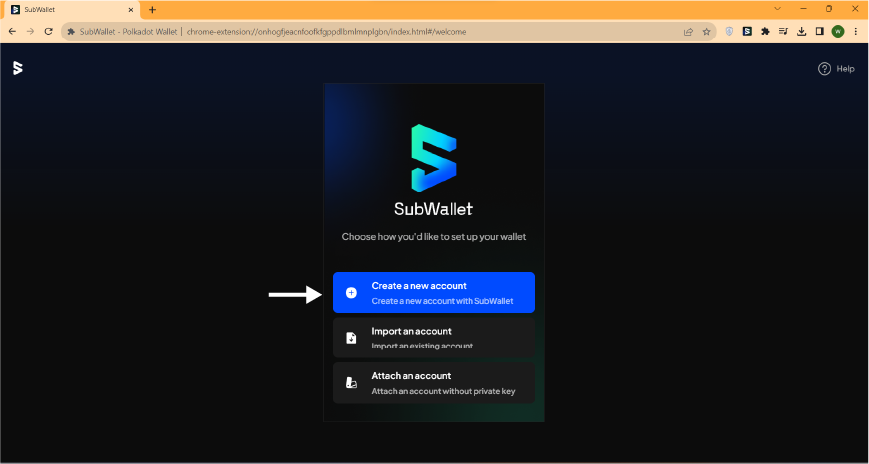
To create a new account, click on Create a new account.
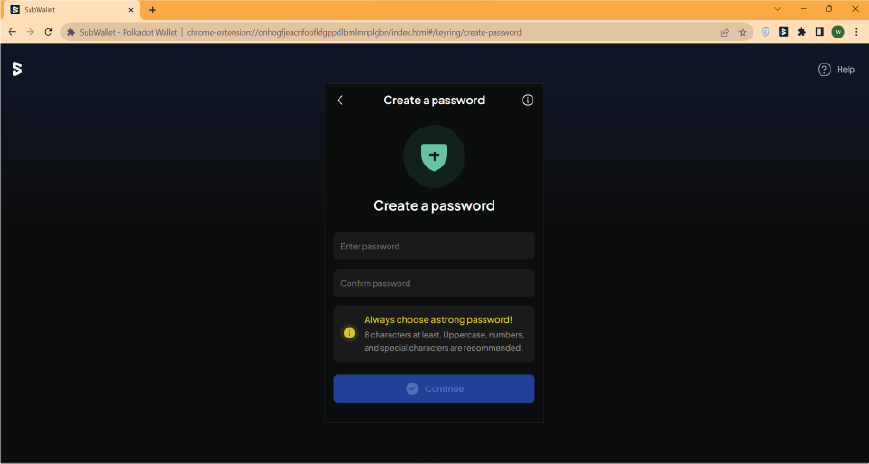
You will then need to create your master password which keeps all of your accounts secure. Once you have entered the password and then confirmed it, click on Continue.
For each seed phrase created with SubWallet, you would have a Substrate account and an Ethereum account. Substrate account would display your assets on Substrate-native blockchains (such as Polkadot, Kusama, and Astar), while Ethereum account would display your assets on Ethereum chains (such as Astar-EVM).
Now you will be shown a seed phrase together with the option to back it up. Once you have saved and stored it in a safe place, choose I have kept it somewhere safe.
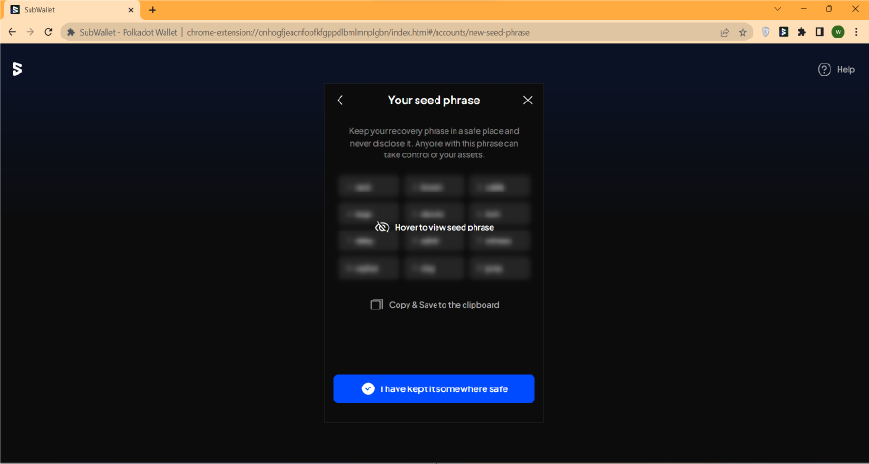
You should never share your seed phrase (mnemonic) or private key with anyone. This gives them direct access to your funds.
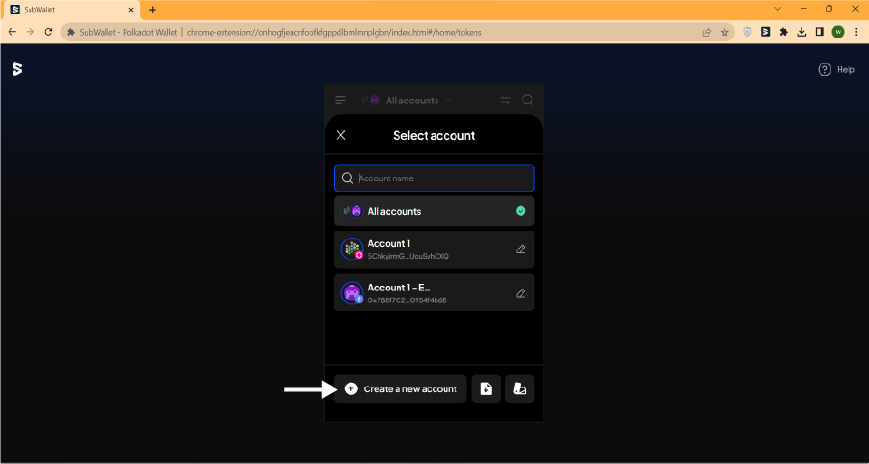
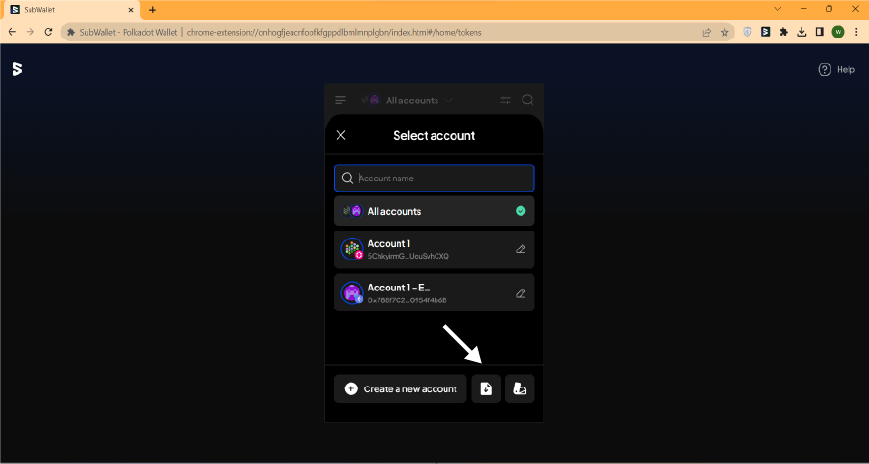
You have finished creating a new account! If you want to create additional accounts, follow these steps:
- Choose the accounts tab on the top of the extension.
- Click on Create a new account and repeat the steps above.
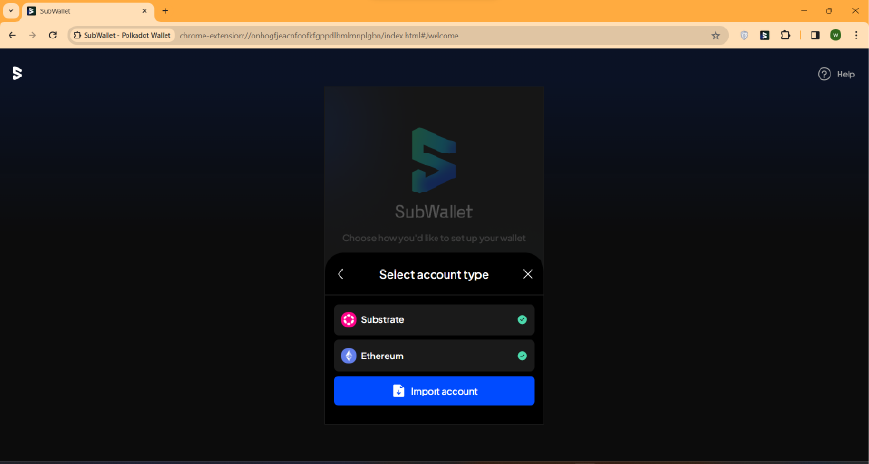
Import an existing account
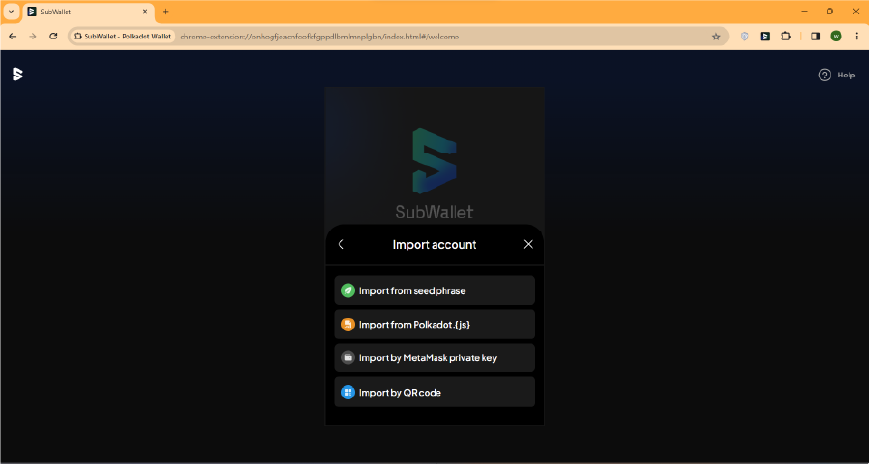
To import an account that you have already created, choose Import an account.
Then you can choose your preferred method of importing.
After you have chosen a method, you will be prompted to create a master password. Enter your password and click on Continue.
Please note that SubWallet is non-custodial, so you would be the only person who knows your password; we cannot help you restore your password once it is lost. Please make sure that your password is well-kept.
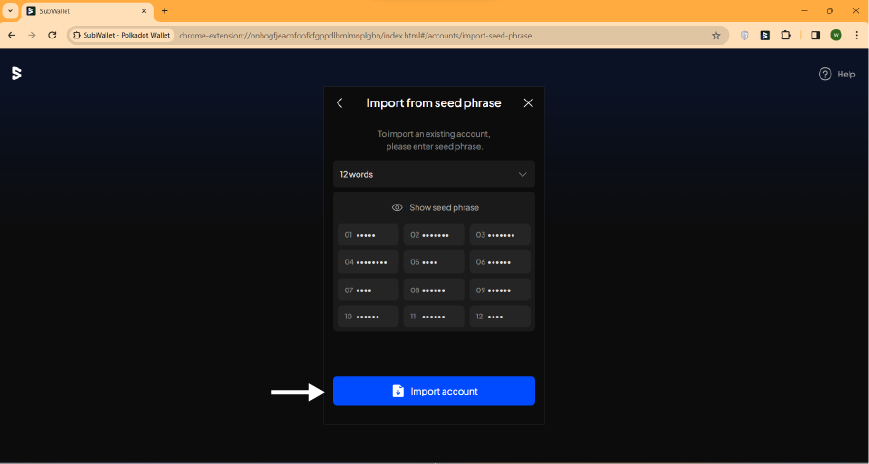
Using seed phrase
You could choose between importing either a Substrate account or Ethereum account, or both. After choosing, click on Import account
Enter your seed phrase in the text boxes. You can use either a 12-word seed phrase or a 24-word seed phrase to import your account. Click on Import account and your account has been imported!
Incompatibility In some cases, if you import an account from a seed phrase, problems can arise if the seed phrase of your original wallet is not compatible with SubWallet. Trust Wallet and Safepal are among the wallets not compatible with us.
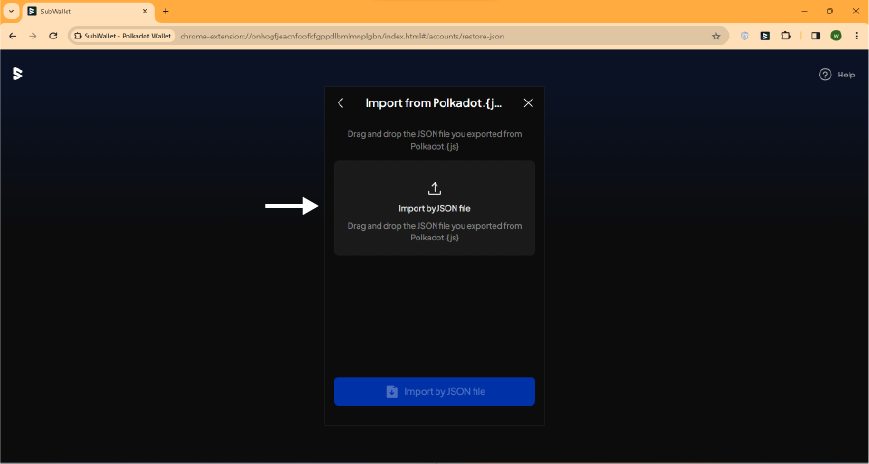
Using Polkadot.js JSON file
You can import a Polkadot.js account after exporting the JSON backup file. Click on the Import from Polkadot.js field to upload a file from your device, or drag and drop your JSON file into the field.
You will then need to enter your JSON file password (created when you set up the wallet for the first time) and click Import by JSON file.
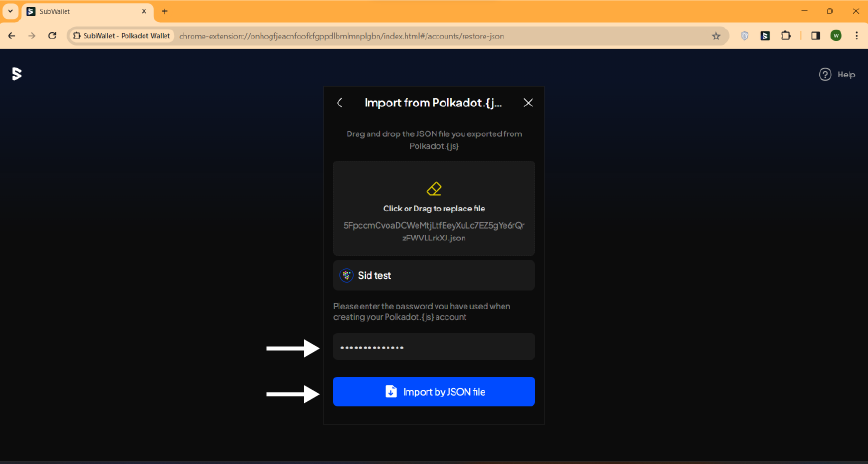
If you want to import multiple accounts simultaneously from a JSON file, you are required to enter the password for each account you want to import.
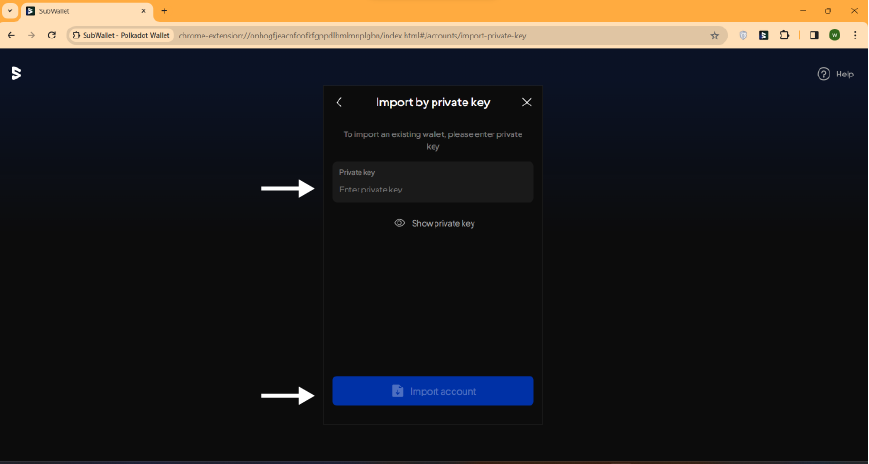
Using MetaMask private key
Once you have exported your private key, enter it into the text box then click on Import account.
Using QR code
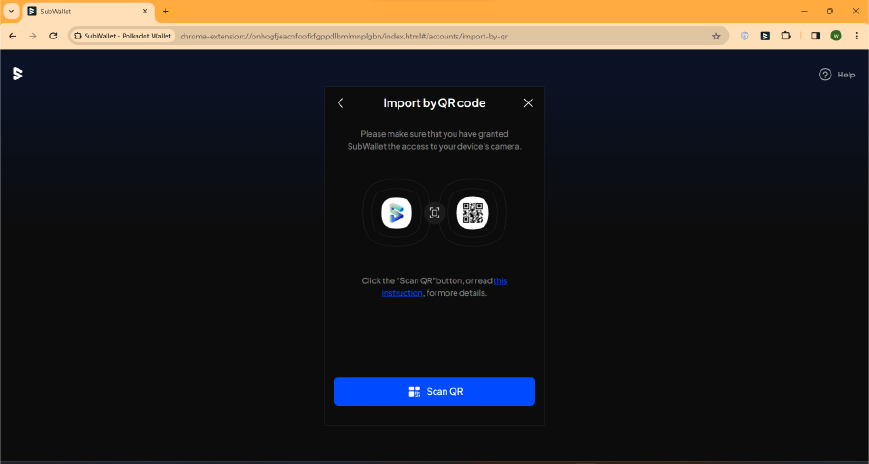
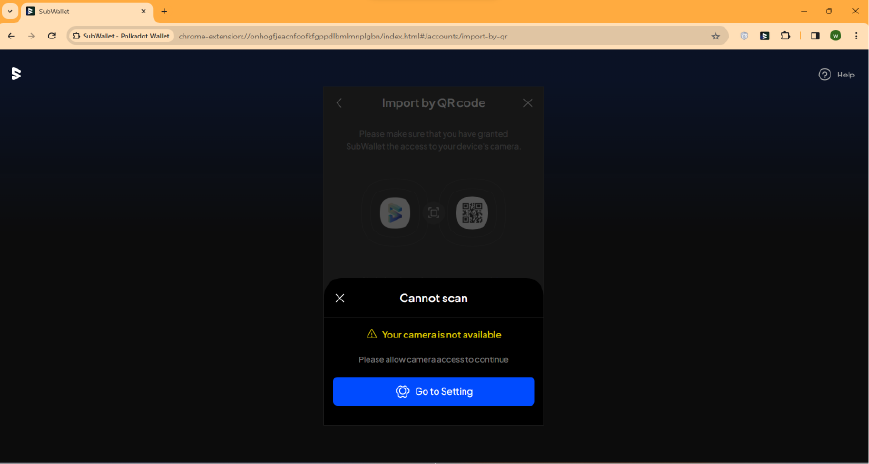
Click on Scan QR. If you have not enabled camera access yet, a message will show up prompting you to Go to settings.
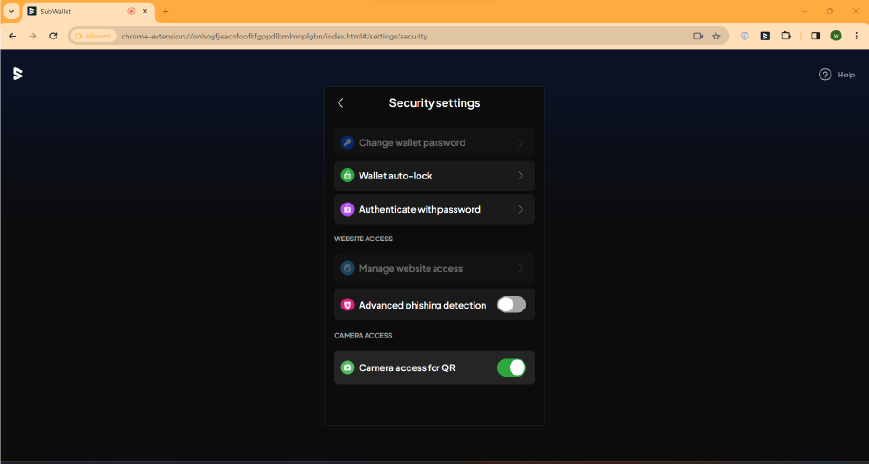
On the settings page, toggle on Camera access for QR then head back to the QR page, click on Scan QR and scan your accounts' QR code. After the successful import of your account by QR code, you will be directed to the Homepage.
Import additional accounts
You have finished importing your account! If you want to import additional accounts, follow these steps:
- Choose the accounts tab on the top of the extension.
- Click on the Import icon and repeat the steps above.
Interacting with Astar
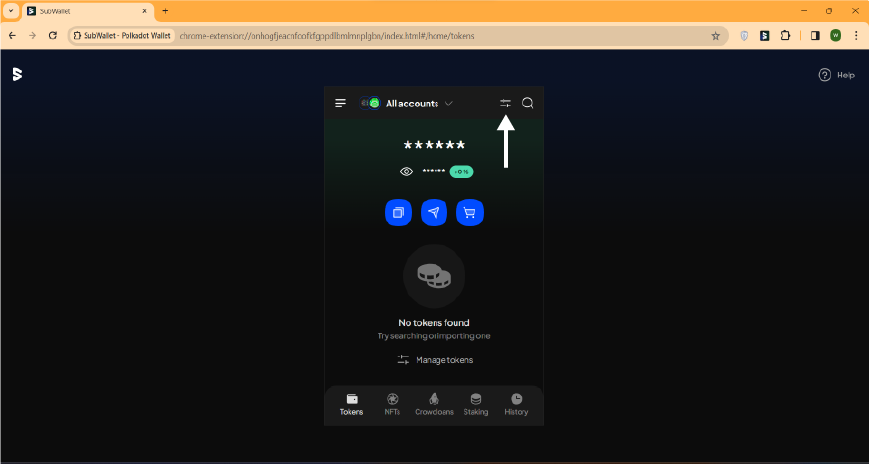
Managing ASTR on SubWallet
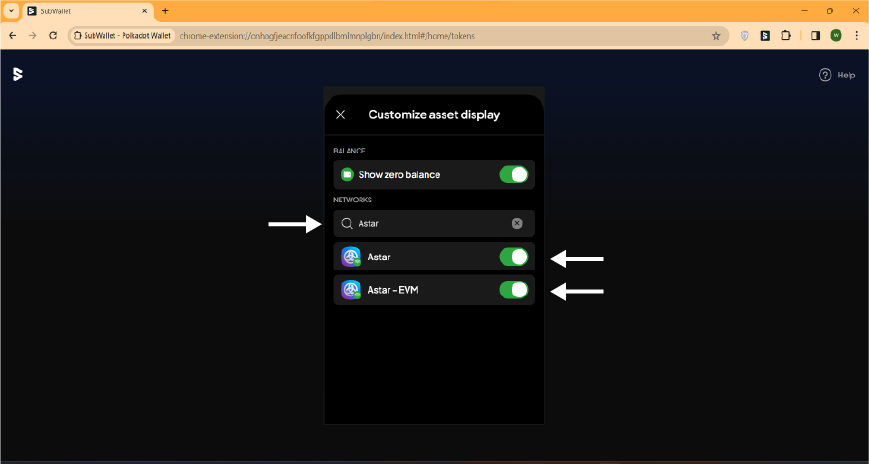
To Manage ASTR on SubWallet, choose the Customize asset display icon next to the search icon.
On the search bar, search for Astar. Toggle on the networks to enable them.
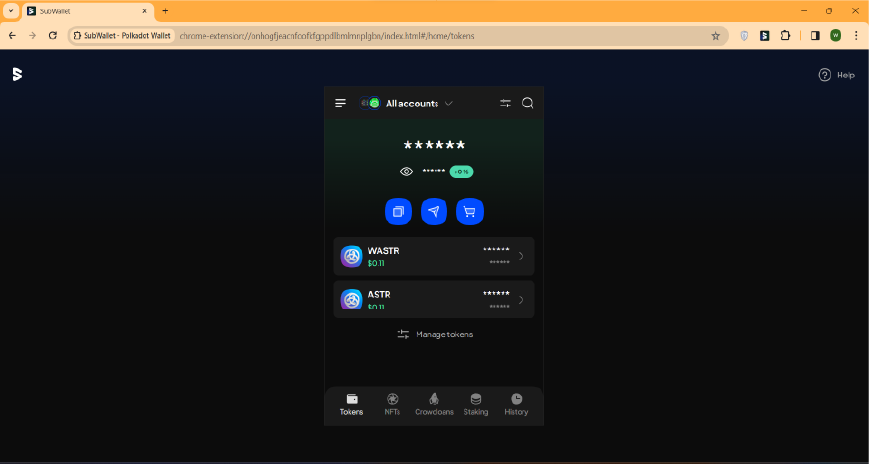
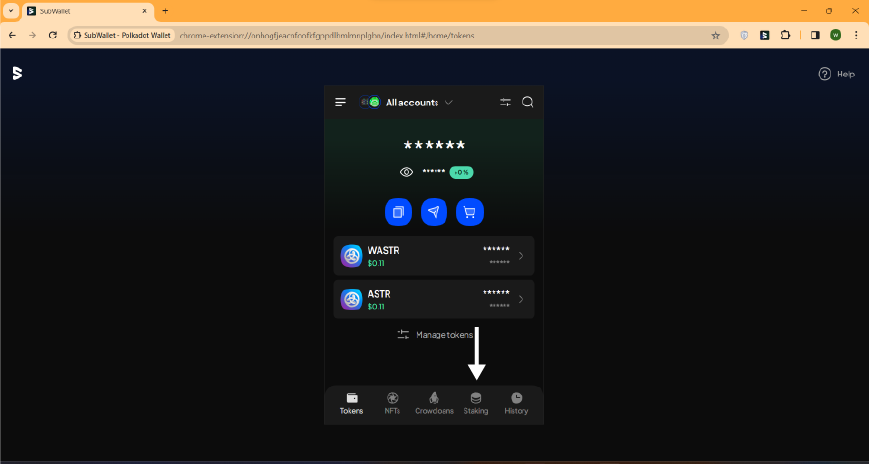
Head back to the home screen. You should be able to see that Astar has been connected and all of the tokens available on the network should be displayed.
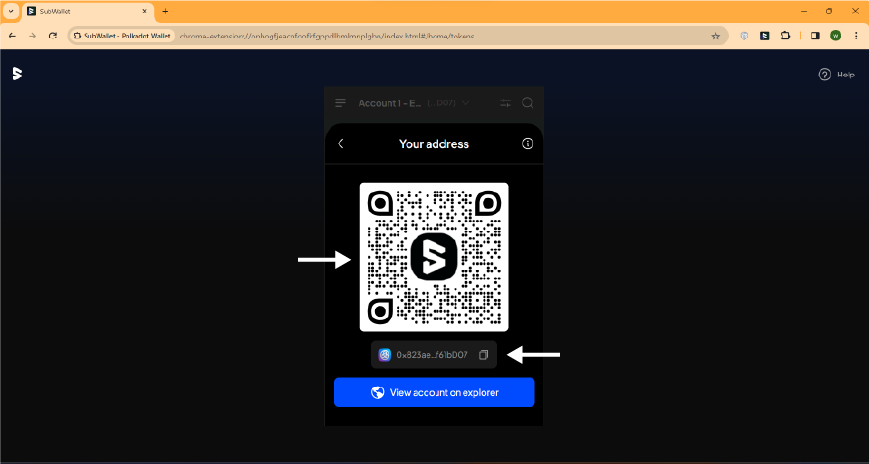
Receive token
From your home screen, choose the first blue icon under the eye.
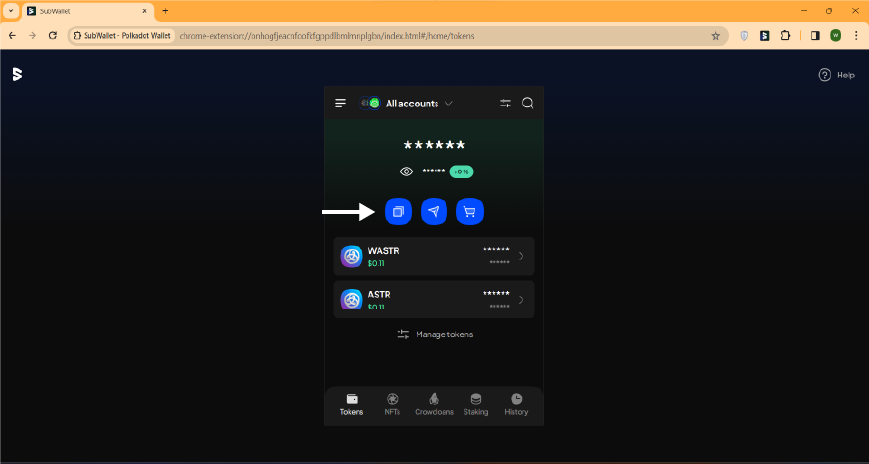
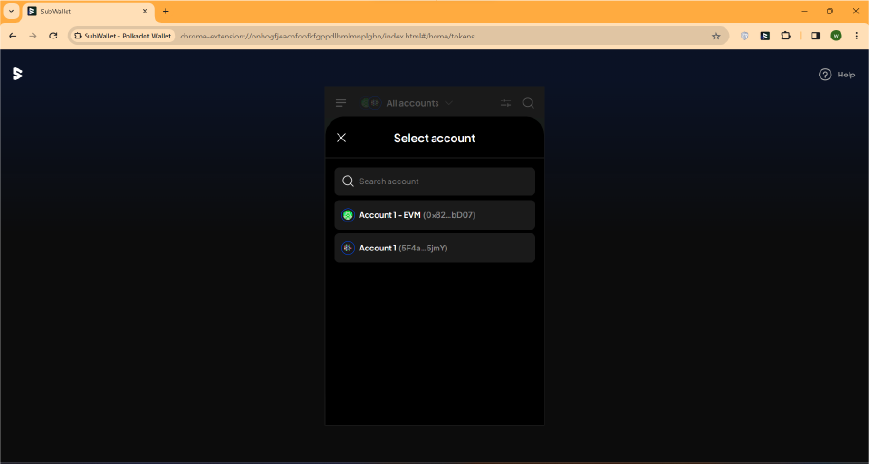
If you are in all-accounts mode You will be prompted to choose an account if you are in all-accounts mode.
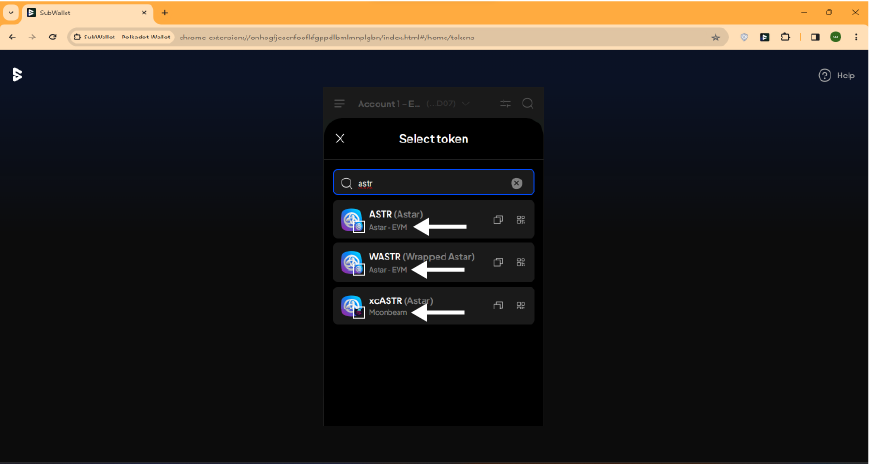
Search for the token that you would like to receive, in this case, ASTR. You can either Copy the address or View address QR.
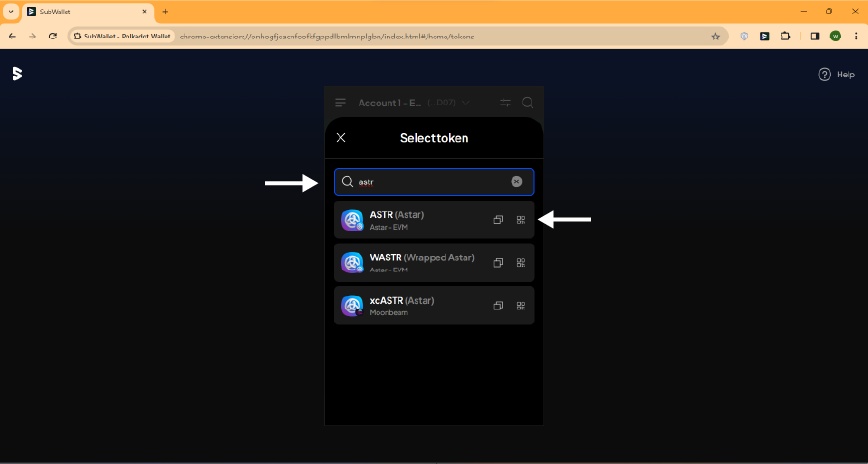
ASTR is allowed to execute cross-chain transfer, so when choosing the token, make sure you are receiving ASTR on the correct chain by checking the network icon under the tokens.
Send the address or show the QR code to the sender and you'll be able to receive ASTR from them!
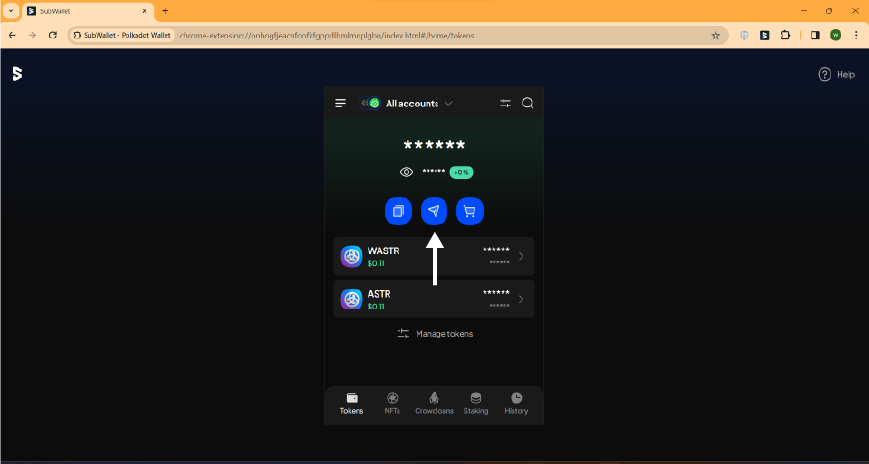
Send a transaction
To get started with a simple token transfer to another address on Astar, you can click the send icon.
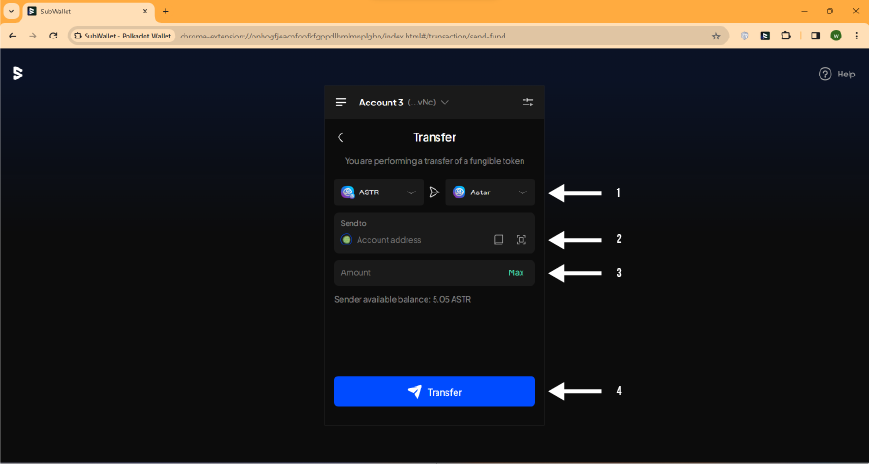
Next, you can take the following steps:
-
Specify the asset to send and the destination chain.
noteASTR is allowed to execute cross-chain transfer, so when choosing the destination network, you can choose the drop-down menu to see the available options.
-
Enter the destination address
-
Enter the amount of tokens to send
-
Look over the transaction details, then press Transfer
On the next screen, you can review the transaction details and submit the transaction. If the transaction details look good, you can click Approve to send the transaction.
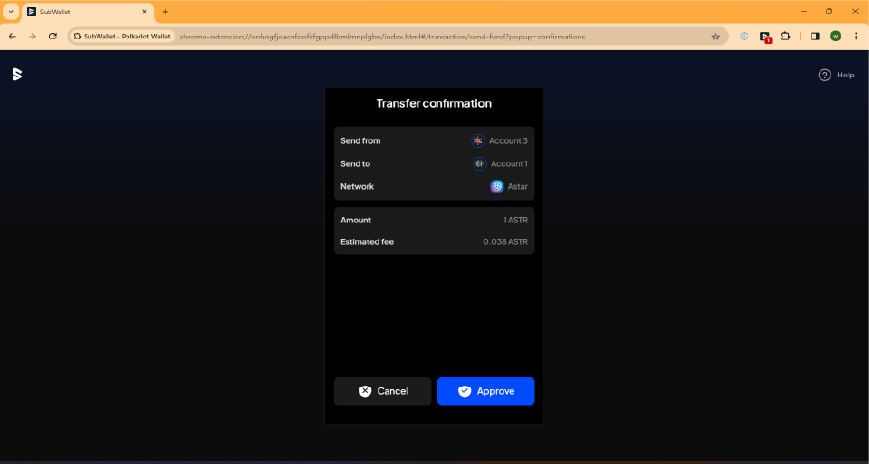
After you send the transaction, you can review the transaction details.
Connect to the Astar Portal
First, head to the Astar Portal. Once you arrive at the portal, you will be prompted to connect your wallet.
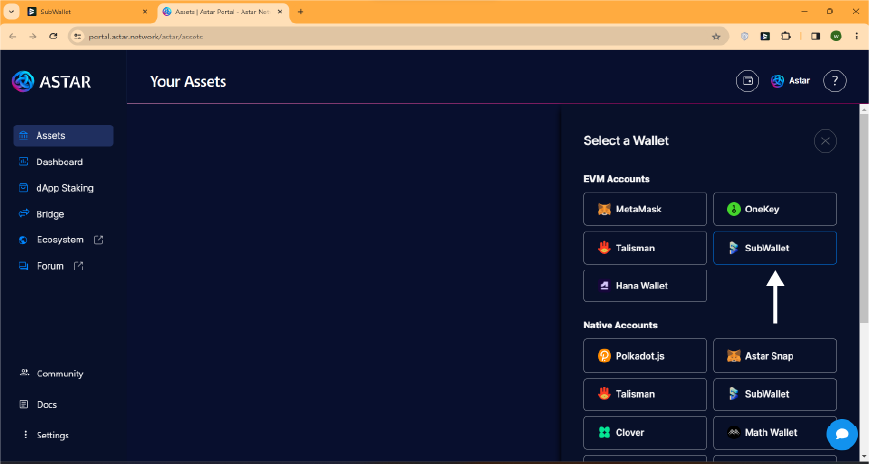
If you want to connect your Ethereum account, choose SubWallet under the Ethereum accounts section.
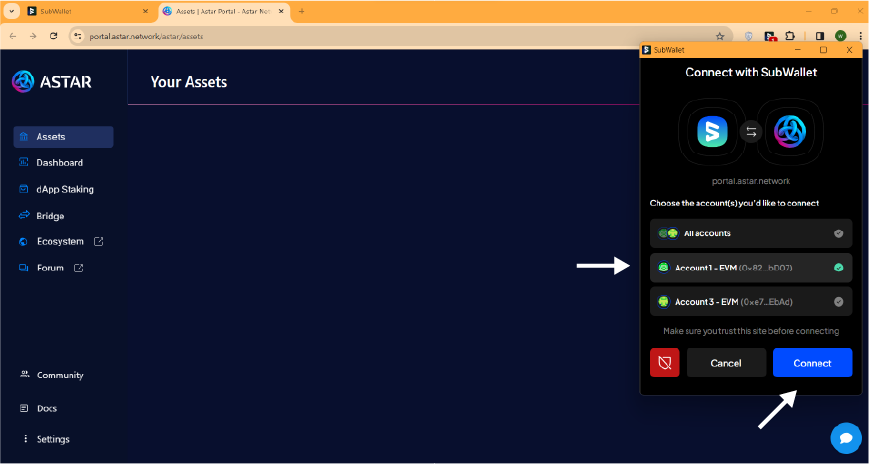
A window will appear. Choose the account that you would like to connect then choose Connect. Approve the connection and you have successfully connected to the Astar portal!
Otherwise, if you want to connect using your Substrate account, choose SubWallet under the Native accounts section.
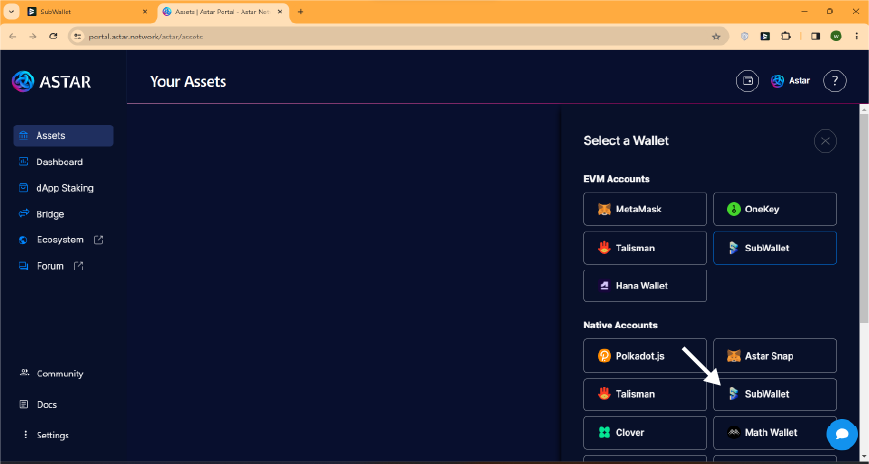
Afterward, the steps to connect are identical to that of connecting Ethereum accounts.
dApp Staking
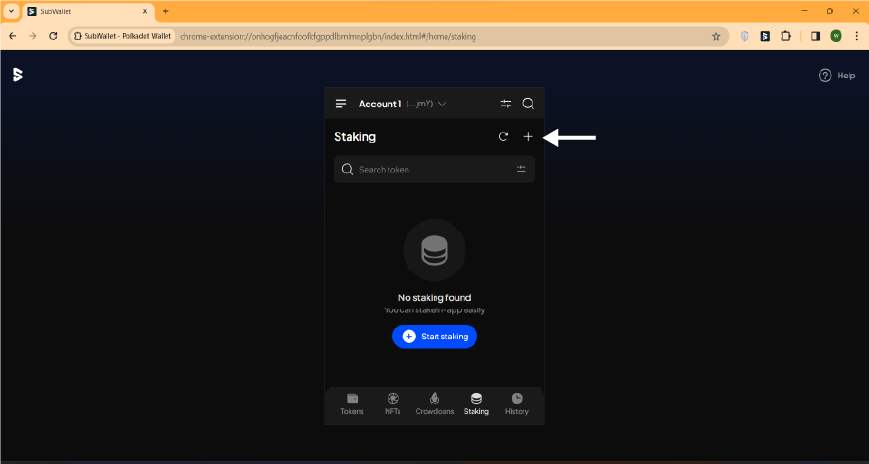
First, head to the staking tab on the navigation bar.
On the staking screen, choose the + icon on the top right of the screen.
Choose the Nominate tab in the "Add to Bond" screen and enter the staking information:
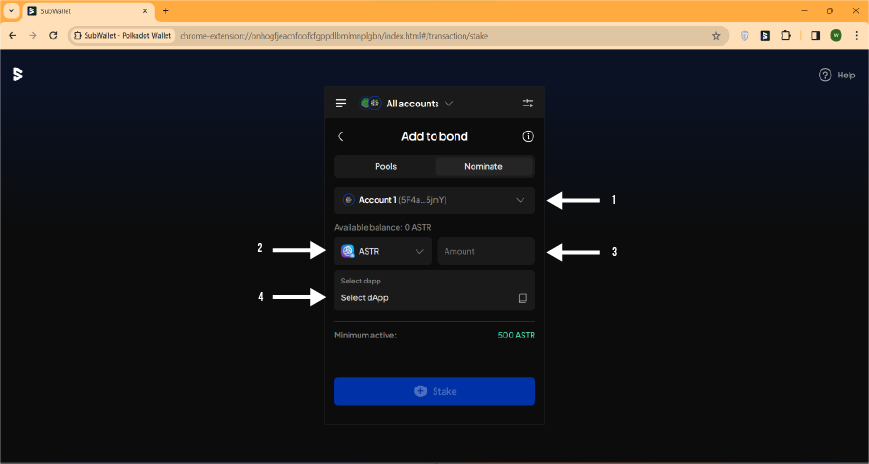
- Choose the account from which you would like to stake (if you are in all accounts mode)
- Choose the token that you would like to stake, in this case, ASTR.
- Enter the amount of tokens. The minimum active for dApp staking with ASTR is 500 ASTR.
- Select a dApp.
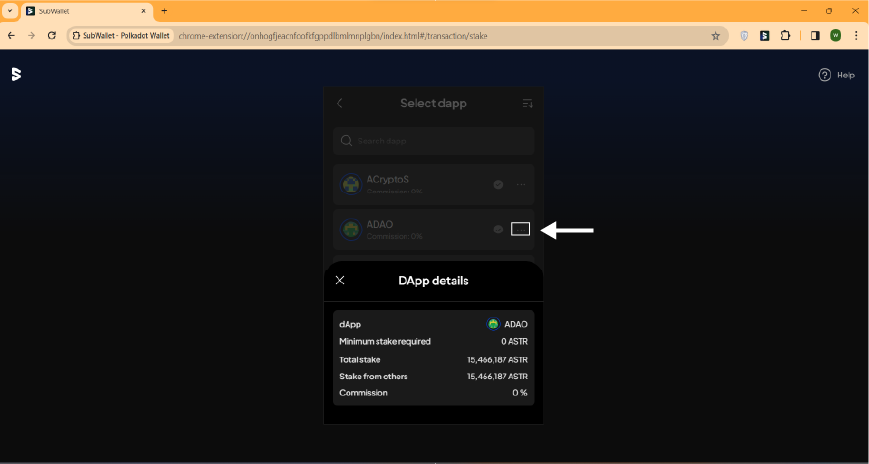
A list of available dApps will be shown. It is suggested that you pay close attention to the dApp you are choosing. When selecting dApp, SubWallet supports you with the latest record of dApp details. Please click the three-dot icon on the right-hand side of each dApp to see the dApp details.
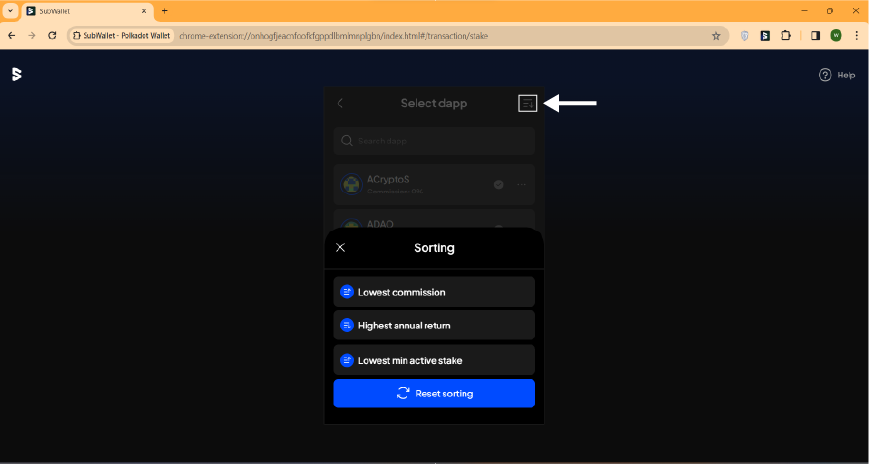
In addition, you could use the sort function to find the most suitable dApp according to your needs. Click the sort icon on the upper right corner and choose your sorting criteria.
After all the staking information is entered, click on Stake then approve the transaction.