MetaMask Astar Wallet Snap
Introduction
The Astar Wallet Snap extends MetaMask's functionality, specifically for blockchains built with Substrate technology. The Astar Wallet Snap enables you to quickly generate a Substrate wallet with MetaMask for signing transactions and interacting with decentralized applications (dApps) that utilize the @polkadot/extension-dapp package. You can seamlessly interact with all dApps in the Astar ecosystem through MetaMask, thereby expanding MetaMask's utility beyond Ethereum and EVM-compatible networks.
Snap-based accounts are derived from the private key associated with your MetaMask account (your seed phrase), so funds cannot be lost even in the event support for a particular Snap is discontinued.
How to install
Follow these steps to interact with the Astar Wallet snap Portal. The source code for the example dApp is available as part of the repository. This guide assumes that MetaMask is installed and properly configured.
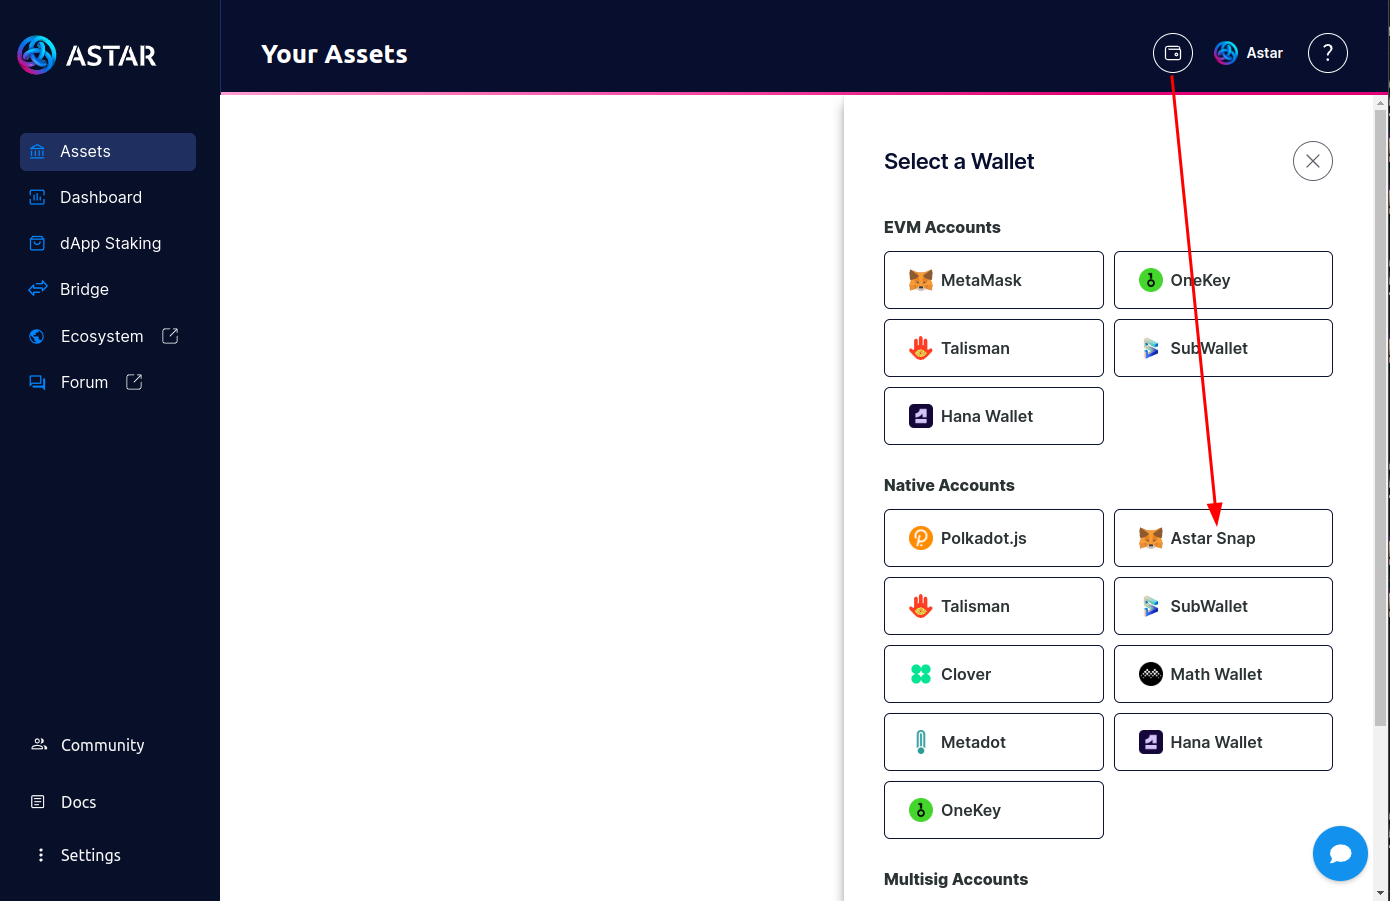
Connect to the Portal
Click the webpage button labeled "Astar Snap" with the MetaMask logo
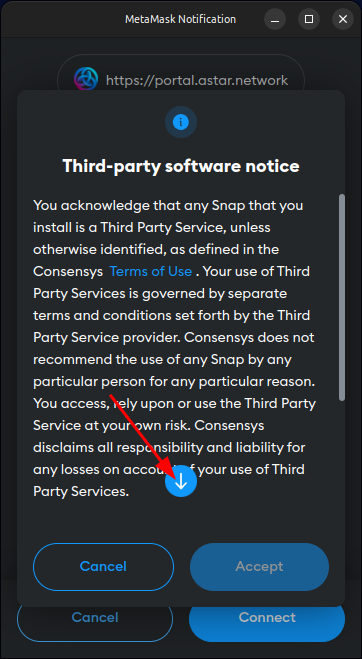
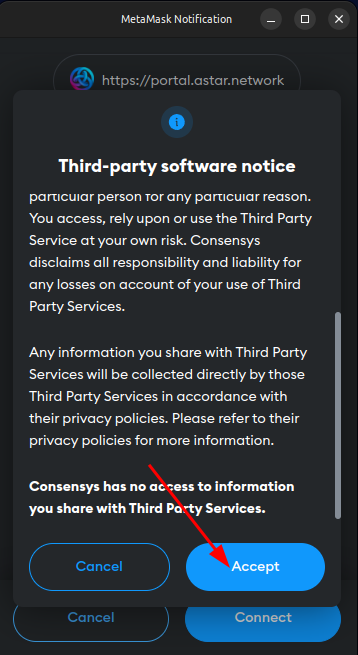
Review & Accept Third-Party Software Notice
Click the arrow to view the entire third-party software notice and, if you accept it, click the MetaMask "Third-party software notice" button labeled "Accept" to accept the MetaMask third-party software notice.
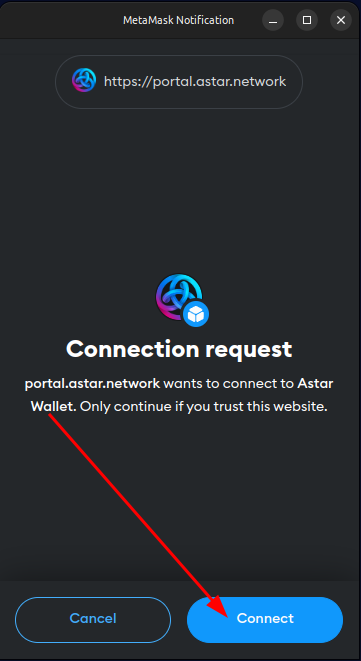
Review & Accept Connection Request
Review the connection request and, if you accept it, click the MetaMask "Connection request" button labeled "Connect" to accept the Astar Wallet snap connection request.
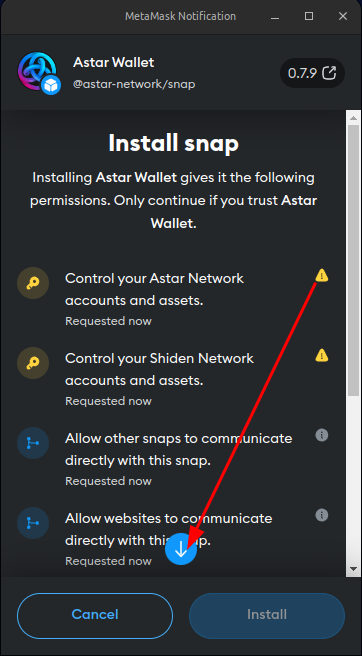
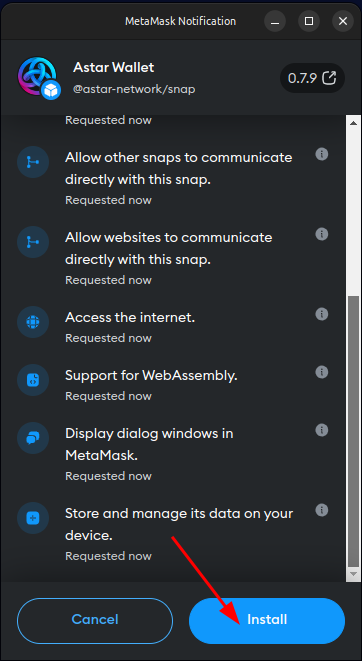
Review Snap Permissions & Begin Installation
Click the arrow to view the entire list of permissions required by the Astar Wallet snap and, if you accept them, click the MetaMask "Install snap" button labeled "Install" to begin installing the Astar Wallet snap.
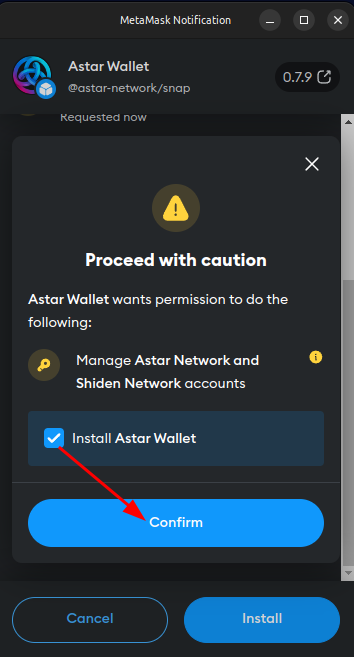
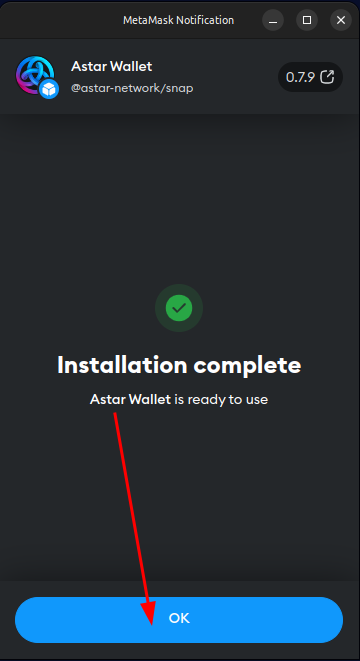
Confirm Elevated Permissions & Complete Installation
Because the Astar Wallet snap has permission to control accounts for the Astar & Shiden Networks (whose tokens carry real economic value), it's necessary to review and confirm this elevated level of access. If you accept this elevated level of access, check the boxes and click the MetaMask "Proceed with caution" button labeled "Confirm" to confirm the elevated level of access and install the Astar Wallet snap. Click the MetaMask "Installation complete" button labeled "OK" to continue to the example dApp.
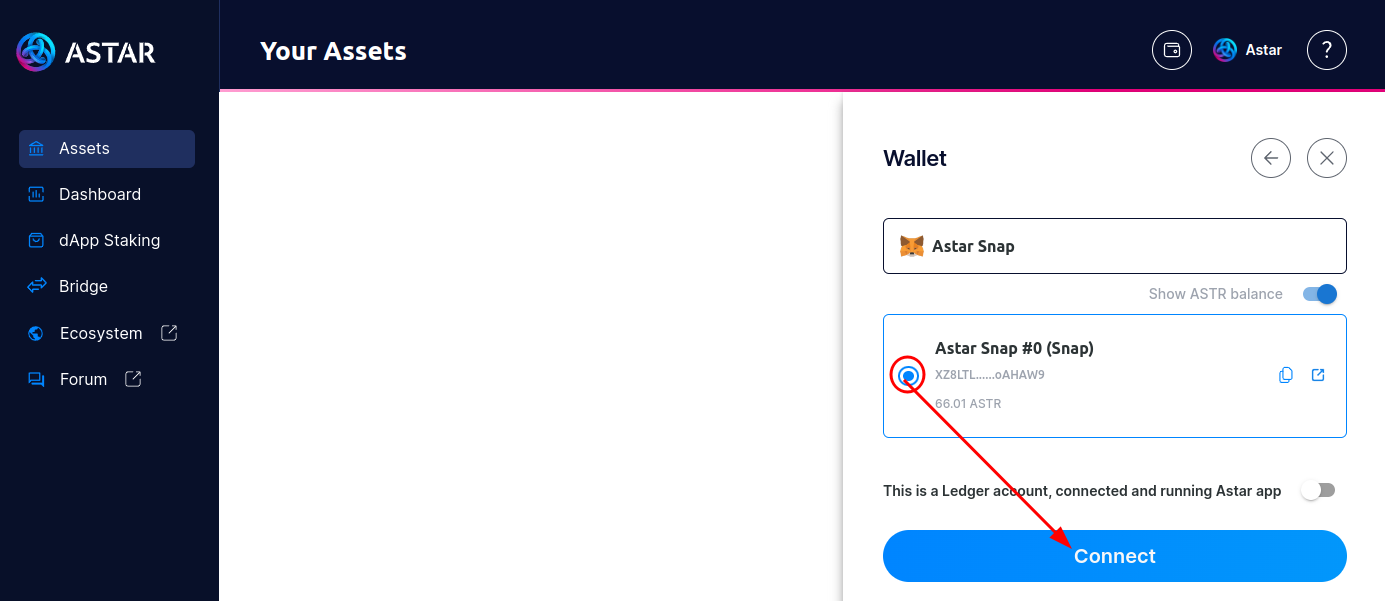
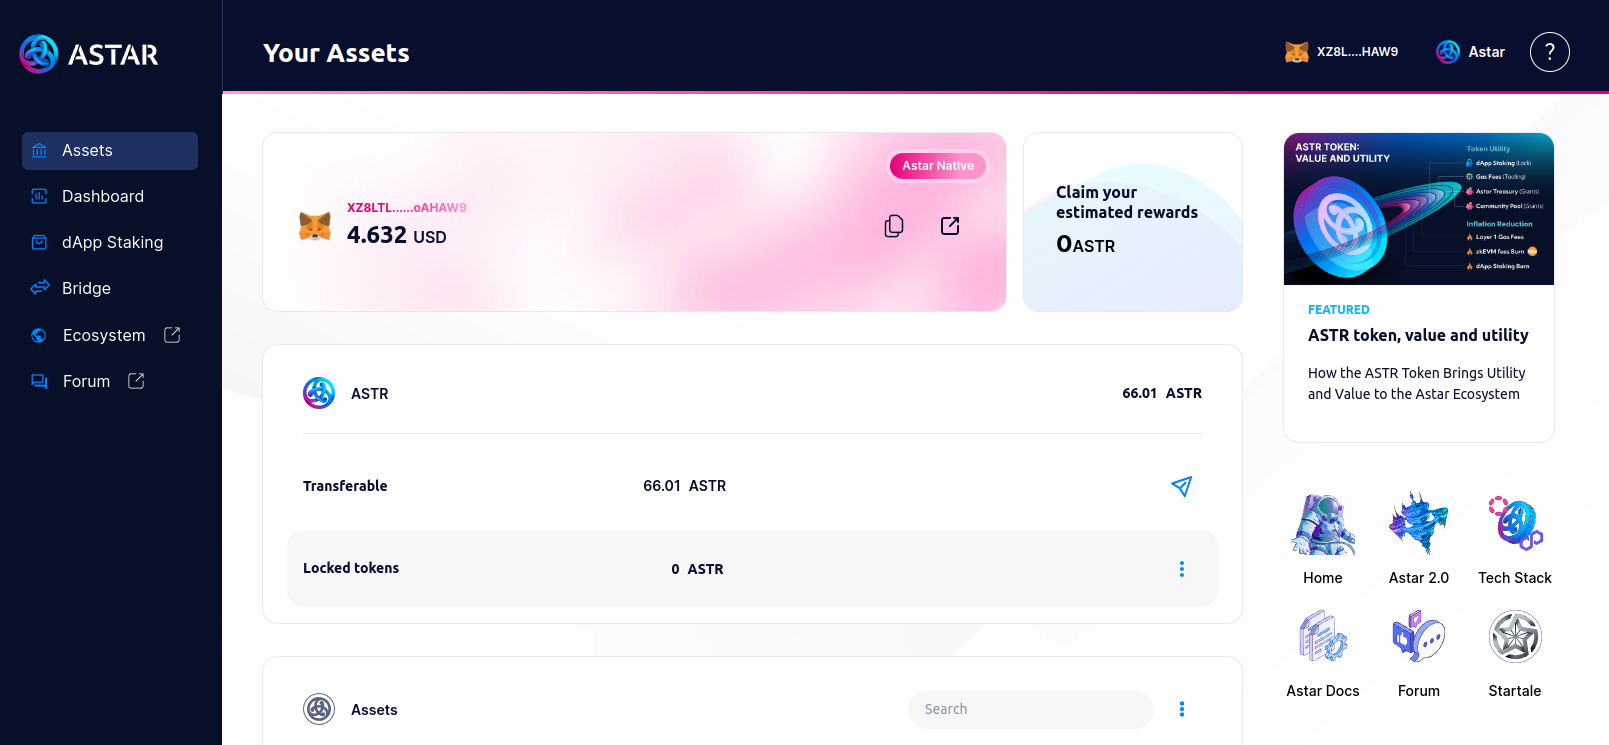
Connect the Snap Wallet
The Astar Snap Wallet is now configured. Notice the address was derived using the entropy from your MetaMask seed phrase and the snapId. The public key does not depend on the network and will always be the same.
How to Remove
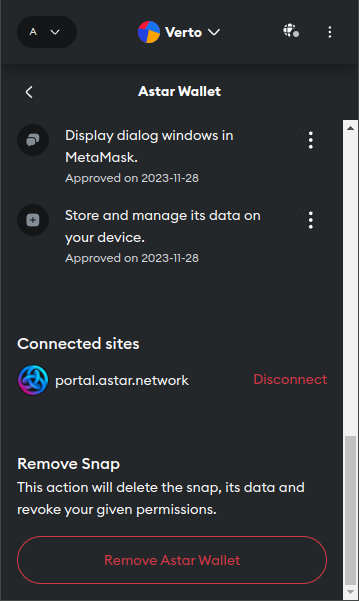
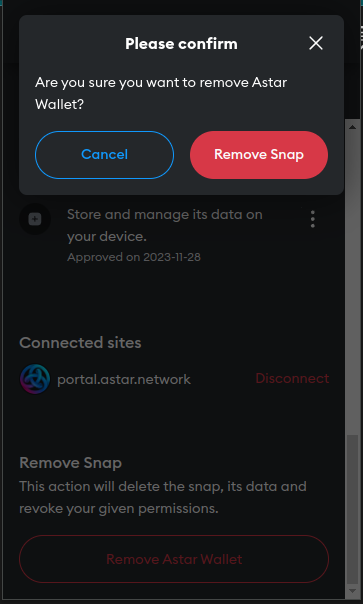
In MetaMask, click on the tripple dot icon on the top right of the extention, then Snap, lastly click on Astar Wallet, scroll to the bottom and click Remove Astar Wallet
This action will not destroy your account or your funds. But deleting your MetaMask account and/or seed could.
How to Restore
Simply reconnect to the Portal and choose the Astar Snap Wallet again. You will obtain the same address as before with all the funds attached.
Disclaimer
XCM is not recommended
Conclusion
That concludes the Astar Wallet snap Portal install instructions. If you have any questions or believe you have found an error or bug, please open an Issue.